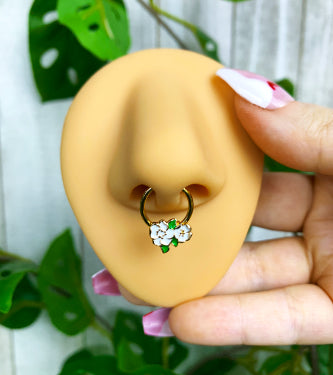















You are holding a ring that looked perfect online, and now it will not close, or it closes and pinches, or it spins around like it belongs to someone else. You bought the right piercing type. You picked the pretty color. You still missed the fit, because piercing jewelry sizes are not one number, they are three separate decisions hiding in one listing.
That is the part nobody tells you at checkout. Gauge is thickness. Wearable length is the usable part of a bar. Inner diameter is the open space inside a hoop. Get one right and the other two wrong and you still have jewelry you cannot wear comfortably.
Start with the chart you came for, keep it handy, then use your healed piercing and your own anatomy to make the final call. A chart gets you close. Your body decides.
Gauge to Millimeter Chart and Why the Steps Are Uneven
You need one number fast, so here is the chart first. Read the gauge on the left, match it to the millimeters, and use that millimeter value when you shop across brands or countries.
Gauge to millimeter and inch conversions
| Gauge | Millimeters (approx.) | Inches (approx.) |
|---|---|---|
| 20g | 0.8 mm | Thinnest fractional inch in this range |
| 18g | 1.0 mm | Slightly thicker fractional inch |
| 16g | 1.2 mm | Small fractional inch |
| 14g | 1.6 mm | Larger small fractional inch |
| 12g | 2.0 mm | Noticeably thicker fractional inch |
| 10g | 2.5 mm | Thick fractional inch |
| 8g | 3.2 mm | Heavy fractional inch |
| 6g | 4.0 mm | Larger heavy fractional inch |
| 4g | 5.0 mm | Very thick fractional inch |
| 2g | 6.0 mm | Stretched size range |
| 0g | 8.0 mm | Larger stretched size range |
| 00g | 10 mm | Largest size in this chart |
The Scale Runs Backward
Gauge follows the American Standard Wire Gauge system, in which a larger number means a thinner piece, with 20g at approximately 0.82 mm, 18g at 1.024 mm, 16g at 1.33 mm, 14g at 1.63 mm, 12g at 2.06 mm, and 10g at 2.60 mm in the Axiom Body Piercing gauge size reference. The same reference lists 8g at about 3.25 mm, 6g at 4.12 mm, 4g at 5.18 mm, 2g at 6.53 mm, and 0g at 8.26 mm. Yes, your eyes read that right. 16g is thinner than 14g.
Do not panic if those decimals do not match the rounded chart exactly. Brands round the millimeter figure differently for the same gauge, which is why you should treat every value as a close reference point, not a law. When you replace a piece that already fits, match its measured millimeters first and its gauge label second.
Why One Step Does Not Feel Like One Step
Gauge steps are uneven in millimeters. Moving from 14g to 12g adds only about 0.425 mm, while moving from 4g to 2g adds approximately 1.36 mm, a difference laid out in the BME gauge chart conversion reference. At thin sizes, a step feels small. At thick sizes, that same one step change is a much bigger jump for your tissue.
That uneven spacing comes from older wire drawing, where wire became thinner as it was pulled through progressively smaller dies. More passes meant a higher number and thinner wire. Piercing jewelry inherited the backward scale, so you are stuck translating it forever. Lucky us.
Practical rule Match the millimeter value of the piece you already wear, because a difference under 1 mm can change fit, comfort, and whether the jewelry sits calmly in the channel.
If you are stretching, that uneven jump matters even more. A larger absolute increase asks more of healed tissue than a tiny increase at the thin end. Do not assume every gauge step deserves the same timeline or the same confidence.
For everyday shopping, keep it simple. Write down your gauge and its millimeters together, every time. That pair travels well between US listings that lead with gauge and European or Asian listings that lead with millimeters, and it saves you from guessing when a listing only gives you one of the two.
Standard Lengths and Diameters by Piercing Type
A forward helix shows you why a standard size table is only a starting point. The same piercing often needs a longer post at first and a shorter post later, even though the gauge does not change. If you buy the healed length on day one, you will likely hate it.
In 2025, the International Silver Body Jewelry Information Center listed forward helix jewelry at 18 gauge (1.0 mm) or 16 gauge (1.2 mm), with initial lengths of 5/16 inch (8 mm) to 3/8 inch (10 mm) and a post-healing length of 1/4 inch (6 mm), as shown in its body jewelry information center sizing listing. Two lengths, one piercing. That is normal, not a sales trick.
Use the table below to narrow your search, then confirm against your healed anatomy. Your piercer's measurement beats any row here, every single time.
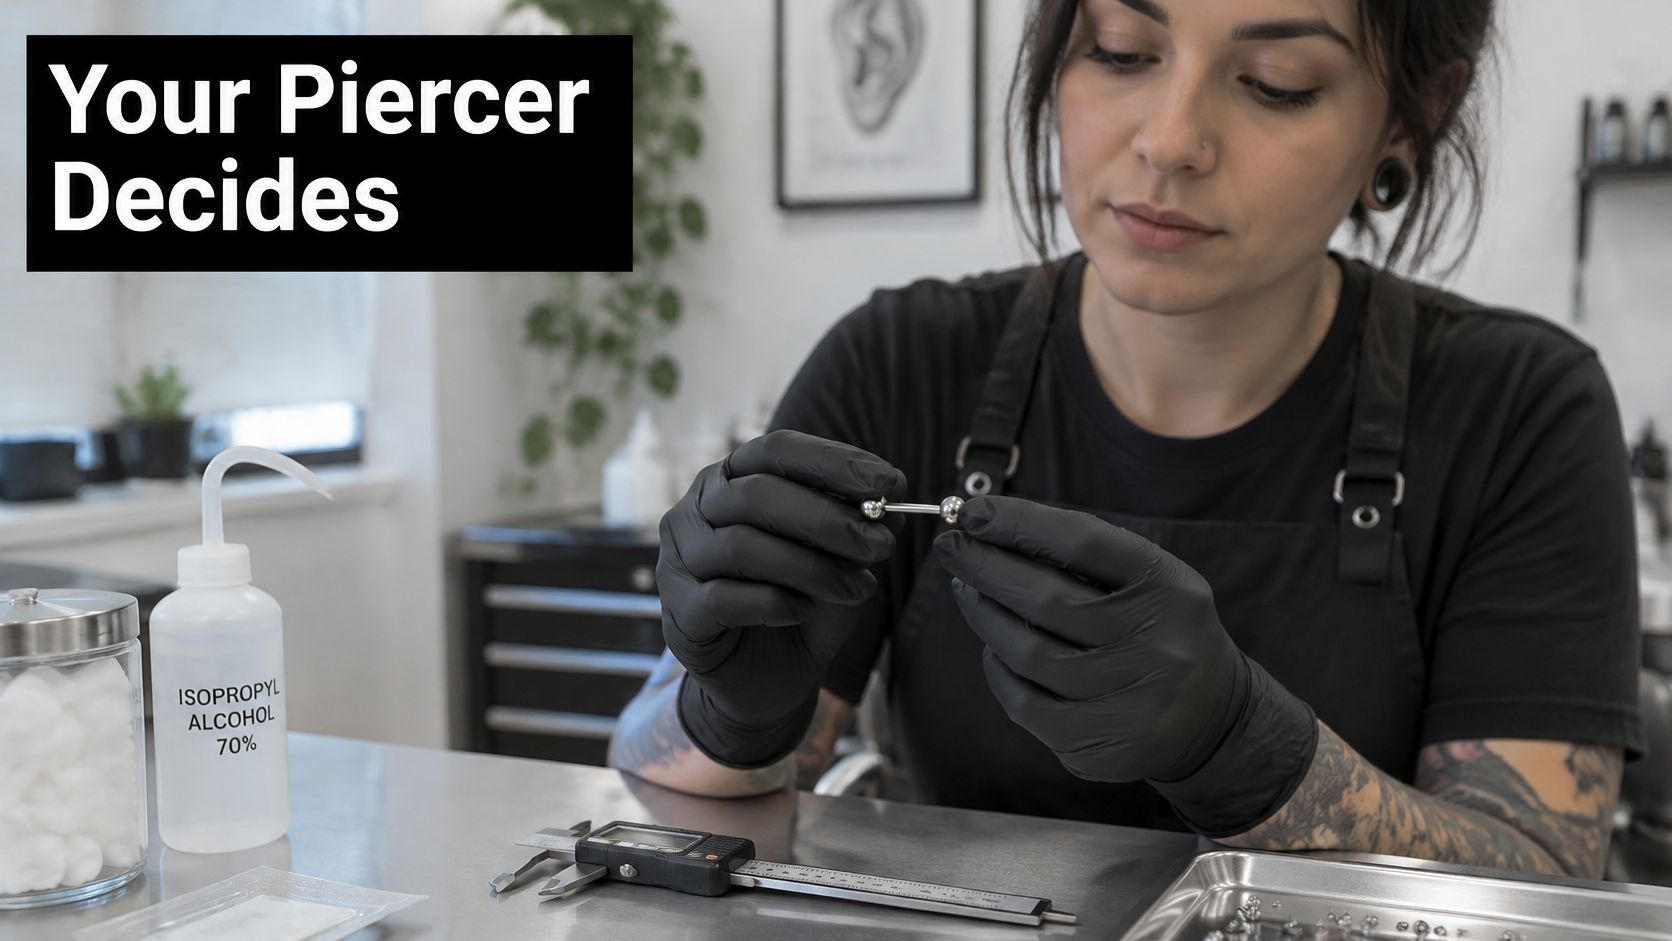
Capturing the right diameter matters as much as picking the gauge, and this look at a piercer checking a barbell shows the kind of close measurement you want before you order.
Typical gauge, length and diameter by piercing type
| Piercing | Typical gauge | Length or diameter | Notes |
|---|---|---|---|
| Forward helix, initial | 18g or 16g | 5/16 to 3/8 in (8 to 10 mm) length | Extra length allows for swelling |
| Forward helix, healed | 18g or 16g | 1/4 in (6 mm) length | Shorter post after healing is confirmed |
| Nostril stud | 18g (1.0 mm) | 5 to 6 mm length | Measure wearable length |
| Nostril ring | 18g (1.0 mm) | 7 mm inner diameter | Measure inside the hoop |
| Septum ring or retainer | 16g | 8 to 10 mm inner diameter | Confirm with piercer |
| Tragus barbell | 16g | 6 to 8 mm wearable length | Cartilage may need a shorter post |
| Belly button barbell | 14g | 3/8 to 5/8 in (about 10 to 16 mm) wearable length | Length varies with navel depth |
| Nipple barbell | 14g to 10g | 1/2 to 3/4 inch width | Confirm with piercer |
| Industrial barbell | 14g | About 1-1/2 in (38 mm) overall | Confirm the wearable span between entry points |
| Labret stud | 16g | 6 mm post length | Length depends on lip thickness |
Nose and Septum Starting Points
Nostril sizing looks tidy on paper and still trips people up in real life. In 2025, LPR Piercing listed standard nostril jewelry at 18 gauge (1.0 mm), with typical stud lengths of 5 to 6 mm and ring diameters of 7 mm in its nostril sizing reference. A stud uses length. A ring uses inner diameter. Do not swap those numbers just because both are small.
Septum rings and retainers are often listed around 16g with an 8 to 10 mm inner diameter. Your sweet spot depends on where the piercing sits and how much room you have below it. If you are choosing a captive style, the sizing guide for captive rings helps you separate ring diameter from bead and gauge choices before you commit.
Cartilage, Navel, Nipple and Industrial Differences
Tragus barbells are commonly 16g with a 6 to 8 mm wearable length, but cartilage thickness varies enough that a snug healed fit for your friend can press on you. Belly button barbells are commonly 14g with a 3/8 to 5/8 inch wearable length, and navel depth changes which end of that range makes sense. A shallow navel and a deep navel do not want the same bar, no matter what a product title calls standard.
Nipple barbells cover a wider range. In 2025, Axiom Body Piercing listed nipple jewelry at 14 gauge to 10 gauge, with typical widths of 1/2 to 3/4 inch in its nipple jewelry size listing. Industrial barbells are commonly 14g and about 1-1/2 inch overall, but the distance and angle between your two entry points decide whether that bar sits straight or pulls. Labret studs are often 16g with a 6 mm post, and lip thickness can push you longer.
Cartilage and oral piercings vary the most between people. Treat their rows as a first guess, then measure. If your current healed piece fits, its dimensions are more trustworthy than any standard table.
How to Measure Gauge, Length and Inner Diameter
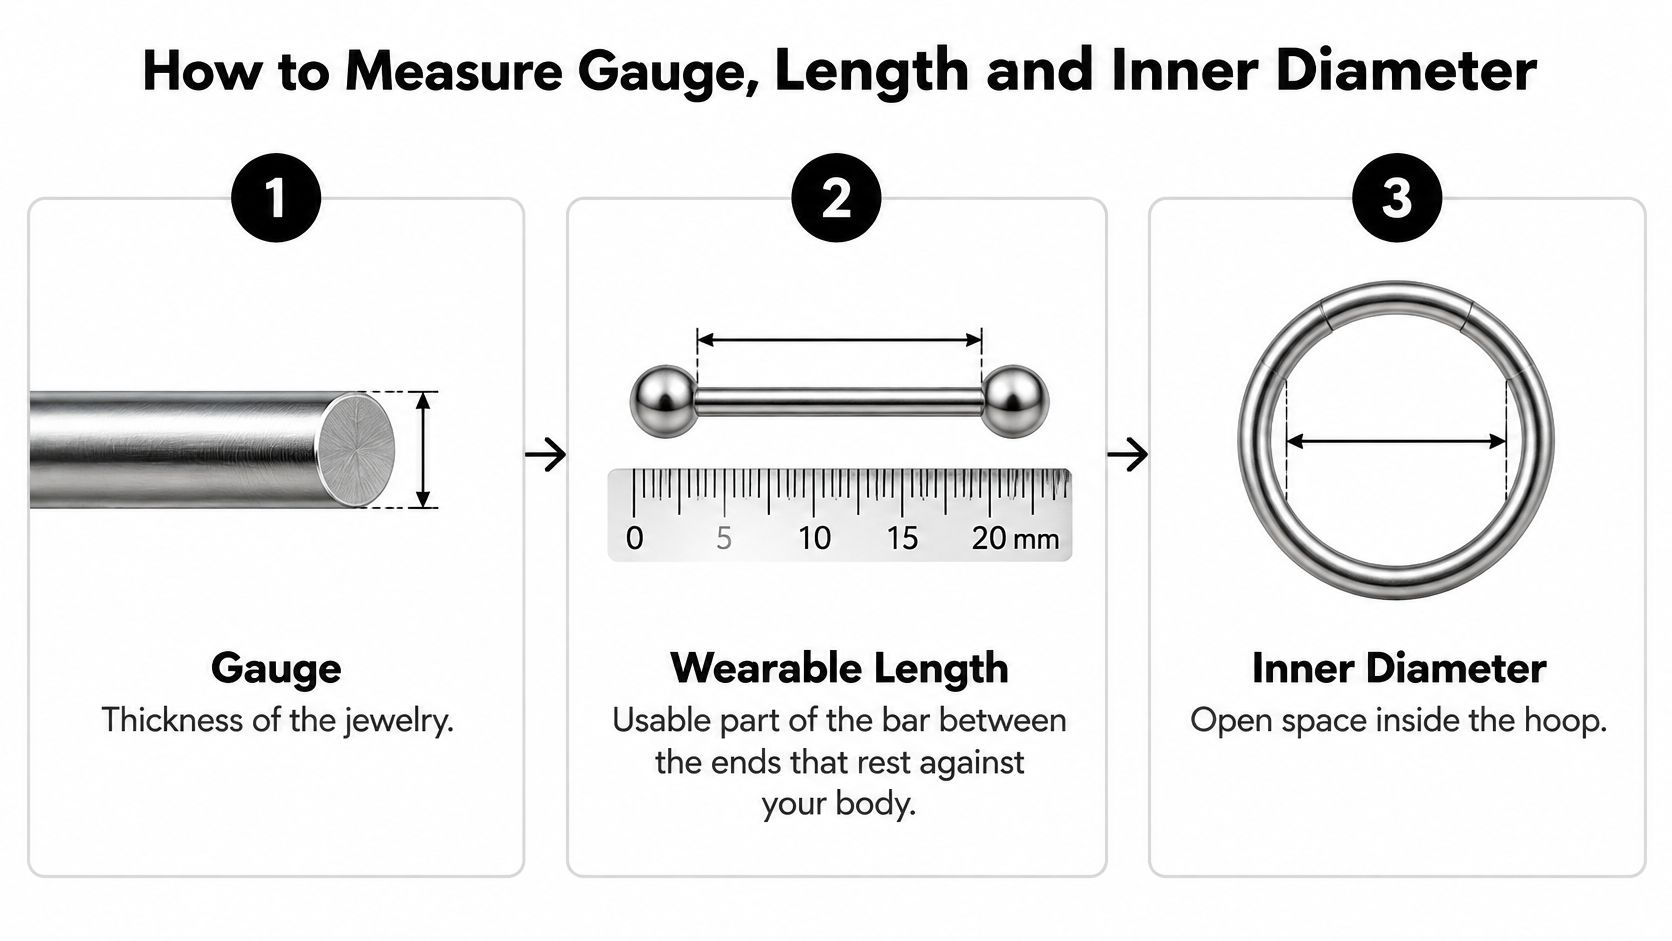
You cannot order the right size if you measure the wrong part of the jewelry. Piercing jewelry uses three separate measurements, gauge for thickness, wearable length for the usable part of a bar, and inner diameter for the open space inside a hoop, as defined in the Vital Piercing sizing definitions. A piece can have the perfect gauge and still be too long, too short, or too tight across the opening.
This diagram puts the three measurements side by side so you can see exactly what you are measuring before you pick up a tool.
Clean your hands, clean the jewelry, and work over a tray or towel. Tiny balls love to escape. They are rude like that.
Six Steps That Give You Usable Numbers
- Remove the attachments first. Unscrew balls, beads, gems, or decorative ends so you are measuring the bar or ring itself, not the jewelry plus its outfit. This keeps total length from pretending to be wearable length.
- Measure gauge on the post or ring wire. Slide the post into a gauge wheel until one slot fits snugly without forcing it, or close calipers gently around the post. Read the thickness, then convert it with the chart at the top. If you want a closer walkthrough of the tool itself, the guide on measuring jewelry using calipers shows where to place the jaws without crushing or guessing.
- Measure wearable length between the bases. For a straight or curved barbell, measure from the base of one threaded end to the base of the other. Do not measure from the outer tip of one ball to the outer tip of the other ball. Those decorations do not live inside your piercing.
- Measure inner diameter across the empty opening. For a hoop or circular barbell, lay it flat and measure in a straight line from one inner edge to the opposite inner edge, excluding the metal. The body piercing jewelry size chart measurement method stresses that the relevant hoop size is that inner diameter, not the outside diameter and not the metal thickness.
- Convert and write down both systems. Note gauge and millimeters together, plus length or inner diameter. A note that only says medium hoop will betray you in three months.
- Record what the piece was doing. Add the material, the piercing it fit, and whether it was worn healed or during swelling. A perfect measurement from a swollen week is not your healed size.
The Mistake That Makes Rings Look Bigger
Measuring the outside of a ring makes it look bigger than it fits, because you added the metal on both sides to the space your body actually gets.
That one error explains a lot of mystery tight hoops. You order what you measured, the ring arrives with a smaller opening than you expected, and suddenly it will not close or it hugs the tissue too closely. Measure the empty space. Your piercing lives in the empty space, not in the metal rim.
Watch the measuring positions once before you trust your first reading, especially if calipers are new to you.
Measure twice, slowly. If your two readings disagree, find out why before you order. A bent ring, a caliper sitting on a decorative edge, or a ball still attached can quietly wreck the number.
Sizing Fresh Piercings Through Healing Stages
Swelling changes length, not usually gauge. That is the rule to tattoo on your brain, figuratively please. A fresh piercing needs enough wearable room for tissue that is about to puff up, settle down, and change its mind a few times.
A healed piece that looks sleek in photos can be a terrible first piece. You are not buying for the final look on day one. You are buying room to heal.
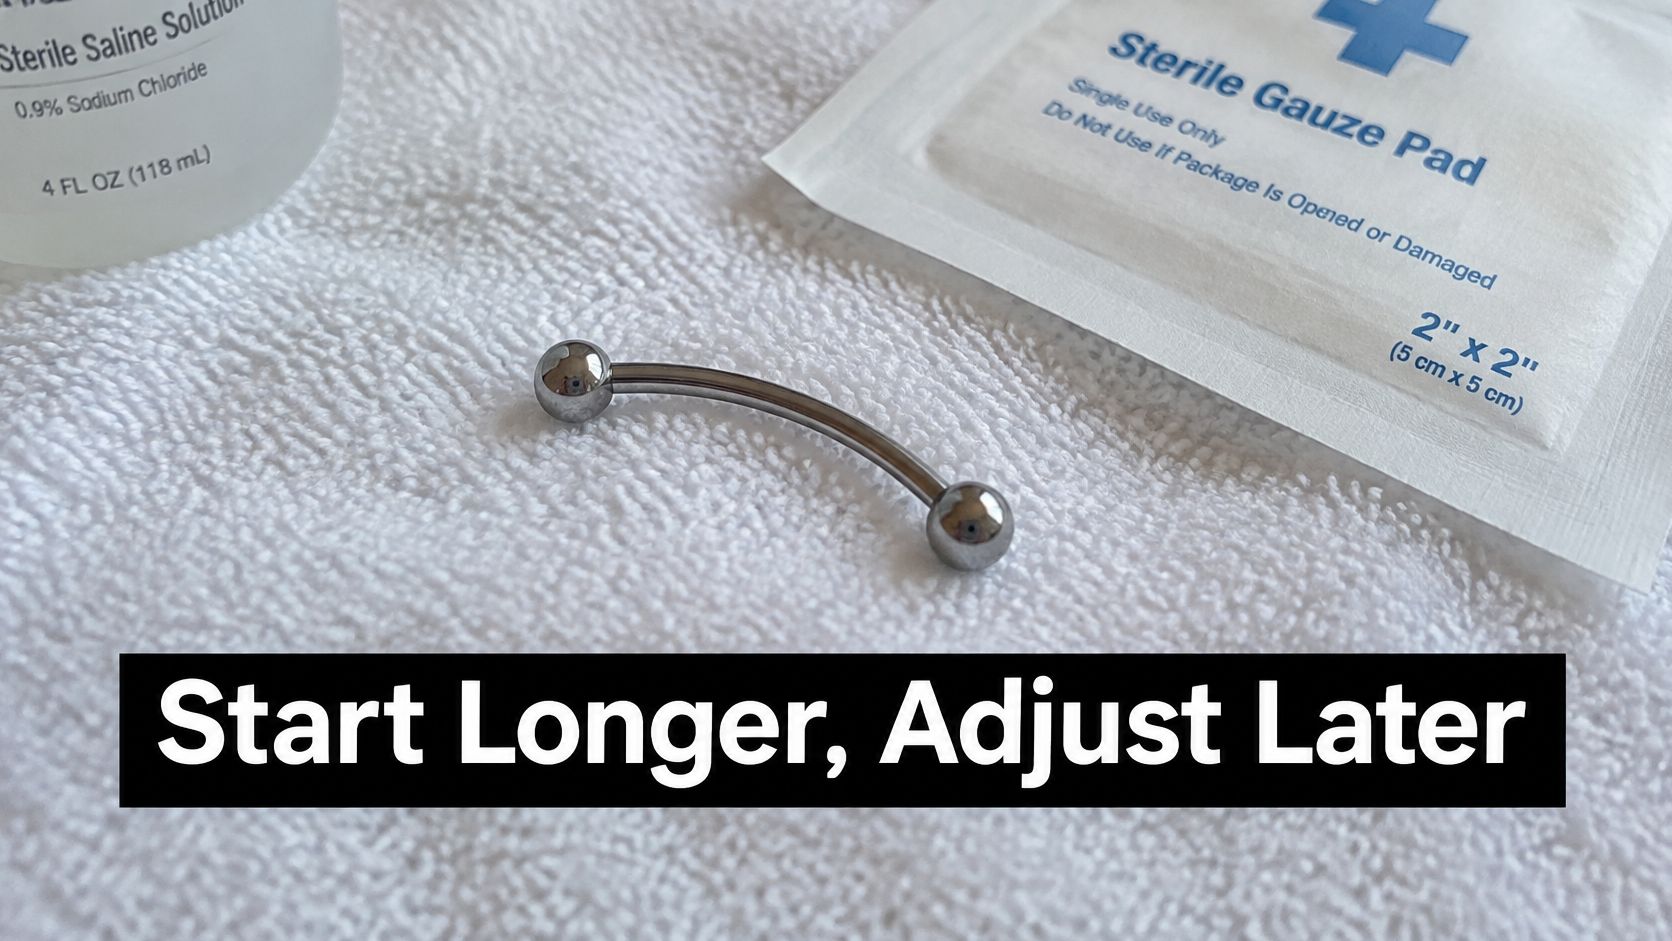
This curved barbell resting with saline and gauze is the early stage in one picture, clean, simple, and sized for healing rather than showing off.
Early Swelling Needs the Longer Piece
In the first stage, use the longer initial length your piercer selected. The forward helix example from the earlier table, 5/16 to 3/8 inch at first and 1/4 inch after healing, shows the pattern clearly without forcing the same numbers onto every body. Your placement may need a different starting length, but the logic stays the same. Room first, snug later.
Do not swap early because the post looks bulky in the mirror. Bulky looking and wrong are not the same thing. A post that is too short can press into swollen tissue, while the longer post gives that tissue somewhere to go.
Mid Healing Is a Holding Pattern
During mid healing, tissue is still settling even if the outside looks calmer. Hold your current size unless your piercer tells you otherwise. Let a professional look at the angle, the tissue condition, and how much bar shows before anyone shortens anything.
Timelines differ by placement, so check the overview of healing times for popular piercings before you compare your progress with a stranger online. Your friend downsizing early does not make your cartilage ready.
Healed and Stable Is When Snug Makes Sense
Once swelling has subsided and the tissue is stable, a shorter piece may sit better and snag less. Book that decision with a piercer who can confirm the healed measurement in person. Cartilage, navel, nipple, and oral piercings vary a lot, so a fitting check matters more than a calendar date.
Before you switch, use one simple test. A healed piece should rest without pressure, pulling, or digging, and it should not need constant pushing back into place. If you feel tightness, sinking, or nonstop movement, do not force the new size and call it breaking it in.
Fresh or swollen piercings should not be downsized based on appearance alone. If you are unsure, stay in the longer piece and get checked. Waiting is annoying. Embedding is worse.
Common Fit Problems and How to Fix Them
A tight or pressing feeling is the complaint I hear first, and it usually points to length or swelling, not gauge. Your bar may be too short for tissue that is still swollen, or you may have downsized before the piercing was ready. Do not tough it out to prove a point to a piece of metal.
Most fit problems come from wearable length or inner diameter. Gauge gets blamed because it is the number people remember, but the bar that catches on your shirt every hour is telling you about length. The hoop that will not close is telling you about diameter.
Read the symptom, find the likely cause, then ask whether your piercing is fresh or healed. The same symptom can need a different response depending on that stage.
Fit problems by symptom
| Symptom | Likely cause | Fix |
|---|---|---|
| Tight or pressing feeling | Post too short or still swollen | Use the next longer length while healing, recheck with a piercer once healed |
| Bead or ball sinking into flesh | Post too short or under pressure | Replace with a longer post, have a piercer confirm the healed measurement |
| Excess movement or snagging | Bar too long for the placement | Choose a shorter wearable length |
| Hoop will not close or sits tight | Inner diameter too small or measured on the outside | Measure the inner diameter and choose a larger size |
| Jewelry slides or migrates | Length too long for the angle | Choose a shorter length, ask a piercer about the placement angle |
| Raised red bump or itch after resizing | Resized too early or metal reaction | Return to the longer piece, check material causes in the later material section |
| Persistent irritation after several weeks | Infection, allergy or unresolved swelling | Stop resizing and consult a doctor or piercer |
Too Short Can Turn Serious Fast
A bead or ball sinking into the flesh is not a wait and see moment. That is embedding territory, where pressure and a short post work against swollen tissue. Get a longer post and professional eyes on it promptly, especially if the end is disappearing or the area feels increasingly tight.
A tight fit can also fool you after a long day, heat, sleep pressure, or accidental snagging makes tissue swell again. If the piece fit yesterday and presses today, think temporary swelling before you declare your healed size wrong forever. Go back to the safer length and reassess when things calm down.
Too Long Creates Its Own Irritation
Excess clearance is not harmless extra room. A bar that moves constantly can snag on hair, clothing, towels, and pillowcases, and every tug drags through the channel. That mechanical irritation can keep a piercing angry even when your cleaning routine is fine.
Slides and sideways sitting often point to a mix of length and angle. Shortening the bar may help, but if the placement angle pushes the jewelry to one side, a piercer needs to judge whether a different length, style, or fit check solves it. Do not keep buying shorter bars hoping geometry will surrender.
Tight Hoops and Mystery Bumps
If a hoop will not close or sits like a clamp, remeasure the opening inside the metal. You may have ordered from an outside measurement or picked an inner diameter that leaves no room for your tissue thickness and placement. A larger inner diameter is not a failure. It is information.
A raised red bump or itch after resizing needs a pause, not another size experiment. You may have changed too early, you may be reacting to the metal, or both problems may be stacked together. Return to the piece that caused less trouble and sort out material before you resize again.
Length fixes can feel better in days, while a metal reaction can take weeks to settle after you remove the trigger. Do not judge both on the same clock.
Get medical care or prompt professional help for spreading redness, pus, increasing pain that does not ease, or an end sinking into tissue. Stop experimenting at home when symptoms escalate. A size chart cannot diagnose you, and neither can a comment thread.
When Your Anatomy Changes the Answer
Charts assume a typical ear, navel, or lip. You may not have the typical version, and there is nothing wrong with that. Anatomy is why two people with the same piercing name can leave a studio wearing different lengths.
Thickness, Angle and Placement All Vote
Tissue thickness changes how much wearable length you need before the ends even clear your body. Thick cartilage or a full lip may need a longer post than the chart suggests. Thin tissue can make that same post wobble, stick out, and catch on everything you own.
Angle is the sneaky one. A piercing placed at a steep or shallow angle can push a bar sideways, so a length that looks correct on paper presses on one side or slides toward the other. You feel it as a piece that never sits centered, no matter how carefully you adjust it.
Placement matters too. A helix close to the rim does not have the same space as one set farther in, and a navel piercing placed higher can change how a curved bar rests. Swelling adds one more variable, and people swell differently even with the same placement and the same aftercare.
The clinical picture supports a fit first approach, because swelling and mechanical irritation are recurring piercing complications discussed in the medical literature on piercing complications. That does not mean every bump is dangerous. It means fit deserves real attention before fashion gets the final vote.
A Three Step Check Before You Change Size
- Observe the piece in your body. Note how your current jewelry sits in the healed piercing during normal wear, not only how it measures on a table. Look for pressure marks, exposed bar, or ends that tilt.
- Test real movement. Turn your head, bend, talk, eat, or sleep on your usual side if that applies, then notice whether the piece moves, presses, or snags. A fit that only works while you stand perfectly still is not a fit.
- Change one variable with help. Compare what you felt with the symptom table, then book a piercer fitting before you change gauge, length, and diameter all at once. Your piercer can see tissue and angles you cannot judge in a bathroom mirror.
This is especially useful for cartilage, navels, nipples, and oral piercings, where bodies differ a lot. Do not let a standard label bully you out of a measurement. The right answer is often not a universal size. It is your size, confirmed on your anatomy.
When Material, Not Size, Is the Real Problem
A perfect size does not make an unsuitable material safe. You can nail gauge, length, and diameter, then still itch, flare, and wonder why your piercing hates jewelry that fits beautifully. Sometimes it does not hate the size. It hates what the size is made of.
That is less satisfying than ordering one size down, I know. It is also the fix that actually works for a lot of sensitive skin.
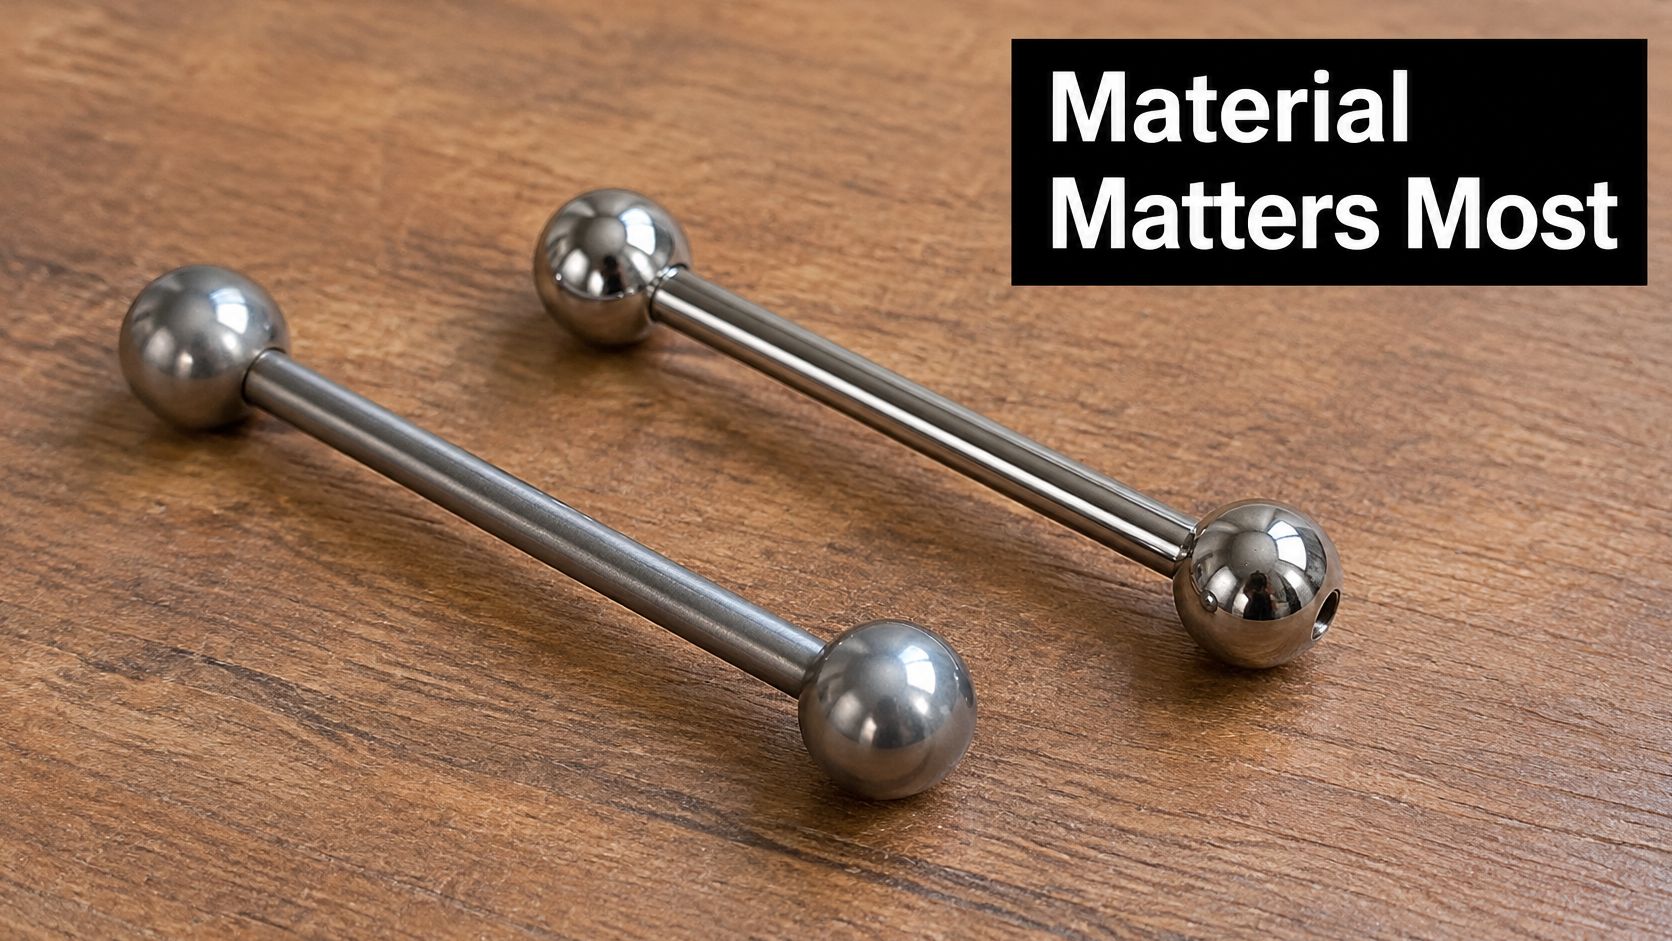
Two simple barbells can look nearly identical and behave very differently on your skin, which is why documentation matters more than shine.
What Verified Material Language Looks Like
ASTM F2999 lists acceptable body piercing categories including surgical implant stainless steel, surgical implant-grade titanium, niobium, solid 14-karat or higher white or nickel-free gold, solid platinum, and dense low-porosity plastics such as PTFE when no lead is intentionally added, as set out in the ASTM F2999 body piercing jewelry standard catalog entry. Professional grade titanium is commonly referenced through ASTM F136 or F67, while ASTM F86 covers surface preparation such as anodizing.
That level of detail matters because vague words do not tell you what you are wearing. Consider these listing checks instead.
- Verified standard name Look for a specific ASTM reference or implant grade language, not only a loose phrase such as surgical steel.
- Solid versus plated Confirm whether precious metal is solid through the piece or only a surface coating, because plating can wear and change what touches your skin.
- Threading and components Check internal or external threading and the size of ends or attachments, since geometry affects insertion comfort and usable length.
Hypoallergenic is not a precise guarantee by itself. Color is not a material certificate either. A gold colored coating and solid nickel-free gold can look similar in a product photo and act nothing alike after weeks of wear.
Nickel Can Explain What Resizing Cannot
A 2025 systematic review found that piercing was associated with nickel allergy in the general population with an odds ratio of 5.9, and nickel release above the relevant threshold was detected in 31.1% of earrings tested in North America and 34.5% in Asia, according to the 2025 systematic review on piercing and nickel allergy. Those numbers explain why a perfectly fitted piece can still trigger dermatitis if its alloy or coating releases nickel.
If you react, switch material first, then revisit size. Put documented implant-grade titanium, niobium, or suitable nickel-free precious metal at the top of your list while you figure it out. Keep the size that was mechanically comfortable so you change one variable at a time.
Recurring dermatitis deserves medical evaluation or patch testing, especially if symptoms return across different pieces. Do not keep shrinking and lengthening bars while your skin is clearly objecting to the metal. Listen to the actual complaint.
Confirm Your Size Before You Order
Run this checklist before you pay, not after the package lands on your porch. It takes a few minutes and it prevents the classic drawer of almost right jewelry. We all know that drawer. Stop feeding it.
Your Pre Order Checklist
- Confirm gauge and millimeters together. The listing should show both, and both should match the piece you measured or the size your piercer recorded. If only one appears, convert it with the opening chart before you trust it.
- Name the second measurement correctly. Decide whether you need wearable length, overall length, or inner diameter. Do not order a hoop by outside diameter or a barbell by tip to tip length including decorative ends.
- Check healing stage carefully. Replacing a healed piece and sizing a fresh piercing are different jobs. Fresh or recently irritated tissue needs the longer initial approach from the healing section, not the snug final look.
- Verify material like you mean it. Check for a named standard, solid rather than plated construction where that matters, thread type, and component dimensions. Sensitive skin gets material priority before tiny size tweaks.
- Get fitted when the answer is not obvious. Book a piercer fitting for new, sensitive, angled, or repeatedly irritated piercings before you commit. One in person measurement can end months of guessing.
If you cannot say your gauge, millimeters, and wearable length or inner diameter out loud, you are not ready to order yet.
Shop With Your Numbers in Hand
Once those numbers are solid, shopping gets fun again. You can browse belly rings, nose rings, and nipple rings at BodyCandy with gauge and dimensions in mind instead of sorting by hope and cute photos. Filter by the size you confirmed, then choose the style you actually want to live in.
Start with the piercing you wear most and replace one piece carefully. Wear it through normal days, sleep, clothes, hair, and movement. If it stays comfortable, record those exact piercing jewelry sizes for next time and build from there.
Still stuck between two lengths or unsure whether you measured inside or outside the hoop? Drop your measurement questions in the comments with your piercing type, healing stage, gauge, and the number you measured. Sign up for the newsletter too if you want new arrivals and size updates without hunting for them.
Do not buy a standard size just because it is the default in a dropdown menu. Buy the size your healed anatomy confirmed. Your piercing will feel the difference long after the new jewelry sparkle wears off.
Ready to shop with your confirmed gauge, millimeters, and wearable length or inner diameter instead of guessing at checkout? Visit BodyCandy to browse belly rings, nose rings, nipple rings, and more body jewelry organized for your next correctly sized piece. Bring your numbers, pick your style, and give that drawer of almost right jewelry an early retirement.