Struggling to make sense of all the different gauges, lengths, and diameters? Finding the right size for your body jewelry can feel a little overwhelming, but don't sweat it. This guide is your complete body piercing jewelry size chart, and we're here to make sure you find that perfect, comfortable fit.
Getting the size right is everything for a happy, healthy piercing, and we're going to break it all down for you. Let's get you feeling like a total pro.
Your Quick Guide To Body Jewelry Sizing
Let's get straight to it. There are two measurements you absolutely need to know for your body jewelry: gauge and length/diameter.
Think of gauge as the thickness of the post or ring. The length (for straight or curved barbells) or diameter (for hoops and rings) is the measurement of the wearable part of the jewelry. Nail these two, and you'll unlock a world of pieces that fit just right.
Getting these measurements correct is about more than just looks—it's critical for your piercing's health. A piece that's too thin can actually cause your piercing to shrink, while one that's too thick can stretch or even damage the tissue. Likewise, a barbell that's too short can embed in your skin, but one that's too long will snag on your clothes and hair. Ouch!
Common Piercing Sizes at a Glance
To give you a running start, it helps to know the industry standards. In the piercing world, jewelry gauge is standardized with common sizes like 20G (0.8mm), 18G (1.0mm), 16G (1.2mm), and 14G (1.6mm). For instance, 14G is the typical go-to for navel piercings, and 16G is a popular choice for many cartilage and nostril piercings. Knowing these common starting points can make shopping so much easier. You can read more about these standards on MarketReportAnalytics.com.
Here's a quick cheat sheet to help you out. It shows the most common starter sizes for popular piercings. But remember, everyone's anatomy is a little different, so think of this as a solid starting point, not a strict rule!
Common Piercings And Their Standard Sizes
A quick lookup table showing the most common gauge (thickness) and length for popular piercings. Use this as a starting point, but remember everyone's anatomy is different!
| Piercing Type | Standard Gauge | Standard Length/Diameter |
|---|---|---|
| Lobe | 20G / 18G | 1/4" (6mm) or 5/16" (8mm) |
| Helix/Cartilage | 16G | 5/16" (8mm) |
| Tragus | 16G | 5/16" (8mm) |
| Navel (Belly) | 14G | 3/8" (10mm) |
| Nostril | 18G / 20G | 1/4" (6mm) |
| Septum | 16G | 5/16" (8mm) or 3/8" (10mm) |
| Nipple | 14G | 1/2" (12mm) or 9/16" (14mm) |
| Tongue | 14G | 5/8" (16mm) |
When in doubt, the best person to ask is always a professional piercer. They can measure your piercing accurately and recommend the perfect size for both your initial jewelry and for when you've fully healed.
Understanding The Piercing Gauge System
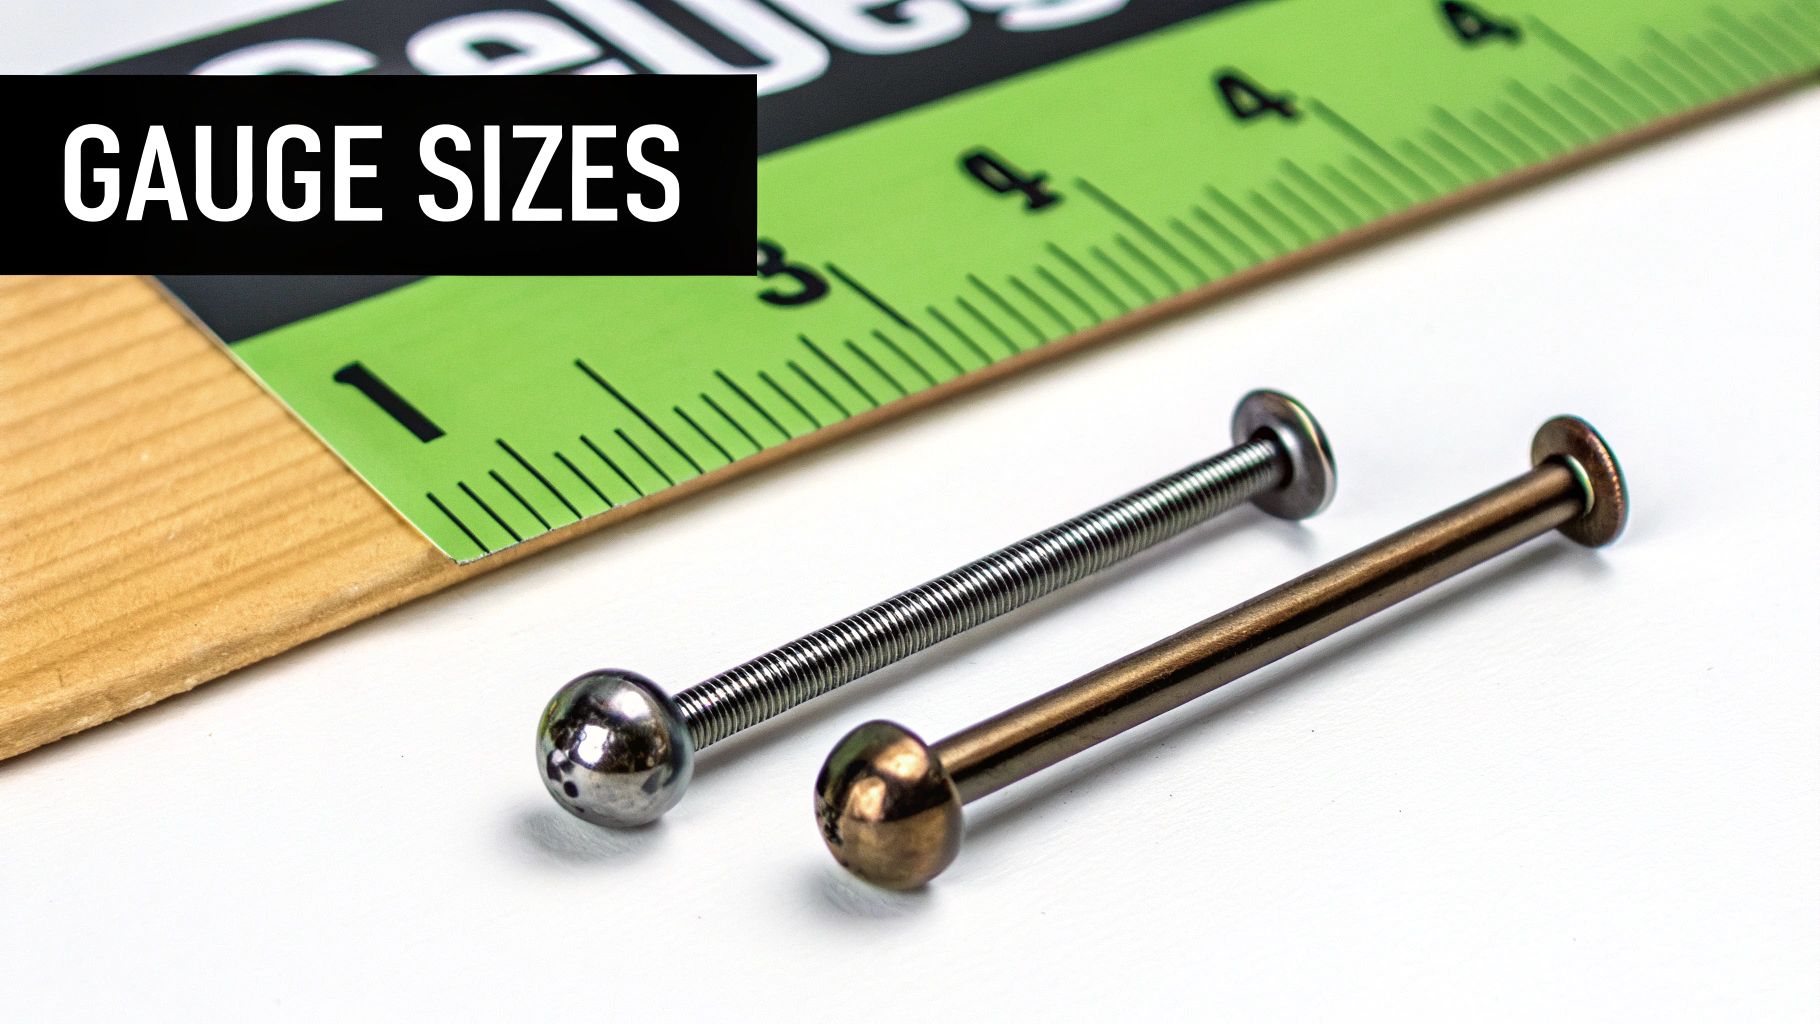
Let's dive into one of the trickiest parts of buying body jewelry: gauges. The gauge (G) system is all about measuring the thickness of the barbell or ring, and honestly, it works a bit backward from what you'd probably expect.
Here’s the main thing you absolutely have to remember: a smaller gauge number means thicker jewelry, while a larger gauge number means thinner jewelry.
So, a 14G barbell is actually thicker than a 16G one. And a delicate 20G nose ring is much, much thinner than an 18G. It feels totally counterintuitive at first, but once you get the hang of it, you'll be navigating our body piercing jewelry size chart like an absolute pro. Knowing your correct gauge is essential for keeping your piercing healthy and making sure your awesome new jewelry fits just right.
Gauge Conversion Chart: Millimeters And Inches
To make things super clear, you need a way to translate these gauge numbers into a measurement you can actually see on a ruler. That’s where millimeters (mm) and inches come in. Most of the world uses millimeters for precision, so it’s the most common unit you'll see alongside gauge sizes.
For example, a standard 14G belly ring is 1.6mm thick. If you accidentally bought a 16G (1.2mm) piece, it would be too loose in the piercing, which could cause it to shrink over time. On the flip side, trying to force a 12G (2.0mm) bar into that same 14G piercing would be painful and could seriously damage the tissue. No fun.
To help you visualize the differences and find your perfect size, here’s a handy conversion chart. Go ahead and bookmark this page so you can always find your way back!
| Gauge (G) | Millimeters (mm) | Inches (") |
|---|---|---|
| 22G | 0.64 mm | 1/40" |
| 20G | 0.81 mm | 1/32" |
| 18G | 1.0 mm | 3/64" |
| 16G | 1.2 mm | 3/64" |
| 14G | 1.6 mm | 1/16" |
| 12G | 2.0 mm | 5/64" |
| 10G | 2.4 mm | 3/32" |
| 8G | 3.2 mm | 1/8" |
| 6G | 4.0 mm | 5/32" |
| 4G | 5.0 mm | 3/16" |
Understanding these conversions is your secret weapon for confident online shopping. If you're curious and want to dig deeper, you can learn more about the standards of gauge sizing for body jewelry in our other awesome blog post! Having this knowledge empowers you to explore all the different styles you want without any of the guesswork.
How To Measure Your Piercing Jewelry At Home
So, you're ready to figure out your jewelry sizing right from your own home? That's awesome. Knowing exactly how to measure your favorite pieces means you can shop for new bling with total confidence. No more guesswork, no more getting a piece that just doesn't fit right.
All you really need is the jewelry you’re currently wearing and a simple tool like a millimeter ruler. A digital caliper is a fantastic investment if you want to get super precise, but honestly, a ruler will do the trick for most measurements. This simple process is your key to building a collection where everything fits perfectly.
Measuring Barbells and Studs For Length
When you're dealing with any kind of straight or curved barbell—think industrial, nipple, or eyebrow piercings—you need to measure the "wearable length." This is super important: it's the distance between the two end balls or attachments, not the total length of the entire piece of jewelry from tip to tip.
- Remove the Jewelry: First, carefully take out the piece you want to measure.
- Unscrew the Ends: Twist off one or both of the balls or decorative ends so you just have the bar.
- Measure the Bar: Lay the bar flat against your millimeter ruler. You're going to measure the space from the base of one threaded end to the base of the other. Do not include the threaded parts themselves in the measurement!
Pro Tip: For a curved barbell, like a classic navel ring, you still measure in a straight line from end to end. Resist the urge to measure along the curve of the bar, as this will give you an inaccurate, longer measurement.
Measuring Hoops And Rings For Diameter
For hoops, captive bead rings, and seamless rings, the magic number you're looking for is the internal diameter. This is just the measurement across the widest part of the ring's inside edge. Getting this right is what keeps your hoop from being painfully tight or awkwardly floppy.
- Step 1: Place your ring on a flat, stable surface.
- Step 2: Use your millimeter ruler to measure the distance straight across the inside of the ring, from one inner edge to the opposite one.
- Step 3: Make sure you aren't including the thickness of the metal itself—you only want to measure the empty space inside.
For a deeper dive into the world of measuring, check out our guide on measuring up body jewelry sizing basics.
No Ruler? No Problem! At-Home Hacks
Don't have a millimeter ruler or calipers just lying around? Don't sweat it, we can get creative. One of the easiest hacks involves a simple piece of paper and a standard credit card.
- Place your jewelry on a piece of plain paper.
- Use a pen to carefully mark the length or internal diameter right on the paper.
- Now for the trick: most credit cards have a standard height of about 54mm. Place the card next to your markings to get a surprisingly close estimate. You can also find ruler apps on your phone that work pretty well in a pinch
A Detailed Sizing Guide For Every Piercing
Welcome to the main event! This is where we get into the nitty-gritty of sizing for just about every piercing you can imagine. Finding the right fit isn't just about comfort—it's about making your style pop in the best way possible.
We've laid this guide out by body part, so it’s super simple to find exactly what you're looking for. Whether you're hunting for your very first piece or adding another gem to your collection, consider this your ultimate reference.
Ear Piercing Sizes
Your ears offer a ton of real estate for incredible jewelry, but every single spot has its own specific sizing needs. From the classic lobe to the more intricate cartilage piercings, let's dive into the details.
-
Lobe Piercing: This is usually the first piercing people get! The standard gauge is typically 20G or 18G. For studs, you're generally looking at a 1/4" (6mm) or 5/16" (8mm) length. When it comes to hoops, diameters can vary a lot based on your anatomy and personal style, but 8mm to 12mm is a really popular range.
-
Helix (Cartilage) Piercing: The upper rim of your ear is the perfect canvas for cool hoops or studs. The most common gauge here is 16G. If you're going for a flat back stud, 5/16" (8mm) is a great starting length. For hoops, diameters in the 8mm to 10mm range usually hit that sweet spot. Be sure to check out our stunning collection of 16G helix earrings to find your next favorite piece.
-
Tragus Piercing: That little nub of cartilage right in front of your ear canal is such a cute spot for a piercing. 16G is the standard thickness. You'll want a shorter post for this one, so look for a 1/4" (6mm) or 5/16" (8mm) length to keep it snug and out of the way of your earbuds.
-
Conch, Rook, and Daith Piercings: These inner-ear piercings have their own unique requirements. A 16G is almost always the gauge of choice. Conch studs often need an 8mm length, whereas daith and rook piercings look amazing with hoops or curved barbells. Their diameters usually fall between 6mm and 10mm, all depending on how much room your anatomy allows.
-
Industrial Piercing: This one's a bit different, since it's a single long barbell that connects two separate piercings. The standard gauge is 14G. The length is totally dependent on your ear's unique shape, but common sizes range from 1 1/4" (32mm) to 1 1/2" (38mm).
Facial Piercing Sizes
From a subtle nose stud to a bold lip ring, facial piercings are all about making a statement. Let's make sure it's a comfortable one.
The image below breaks down the three key measurements you'll always see on a body jewelry size chart: the length, diameter, and gauge.
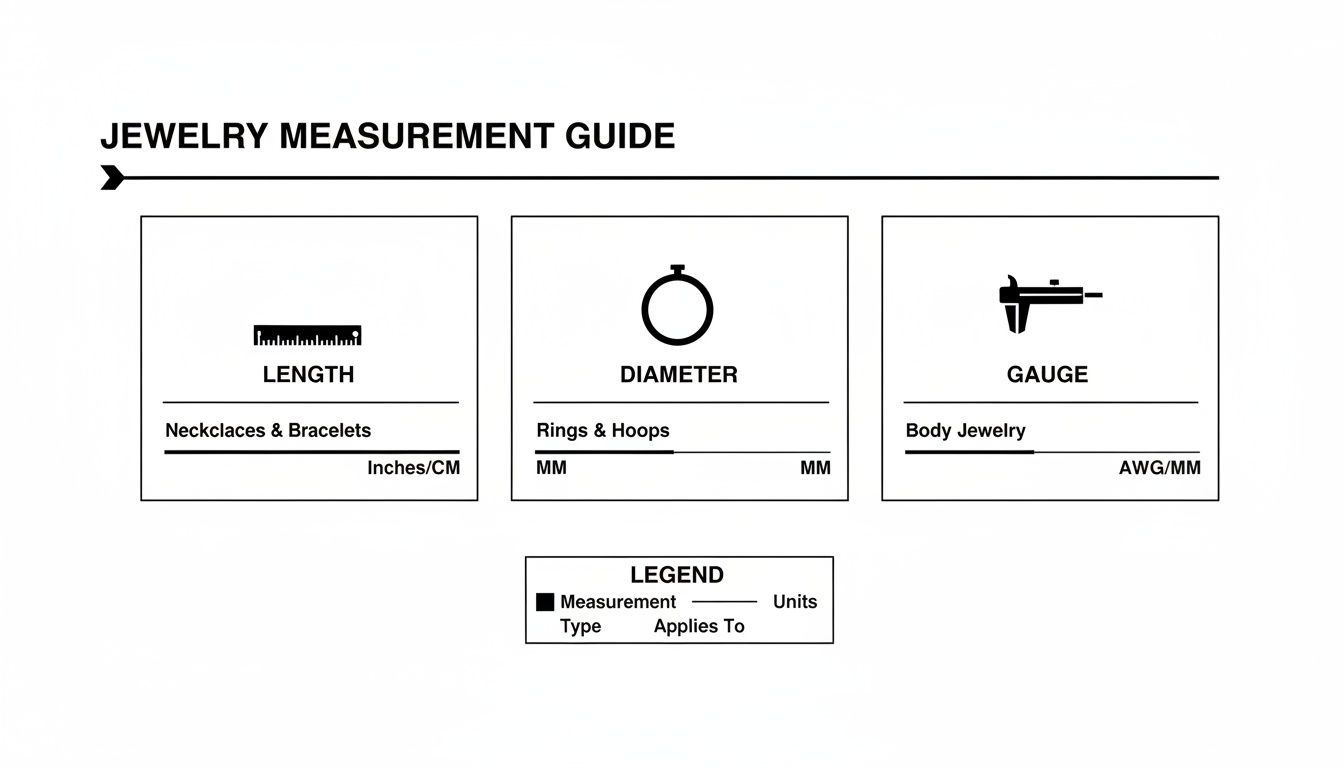
This is a great visual reminder of how a ruler measures length, a hoop's inner space gives you its diameter, and a caliper confirms the jewelry's thickness, or gauge.
Lip Piercing Variations
Lip piercings like the Labret, Monroe, or Medusa are incredibly popular, and thankfully, they all tend to follow similar sizing standards.
- Standard Gauge: The go-to gauge for most lip piercings is 16G.
- Standard Length: For a snug but comfortable fit, look for a flat back labret stud with a 5/16" (8mm) wearable length. Some people with thicker lips might find a 3/8" (10mm) length feels much better.
Nose and Eyebrow Piercings
These piercings need delicate jewelry that fits just right to keep them from snagging on everything.
-
Nostril Piercing: This is one of the few piercings where you'll see a good bit of variation in gauge. The most common sizes are 20G and 18G. For hoops, a 5/16" (8mm) diameter is the most popular choice by far, but some people need a smaller 1/4" (6mm) for that perfect, tight fit.
-
Septum Piercing: To get that perfect bull-ring look, 16G is the standard. The diameter you choose—usually 5/16" (8mm) or 3/8" (10mm)—is what will determine how low the jewelry hangs.
-
Eyebrow Piercing: The classic choice here is a 16G curved barbell. A 5/16" (8mm) length is the most common size, giving you a nice, snug fit along the brow ridge.
Body Piercing Sizes
Now for the classics! From belly rings to tongue bars, getting the size right isn't just for looks—it's crucial for the health and comfort of your piercing.
A common mistake is choosing the wrong length. In fact, a significant portion of sizing issues, between 23%–28%, happens when customers select the wrong barbell length. This highlights just how important it is to measure correctly before you buy!
-
Navel (Belly Button) Piercing: The undisputed champion for navel piercings is a 14G curved barbell. The most common length is 3/8" (10mm), but you can definitely find shorter 5/16" (8mm) or longer 7/16" (11mm) options to perfectly match your anatomy. Find your perfect style in our huge collection of 14G belly button rings.
-
Nipple Piercing: For nipple piercings, a 14G barbell is the typical choice. Length is super important here for comfort, with 1/2" (12mm) and 9/16" (14mm) being the most common sizes. This gives you just enough room without the bar being excessively long.
-
Tongue Piercing: Your initial tongue piercing is always done with a much longer bar to make room for swelling. Once it's healed, most people downsize to a 14G straight barbell that’s 5/8" (16mm) long. It's interesting to note that market data shows the most popular barbell lengths sold are between 8mm and 16mm, with 10mm and 12mm sizes frequently used as starter lengths for tongue and nipple piercings. You can dig into more of these market trends in this detailed industry report.
Navigating Initial Swelling Vs. Healed Sizing
Ever get a brand-new piercing and wonder why the jewelry seems a little long? That’s not an accident—it’s actually a super important part of the healing process! When you first get pierced, your piercer intentionally uses a longer post, often called a "swelling bar," to give your body room to do its thing.
Fresh piercings swell up, and that extra space is absolutely essential for a smooth start. A longer initial bar prevents the jewelry from getting too tight, which can lead to painful pressure, irritation bumps, and even embedding (where the jewelry actually sinks into your skin). Think of it as giving your new piercing some much-needed breathing room while it calms down.

The Importance of Downsizing Your Jewelry
After that initial swelling phase, which usually lasts anywhere from a few weeks to a couple of months, you'll probably notice that long bar is starting to feel a bit too long. This is your cue to downsize! Downsizing simply means swapping out the initial jewelry for a shorter, snugger piece that fits your now-healed piercing perfectly.
Don't skip this step; it's just as critical as starting with a long bar in the first place. Leaving that initial jewelry in for too long can cause its own set of problems.
- Increased Snagging: A long bar is way more likely to catch on your hair, clothes, or pillowcase. This can seriously irritate and even damage a healing piercing.
- Migration and Irritation: Jewelry that moves around too much can cause the piercing angle to shift or "migrate," leading to those dreaded irritation bumps and a crooked result.
- Oral Health Risks: For lip or tongue piercings, a long bar can constantly rub against your gums and teeth, potentially causing permanent damage over time.
Key Takeaway: The initial long jewelry is for healing, but the final, snugger jewelry is for living. Downsizing is a crucial step for a happy, healthy, and comfortable piercing for years to come.
Knowing When You're Ready to Downsize
So, how do you know it's time to make the switch? The best person to tell you is always your professional piercer. They've seen it all and can assess your piercing during a check-up to confirm that the swelling has fully gone down.
As a general rule, you'll be ready to downsize when the initial swelling is gone and the bar looks noticeably long, with extra space visible on either side of the piercing. Whatever you do, don't rush this process! Downsizing too early can cause the swelling to come back with a vengeance.
Once your piercer gives you the green light, you can finally explore a whole new world of perfectly-fitted jewelry that will sit flush against your skin, looking and feeling amazing.
Choosing The Right Material For Your Piercing
Getting the right size jewelry is a huge win, but that’s only half the battle. The material your jewelry is made from is just as important. Think about it: the perfect fit won't feel so perfect if your skin is throwing a fit over the metal. Sizing and material truly go hand-in-hand for a happy, healthy piercing.
When you've got a fresh piercing, not just any metal will do. This is exactly why professional piercers are so specific about the materials they use for initial jewelry. They need something that’s body-safe, tough enough for daily wear, and won't cause irritation while your body is trying to heal.
Hypoallergenic Heroes
If you have sensitive skin or a known nickel allergy, picking a hypoallergenic material isn't just a good idea—it's essential. These are the materials that are extremely unlikely to cause an allergic reaction, which makes them the top choice for new piercings and for anyone who's had trouble in the past.
-
Implant-Grade Titanium (ASTM F136): This is the gold standard for a reason. It's completely nickel-free, super lightweight, and won't corrode. If your skin gets angry easily, titanium is your absolute best friend.
-
Surgical Steel (316LVM): You'll see this one everywhere! It's a super popular and affordable option. While it does contain trace amounts of nickel, the alloy is typically stable enough that it's safe for most people once a piercing is fully healed.
-
14k Gold: For those who love a classic, luxe look, solid 14k gold (or higher) is a fantastic choice. Just make sure you're avoiding gold-plated jewelry in new or sensitive piercings—the plating can flake off and lead to some serious irritation.
Making the Best Choice for Your Body
Picking the right material is a massive part of keeping your piercing healthy for the long haul. It's no wonder that hypoallergenic options like implant-grade titanium are such a big deal, making up 34%–42% of global jewelry revenue in 2024. Smart shoppers know that when you match the right size with a quality material, you run into fewer problems. For more on these trends, you can check out the report from Cognitive Market Research.
While metals are amazing, they aren't your only choice. If you're looking for something flexible and totally metal-free, there are other cool options out there to explore. We've actually got a great post that dives into the benefits of Bioplast body jewelry.
At the end of the day, the most important thing is to listen to your body. It will always let you know what works and what doesn't.
Troubleshooting Common Jewelry Sizing Issues
So you finally got that new piece of jewelry you've been eyeing, but the fit is just… off. Don’t panic! It’s something that happens to literally everyone, and thankfully, most sizing problems are pretty easy to fix once you know what’s going on.
Whether your new bling is uncomfortably snug or annoyingly loose, this is your guide to figuring out the problem and finding the right solution. Think of it as your personal fit-check so you can get back to rocking a collection where every piece feels like it was made just for you.
When Your Jewelry Feels Too Tight
A piece that's too tight is more than just irritating—it can be a real issue for your piercing's health. That constant pressure can lead to some nasty problems like embedding, prolonged healing, or just general irritation bumps.
If your jewelry feels snug, it's usually down to one of two things:
-
The Length is Too Short: This is the most common culprit for barbells and studs. It means the wearable length of the bar isn't long enough to comfortably pass through your piercing, causing it to squeeze the tissue. The fix is simple: you need a longer bar. For example, if that new 5/16" (8mm) tragus stud is pinching, try moving up to the next standard size, which is often 3/8" (10mm).
-
The Gauge is Too Thick: Ever tried to put a 14G bar into a piercing that’s happily healed at 16G? You’re definitely going to feel it. Forcing a thicker gauge can tear and damage your piercing fistula. The solution here is to stick with the gauge your piercing was originally done with or the size it has comfortably settled into.
When Your Jewelry Feels Too Loose
On the flip side, you might have jewelry that spins constantly, slides around, or just looks droopy. This can also cause problems, from annoying snagging on hair and clothes to unwanted movement that irritates the piercing channel.
Sizing Tip: A little bit of wiggle room is totally normal, but if your stud is constantly sliding way out of the piercing or a hoop hangs much lower than you’d like, that's a clear sign you need to adjust your size.
Let's figure out why it's happening:
-
The Length is Too Long: If you’ve got a long post sticking way out of your lip or helix piercing, it’s a major snag risk. This is super common when you've downsized from the initial, longer jewelry used to accommodate swelling. Just measure the bar you have and order the next size down to get that perfect, flush fit.
-
The Diameter is Too Big: For hoops, a diameter that's too large can look a bit awkward and get caught on everything. If your 10mm septum ring is hanging down to your lip, swapping it for an 8mm will give you that much snugger, cleaner look.
Finding your perfect fit can sometimes take a little trial and error, but it's completely worth the effort. Once you know your ideal measurements, you'll be able to shop the entire Bodycandy collection with total confidence
Sizing Questions You're Still Wondering About
Still have a few sizing questions rattling around in your head? Good. This is where we get into some of the most common things people ask when they're trying to figure out the world of body jewelry. Think of this as your final check-in with a piercing pro to make sure you're feeling totally confident.
We're tackling the big ones here, from whether you can change your gauge to the real risks of wearing the wrong size. We'll even cover how to secretly figure out your friend's size for that perfect gift. Let's get you feeling like a true sizing expert.
Can I Change The Gauge Of My Piercing?
Absolutely! This is a question we hear all the time. For a fully healed piercing, you can definitely change the gauge, and you can go in either direction—stretching up to a thicker gauge or letting it shrink down to a thinner one.
- Stretching (Going Thicker): This is all about gradually increasing the size of your piercing, typically one gauge at a time (like going from a 16G to a 14G). This has to be done slowly and carefully, using the right tools like tapers and plenty of proper lubrication to avoid tearing or damaging your skin. Patience is everything here!
- Shrinking (Going Thinner): If you've got your eye on a thinner piece of jewelry, you can just pop it into your healed piercing. Over time, the fistula (the little tunnel of skin) will likely tighten up naturally around the smaller jewelry. Just be aware that this can be a one-way street; it might be tough to go back to your original, thicker gauge later on.
What Happens If I Wear The Wrong Size Jewelry?
Wearing the wrong size is more than just a fashion mistake; it can create some serious problems for your piercing. Your body has a way of telling you what it doesn't like, and ill-fitting jewelry is high on that list.
An incorrect fit can cause a whole host of issues, depending on what's wrong:
- Too Tight (Short Length/Small Diameter): This is probably one of the most dangerous fit problems. Jewelry that’s too snug can squeeze the piercing, causing irritation, swelling, and even embedding—where the jewelry actually starts to sink into your skin.
- Too Loose (Long Length/Large Diameter): A piece that's way too long or has a huge diameter is going to catch on everything—your hair, clothes, and pillowcase. This constant yanking and friction can lead to those stubborn irritation bumps and can even change the angle of your piercing over time.
- Too Thick (Wrong Gauge): Shoving a thicker gauge into a piercing that isn't stretched and ready is a recipe for disaster. It can cause tearing, pain, and scarring. You're basically re-traumatizing a healed piercing.
- Too Thin (Wrong Gauge): This can lead to something called the "cheese-cutter effect," especially in piercings like the navel. The super-thin jewelry can slowly migrate or even slice through the skin. It can also cause the piercing to shrink down, making it impossible to wear your old jewelry.
How Do I Know What Size To Buy As A Gift?
Buying jewelry for a friend is an amazing gesture, but it's tough when you don't know their size. Guessing is a gamble, but you have a few clever ways to play detective without ruining the surprise.
Sleuth Tip: The easiest method is often the most direct, as long as you can be sneaky. Try telling them you love a piece of jewelry they're wearing and ask what size it is because you're "thinking of getting one" for yourself.
If you need to be a bit more subtle, try these tactics:
- Ask a Mutual Friend: See if one of their besties is in on the secret and might know their jewelry sizes. A little teamwork can go a long way!
- Borrow a Piece: If you get a chance, discreetly borrow a piece of jewelry they wear in that exact piercing. You can then measure it at home using the methods we've already covered.
- Check Their Wishlist: Have a peek to see if they have a public wishlist on a jewelry site (like here at Bodycandy!) where they might have saved items with the sizes listed.
- Go with a Standard: If all else fails, you can always buy the most common standard size for that specific piercing (just look back at our charts in this guide!). Make sure to include a gift receipt so they can swap it out if the fit isn't quite right.
Ready to put all this newfound sizing knowledge to the test? Bodycandy has an incredible collection of jewelry for every piercing imaginable, in every size you could possibly need.