


















You're staring at your 6g plugs in the mirror, turning one between your fingers, thinking it looks loose enough. The 4g set is already in your cart. Many get this wrong, not because 4g is intimidating, but because they treat it like a label instead of a measurement.
A 4g ear stretch is a 5 mm decision. If your lobe is ready, the next size should slide in with mild pressure. If it needs a fight, your ear already gave you the answer.
4G Ear Size Chart and What 5 mm Really Means
4g is about 5 mm. The ear gauge size chart lists 4g as 5.0 mm, or about 0.20 inches, while the exact American Wire Gauge conversion is approximately 5.19 mm.
That gap explains why two listings can both say 4g and feel slightly different. One shop uses the rounded jewelry size. Another uses the technical wire gauge figure. Compare millimeters, not labels.
Ear Gauge Sizes From 8g to 0g
| Gauge | Diameter in mm | Approximate inches |
|---|---|---|
| 8g | 3.2 mm | 1/8 inch |
| 6g | 4.0 mm | 5/32 inch |
| 4g | 5.0 mm | 3/16 inch |
| 2g | 6.4 mm | 1/4 inch |
| 0g | 8.0 mm | 5/16 inch |
Gauge numbers run backwards, so larger numbers mean thinner jewelry. A conventional lobe piercing around 18g to 20g sits near 1.0 to 0.8 mm, which makes 4g roughly five times wider than where most lobes start.
The jumps also grow as numbers drop. The ear stretching schedule planner puts the 4g to 2g change at about 1.36 mm, a bigger leap than the labels suggest.
Practical rule: Don't order the next size until you've confirmed the millimeter diameter of the jewelry you're wearing now.
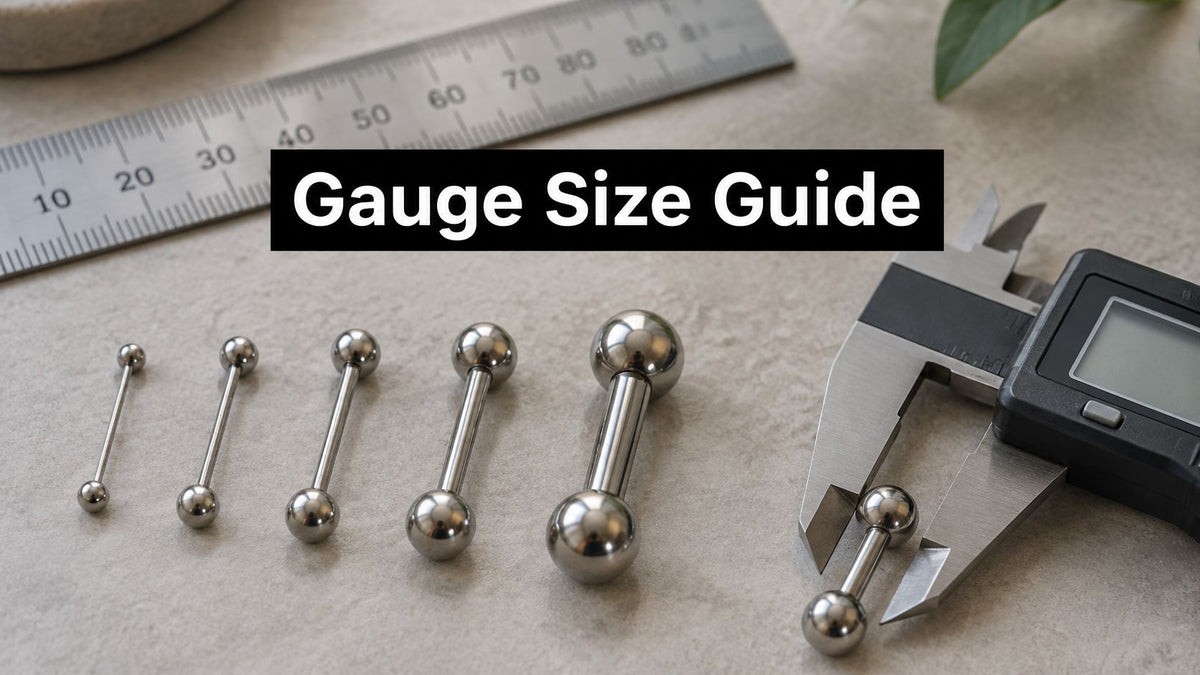
Measure your current plug or tunnel with calipers or a sizing gauge before you buy. Check whether a listing describes the wearable diameter clearly, especially with tunnels. If gauge math still feels fuzzy, our guide to standard gauge sizes for piercings breaks the system down in plain language.
Check Readiness and Pick Your Method
Your 6g plug turns freely, your lobe feels soft, and the 4g pair is sitting in your cart. That is not a green light yet. Treat the readiness checklist as pass or fail. Your lobe will.
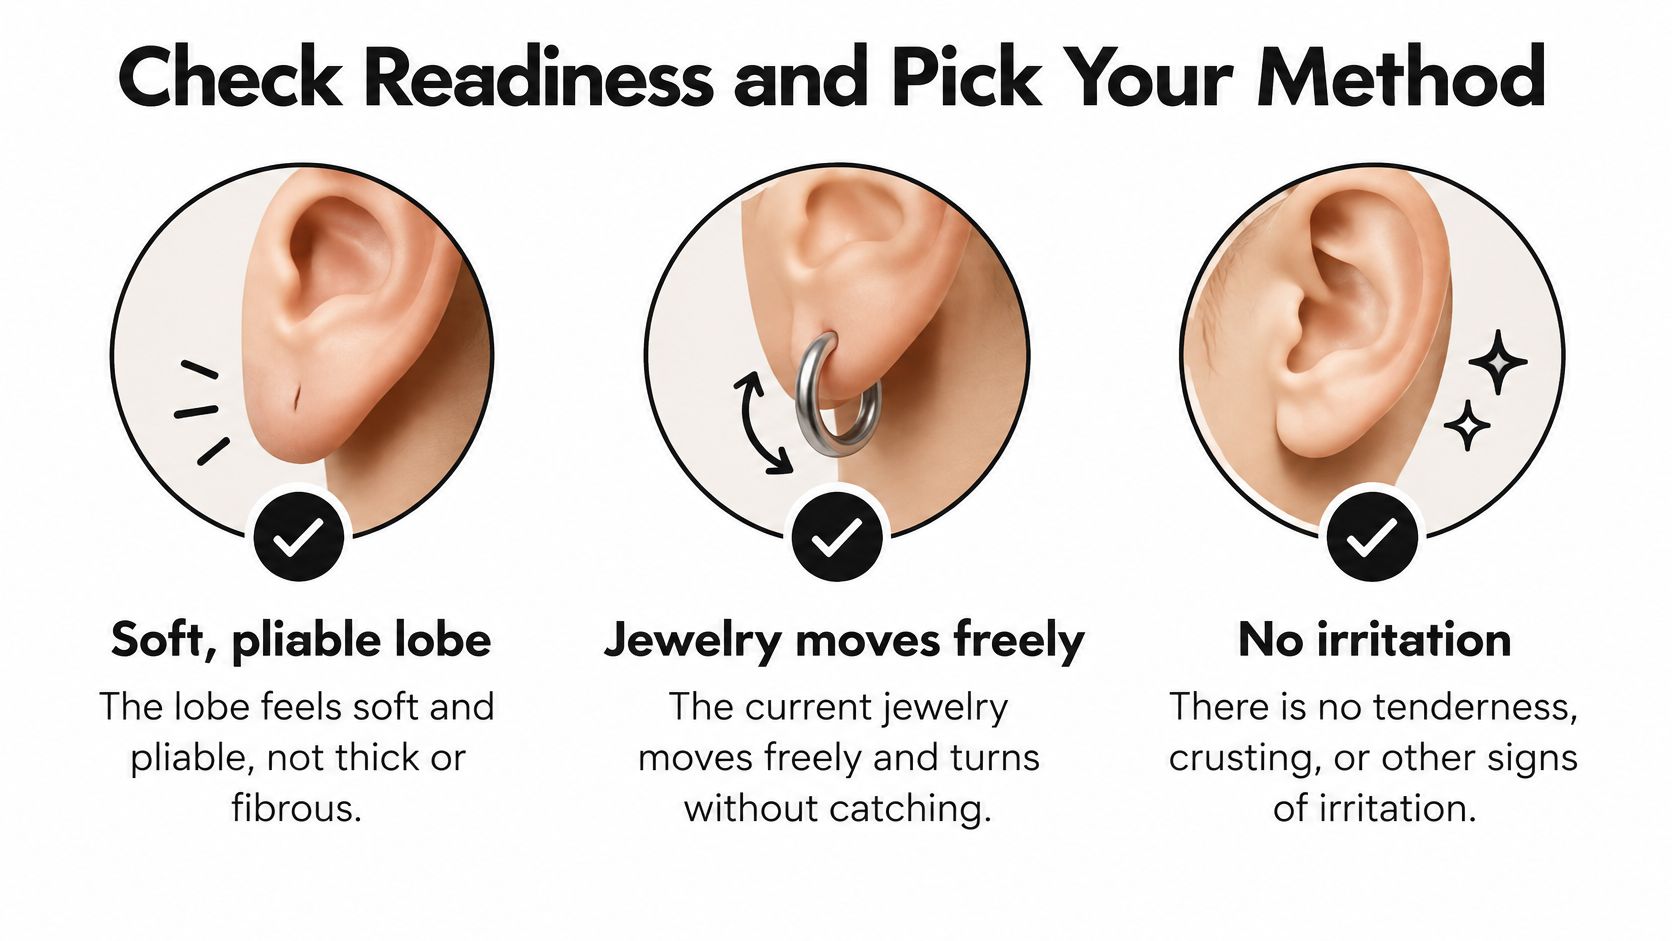
The Readiness Checklist
- Soft, pliable lobe: Your lobe feels soft and flexible, not thick, tight, or fibrous.
- Free movement: Your current jewelry moves and turns without catching or dragging.
- No irritation: There's no tenderness, crusting, redness, or discharge.
- No pressure at 6g: Your current 6g, about 4.0 mm, sits without tightness or a squeezed feeling.
- Enough healing time: Your previous stretch has fully settled before you ask for more.
The Nation Tattoo ear stretching guidance puts 4g at approximately 5.0 to 5.1 mm and frames 6g to 4g as a relatively large jump. A half size intermediate step can reduce tissue stress if things feel snug. Snug is a warning, not an invitation to push harder.
If any check fails, stay where you are and look again after a short wait. Don't stretch to hit a party, photoshoot, or arbitrary deadline. Mild pressure can be normal. Sharp pain, bleeding, visible tearing, or a bulging rim means stop, downsize, and get assessed by a professional piercer or clinician.
Taper Versus Dead Stretching at a Glance
| Method | Best when | Tools | Wait rule |
|---|---|---|---|
| Dead stretch | Current jewelry is loose and the next size slides in with little resistance | None, just the new jewelry | Previous stretch healed about 6 to 8 weeks and fully settled before the next size |
| Taper stretch | Next size needs gentle guidance but the lobe is healed and soft | Body-safe taper, then the new plug or tunnel | Switch to the plug or tunnel once the taper is in, then wait until the lobe is fully settled before the next size |
Dead stretching isn't a shortcut. The professional stretching guidance from The Neat and Tidy Man specifies roughly six to eight weeks of healing after the previous stretch, with the lobe free of tightness, pressure, and soreness. That window is the floor, not a green light to rush.
The method works because a healed opening gradually relaxes enough to accept slightly larger jewelry without a cone. If you need hard pushing or aggressive twisting, you're forcing it, not dead stretching.
A taper suits a healed, soft lobe that needs guidance, not force. Put the timeline in your calendar once: six to eight weeks for the previous stretch to heal, then wait until it has fully settled before any larger size. Longer waits as sizes increase. Boring? Yes. Effective? Also yes.
Pick Materials and Aftercare That Help Healing
Material matters as much as diameter on a fresh 4g stretch. A perfect 5 mm fit in the wrong metal can still leave you itchy, sore, and wondering what went wrong.
Jewelry Materials for a Healing 4G Stretch
| Material | Why it suits healing | Watch for |
|---|---|---|
| F136 titanium | Hypoallergenic, lightweight and common for sensitive ears | Costs more than steel |
| Niobium | Inert and hypoallergenic, a strong choice during healing | Often fewer styles available |
| Solid 14k gold | Suitable for many ears when it is solid gold | Some gold alloys contain nickel, so check the spec |
| 316L surgical steel | Affordable and widely stocked | Contains nickel and can irritate allergic ears |
| Soft or acrylic jewelry | Light and comfortable for larger sizes | Use only after the stretch is fully healed |
Don't assume surgical steel automatically means safe for your ears. If nickel bothers you in earrings, belts, or jean buttons, it'll probably bother you here too. Our guide to piercing and material sensitivities helps you spot that pattern before you buy.
Gold needs the same skepticism. Solid 14k gold can work well, but some alloys contain nickel, so check the actual spec instead of trusting a color description.
Set up before you stretch: confirm the millimeter size, pick a material your skin tolerates, and keep a dated log of each change.
Once your new jewelry is in, keep aftercare simple:
- Clean once or twice daily: Use sterile saline spray or fragrance-free soap, rinse well, and pat dry.
- Hands off: Don't twist jewelry on a fresh stretch just to check it.
- Sleep smart: Sleep away from the new piece when you can, so you aren't grinding it into a pillow.
- Skip harsh products: Avoid over-cleaning and alcohol-based products that dry skin out.
- Keep it light: Choose lightweight first jewelry, since heavy plugs can pull on settling tissue.
Write down the date, gauge, and millimeter size every time you change. Future you will not remember whether it was three weeks or three months ago, and that guesswork causes rushed stretches. Expect the opening to need several weeks to settle before you even think about a larger size.
How to Stretch to 4G Step by Step
The taper route is straightforward when your lobe is ready. It gets messy when people treat resistance as a challenge.
The Taper Route
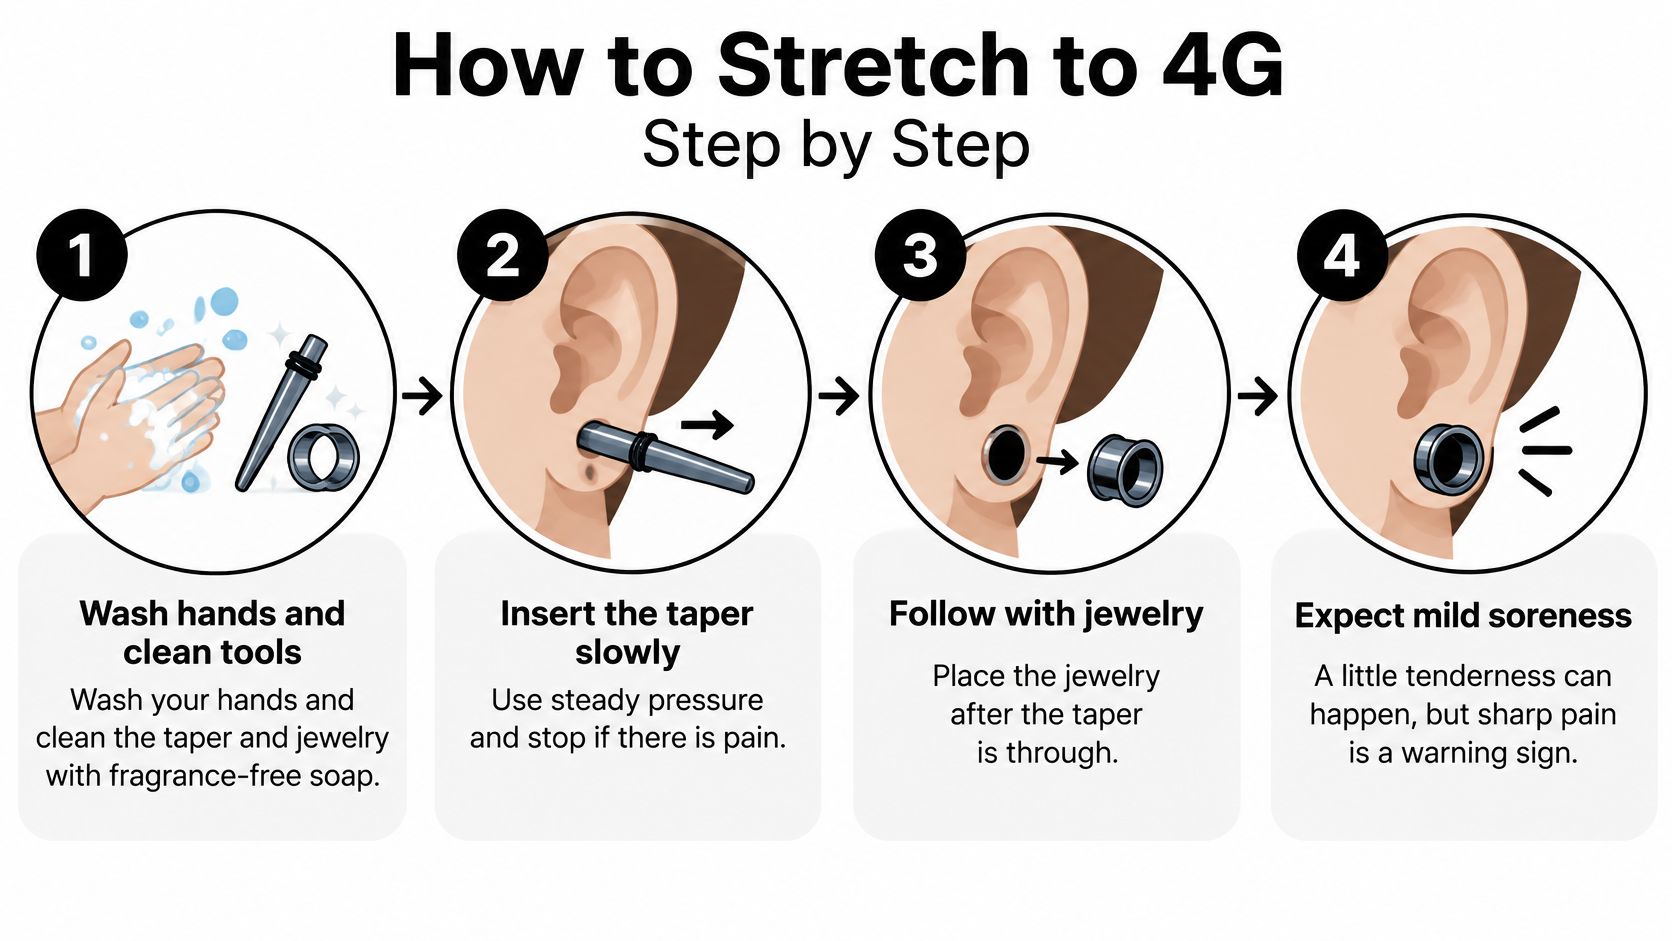
- Wash your hands and clean your tools. Clean the taper and jewelry with fragrance-free soap, because clean tools lower infection risk. Common slip: dropping a taper on the counter and using it anyway. Wash it again.
- Add water-based lubricant. Put a small amount on the taper tip so it glides instead of dragging. Common slip: grabbing an oily product that can trap bacteria against irritated skin.
- Insert the taper slowly. Use steady, gentle pressure with a slight rotation if it helps alignment. Stop at sharp pain. Common slip: pushing because you're almost there. Almost there is where tears happen.
- Let the opening adjust. The WebMD guide to ear stretching describes wearing the taper for roughly 24 hours before inserting the jewelry. Common slip: pulling it early because everything looks fine from the front.
- Follow with your 4G jewelry. Remove the taper and insert the plug or tunnel with the same gentle motion. It should pass with mild pressure only. Common slip: forcing a double flare or thick plug that your fresh stretch can't handle yet. A single flare piece is usually the kinder first choice.
- Check the lobe and start aftercare. Look for bleeding, bruising, tearing, or a rim of tissue pushing out. Then clean gently and leave it alone. Common slip: repeatedly removing the jewelry to inspect it, which just keeps irritating the channel.
If you have to grit your teeth, brace yourself, or talk yourself into one more push, stop. That's not a stretch. That's an injury in progress.
A healthy result looks undramatic. The opening feels snug but not strained, there's no blood, and the lobe isn't bruised, hot, or torn. A little tenderness can settle quickly. Pronounced swelling, persistent soreness, or bleeding tells you the tissue wasn't ready, even if the jewelry technically went in.
I would rather see you back out, return to 6g, and try again later than watch you keep a painful 4g out of stubbornness. Downsizing early protects the shape and thickness of your lobe. Pushing through can create scar tissue that makes every future stretch harder, tighter, and less even.
Irritation, Allergy or Infection and What to Do
After a stretch, three different problems can look annoyingly similar: irritation, allergy, and infection. They don't need the same response, so don't treat every red lobe like it needs more cleaning.
Irritation usually comes from friction, tight jewelry, harsh cleaners, or over-cleaning. It tends to stay localized and ease within days once the fit is right and you calm your routine down.
Allergy points more toward the metal. The DermNet guide to body piercing identifies allergic contact dermatitis as the most frequent non-infectious complication of body piercing, with nickel as the most common allergen.
Symptoms, Likely Causes and What to Do After a 4G Stretch
| Symptom | Likely cause | What to do |
|---|---|---|
| Mild redness and itching for a few days | Friction, tight jewelry or harsh cleaning | Check the size, clean gently once or twice daily and stop over-cleaning |
| Itching, rash or raised skin where metal touches | Allergic contact dermatitis, often nickel | Switch to titanium or niobium and speak to a clinician if it persists |
| Increasing warmth, worsening pain, pus or spreading redness | Possible infection | Seek medical evaluation and do not force jewelry in or out yourself |
| Fever with swelling or red streaks | Serious infection | Get urgent medical care |
| Sharp pain, bleeding, visible thinning or a bulging rim | Overstretching or tearing | Remove the jewelry, downsize and get a professional assessment |
If itching and rash show up exactly where metal touches skin, switching to titanium or niobium may help more than scrubbing the lobe again. Repeated cleaning can't fix a material your skin rejects. It can only make already angry tissue angrier.
Infection moves in the wrong direction. Watch for increasing warmth, worsening pain, pus, spreading redness, or fever, and get medical evaluation instead of waiting it out. Our breakdown of normal irritation versus piercing infection gives you another quick check when you're unsure.
One caution matters here. If you suspect a pocket of infection under the skin, let a clinician decide about removing the jewelry, because removing it yourself can trap the infection inside. For a clear tear or blowout, downsizing reduces pressure. For a possible infection, get assessed first and don't force jewelry in or out.
Decide Whether 4G Is Right for Your Ears
A 4g stretch is not automatically permanent, but it isn't guaranteed to shrink back either. Anyone promising either outcome for your specific ears is guessing.
Here's a close look at the kind of tunnel many people picture at this size.
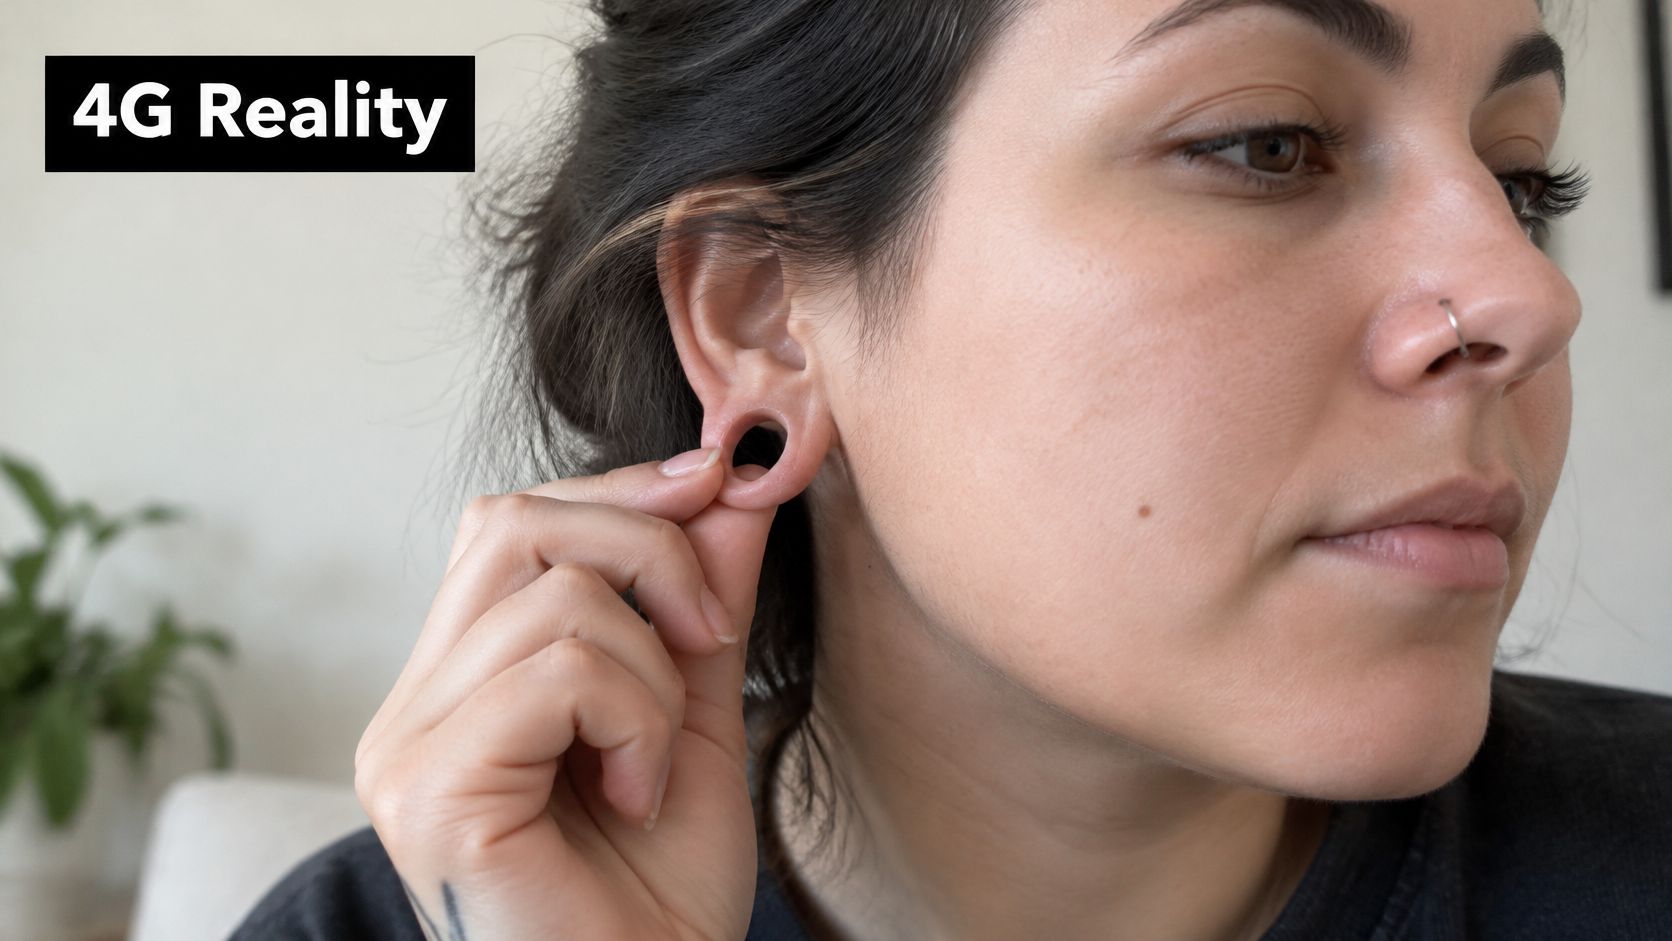
Shrinkage depends on how long you've worn the size, your tissue quality, your stretching technique, jewelry weight, and whether you've had tearing or thinning. A lobe stretched slowly and kept healthy has a better shot at closing down than one that was rushed, torn, and loaded with heavy plugs.
If you take jewelry out to test shrinkage, give it real time before judging. Watch the bottom and back of the lobe for thinning or a blowout rim, and skip heavy pieces that can gradually enlarge the opening while you're deciding.
This short video is worth watching before you commit, especially if you're still picturing 4g as a temporary experiment.
Repair is possible, but it's surgery, not a backup stretching trick. The clinical literature on gauged earlobe repair reports that defects under 15 mm may be treated with de-epithelialization and primary closure, while larger defects may require excision and rotation, with minor complication rates of 12.5% and 10.8% respectively.
That same clinical context advises patients seeking repair to remove jewelry for at least one month before surgery to allow contraction and reduce the defect. That's surgical planning, not a universal self-treatment rule. If closure is your goal, a board-certified plastic surgeon is the right conversation, not another taper kit.
Your move today: Stay at 6g until every readiness check passes, then book a consultation with a professional piercer if you're still unsure.
When you are ready, choose materials you can verify. Our ear jewelry is available in F136 titanium, 14k gold, 316L surgical steel and nickel-free materials, so you can match the piece to your skin instead of hoping mystery metal behaves. If you're not okay with the possibility that 5 mm leaves a lasting opening, don't stretch yet. Loving the look and accepting the commitment should arrive together.
Ready to build your 4g setup with jewelry you can identify by material and millimeter size? Visit BodyCandy to shop titanium, solid gold, and nickel-free options for healed and stretching lobes, and drop your sizing or aftercare questions in the comments before you size up.