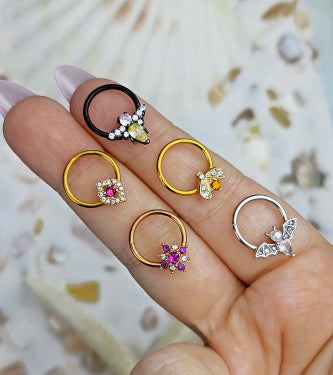


















You know that moment when you reach for your favorite septum ring or belly bar and it looks a little tired, a little gray, a little less “you”? That's tarnish, and it doesn't mean your jewelry is ruined. It means it needs the right kind of cleanup, because cleaning tarnished jewelry is really about protecting the piece, your piercing, and your skin at the same time.
The move is simple, but the stakes are real. Some metals love a quick soap-and-water rinse, some silver needs a proper tarnish-removal method, and some pieces should never touch a soak at all. If you've got body jewelry in the mix, the first rule is ruthless and easy, know what the piece is made of before you touch it with anything stronger than mild soap.
That Fave Piece Looking a Little Dull? Let's Fix It
Tarnish hits at the worst time. You're getting dressed, you catch the light, and your go-to piece looks more “forgotten in a drawer” than “fresh and shiny.” Annoying? Absolutely. Permanent? Not usually.
The good news is that cleaning tarnished jewelry doesn't need to turn into a full-on chemistry experiment. The bad news is that a random internet hack can wreck plating, loosen glued stones, or leave tiny scratches on the exact piece you were trying to save. So we're keeping this body-safe, simple, and blunt.
The first move is always the same, identify the material. If you skip that, you're guessing, and guessing with jewelry is how people end up stripping finishes or weakening settings. A quick material check saves way more heartbreak than any “miracle” cleaning trick ever will.
Know Your Bling Why Material Matters Before You Clean

Start with the metal, not the shine
Two pieces can look almost identical and still need totally different care. Sterling silver can handle a tarnish-specific cleanup, but plated pieces, mixed-metal jewelry, and stone-set designs need a much softer touch because harsh recipes can wear down plated finishes and porous gemstones, and soaking can loosen glued stones in costume or body jewelry.
If you're unsure, read the piece first. Surgical steel and titanium usually behave like low-drama materials, so mild soap and water are the safe starting point. Sterling silver is the classic tarnish magnet, which means it may need a targeted tarnish-removal method instead of a basic wipe-down. Gold-plating is the delicate one in the group, because the top layer is thin and hard scrubbing can wear it away fast.
Check the extras before you soak
Stone-set pieces are a different story. If there's glue, a setting, or anything porous in the design, a soak can do more harm than good. That's why the first question isn't, “How do I make it shiny?” It's, “What will this material tolerate?”
Practical rule: if you can't confidently name the metal and the stone situation, keep the cleaning gentle.
For a deeper material breakdown, this BodyCandy guide on jewelry metals is worth checking before you grab a brush. It helps you sort out what you're wearing, so you can clean it without irritating your skin or wrecking the finish.
Your Go-To Cleaning Recipes for Every Metal Type

If the piece is mostly surgical steel or titanium, keep it simple. Warm water and a little pH-neutral dish soap handle everyday buildup without wrecking the finish, and a quick dry keeps water spots from hanging around. For mixed-material jewelry, use the same controlled routine, a brief soak in warm water with 1–2 drops of pH-neutral dish soap for no more than 2 minutes, then microfiber wiping and immediate drying.
Silver gets the foil bath, not the panic scrub
Tarnished silver responds well to the foil bath because you're using chemistry, not force. Line a nonreactive bowl with aluminum foil, add about 1 tablespoon of baking soda per cup of hot water, and make sure the silver touches the foil. Tarnish transfer is often visible within 2–10 minutes, according to Jewelry Carats' silver cleaning guide.
That method works because it avoids abrasion. If your piece has engraving, filigree, or tiny details, scrubbing is a bad move. A chemical reaction can lift tarnish without chewing up the surface, which is exactly what you want on jewelry you wear against skin.
Gold-plated and mixed pieces need restraint
Gold-plated jewelry does not deserve aggressive brushing or a long soak. Use the mild soap method, wipe gently, and dry it right away. If the piece has stones or decorative parts, treat it like something delicate, because that thin top layer disappears faster than you want it to.
For silver with simple settings, some care guides also use warm water and gentle soap with a soft brush around crevices, which fits the low-drama approach body jewelry usually needs. The goal is clean jewelry that still feels safe and smooth against your skin, not a piece that looks polished at the cost of a worn-down finish.
If you want the shortest version, here it is. Soap for daily grime, foil bath for real silver tarnish, and no long soaking for anything glued, plated, or mixed-material. That keeps your style sharp without beating up the piece.
Handle With Care Cleaning Gems Acrylics and Organics
Stone-set jewelry gets damaged fast when people treat every material the same. If a gem is glued in, the setting feels fragile, or the piece has a coating, skip soaking. Water can creep into adhesive, dull the finish, or stress parts that were never meant for a long bath. A quick wipe beats a dramatic dip every time, especially on pieces that sit against skin.
Keep porous and soft materials out of the harsh stuff
Acrylic, organic materials like wood or bone, and plenty of decorative pieces do not belong near vinegar, ammonia, or hot water. Those materials can haze, warp, dry out, or crack, and once they do, polishing cloths will not fix the damage. Gentle care wins because these pieces are made for wear, not punishment.
Mixed-material jewelry needs the shortest safe clean possible. If your piece includes a gem and you want to know what you are dealing with before you clean it, a BodyCandy guide to natural stone jewelry helps you understand the stone and treat it with the right level of caution.
Wipe, don't marinate.
For mixed materials, keep the routine plain. Use a brief warm-water soak with 1–2 drops of pH-neutral dish soap for no more than 2 minutes, then dry it immediately with a high-density microfiber cloth. That microfiber detail matters because a cloth with at least 220 g/m² density helps cut down on abrasive residue and fiber trapping. The point is simple, clean the piece without working grime deeper into soft surfaces or stressing glued-in parts.
What to do instead of “deep cleaning”
Use a soft touch, then stop. If a gem looks dull because buildup is sitting on top of it, clean the surrounding area instead of scrubbing the stone like a countertop. If the piece still looks off after a gentle wipe, back away. That means the material needs a different approach, not more force.
The Big No-No List What to Avoid at All Costs

Some cleaning advice is just jewelry sabotage with prettier packaging. If you wear body jewelry, skip the stuff that eats away at metal, wrecks plating, or irritates skin you want to keep happy.
- Harsh chemicals: Bleach, ammonia, and strong cleaners can damage metals and gemstones, and they hit plated finishes and porous stones even harder.
- Abrasive materials: Scrubbing pads, gritty pastes, and anything built to grind grime off a sink can scratch delicate surfaces.
- Toothpaste: It sounds harmless because it lives in your bathroom, but it is abrasive and can leave micro-scratches.
- Ultrasonic cleaners for certain gems: Opals, pearls, and other fragile stones can crack or loosen, so don't gamble with them.
Use prevention like it's part of the look
Keep jewelry away from the situations that cause the mess in the first place. Take pieces off before showering or swimming, dry them after wear, and store them where they are not sitting in humid air. That routine is plain, but it protects the finish and keeps your pieces wearable.
Save the rough stuff for your cleaning supplies, not your piercings.
Frequent aggressive cleaning is not a flex. Dry-wiping after each wear and keeping pieces in the right storage cuts down the need for big cleanups later, which is better for the finish, and better for your skin. If you want a longer-lasting routine, the BodyCandy guide on making jewelry and body jewelry last lays out the habits that keep wear and tear from turning into a constant repair job.
Stop Tarnish Before It Starts and When to Get New Bling

Prevention is the ultimate cheat code. Proper storage can extend the tarnish-free life of silver jewelry by 3–5 times when you use anti-tarnish flannel pouches instead of standard boxes, according to JewelTrendPro's vintage sterling guide. That's a huge payoff for one tiny habit.
Make storage do the heavy lifting
Keep silver in anti-tarnish pouches or airtight storage, and don't toss it loose with other pieces that can scratch it. For jewelry you wear a lot, a dry wipe after each wear is the move that keeps grime from turning into a bigger problem later. The less air, friction, and residue your piece sees, the longer it stays clean-looking.
Know when the piece is done
Sometimes tarnish is not just tarnish. If plating has visibly worn off, if the finish looks patchy, or if the piece keeps looking dull right after cleaning, it may be past the point where cleaning solves anything. That's not a moral failure, it's just wear and tear.
If you want your jewelry to last longer overall, this BodyCandy guide on making jewelry and body jewelry last is a smart next stop. And if a favorite piece is beyond saving, don't keep fighting it. Pick a fresh one that fits your style, treat it right from day one, and let the old piece retire with dignity.
A CTA for BodyCandy. If your current favorite is beyond a gentle rescue, shop for a fresh piece, then keep it clean, dry, and stored properly so it stays as sharp as your style.