
So, you're thinking about stretching your ears? Awesome! The very first step is getting your head around how gauge sizes work. Don't worry, it seems a little weird at first, but it's super simple once you get the hang of it.
Gauge is just the fun word we use for the thickness of body jewelry. The confusing part? The numbers work backward when you're starting out: a smaller number like 14g is actually thicker than a larger number like 20g. Let's dive in!
Your Guide to Understanding Ear Gauge Sizes
Ready to start your ear stretching journey? Let's clear up that biggest hurdle right away: the sizing system. It might feel backward, but you'll be navigating the world of plugs and tunnels like a seasoned pro in no time.
Think of it this way: most standard ear piercings are done with a tiny 20 gauge (20g) or 18 gauge (18g) needle. When you begin to stretch, you'll move to thicker jewelry with smaller gauge numbers—first to 16g, then 14g, and so on. Each step up is a small, manageable increase in size. This reverse system is just an old holdover from an industrial wire standard, so don't let it throw you!
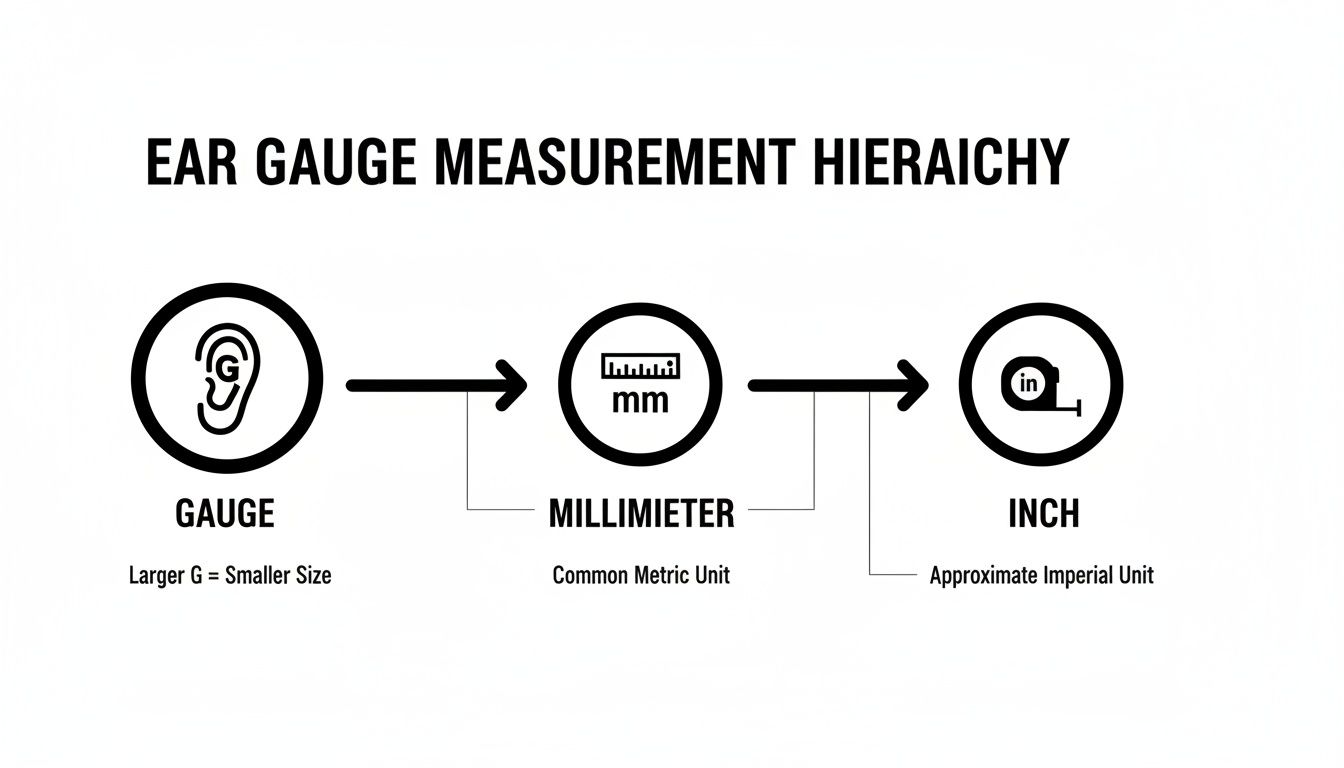
From Gauges to Millimeters
As you continue on your stretching path and your lobes get bigger, the sizing system thankfully flips to something more straightforward. Once you get past 0 gauge (0g), sizes are measured in fractions of an inch or, much more commonly, in millimeters (mm).
This switch happens because the jumps between sizes become much more significant, and millimeters give you a more precise, universal way to measure. From here, you'll go from 0g (about 8mm) to 00g (about 10mm), and then the sky's the limit with sizes like 1/2 inch (12mm), 5/8 inch (16mm), and way beyond.
The most important thing to remember is simple: listen to your body and never skip sizes. Each numbered gauge or millimeter increase is a deliberate step designed to keep your earlobes healthy and happy.
To make all of this crystal clear, we've put together a handy chart so you can see how the most common sizes stack up. Think of this as your new best friend for planning your next stretch and picking out some amazing new pieces from Bodycandy.
Quick Reference Guide to Common Gauge Sizes
Here's a quick-reference chart converting standard gauge sizes to millimeters (mm) and inches (in) to help you visualize your stretching journey.
| Gauge Size (g) | Millimeters (mm) | Inches (in) |
|---|---|---|
| 16g | 1.2mm | - |
| 14g | 1.6mm | - |
| 12g | 2mm | - |
| 10g | 2.4mm | - |
| 8g | 3.2mm | 1/8" |
| 6g | 4mm | 5/32" |
| 4g | 5mm | 3/16" |
| 2g | 6mm | 1/4" |
| 0g | 8mm | 5/16" |
| 00g | 10mm | 3/8" |
Keep this guide bookmarked! It will be incredibly useful as you choose your next size and explore all the different styles of plugs, tunnels, and tapers available to you.
The Complete Ear Gauge Size Chart
Feeling a little lost in the sea of numbers and measurements? Don't sweat it. We’re here to give you the ultimate roadmap for your ear stretching journey. Think of this as your personal guide to leveling up, one perfect size at a time.
Each jump is a small victory, moving you closer to your goal. The key is understanding how these sizes actually relate to each other so you can make smart, safe choices. From a standard piercing to your dream size, this chart breaks it all down.
To help you really see the progression, we've put together this handy chart showing how gauges, millimeters, and inches all line up.
This visual guide makes it super clear how all the different measurements work together. It's perfect for planning your next move with total confidence.
Decoding the Numbers
Let's dive into the specifics. The chart below covers every major step you'll take, from a standard 20g piercing all the way up to 1 inch and beyond. We've included gauge, millimeters, and inches to give you the full picture.
Just remember, the gauge system (marked with a 'g') runs backward at first. It feels a bit weird, but a 16g is thicker than an 18g. Once you hit 0g, the system switches over to millimeters (mm) and inches (in), which is way more straightforward.
Pro Tip: Screenshot this chart and save it on your phone! It’s the perfect companion for when you're browsing for your next pair of awesome plugs or tunnels on Bodycandy. No more guessing games.
Here is the full breakdown you'll need for your stretching adventure:
| Gauge Size (g) | Millimeters (mm) | Inches (approx.) |
|---|---|---|
| 20g | 0.8mm | - |
| 18g | 1.0mm | - |
| 16g | 1.2mm | - |
| 14g | 1.6mm | - |
| 12g | 2.0mm | - |
| 10g | 2.4mm | - |
| 8g | 3.2mm | 1/8" |
| 6g | 4.0mm | 5/32" |
| 4g | 5.0mm | 3/16" |
| 2g | 6.0mm | 1/4" |
| 0g | 8.0mm | 5/16" |
| 00g | 10.0mm | 3/8" |
| - | 11.0mm | 7/16" |
| - | 12.0mm | 1/2" |
| - | 14.0mm | 9/16" |
| - | 16.0mm | 5/8" |
| - | 18.0mm | 11/16" |
| - | 19.0mm | 3/4" |
| - | 22.0mm | 7/8" |
| - | 25.0mm | 1" |
This chart is your best friend on this journey. For a bit more detail on how these sizes stack up, especially with international differences, check out our guide on plug sizing.
Crucial Milestones on Your Stretching Journey
As you move through the sizes, you'll hit a few key milestones. These aren't just numbers on a chart; they represent important moments for your lobes that deserve a little extra attention.
-
The Big Switch (0g to 00g): Heads up! The jump from 8mm (0g) to 10mm (00g) is a full 2 millimeters. This is one of the biggest single stretches you'll make and it requires extra patience. Seriously, don't rush it!
-
The Point of No Return: This is a big one. For most people, the point where your lobes might not shrink back to a standard piercing size is somewhere between 2g (6mm) and 00g (10mm). It varies a lot based on your skin's elasticity, but it's a decision to think about carefully before you cross that threshold.
Ultimately, taking your time is the most important part of this whole process. In fact, research shows that 75% of stretchers safely reach 10mm by waiting 4-6 weeks between size increases. This simple act of patience helps drop infection rates to under 3%. It's especially true when you use quality materials like the surgical steel options you'll find at BodyCandy.
How to Stretch Your Ears Safely
Alright, let's get into the most important part of this whole journey: doing it safely. Think of ear stretching less like a race and more like a slow, chill marathon. Your ears are the VIPs here, and patience is the single most critical tool in your entire kit.
Rushing the process is the fastest way to run into trouble. We're talking about nasty stuff like blowouts, infections, or tears—all things we definitely want to avoid. This guide is your step-by-step playbook for keeping your lobes healthy, happy, and ready for all the amazing jewelry you've got your eye on.
The golden rule is simple but non-negotiable: listen to your body. If you feel sharp pain or serious resistance, stop. Your ears are telling you they're not ready, and it's your job to respect that.
Your Starting Point and First Stretch
So, where do you begin? Most standard ear piercings are done at either 20g or 18g. Your first stretch will be a small, easy step up to the next size, which is usually 16g or 14g.
It’s super important to know your starting size for sure. If you're not positive, a professional piercer can tell you in a second. This first step really sets the tone for your entire journey.
Here's how to make that first stretch a success:
- Get Clean: Wash your hands thoroughly with soap and water. Clean your earlobes and your new jewelry with a gentle, unscented soap or a sterile saline solution. Hygiene is everything!
- Lube Up: Apply a small amount of a water-based lubricant or a natural oil (like jojoba or vitamin E oil) to your earlobe and the taper. This is what makes the process smooth and comfortable.
- Go Slow: After a warm shower is the perfect time to stretch, as the heat makes your skin more pliable. Gently guide the thin end of the taper through your piercing. You should feel some light pressure, but never pain.
- Follow Through: Once the taper is all the way through, line up your new plug or tunnel with the thick end of the taper and push it through, following the taper out. Your new jewelry should slide right in.
That's it! You've successfully completed your first stretch. Now for the hard part: waiting. For a deeper dive into the whole process, you can learn more about how to properly stretch your lobes in our comprehensive guide.
The Waiting Game: Healing Between Sizes
After a stretch, your earlobe has a tiny micro-tear that needs to heal up. This is completely normal, but it requires time. Rushing to the next size before you're fully healed is how you get scar tissue, which makes future stretching way harder and less healthy.
The Rule of Thumb: Wait a minimum of 4-6 weeks between stretches for smaller sizes (up to about 8g). For larger sizes, your lobes need more recovery time, so plan on waiting 2-3 months or even longer. Your body will tell you when it’s ready.
How do you know you’re healed? Your ear should feel completely normal—no redness, no swelling, no soreness, and no "crusties." The jewelry should move freely and feel like a comfortable part of you.
Aftercare for Happy, Healthy Lobes
Proper aftercare is what makes the difference between beautifully stretched lobes and a painful problem. It's simple, but you absolutely have to be consistent.
Daily Cleaning Routine:
- Saline Soaks: At least once a day, soak your lobes in a sterile saline solution or gently clean them with a saline-soaked cotton ball. This keeps things clean without being harsh.
- Gentle Soap: When you shower, use a mild, unscented soap to clean around the piercing, then rinse it all off. Definitely avoid harsh chemicals or alcohol, which can dry out and seriously irritate your skin.
Lobe Massages for Elasticity:
Once your lobes are healed from the initial stretch (give it about a week or two), start doing daily massages. Take your jewelry out and gently massage your lobes for a few minutes using a good-quality oil.
- Jojoba Oil: This is a fan favorite because its structure is very similar to your skin's natural oils.
- Vitamin E Oil: Excellent for promoting healing and keeping skin elastic.
- Emu Oil: Known for its anti-inflammatory properties that can help soothe lobes.
These massages are a game-changer. They boost blood flow, break down any potential scar tissue, and keep your skin healthy and stretchy for that next size up. The data backs this up, too: 90% of stretchings are successful when done gradually. Following this advice prevents complications like blowouts, which only affect about 5% of people who practice proper aftercare.
Choosing the Right Jewelry Materials and Styles
Alright, now for the fun part—picking out your new jewelry! Once you've got your head around the sizes of gauges for ears, a whole universe of awesome styles and materials opens up. This is where your personality really gets to shine, but it’s also super important to choose the right materials to keep your lobes happy, especially right after a fresh stretch.
Think of it this way: a freshly stretched ear is a little sensitive and needs something smooth, non-porous, and gentle to hang out with. Once it’s healed, you can introduce it to a wider circle of friends—like cool organic materials.

Best Materials For Freshly Stretched Ears
Right after you size up, your lobes are in healing mode. The best materials are non-porous, meaning they don't have tiny microscopic holes where bacteria can throw a party. This is key to preventing irritation and infection, making for a much smoother healing process.
Your go-to options should be:
- Surgical Steel: This is the workhorse of the piercing world for good reason. It's durable, affordable, and body-safe for most people out there.
- Titanium: If you have sensitive skin or are prone to allergies, titanium is your absolute best friend. It’s incredibly lightweight, nickel-free, and biocompatible.
- Glass: Not only does glass look amazing, but it’s also perfectly smooth and ideal for healing lobes. A big plus is that glass plugs often come in half-sizes, which can make those tricky stretches a whole lot easier.
These materials are a breeze to clean and won't harbor germs, giving your ears the best possible environment to heal up for the next size. Another fantastic option is Bioplast, which is flexible and hypoallergenic. You can learn more about the benefits of Bioplast in our detailed guide.
Materials For Fully Healed Lobes
Once your ears are totally healed and comfortable at their current size (give it a few months, at least!), you can start playing with a whole new range of materials. This is where you can really start building a unique collection.
Organic materials are beautiful and one-of-a-kind, but they are porous and need a little extra care. Never, ever use them to stretch or in a piercing that's still healing.
- Wood: Lightweight and breathable, wood plugs come in stunning natural grains. Just remember to oil them every now and then to keep them from drying out or cracking.
- Stone: From amethyst to tiger's eye, stone plugs offer a bit of weight and a gorgeous, earthy vibe. Each pair is completely unique.
- Bone and Horn: These traditional materials are lightweight and have been used for centuries. They are only suitable for completely healed and well-established piercings.
Remember, organic materials can absorb moisture, so you shouldn't wear them in the shower or while swimming. A little TLC goes a long way in keeping them beautiful.
Finding Your Perfect Jewelry Style
Beyond just the material, the style of your jewelry plays a huge role in both comfort and how it looks. The main styles you'll run into are single-flared, double-flared, and tunnels.
Single-Flared Plugs
These are your best buds for stretching. They have a flare on one end to keep them from falling out the front, with a flat back secured by a tiny o-ring. This design makes them easy to pop into a fresh stretch without aggravating your lobe.
Double-Flared Plugs
These plugs have a flare on both ends, which means no o-ring needed! They sit securely in your ear on their own. The catch? You need to wait until your lobe is fully healed and has a bit of give to get them in. Don't ever try to force a double-flared plug into a fresh stretch!
It turns out most people find a sweet spot they love and stick with. A global piercing survey found that 55% of people stop stretching at or around 1/2 inch (12mm), often because it's a comfortable and easily reversible size. For many, lobes can shrink back naturally from sizes below 2g (6.5mm). Discover more insights about the growing body jewelry market on Fortune Business Insights.
How to Handle Common Stretching Problems
Look, even when you do everything by the book, sometimes your ears just won't cooperate. Don't freak out! Setbacks happen to almost everyone, and knowing how to deal with them is what separates a minor hiccup from a major disaster. Think of this as your troubleshooting guide for the bumps in the road on your stretching journey.
The goal here is to replace any panic with calm, practical steps. With the right know-how, you can navigate these issues, get your lobes healthy again, and ready for your next killer piece of jewelry from Bodycandy.
The Dreaded Blowout
A blowout is probably the scariest word in the ear-stretching community, but it’s totally manageable if you catch it early. This happens when you stretch too fast, which forces the delicate skin inside your piercing (the fistula) to get pushed out the back of your earlobe. It looks like a little "lip" of skin.
If you see this, it’s a massive red flag from your body telling you to stop.
Immediate Action Required: The second you even suspect a blowout, you need to downsize immediately. Take out the current jewelry and put the previous, smaller size back in. You have to relieve the pressure that caused the blowout in the first place.
After you've downsized, you need to treat your ear like it's a brand new piercing all over again. That means:
- Daily Saline Cleans: Gently clean the area twice a day using a sterile saline solution. No harsh soaps or chemicals.
- Gentle Massages: After any broken skin has fully healed, start massaging your lobe daily with jojoba oil or vitamin E oil. This helps break down scar tissue and gets the blood flowing, which is key for healing.
- Be Patient: You’ll have to stay at the smaller size for several weeks, maybe even a couple of months. Your lobe needs to be completely healed and happy before you can even think about trying to stretch again.
Managing Minor Irritation and Redness
Sometimes your ears get a little ticked off without it being a full-blown emergency. You might notice some redness, a bit of swelling, or soreness, especially right after a stretch or after sleeping on it funny. This is usually just your body saying, "Hey, let's take it easy for a minute!"
If you're dealing with minor irritation, here's the game plan:
- Hands Off: Stop touching and fiddling with your jewelry. It’s a great way to introduce bacteria and make everything worse.
- Stick to Aftercare: Be super diligent with your saline soaks. A gentle, cool compress can also feel amazing and help soothe any discomfort.
- Check Your Jewelry: Make sure you're wearing high-quality, non-porous materials. Sometimes, what seems like irritation is actually your skin reacting to cheap metal. Stick with the good stuff, like surgical steel or titanium plugs from Bodycandy.
Spotting and Handling Infections
An infection is a whole different ballgame from simple irritation, and it’s critical to know the difference. Infections usually pop up due to poor hygiene—like stretching with dirty hands or jewelry, or just slacking on your cleaning routine.
Signs of an Infection:
- Intense, throbbing pain or a feeling of heat in the lobe
- Major swelling and a bright red or even dark discoloration
- Yellow or green discharge (pus)
- A funky, unpleasant smell
If you think you have an infection, do not take the jewelry out. I know it sounds counterintuitive, but removing it can let the piercing close up, which traps the infection inside. This can lead to a much more serious problem, like an abscess.
Instead, focus on cleaning it rigorously with saline solution and go see a doctor. They can properly diagnose it and will likely prescribe an antibiotic to knock it out for good.
Got Questions About Ear Gauges? Let's Talk.
Still have a few things buzzing around in your head? You're definitely not alone. The world of ear stretching is full of new lingo and techniques, and it's smart to soak up all the info you can before you dive in. We've pulled together some of the most common questions we hear to give you clear, straight-up answers.
Think of this as your final check-in before you confidently continue your stretching adventure. Our goal is to make sure you feel totally prepared and excited for every new size you hit.
What Is the "Point of No Return" for Ear Stretching?
This is a huge question, and for good reason! The "point of no return" is the size where your earlobes might not shrink all the way back to a standard piercing if you decide to take your jewelry out for good. It's a pretty big milestone in your journey.
While it’s a little different for everyone—things like your skin’s elasticity and how safely you stretched play a big role—the general consensus is that this point is somewhere between 2g (6.5mm) and 00g (10mm). If you stay below this range, your lobes have a pretty good chance of shrinking down on their own.
Stretching slowly and keeping your lobes healthy with regular oil massages gives them the best possible chance of staying elastic. This can be a massive help if you ever decide downsizing is the right move for you.
How Long Should I Wait Between Stretches?
Patience is everything! Seriously, we can't say it enough—it is your absolute best friend when it comes to healthy, happy lobes. Rushing the process is just asking for problems like blowouts, tears, and building up nasty scar tissue.
Here’s a solid timeline to keep in mind:
- For smaller gauges (up to 8g): You should wait a minimum of 4-6 weeks between each and every stretch. No exceptions.
- For larger sizes (6g and up): Your lobes need a lot more recovery time. Plan on waiting at least 2-3 months between sizes, and don't be shocked if your body asks for even more.
Your body is the ultimate guide. Your ear should be completely healed before you even think about sizing up. That means zero soreness, no redness, no swelling, and no crusties—your jewelry should move freely and feel totally comfortable.
Can I Skip Gauge Sizes to Stretch Faster?
We totally get the excitement of wanting to hit your goal size, but let's be crystal clear: never, ever skip sizes. It’s one of the biggest and most damaging mistakes you can make on your stretching journey.
Think of it like climbing a ladder. Each gauge size is a single, manageable step. Skipping a size is like trying to leap three rungs at once—you’re way more likely to fall and get seriously hurt.
Forcing a much larger piece of jewelry into a piercing that isn't ready can easily cause painful tears and the dreaded blowout. This kind of trauma creates permanent scar tissue, which can make any future stretching way more difficult, if not impossible. Always go one size at a time. For those really stubborn stretches, Bodycandy even offers half-sizes to make the jump smoother and safer.
What's the Difference Between Plugs, Tunnels, and Tapers?
It's easy to get these terms mixed up when you're just starting out. Let's break it down so you know exactly what you're looking at when you shop for new jewelry.
- Tapers: These are the tools you use for stretching, not everyday jewelry. They're cone-shaped pieces that gently guide the next size into your piercing. Once the stretch is done, the taper comes right back out.
- Plugs: These are solid pieces of jewelry that "plug" the stretched hole. They come in tons of materials and styles, from simple steel to gorgeous wood and stone.
- Tunnels: These are hollow in the middle, creating that classic "tunnel" look you can see right through. Like plugs, they're meant for daily wear in a healed piercing.
The right way to do it is to use a taper to perform the stretch, then immediately follow it through with a single-flared plug or tunnel of the exact same size. That plug or tunnel is what you'll wear while your lobe heals and gets ready for the next step.
Ready to find the perfect jewelry for your next stretch? Bodycandy has an incredible collection of high-quality plugs, tunnels, and tapers to help you reach your goals safely and in style. Explore our full range of sizes and materials to find your new favorite look.


