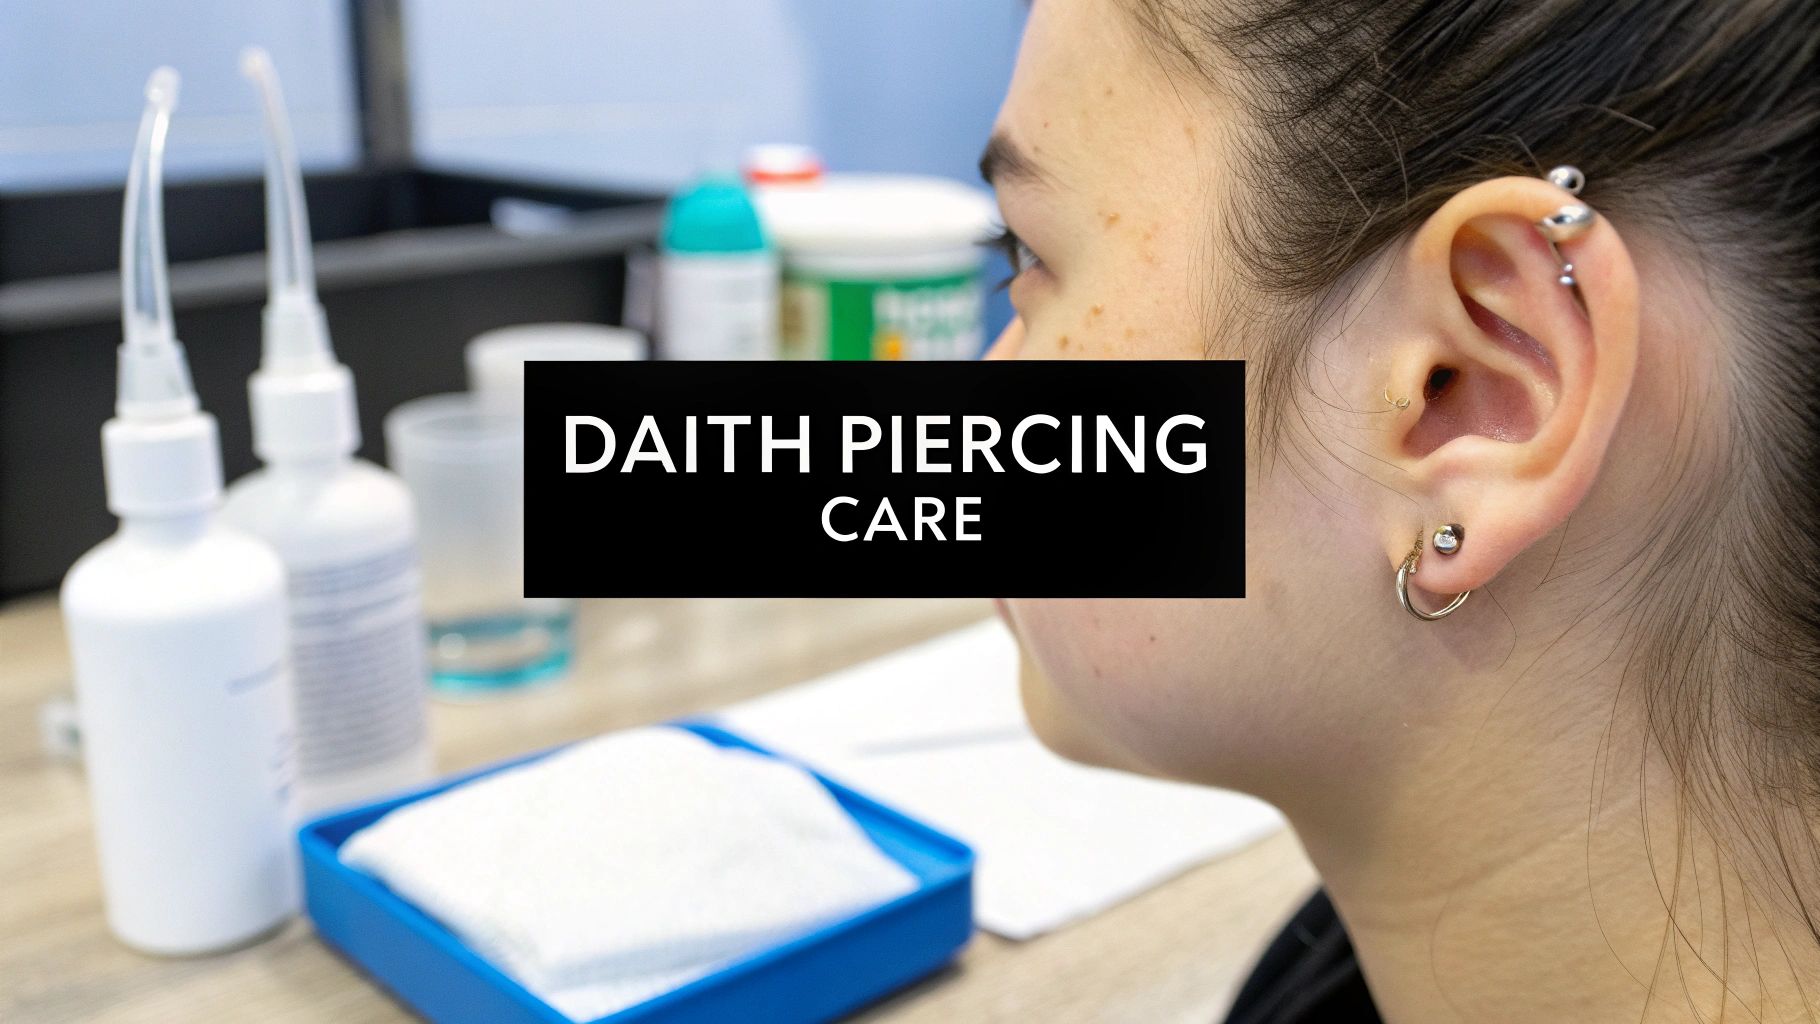
So, you did it—welcome to the nostril piercing club! That new sparkle looks amazing on you. Proper nostril piercing aftercare starts the second you walk out of the studio, and nailing this part is the key to a happy, healthy piercing you'll love for years.
Think of your aftercare as a simple routine that protects your new bling and helps you dodge those annoying healing bumps. Don't worry, we're here to walk you through every step.
Your Guide To a Perfectly Healed Piercing

You've just added some amazing new sparkle to your look, and we are so here for it. Now, let's make sure it heals up perfectly. Think of this as your personal guide to mastering nostril piercing aftercare from day one.
Getting the routine right from the jump is the secret to a piercing you’ll rock for years to come. This isn't about complicated rules or scary medical jargon; it's about building simple, consistent habits that protect your new jewelry and help you avoid common healing hiccups.
The Aftercare Essentials
We'll start with the absolute must-dos, covering your cleaning schedule and what you should expect in the first few weeks. Forget everything you've heard about harsh soaps or alcohol—we're all about gentle, effective care.
Here’s a quick rundown of the golden rules:
- Clean Twice Daily: Grab a sterile saline solution spray. That's it. Cleaning more than twice a day can be just as irritating as not cleaning at all.
- Hands Off!: Your hands are covered in germs, so avoid touching, twisting, or playing with your new stud. This is probably the hardest rule to follow, but it's the most important.
- Keep it Dry: After cleaning or showering, gently pat the area dry with a fresh paper towel. A damp piercing is a breeding ground for irritation.
- Pillowcase Protocol: Swap out your pillowcase every couple of days to keep bacteria away from your healing piercing while you sleep. It makes a huge difference.
Your body is already doing the heavy lifting to heal itself. Your only job is to keep the area clean and free from irritation so it can work its magic without any interruptions.
This initial phase is all about creating a clean, low-stress environment for your piercing. By focusing on these simple steps, you're setting yourself up for a smooth and successful healing journey. Let’s get that new piercing settled in and looking fantastic.
The Essential Cleaning Routine For Your New Piercing
Alright, let's get into the most important part of your aftercare journey: the daily cleaning ritual. Nailing this routine is totally non-negotiable if you want a healthy, happy piercing that heals without a fuss. We're going to walk you through the super simple, effective steps to keep your new bling sparkling and your piercing clean.
First things first, forget all the old myths you've heard. Using harsh stuff like alcohol or peroxide is a huge no-no. It will only irritate your piercing, slow down healing, and generally cause drama you don't need. Instead, we're focusing on gentle, piercer-approved methods that work with your body, not against it.
Choosing Your Cleaning Solution
The gold standard for aftercare is a sterile saline solution. That's it! Your body is an amazing healing machine, and saline simply helps it do its job by keeping the area clean and free of gunk.
You've got two main options here:
- Pre-made Saline Sprays: This is by far the easiest and safest route. You'll want to look for sprays that contain only 0.9% sodium chloride and purified water. These are designed for wound care, so they're sterile and have the perfect salinity to match your body's natural fluids.
- DIY Saline Soaks: If you're really in a pinch, you can mix your own. Just dissolve 1/4 teaspoon of non-iodized sea salt into 8 ounces (1 cup) of warm distilled or bottled water. It's critical that the salt is non-iodized and the water is sterile to avoid introducing any contaminants.
Pro Tip: While a DIY soak works, we always recommend a pre-packaged sterile spray. It completely eliminates the risk of getting the salt-to-water ratio wrong or using non-sterile ingredients, both of which can lead to major irritation.
Your Twice-A-Day Cleaning Steps
Consistency is your best friend here. You'll want to clean your piercing just twice a day—once in the morning and once at night. It might sound strange, but over-cleaning can be just as bad as not cleaning enough. It can dry out and irritate the delicate healing tissue, so stick to the schedule.
Here’s your simple, go-to routine:
- Wash Your Hands! Before you even think about touching your face, scrub your hands thoroughly with soap and water. This is non-negotiable for preventing bacteria transfer.
- Spray the Piercing. Give the front and back of your nostril piercing a generous spray with your sterile saline solution. Let it sit for about a minute to soften up any of those little "crusties" that may have formed.
- Gently Clean Away Debris. Grab a piece of non-woven sterile gauze or a clean paper towel and gently wipe away the softened crust. Be super gentle! Those crusties are a normal part of healing, but you never want to force them off.
- Pat Everything Dry. Once it's clean, carefully pat the area completely dry with a fresh paper towel. Leaving moisture around the piercing can create a perfect breeding ground for bacteria and lead to those dreaded irritation bumps.
That’s the whole routine! It’s quick, easy, and incredibly effective.
What NOT to Do During Cleaning
What you don't do is just as important as what you do. Steer clear of these common mistakes to keep your healing on track.
The biggest one? Do not twist or turn your jewelry. This is old-school advice that has been totally debunked by professional piercers. Twisting the jewelry just reopens the wound, drags in bacteria, and can cause some serious trauma to the tissue. Trust us, your jewelry will not get "stuck." Just leave it alone!
Also, ditch the cotton swabs and cotton balls. Their tiny fibers can get snagged on your jewelry and trapped inside the piercing, leading to irritation and potential infection. Stick to non-woven gauze or paper towels.
If you're looking for more info on the best aftercare products, you can explore our detailed guide on H2Ocean aftercare solutions and see what the pros recommend. Remember, keeping things simple is the secret to a beautifully healed piercing.
Understanding The Nostril Piercing Healing Timeline
So, you’ve made it through the piercing chair—congrats! Now comes the part that requires a little patience: the healing journey. Knowing what’s normal (and what isn’t) at each stage will save you a ton of stress and help you feel confident in your nostril piercing aftercare routine.
Healing is a marathon, not a sprint. Even though your piercing might look and feel pretty good after a few weeks, the tissue on the inside is still working hard to rebuild and strengthen. Think of it like this: the outside heals first, but the real magic is happening deep inside the piercing channel.
The First Few Weeks: The Swelling and Tenderness Phase
The first couple of weeks are definitely the most intense. Right after you get pierced, you can absolutely expect some redness, swelling, and tenderness. This is just your body's natural response to the new addition, and it’s completely normal! Your nose might feel a bit puffy, and the jewelry could seem tight.
During this phase, you'll also notice some clear or slightly yellowish fluid that dries into what we affectionately call "crusties." Whatever you do, don't pick at them! They're actually a sign that your body is healing correctly. Just let your sterile saline spray soften them up during cleaning, and they’ll wipe away gently on their own.
The Middle Ground: Settling In
Once the initial swelling goes down, you’ll enter a longer, less dramatic healing phase. This usually lasts from about week two until the three-month mark. Your piercing will look much better, and it’s tempting to think it’s fully healed. Hold on, though—it's not quite there yet.
This is the crucial stage where the fistula (the skin tube inside your piercing) is forming. You'll see way less redness and swelling, but you might still have:
- Occasional Itchiness: As the skin repairs itself, it's common to feel a little itchy. Just resist the urge to scratch!
- Minor Flare-Ups: You might accidentally snag your piercing on a towel or pillowcase, causing some temporary redness. This is totally normal; just be extra gentle with it for a day or two.
- Continued Crusting: You’ll probably still see some crusties, though likely not as much as in the first couple of weeks.
This infographic gives you a simple visual of what to expect as you move through the healing process.
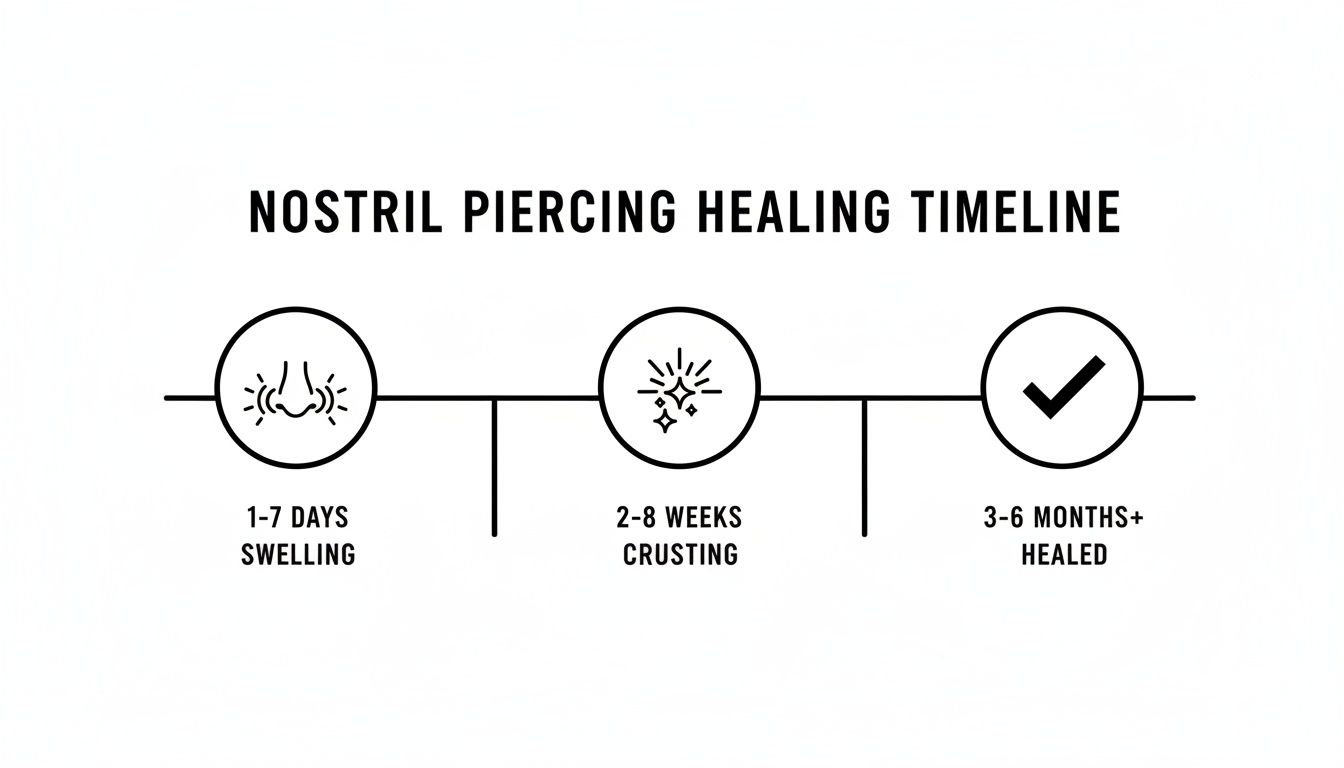
It really highlights that the most active healing happens in the first few months before the piercing finally settles down.
The Final Stretch: Long-Term Maturation
So when is it actually healed? A new nostril piercing generally takes about 4 to 6 months to fully heal. Some people might even find it takes closer to a year for the channel to become completely stable and resilient. It really depends on your body and how diligent you are with aftercare.
This long-term phase is when the fistula becomes strong. The piercing should be completely comfortable, with no pain, discharge, or swelling. You’ll know it’s fully matured when you can gently move the jewelry without any discomfort and there’s no more crusting.
It's super important to wait until your piercing is 100% healed before changing your jewelry for the first time. Swapping it out too early can tear the delicate, newly-formed fistula and set your healing back to square one. Patience really is your best friend here! For a more in-depth look, check out our guide on healing times for popular piercings. Understanding this timeline helps you give your piercing the time and care it needs to look amazing.
Your Piercing Aftercare Cheat Sheet: The Dos and Don'ts
When it comes to healing a new nostril piercing, the internet is a wild place full of well-meaning but often flat-out wrong advice. It’s easy to get overwhelmed, so let's cut through all that noise. This is your ultimate cheat sheet for what you absolutely should and shouldn’t do to make healing a total breeze.
Think of these as the golden rules for a happy piercing. Getting this stuff right isn't about some complicated, time-consuming ritual. It’s about building a few simple, smart habits that will help you heal faster and avoid a world of irritation.
The Absolute Must-Dos for a Happy Piercing
These are the non-negotiables. Nail these small habits, and you'll make a massive difference in keeping irritation at bay and helping your body heal up perfectly.
- Change Your Pillowcase Religiously: You’d be shocked at how much bacteria, oil, and leftover hair products can build up on your pillowcase. A super simple hack is to swap it out every two to three days. This keeps your new piercing from hanging out with a party of germs all night long.
- Stay Hydrated and Eat Well: Your body is literally building new tissue, and that takes fuel! Drinking plenty of water and eating a balanced diet gives your immune system the boost it needs to heal your piercing from the inside out. A healthy body means a happy piercing.
- Be Mindful of Your Face Routine: When you're washing your face or putting on makeup, treat the area right around your piercing like a no-go zone. Products like cleansers, foundation, and powders can easily clog up the piercing channel and cause some serious irritation.
Simple, consistent care is your best defense against complications. Your job isn't to force healing but to create the perfect clean, low-stress environment for your body to do its thing.
Making these small tweaks to your daily routine is the real secret to an easy, drama-free healing process.
Major Don'ts: Just. Don't. Do. It.
Now for the fun part—a list of everything you should absolutely not do. Avoiding these common mistakes is just as important as your cleaning routine, so listen up! These are the bad habits that can turn a perfectly fine piercing into an angry, irritated mess.
Let's kick things off with the biggest one: keep your hands off! It's so tempting to touch, twist, or just fiddle with your new bling, but your hands are covered in bacteria. Every time you touch your piercing, you're basically giving germs a free ride into an open wound. You're also causing unnecessary trauma to the delicate tissue that’s trying to heal.
Next, ditch the harsh chemicals. You might see some old-school advice floating around that suggests using alcohol, hydrogen peroxide, or antibacterial soaps. Don't do it! These products are way too aggressive for a new piercing. They strip the area of its natural moisture, kill off the good cells your body needs to heal, and can lead to major dryness, irritation, and even scarring.
Finally, treat your new piercing like a vampire—it hates being submerged in water. For at least the first few months, you have to avoid soaking it in pools, hot tubs, lakes, and oceans. These are breeding grounds for bacteria, and taking a swim can seriously increase your risk of a nasty infection. The Association of Professional Piercers (APP) is crystal clear on this, recommending waterproof dressings if you absolutely must go in the water. One study even found that exposure to certain bodies of water can double your odds of complications. It’s a temporary sacrifice for a long-term, healthy piercing.
This isn't about being paranoid; it's just about being smart. By steering clear of these common pitfalls, you're setting yourself up for a smooth and successful healing journey.
Troubleshooting Common Piercing Problems
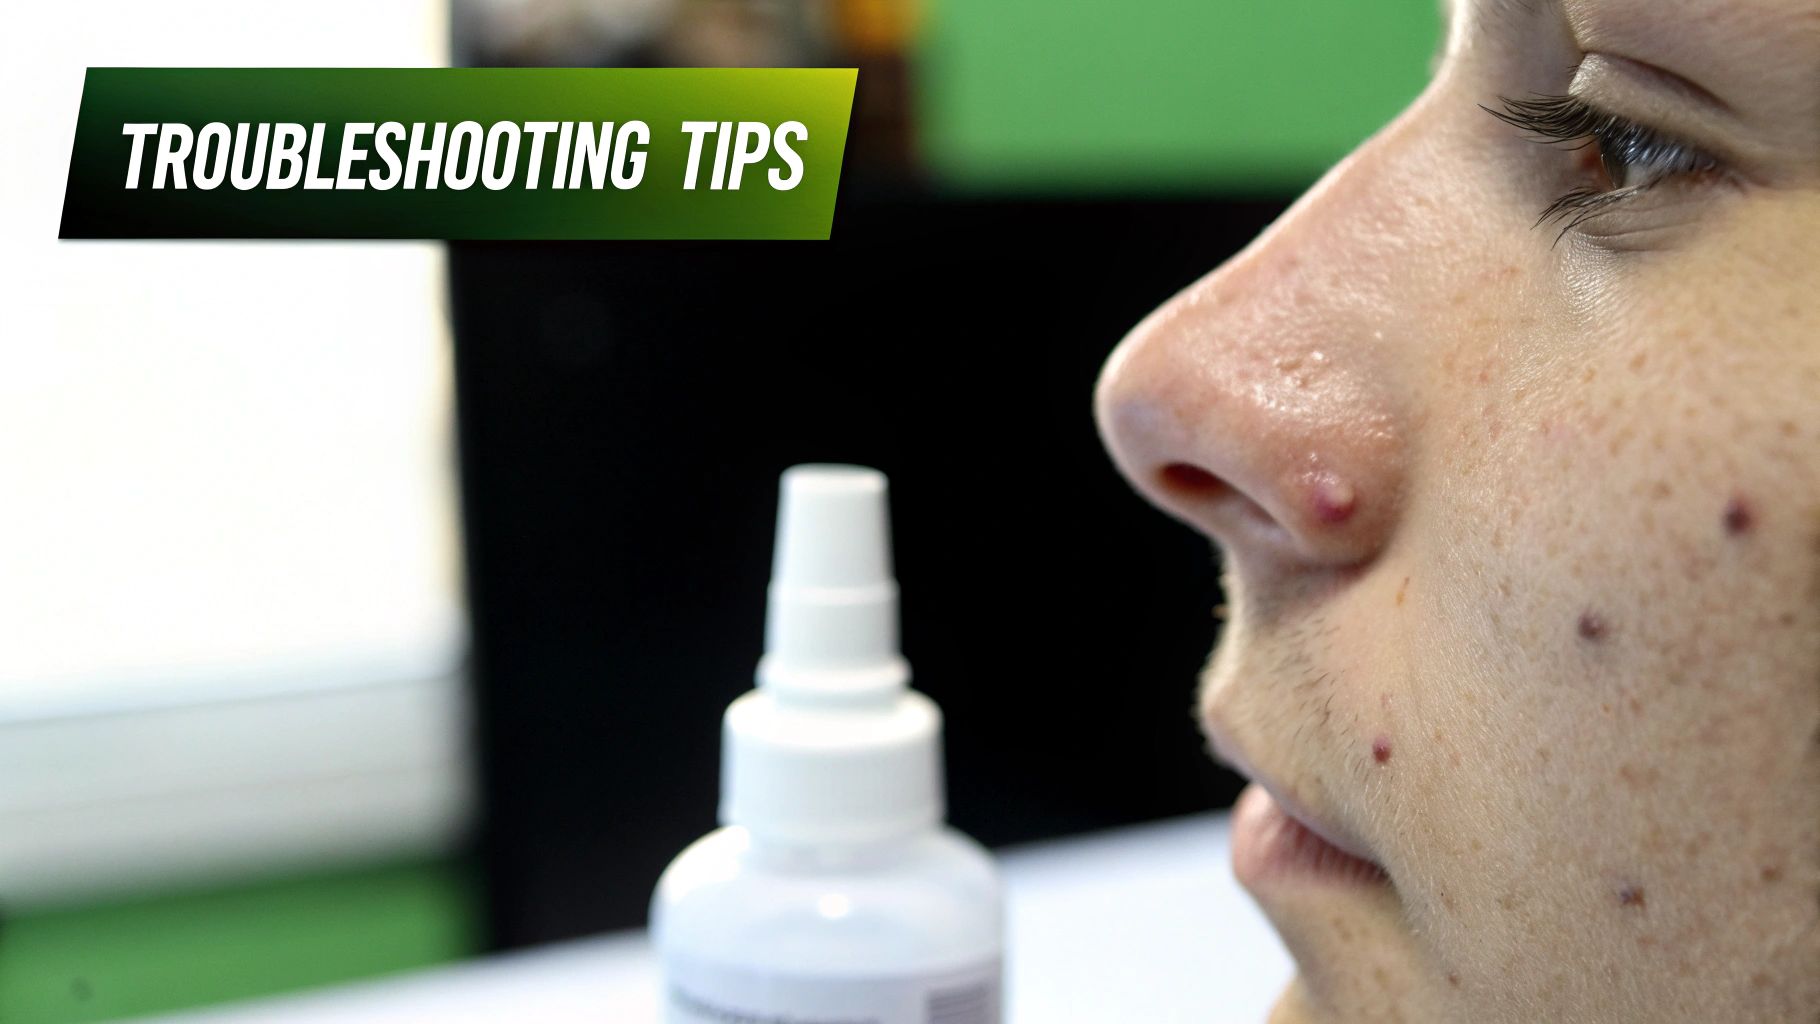
Even when you follow every aftercare rule to a T, piercings can sometimes get a little grumpy. Don’t panic! Most of the time, it's just a minor hiccup that you can easily manage.
Knowing how to spot the difference between normal irritation and something more serious is a total game-changer for your peace of mind. A small bump or some lingering redness usually just means it got snagged on a pillow or you accidentally slept on it. This section is your go-to guide for handling these common issues and knowing when it's time to call in the pros.
The Dreaded Irritation Bump
If you've spent any time in piercing forums, you've heard of the infamous "irritation bump." This is a small, fluid-filled bump that pops up right next to the piercing site. It’s not an infection, but rather your body's dramatic way of saying, "Hey, I'm annoyed about something!"
These bumps are usually caused by a few key culprits:
- Physical Trauma: Snagging your piercing on a towel, mask, or clothing.
- Moisture Issues: Not drying your piercing properly after cleaning.
- Pressure: Sleeping on the piercing or wearing jewelry that’s too tight.
- Incorrect Aftercare: Using harsh chemicals or touching it with dirty hands.
The good news? They usually go away once you remove the source of the irritation. Double-check your nostril piercing aftercare routine, be extra gentle, and make sure you're patting the area completely dry after every saline spray.
Is It Irritated or Infected?
This is the million-dollar question, and learning the difference is crucial. It’s easy to jump to the worst-case scenario, but true infections are much less common than simple irritation.
An irritated piercing is angry, but an infected piercing is in trouble. Irritation is a localized problem you can usually solve at home, while an infection is a medical issue that needs professional attention.
Let's break down the key differences to help you identify what’s going on with your piercing.
Signs of Irritation:
- Redness is concentrated right around the piercing site.
- Swelling is minor to moderate and localized.
- Discharge is clear, white, or pale yellow and forms "crusties."
- Pain is more like tenderness or soreness, especially when touched.
Signs of a Potential Infection:
- Radiating Heat: The area around the piercing feels hot to the touch.
- Thick Discharge: You see green, dark yellow, or pus-like drainage.
- Severe Pain: The pain is throbbing, constant, and spreads beyond the piercing site.
- Widespread Redness: The redness spreads significantly out from the piercing.
- Fever or Chills: You feel generally unwell.
If you're experiencing any signs of infection, do not remove the jewelry. Taking it out can allow the hole to close, trapping the infection inside and potentially leading to a more serious abscess. Instead, it’s time to seek professional help.
When to See a Professional
While you can handle most minor irritations at home, some situations absolutely require an expert. Your first stop should always be your professional piercer. They can assess the situation, suggest changes to your jewelry or aftercare, and tell you if what you're seeing is normal.
However, if you have clear signs of an infection, it's time to see a doctor. They can properly diagnose the issue and prescribe antibiotics if necessary.
Don’t try to self-diagnose or treat an infection with online remedies. Your health is way more important than any piercing. Getting a professional opinion gives you a clear path forward and ensures your piercing—and you—stay safe and healthy.
When and How To Change Your Nostril Jewelry
This is the moment you've been dreaming of—finally swapping out that initial stud for some fresh, new sparkle from your BodyCandy haul! But hold on. Before you get too excited, let's talk timing. Changing your jewelry too soon is one of the biggest mistakes you can make in your nostril piercing aftercare journey.
Patience is everything here. A nostril piercing needs a solid 4 to 6 months minimum to fully heal. Even if it looks perfect on the outside, the delicate tissue tube inside (called a fistula) is still maturing. Jumping the gun can tear that new tissue, welcome in bacteria, and basically reset your healing clock all the way back to day one.
Is Your Piercing Ready For a Change?
So, how do you know for sure that it's go-time? A fully healed piercing should be completely drama-free. You’re looking for a total absence of all those little annoyances you dealt with in the first few weeks.
Here’s your readiness checklist. Your piercing is likely healed if:
- There's absolutely no pain or tenderness, even when you gently press on the area.
- You haven't seen any crusties or discharge for several weeks.
- The redness and swelling are completely gone, and the skin around your piercing looks calm and normal.
- The jewelry can move just a tiny bit without any discomfort or pulling.
If you're checking off all these boxes and you're past that four-month mark, you're probably in the clear. But when in doubt, a quick visit to your piercer for a professional look-see is always a smart move.
Choosing Your Next Piece of Bling
Once you get the green light, the fun really begins! For your very first jewelry swap, it's super important to stick with high-quality, body-safe materials. This is key to keeping your healed piercing happy and preventing any surprise irritation from flaring up.
Implant-grade titanium and 316L surgical steel are your best friends. These materials are biocompatible, which is a fancy way of saying your body is extremely unlikely to have a bad reaction to them. They're also durable, polished to a mirror finish, and perfect for long-term wear.
For a freshly healed nostril, it’s a good idea to stick with stud styles for a bit longer. A flat-back labret stud or a classic nostril screw is a fantastic choice because they’re stable and less likely to get snagged.
While hoops are undeniably cute, they move around a lot more, which can sometimes aggravate a piercing that isn't fully seasoned. Save that perfect-fit hoop for when your piercing is a bit more established, usually around the 9-12 month mark. Getting the fit right is crucial, so if you're unsure about sizing, you can get all the details from our guide on why your nose ring might not fit.
Now, get ready to start planning that amazing new jewelry lineup.
Common Nostril Piercing Aftercare Questions
Got some questions buzzing around? You're not the only one. It's totally normal to want all the details when it comes to something as important as healing a new piercing. We’ve rounded up the questions we hear most often about nostril piercing aftercare to give you quick, no-nonsense answers.
How Long Until I Can Stop Cleaning My Nostril Piercing?
Patience is key here. Even if your piercing feels healed, you need to stick with your daily cleaning routine for the full 4 to 6 months. The fistula—that’s the little skin tube forming inside your piercing—takes a long time to get strong.
If you stop your aftercare too early, you’re basically rolling out the welcome mat for irritation or infection, even if the piercing looks perfect on the outside.
Can I Use Makeup to Cover the Redness?
We get the temptation, but it’s a hard no. You absolutely have to keep makeup away from a healing piercing. Foundation, concealer, and powders are packed with ingredients and bacteria just waiting to clog up the piercing channel.
This can lead to nasty irritation bumps and even infection. Think of the area right around your new bling as a strict no-makeup zone until it's completely healed.
Keeping your piercing free from irritants like makeup is just as important as your saline spray routine. You wouldn't put foundation on an open cut, right? A new piercing is pretty much the same thing!
What If I Get a Cold While My Piercing Is Healing?
Getting sick while healing a nostril piercing is a bummer, but you can definitely manage it. Just be extra gentle when you blow your nose—soft tissues are your friend here.
You might find you need to clean your piercing a little more often, maybe three times a day, to keep everything clear of germs. Stick with your saline spray and be super careful not to snag your jewelry.
Ready to plan your post-healing glow-up? At BodyCandy, we've got an incredible collection of high-quality nose rings perfect for when your piercing is ready for its big debut. Explore our full range of nostril jewelry at Bodycandy.com and find your next favorite piece today