
So, you finally did it. You got that cartilage piercing you’ve been dreaming of! Welcome to the club.
The secret to keeping it looking amazing is a solid aftercare routine, and it starts right now. To clean your new cartilage piercing, you just need to gently spray it with a sterile saline solution twice a day. Then, pat it dry with some clean, non-woven gauze. That's it. A simple process that makes all the difference for a smooth healing journey. And whatever you do, never twist or rotate the jewelry.
Your Cartilage Piercing Healing Journey
Alright, let's get into the most important part: keeping your new piercing happy and healthy. Cartilage isn't like other piercings; it needs some extra love and a whole lot of patience to heal properly.
Think of this as your roadmap to a beautiful, fully-healed piercing, free from those dreaded irritation bumps. A consistent cleaning routine is non-negotiable from day one. It’s the first step toward showing off all the amazing BodyCandy jewelry you’ve got your eye on.
The Timeline You Can Expect
Here's the deal: cartilage piercings are notoriously slow healers. You're looking at anywhere from 6 to 12 months for it to fully mend.
This long timeline is because cartilage has a limited blood supply compared to fleshy spots like your earlobe, which really slows down your body's natural repair process. Skipping out on proper care during this critical time can cause real problems—some studies even suggest up to 30-40% of piercings run into issues like infections when aftercare is neglected.
This visual breaks down the main stages you'll go through, from the initial swelling to that final, fully-healed sparkle.

Here's a quick overview of what to expect during each phase.
Cartilage Piercing Healing Timeline At a Glance
| Healing Stage | Typical Duration | What to Expect |
|---|---|---|
| Stage 1: Initial (Inflammatory) | First 1-4 weeks | Redness, swelling, tenderness, and some clear or whitish fluid (lymph). This is totally normal. |
| Stage 2: Healing (Proliferative) | 1-6 months | The outside looks better, but the inside is still building new tissue. Redness and crusties will lessen. |
| Stage 3: Matured (Healed) | 6-12+ months | Piercing is no longer tender, swelling is gone, and jewelry moves freely. The fistula is fully formed. |
Just remember, healing isn't a race; it's a marathon. Your piercing might look and feel much better after a few months, but the tissue inside is still super fragile. You've got to stick with consistent care for the entire healing period.
Remember: Patience is your secret weapon. Rushing things by changing jewelry too soon or slacking on your cleaning routine is just asking for irritation bumps. Trust the process, and you’ll be rewarded with a beautifully healed piercing that’s ready for endless styling.
For a deeper dive into what to expect with different placements, check out our guide on the healing times for popular piercings.
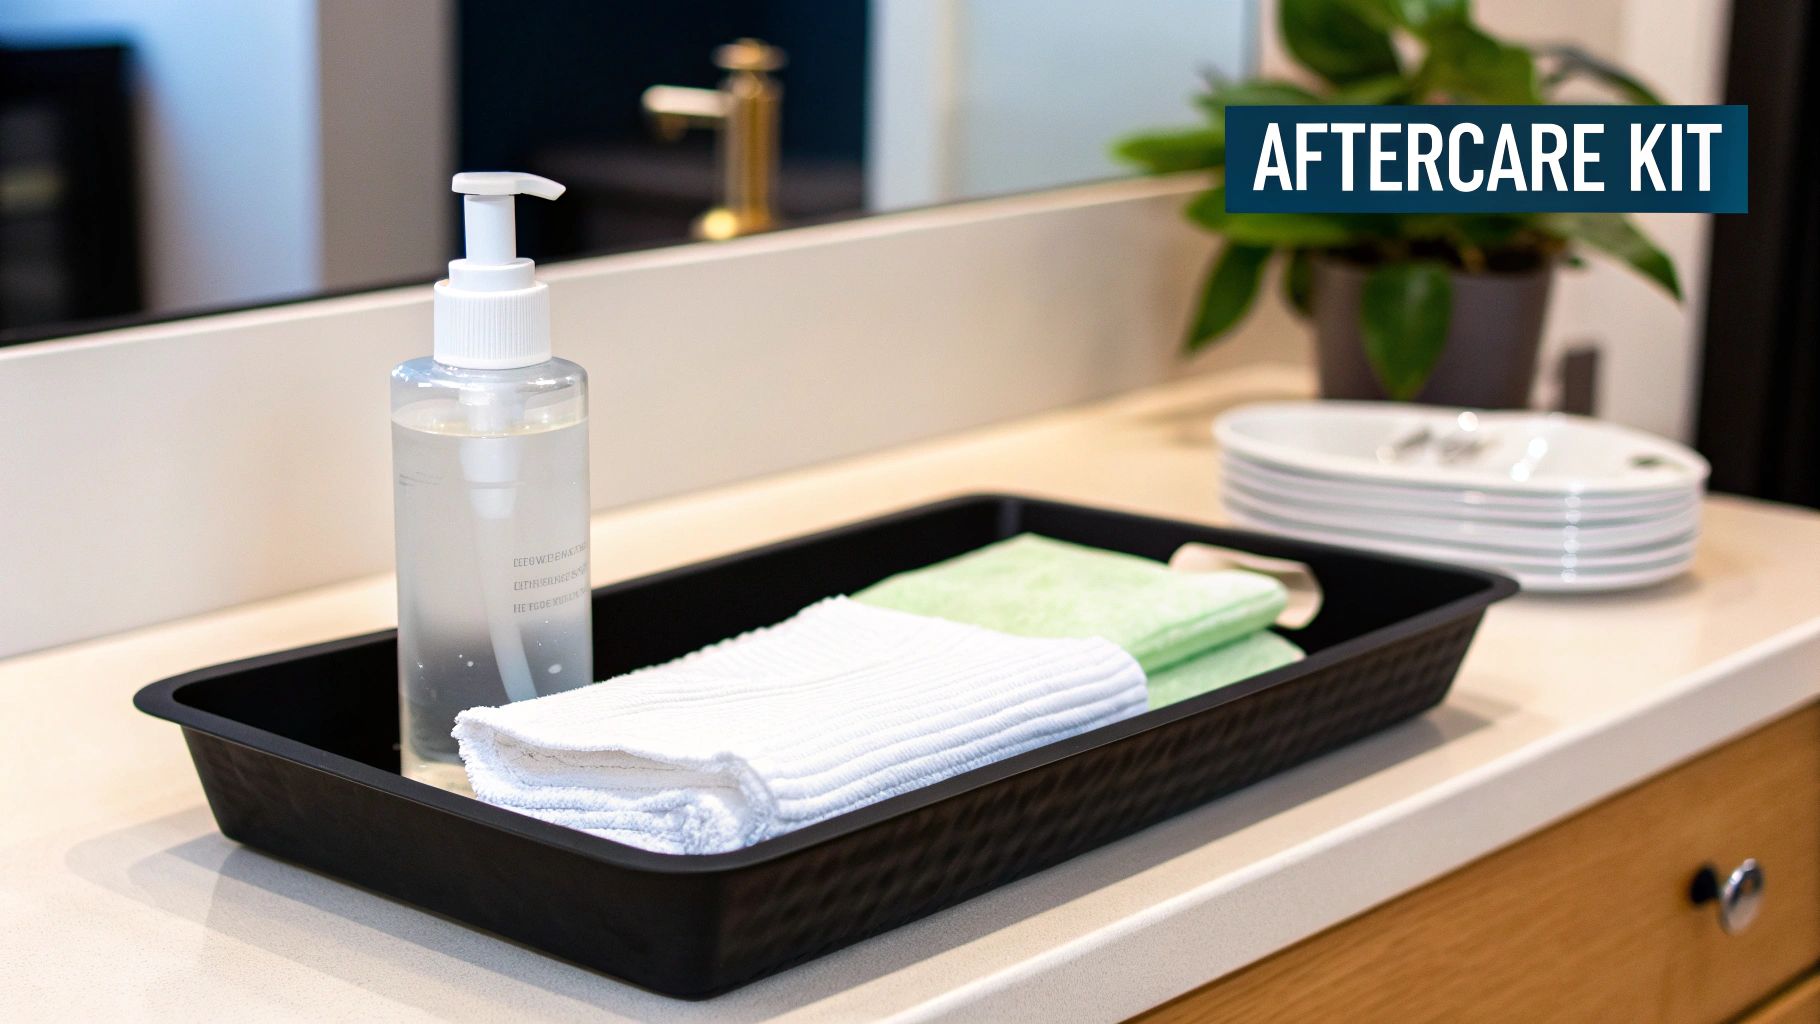
Building Your Piercing Aftercare Toolkit
Before we even get into the how-to of cleaning your new cartilage piercing, let's talk supplies. Honestly, having the right tools on hand from day one makes a world of difference. It’s the easiest way to set yourself up for a smooth, drama-free healing journey.
Your absolute number one, can’t-live-without-it essential? A sterile saline solution. This isn't just a suggestion from us; it's the gold standard for aftercare, recommended by professional piercers everywhere for a reason.
Why Saline Is Your Best Friend
Sterile saline spray is a super simple, gentle mix of pharmaceutical-grade salt and purified water. The magic is in its balance—its pH is a perfect match for your body’s own fluids. This means it can flush away debris and those pesky "crusties" without causing irritation or drying out your skin.
You might be tempted to just mix up your own salt soak at home. Please don't! It’s next to impossible to get the salt-to-water ratio just right, and tap water can introduce all sorts of unwanted bacteria to a fresh piercing.
Pro Tip: Always grab a saline product that’s clearly labeled "sterile" and comes in a spray canister. This keeps the solution inside pure and uncontaminated from the first spritz to the last, unlike mixes or bottles you have to pour from.
The Right Tools for Drying
Okay, you've sprayed your piercing. What's next? Getting it dry, and doing it properly, is just as crucial as the cleaning itself. The goal here is to gently pat the area dry without leaving behind any lint or fibers that could get tangled up.
Here’s a quick rundown of what to grab and what to ditch:
- Your Go-To: High-quality, non-woven gauze or lint-free paper towels. These are your best friends because they're sterile, absorbent, and won't snag on your jewelry.
- What to Ditch: Cotton balls, cotton swabs (like Q-tips), and your regular cloth towels. Cotton fibers are notorious for wrapping around jewelry posts and causing some serious irritation. And that bath towel? Even if it feels clean, it can be a breeding ground for bacteria.
Getting your aftercare kit together is the first real step in taking charge of your healing. It’s a simple setup, but using the right stuff consistently is the secret to dodging complications down the road. If you want a super convenient option, you can find complete piercing aftercare kits on BodyCandy.com that have everything you need to get started.
Mastering Your Daily Cleaning Routine
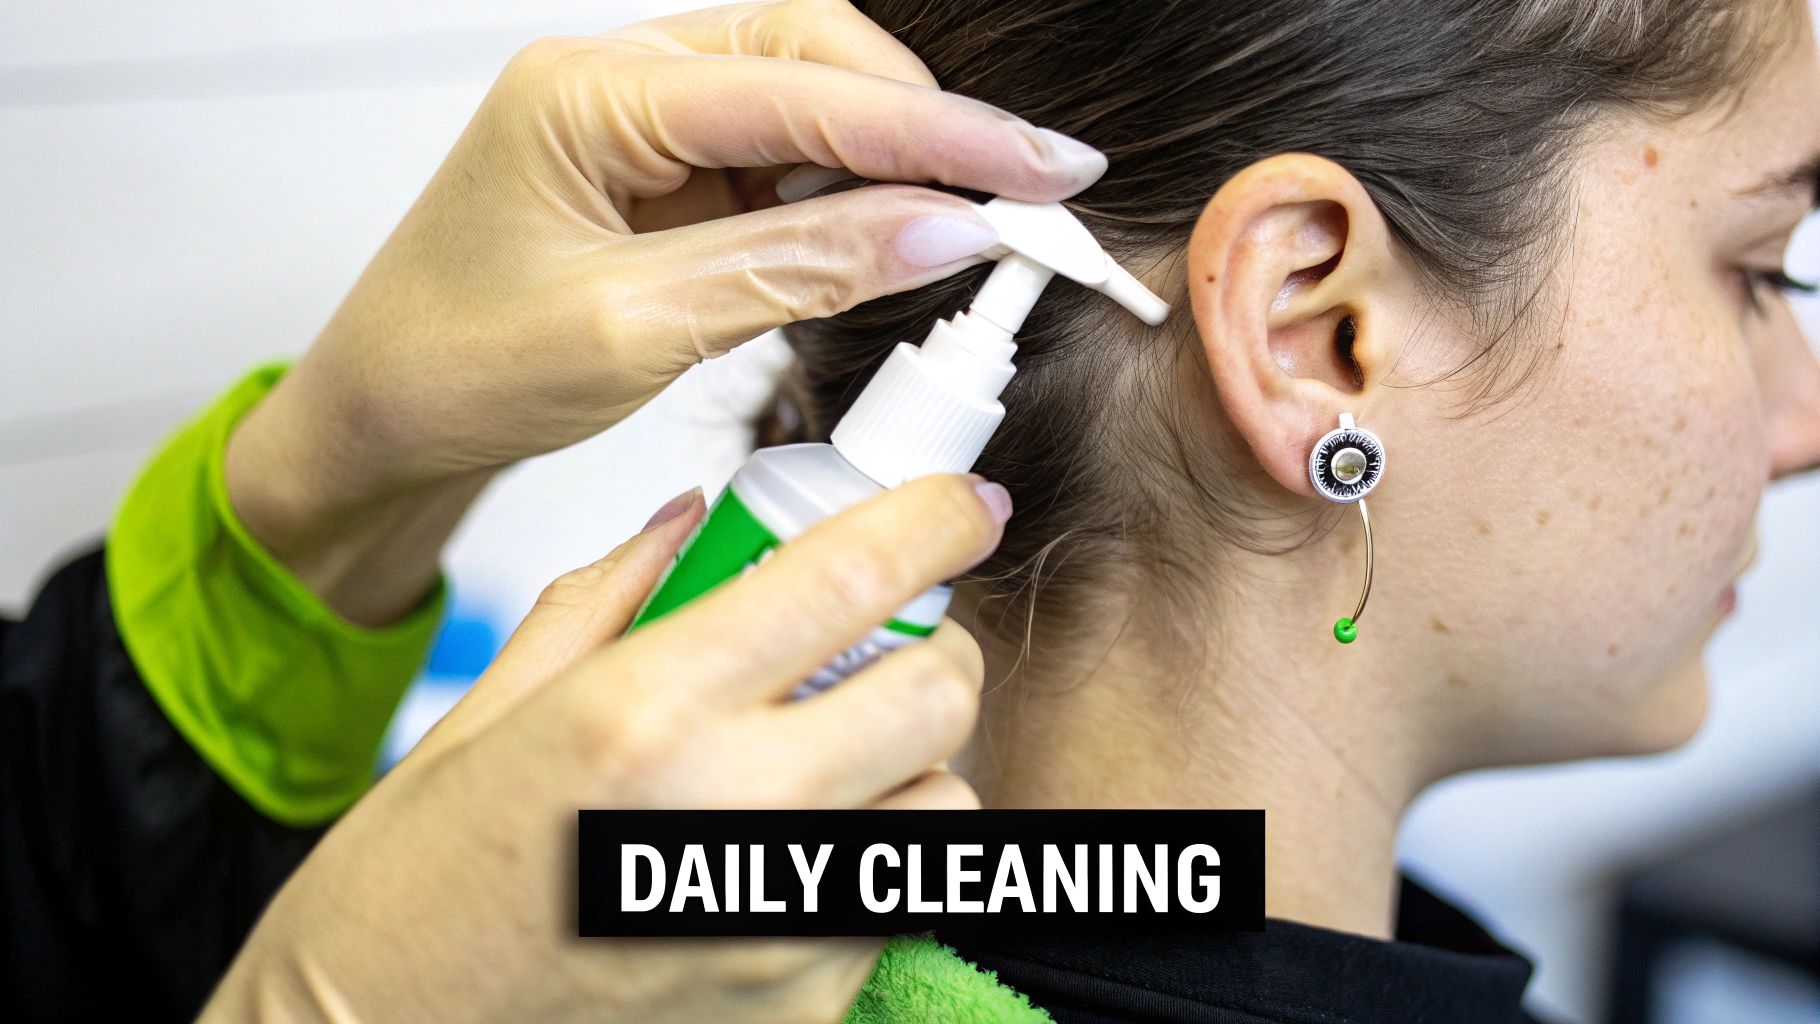
Alright, let's get into the nitty-gritty of how to clean your new cartilage piercing. This simple, no-fuss daily routine is your secret weapon for a happy, healthy piercing. If you can nail this part, you're already well on your way to a smooth healing process.
Before you even think about touching your piercing, the single most important rule is to always, always wash your hands thoroughly with soap and water. Your hands carry tons of germs, and the last thing you want is to introduce them to a fresh wound. Think of it as creating a sterile workspace for your aftercare.
Your Step-by-Step Cleansing Ritual
Consistency is everything. Your mission is to perform this gentle routine twice a day—once in the morning and once at night is perfect. It might be tempting to clean it more, but over-cleaning can be just as irritating as not cleaning it enough. Don't go overboard.
Here's how to do it right:
- Saturate the Front: Grab your sterile saline spray. Hold the nozzle a few inches from your ear and give the front of your piercing a good, gentle spritz. You want to fully douse the area so the solution can do its job.
- Cleanse the Back: Don’t forget the back! This spot can easily trap gunk and needs just as much attention. Spray the back of the piercing thoroughly as well.
- Soften and Rinse: Let the saline sit for about a minute. This gives it time to soften any of those little "crusties" (which are totally normal, by the way). A great trick is to let warm water run over it in the shower to help rinse everything away gently without touching it.
- Pat It Dry: After rinsing, gently pat the area completely dry with a fresh piece of non-woven gauze or a clean paper towel. A damp environment is a playground for bacteria, so making sure it's fully dry is a crucial final step.
Debunking a Major Piercing Myth
You've probably heard someone say you need to twist or rotate your jewelry to keep the hole from "closing around it." Let's bust this myth right now: Do not rotate your jewelry!
Your body is trying to build a delicate tunnel of new skin (called a fistula) through the cartilage. Twisting the jewelry tears this fragile new tissue, causing irritation, dragging out the healing time, and seriously increasing your risk for those dreaded piercing bumps.
The truth is, your jewelry isn't going to get stuck. Just leave it alone and let your body do its thing. The less you mess with it, the faster and happier it will heal. For more on why some products work better than others, check out our deep dive on H2Ocean aftercare in our guide.
Getting this process right is a huge deal. Choosing the wrong cleaning method can actually double your healing time and spike complication risks by 40-50%. Cartilage demands precision, which is why experts agree that only sterile 0.9% saline sprays should be used. This helps you avoid issues like irritation from jewelry rotation, which can cause problems in about 20% of cases.
Common Aftercare Mistakes You Need To Avoid
Knowing how to clean your cartilage piercing is only half the battle. Honestly, the more important half is knowing what not to do. Let's walk through the essential guide to sidestepping the common mistakes that can totally derail your healing journey, bust some persistent piercing myths, and steer you clear of some seriously bad habits.
It’s tempting to think "stronger is better" when it comes to cleaning, but your healing piercing is incredibly delicate. I've seen it time and time again: a huge number of piercing problems come from using products that are way too harsh for new, sensitive tissue.
Ditching Harsh Chemicals and Old Wives' Tales
Your bathroom cabinet might be full of things that seem like a good idea for a wound, but trust us, they're your piercing's worst enemies. Aggressive chemicals can cause some nasty reactions—think chemical burns, extreme dryness, and massive irritation. Using them can essentially restart your healing clock right back to zero.
Here's what to keep far, far away from your ear:
- Rubbing Alcohol & Hydrogen Peroxide: These are way, way too strong. They don't just kill the bad bacteria; they also destroy the fragile new cells your body is working so hard to create.
- Antibacterial Soaps (like Dial): These often contain harsh chemicals and fragrances that can seriously dry out and irritate your piercing. Worse, they can leave behind a residue that causes even more problems.
- Ointments (Neosporin, Bacitracin): This is a huge no-no. These are thick, greasy, and trap bacteria right against your piercing. They also cut off the oxygen supply your piercing desperately needs to heal properly.
- Tea Tree Oil & Aspirin Pastes: While these are popular online DIY "hacks," they are notorious for causing chemical burns and making those dreaded irritation bumps even worse. Always stick to what your professional piercer recommends.
Think of it this way: your body is an expert at healing itself. Your only job is to keep the area clean and free of irritants so it can do its work undisturbed.
The Golden Rule: If you wouldn't put it in your eye, don't put it on your healing piercing. Your new piercing is an open wound, and only the gentlest, simplest solutions are safe.
Picking the right cleaning solution is crucial, but so is knowing what to stay away from. This table breaks it down, comparing the good stuff with the products you should toss in the trash.
Safe Solutions vs. Harmful Irritants
| What to Use (The Good Stuff) | What to Avoid (The Bad Stuff) |
|---|---|
| Sterile Saline Solution (0.9% sodium chloride) | Rubbing Alcohol or Hydrogen Peroxide |
| Warm running water in the shower | Antibacterial Soaps (Dial, etc.) |
| Non-woven gauze or lint-free paper towels for drying | Thick ointments like Neosporin or Bacitracin |
| That's it! Your body handles the rest. | Tea Tree Oil, Aspirin paste, and other DIY remedies |
See how simple the "good stuff" list is? When it comes to healing, less is truly more. Sticking to the approved items and avoiding the rest will give your piercing the best possible chance to heal quickly and without complications.
Lifestyle Habits That Cause Trouble
It's not just about what you put on your piercing; it's also about what happens around it. Everyday habits can accidentally introduce bacteria or cause physical trauma, leading to those dreaded irritation bumps that nobody wants.
Be mindful of these common culprits:
- Sleeping on your piercing: This is probably the number one cause of migration (where the piercing angle shifts) and bumps. The constant pressure is an absolute nightmare for healing cartilage. A travel pillow can be a total lifesaver here—just place your ear in the hole!
- Makeup, hairspray, and lotions: These products are sneaky. They can easily clog your piercing and introduce irritating chemicals without you even noticing. Apply them carefully, keeping a clear zone around your new jewelry.
- Snagging and bumping: We've all done it. Headphones, hats, glasses, and even just taking off a shirt can catch on your jewelry. You just have to be extra mindful of your new accessory as you move through your day.
Avoiding these common mistakes is the most powerful thing you can do to ensure your piercing heals beautifully. A happy, healthy piercing is one that's ready for some stunning new cartilage jewelry when the time comes.
How To Spot Piercing Problems Early
Even when you’re doing everything right, sometimes a piercing just decides to throw a little tantrum. The trick is knowing how to tell the difference between normal healing weirdness and a genuine problem that needs a professional eye. Learning to read the signs will help you stay calm and know exactly what to do next.
It's totally normal for a new piercing to be a bit dramatic at first. For the first few weeks, you can expect some mild redness, a bit of swelling, and some tenderness to the touch. You'll also see some clear or whitish fluid that dries into those little "crusties" we've talked about. This is just lymph fluid, and it’s a sign your body is doing its healing thing perfectly.
Red Flags to Watch For
While some initial drama is expected, some signs are your body's way of screaming for help. Statistically, cartilage piercings are way more prone to infection than softer tissues. Medical literature notes that infection rates can be as high as 10-20% in the first couple of months if aftercare isn't on point. For comparison, that's much higher than the under 5% rate for simple lobe piercings. Knowing what to look for is crucial.
Keep a close eye out for these definite red flags:
- Thick, Colored Discharge: If you're seeing yellow, green, or murky gunk instead of clear fluid, that's a major warning sign.
- Intense or Worsening Pain: A new piercing will be sore, but if the pain gets worse after the first few days instead of better, pay attention.
- Hot to the Touch: The area feeling unusually warm or hot is a classic sign something’s not right.
- Excessive Swelling or Redness: If the swelling spreads far from the piercing site or the redness darkens and expands, it's time to act.
The Infamous Irritation Bump
Now, let's talk about the piercing problem everyone dreads: the irritation bump. These annoying little bumps usually aren't an infection but a sign that something is bothering your piercing. They’re super common with cartilage and are almost always caused by a handful of things:
- Physical Trauma: Sleeping on it, snagging it on your hair, or even wearing headphones that press on it.
- Moisture: Not drying the piercing thoroughly after cleaning is a big one.
- Angle Issues: The jewelry shifting due to constant pressure (I'm looking at you, side-sleepers!).
- Incorrect Jewelry: Low-quality metal, a hoop put in too soon, or a post that's too short or too long can all cause chaos.
If a bump appears, don't panic! Go back to basics with your saline soaks, be extra careful not to bump it, and try to figure out the source of the irritation. If you're unsure what's causing it, our guide to allergic reactions and piercing irritation can offer more clues.
Key Takeaway: Don't self-diagnose! If you see any signs of a real infection, don't wait. Contact your piercer or a doctor right away. They can tell you for sure what's going on and how to handle it safely.
Your Cartilage Piercing Aftercare Questions Answered
Even with the most detailed guide, questions are going to pop up as you heal. Don't worry, you're not alone! We've rounded up some of the most common questions we hear about cartilage aftercare to give you fast, reliable answers. This is your go-to FAQ for getting through the healing process like a total pro.

From figuring out when you can finally switch up your jewelry to what to do after an accidental bump, we've got you covered.
How Soon Can I Change My Cartilage Piercing Jewelry
We get it—the urge to swap in that new piece of jewelry is real! But you absolutely have to wait until your piercing is fully healed. For cartilage, that's a long haul: a full 6 to 12 months.
Changing the jewelry too early is a recipe for disaster. It can cause serious irritation, let bacteria in, and basically reset your healing clock.
Your piercer is the ultimate authority here. They'll give you the green light when it's truly safe. They might have you come in to downsize the post after the initial swelling goes down (usually around 4-8 weeks), but save that fun first jewelry swap for when they say it's ready.
Can I Use Tea Tree Oil On An Irritation Bump
Please don't! This is one of those internet "hacks" that does more harm than good. Tea tree oil is way too harsh for a healing piercing and can easily lead to chemical burns or extreme dryness. This will only make that pesky bump angrier.
Same goes for other DIY remedies like aspirin paste. It's acidic and can seriously damage the delicate new tissue your body is working so hard to build.
The Best Approach: If a bump shows up, play detective. The real solution is to find and eliminate the source of the irritation. Are you sleeping on it? Do your headphones rub against it? Stick to your simple sterile saline routine and give your piercer a call for personalized advice.
What If I Accidentally Sleep On My New Piercing
First, don't panic. It happens to literally everyone! If you wake up and realize you've been sleeping on your fresh piercing, it's probably going to be sore and look a little irritated.
Just give it a gentle saline clean and try to be more mindful for the next few nights. A total game-changer is using a travel pillow—just pop your ear in the hole! This trick takes all the pressure off and lets your piercing heal in peace.
Is It Normal For My Piercing To Be Crusty
Yes, totally normal! In fact, it's a good sign. Those little "crusties" you're seeing are just dried lymph fluid, which is a natural part of the healing process.
The golden rule here is simple: do not pick at them. Picking them off can tear the fragile new skin forming underneath, which can lead to irritation, bleeding, and even scarring.
Instead, let your saline spray work its magic. A good spritz will soften the crusties up, allowing them to rinse away on their own when you clean your piercing or take a shower.
Now that you’re a pro on cartilage aftercare, are you ready to start planning your healed look? BodyCandy has an incredible collection of high-quality, stylish cartilage jewelry perfect for showing off your beautifully healed piercing. Shop our collection today and find your next favorite piece


