
So, you’re thinking about getting a new piercing but have one tiny question holding you back: how much is this going to hurt?
You're not alone! It's the number one question on pretty much everyone's mind before they take the plunge. To make it simple, we put together the ultimate body piercing pain chart, a quick visual guide ranking common piercings on a 1-10 scale.
Your Guide To The Body Piercing Pain Chart
Think of piercing pain like your tolerance for spicy food. Some people are totally cool with a mild jalapeño (that’s your earlobe piercing), while others are ready to take on the ghost pepper challenge (hello, nipple piercing!).
This guide is your go-to reference before you book your next appointment. It'll help you feel prepared and excited, not anxious.
What The Pain Scale Really Means
A pain scale is just a simple way to put a number on a feeling that's super personal. When we talk about a body piercing pain chart, we're usually looking at a scale from 1 (barely a pinch) to 10 (an intense, sharp sensation that makes you say whoa).
Here's a quick breakdown of what those numbers actually feel like:
- 1-3 (Mild): This is the "barely there" zone. It's over before you really have time to process it, kind of like a quick bug bite. Earlobe piercings are the poster child for this level.
- 4-6 (Moderate): You'll definitely feel this one. It’s a noticeable, sharp sting that might make your eyes water for a second, but it fades almost as quickly as it arrives. Nostril, navel, and tongue piercings often fall into this range.
- 7-10 (Intense): Okay, deep breaths. These piercings involve a sharp, significant pain that lasts for a few very intense seconds. This is common for piercings that go through thick cartilage or in highly sensitive areas.
To give you a better idea, here's a quick visual comparison showing just how much the pain can vary depending on where you get pierced.
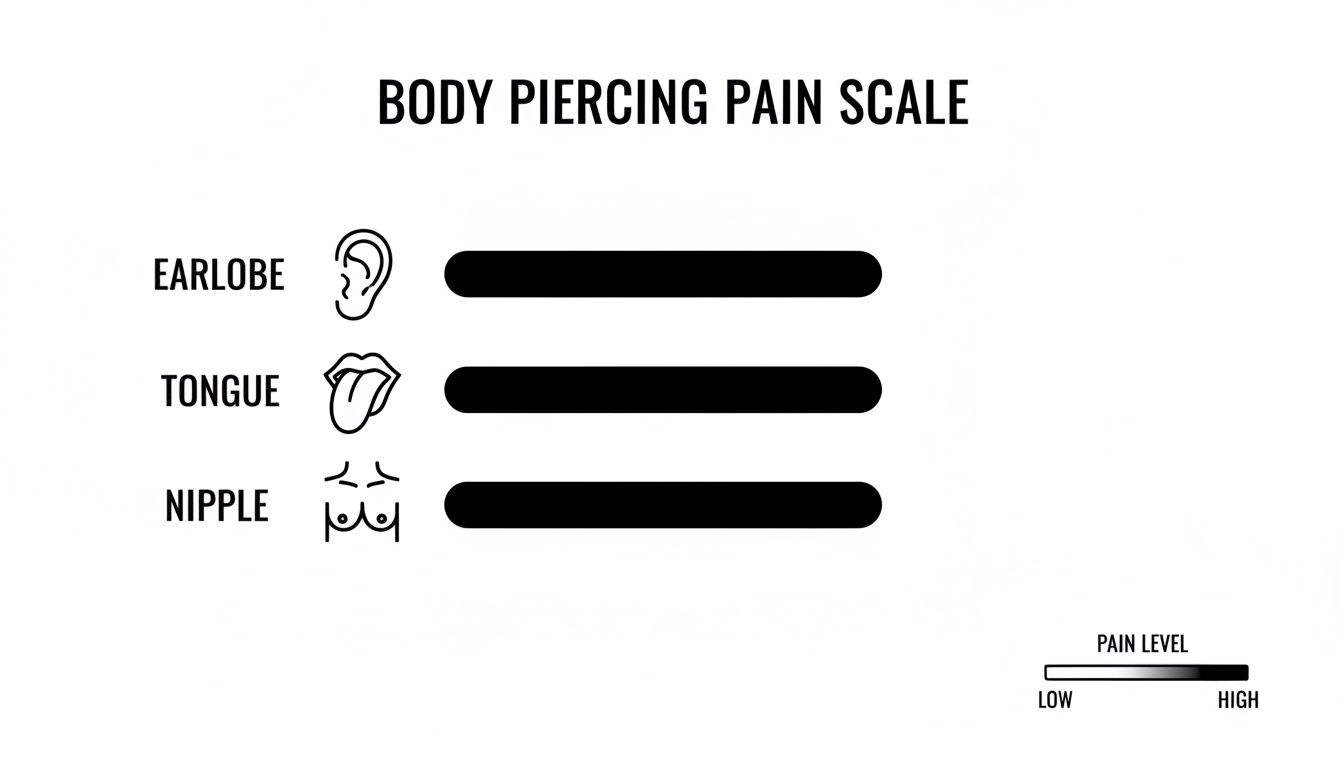
As you can see, the spectrum is pretty wide, with fleshy spots being far less sensitive than other areas.
For a more detailed look, here's a quick reference table that breaks down some of the most popular piercings by their average pain level and healing time.
Quick Guide to Piercing Pain Levels
This chart gives you a snapshot of what to expect, but remember, everyone's body and pain tolerance is unique!
| Piercing Type | Average Pain Level (1-10) | Typical Healing Time |
|---|---|---|
| Earlobe | 2-3 | 6-8 Weeks |
| Eyebrow | 4-5 | 2-3 Months |
| Nostril | 5-6 | 4-6 Months |
| Tongue | 4-5 | 4-8 Weeks |
| Lip (Labret/Monroe) | 4-5 | 2-3 Months |
| Septum | 5-6 | 2-3 Months |
| Navel (Belly Button) | 4-6 | 6-12 Months |
| Helix (Cartilage) | 6-7 | 6-12 Months |
| Industrial | 7-8 | 9-12 Months |
| Nipple | 8-9 | 6-12 Months |
This should help you line up your expectations with reality before you head to the studio.
Why Some Spots Hurt More Than Others
The "why" behind piercing pain is actually pretty straightforward: it all comes down to nerve endings. The more nerves packed into an area, the more you're going to feel it.
For example, earlobe piercings are famously low on the pain scale, with around 83% of people rating the pain a 3 out of 10 or lower. Tongue piercings, which are surprisingly fleshy, tend to land in the middle, with most people putting them between a 4 and 5. You can always learn more about how experts rank piercing pain on Healthline.com if you want to dig deeper.
The key takeaway is simple: more nerves equal more ouch. That's why a fleshy earlobe is a walk in the park compared to a cartilage-heavy industrial piercing.
Ultimately, your personal experience will be your own. But having a general idea from a pain chart helps you walk into your appointment feeling informed and empowered, ready for that awesome new piece of jewelry.
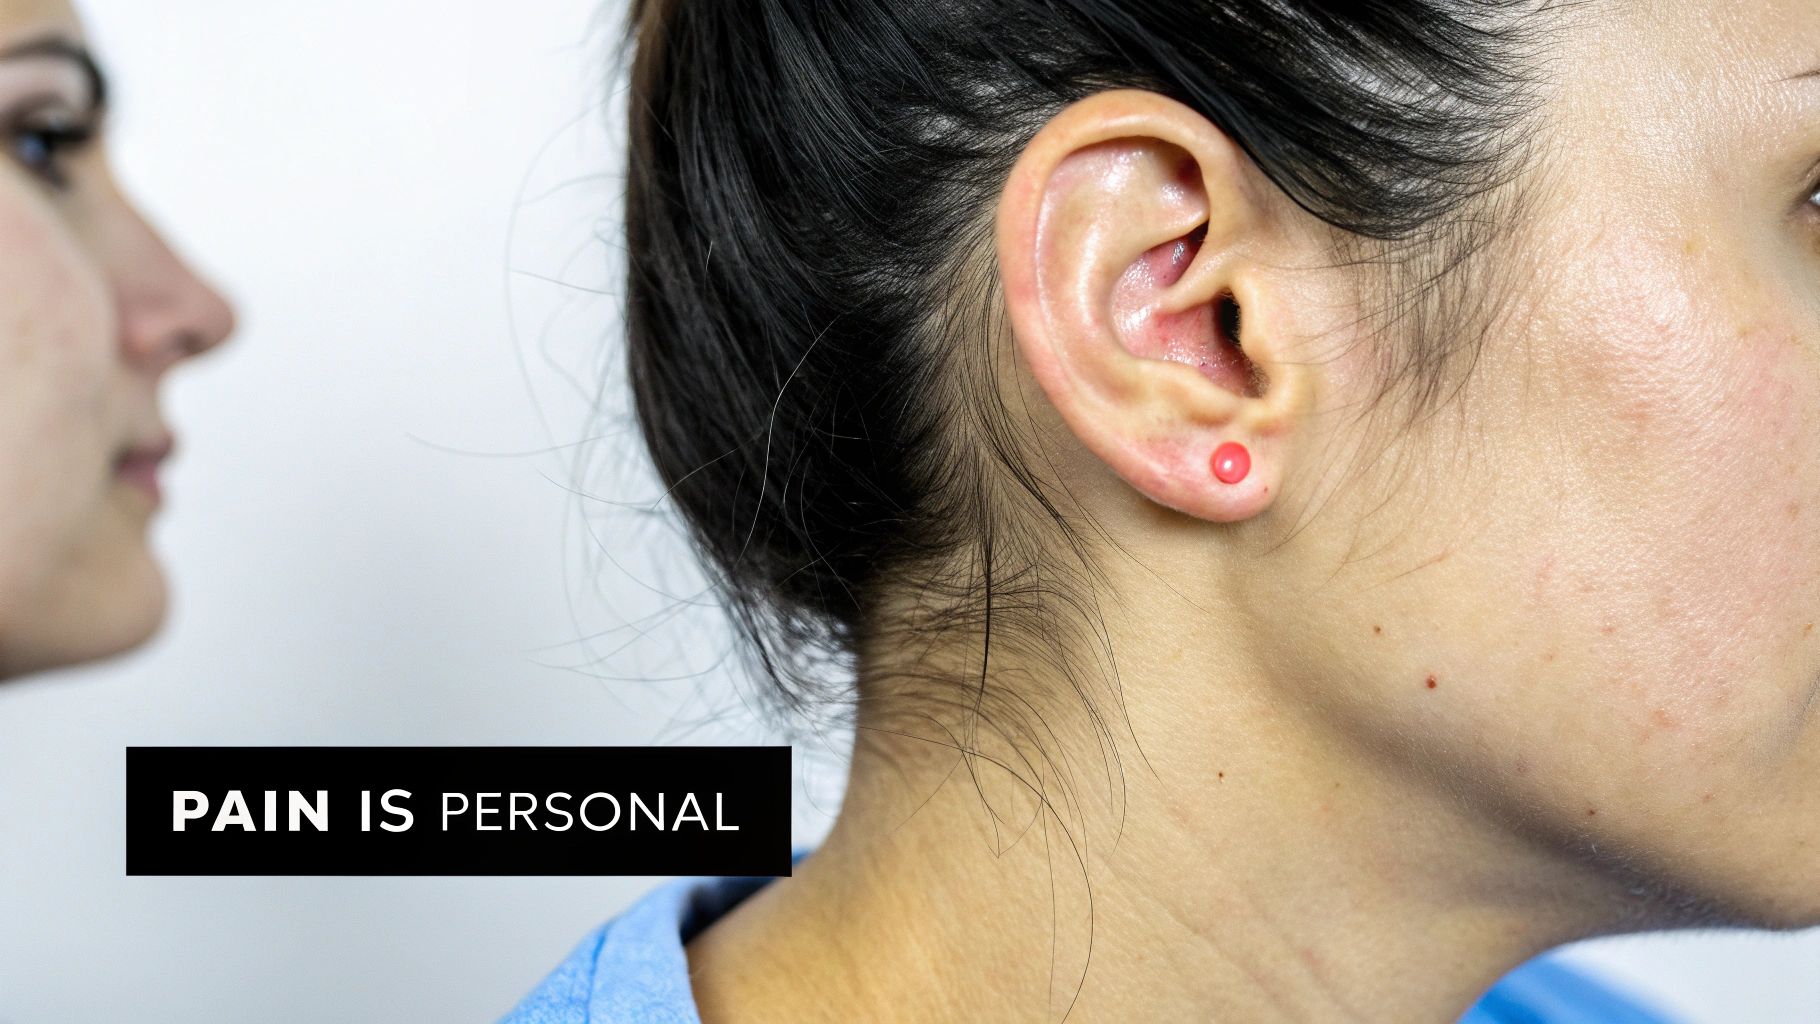
Why Piercing Pain Is a Personal Experience
So, you’ve been staring at a body piercing pain chart, trying to figure out why your bestie didn't even flinch getting her helix done, but just the thought of it makes you a little queasy. Here’s the deal: pain is not a one-size-fits-all thing. It's an incredibly personal experience, and a whole bunch of factors play into how you are going to feel that needle.
Think about it like this: two people can hear the same song, and one gets pumped up while the other feels totally relaxed. Your body and mind have a similarly unique reaction to a piercing. Let's get into what really makes the experience yours and yours alone.
Your Body's Unique Blueprint
The single biggest physical factor comes down to nerve density. Some parts of your body are simply loaded with more nerve endings than others.
- Fleshy Areas: Places like your earlobes have far fewer nerves, which is why they’re consistently ranked low on the pain scale. It’s usually a quick, dull pinch that’s over before you know it.
- Cartilage Areas: On the other hand, spots like the tragus, daith, or an industrial go through dense cartilage packed with more nerves. This means you can expect a sharper, more intense sensation.
It's not just about the nerves, though. Your skin's natural thickness and general sensitivity play a part, too. Some of us are just wired to be more sensitive, and that’s perfectly normal!
The Piercer's Skill and Technique
Who you trust to do the piercing makes a huge difference. An experienced, professional piercer is like a master of their craft—their technique changes everything.
A real pro uses a sterile, razor-sharp, hollow needle that glides through tissue smoothly, creating a clean channel for the jewelry. This minimizes trauma to the area and, as a result, minimizes pain. Someone with less experience might be slower or less precise, which can definitely lead to more discomfort. Always, always choose a reputable piercer. Your body will thank you.
Your Mindset Matters More Than You Think
Don't underestimate the power of your own mind. Your brain is the command center for how you interpret pain, and your mental state walking into the studio can totally change the game.
Your thoughts and feelings have a direct physical impact. If you walk in anxious and tense, your muscles will clench, making the piercing feel more intense. But if you're excited and relaxed, your body is more likely to handle it like a champ.
This isn't just a hunch; there's science to back it up. Medical professionals use a tool called the visual analog scale (VAS) to let patients rate their pain, and study after study shows that psychological factors like anxiety or excitement have a major impact on the scores people give. You can even read the full research about these findings and see just how connected your mind and body really are.
Ultimately, your personal pain threshold is a unique mix of your anatomy, your piercer's expertise, and your own state of mind. Make sure you have a good meal, stay hydrated, and focus on how awesome your new piercing is going to look. Set yourself up for a smooth experience—you've got this.
Ranking Pain Levels by Piercing Location
Okay, so we've looked at the big picture pain chart, but let's be real—what does a "6 out of 10" actually feel like when a needle is involved? This is where we get into the nitty-gritty of what you can expect from the most popular piercing spots.
Think of this as your personal tour guide for body modification. We're going beyond just the numbers to give you a play-by-play, from the initial pinch to the first few weeks of healing.
Ear Piercings: From Lobe to Cartilage
The ear is a whole universe of piercing possibilities, and the pain can run the gamut. We're talking everything from a tiny pinch that's over in a second to an intense pressure that might just take your breath away. Let's break down the fan favorites.
Earlobe Piercings (Pain: 2-3/10) This is the classic for a reason! An earlobe piercing is just a quick, sharp pinch that's gone in a flash. Because it’s going through soft, fleshy tissue with fewer nerve endings, the pain is incredibly minimal. It’s the perfect starter piercing.
Helix Piercings (Pain: 6-7/10) Moving up to the upper cartilage rim, the helix is a definite step up. You can expect a sharp, stinging sensation that’s quickly followed by a dull, throbbing ache for a few hours. For a lot of people, the sound of the needle going through cartilage—a distinct little crunch—is more startling than the pain itself!
Industrial Piercings (Pain: 7-8/10) An industrial is essentially two cartilage piercings connected by one long barbell. Since you're getting two holes in a single session, the pain is more intense and lasts longer. It’s a sharp, significant pressure that will probably have you taking a few deep breaths. The throbbing afterward can be pretty noticeable, too.
Conch, Daith, and Tragus Piercings (Pain: 6-8/10) These inner-ear cartilage spots all feel pretty similar. It's less of a quick sting and more of a deep, intense pressure. The cartilage here is thicker, so the sensation feels much more forceful. Many people say the pressure is the main event, and the "pain" part is surprisingly short. Just be ready for the aftercare, as these can be finicky healers. To get a better idea, we have a complete guide covering the healing times for popular piercings that's worth a look.
Facial Piercings: Up Close and Personal
Facial piercings are front and center, and so is the sensation. From that teary-eyed nostril poke to a surprisingly quick lip piercing, here's the rundown.
Nostril Piercings (Pain: 5-6/10) This one is famous for making your eyes water! It’s a very sharp, quick sting, almost like getting a shot. That watery eye is just an involuntary reflex because of the nerves in your sinus area; it’s not a sign of unbearable pain. The initial sharpness fades almost immediately into a dull soreness.
Septum Piercings (Pain: 5-6/10) When done right, a septum piercing goes through the "sweet spot"—a thin bit of skin between the cartilage. This makes it surprisingly low on the pain scale! It feels like a sharp pinch that makes you feel like you have to sneeze. If your piercer misses and hits cartilage, it will be a lot more painful, which is exactly why finding a skilled professional is non-negotiable.
Lip Piercings (Labret, Monroe, etc.) (Pain: 4-5/10) Your lips are packed with nerve endings, but the piercing itself is incredibly fast. You'll feel a sharp pinch that’s over and done with in a couple of seconds. Honestly, the swelling afterward is often more annoying than the piercing itself, so get ready for a puffy lip for a day or two.
Body Piercings: The Full Experience
Ready to adorn more than just your face and ears? From the classic navel to the notorious nipple piercing, the experience is totally unique for each spot.
Navel (Belly Button) Piercings (Pain: 4-6/10) Most people describe a navel piercing as a strong pressure followed by a quick sting. Since it goes through a fleshy piece of skin, it's generally less painful than most cartilage piercings. The real challenge here is the healing process, since it's so easily snagged or irritated by clothing.
Nipple Piercings (Pain: 8-9/10) Let’s be real—this one is intense. The nipple is one of the most sensitive parts of the body, so you should expect a sharp, powerful, and breath-taking pain that lasts for several long seconds.
The pain is very real but also very quick. Most people say the first nipple is the hardest; once you know what to expect, the second one is often mentally easier to handle.
After the initial shock, a hot, throbbing sensation is pretty common for the rest of the day. But don't let that high pain score scare you off! It’s one of the most popular piercings for a reason. With proper aftercare, the pain subsides quickly, leaving you with a seriously cool look.
How Your Jewelry Choice Impacts Healing
Believe it or not, the jewelry you get pierced with is about so much more than just looking cute from day one. Your initial jewelry choice is one of the most important factors in your healing journey, directly impacting your comfort, healing time, and overall experience.
Think of it like this: you wouldn't run a marathon in flip-flops, right? Your fresh piercing needs the right "equipment" to heal properly. The material, size, and style of your starter jewelry are all part of a professional strategy to set you up for success.
Why Material Is Everything
When your body is healing a new piercing, it's incredibly sensitive to what's touching it. Using the wrong material can lead to irritation, allergic reactions, and a much longer, more painful healing process. That's why professional piercers are so picky about what they use.
Here’s a quick breakdown of the best materials for a fresh piercing:
- Implant-Grade Titanium: This is the gold standard, and for good reason. It's completely hypoallergenic, nickel-free, and incredibly lightweight, meaning it's the least likely material to cause a reaction. It's what surgeons use for medical implants—if it's safe enough to be inside your body, it's perfect for your new piercing.
- Surgical Steel: While very common, "surgical steel" can be a bit tricky. There are many different grades, and some contain enough nickel to irritate sensitive skin. Reputable piercers use specific grades like 316LVM ASTM F-138 compliant steel, which is a much safer bet.
- 14k or 18k Gold: Solid gold (not plated!) can be a good option, but only if it's nickel-free. Gold is a softer metal, so it can sometimes harbor bacteria more easily than titanium. It's often best saved for when your piercing is fully healed.
Titanium is truly the top choice for starter jewelry. Its biocompatible nature means your body is less likely to see it as a foreign invader, which can significantly reduce irritation and help you heal faster.
For a deeper dive into the metals that make up your favorite bling, check out our guide that explores what body jewelry is made of in our detailed article. It’s super helpful for making informed choices!
Demystifying Jewelry Gauge and Length
Ever notice that starter jewelry looks a little… long? That's completely intentional! Your piercer isn't trying to give you an ill-fitting accessory; they're preparing for the inevitable swelling.
Initial Length: A fresh piercing is going to swell. Your piercer uses a longer post or a larger diameter ring to give the area room to breathe and expand without the jewelry becoming tight. A bar that's too short can actually sink into the skin, which is not only painful but can lead to serious complications.
Gauge (Thickness): The gauge just refers to the thickness of the jewelry itself. Your piercer will choose a gauge that’s appropriate for your anatomy and the specific piercing. Starting with a slightly thicker gauge often helps create a more stable channel, which leads to a healthier, more permanent piercing down the road.
The All-Important Downsize
Once that initial swelling subsides—usually within a few weeks to a couple of months—that extra-long starter bar is no longer your friend. It can easily snag on hair and clothing, causing irritation that can totally set your healing back.
This is where downsizing comes in. You’ll head back to your piercer, and they'll swap the long starter post for a shorter one that fits you perfectly. This step is crucial for long-term healing. It helps prevent migration (where the piercing shifts) and keeps those annoying irritation bumps from popping up. Don't skip it!
Your Essential Pain Management and Aftercare Plan
You did it! The piercing is done, and it looks absolutely amazing. But as that first wave of adrenaline starts to wear off, you're probably wondering... now what? Welcome to the most critical part of your entire piercing journey: the aftercare.
Getting the aftercare right is everything. It's your secret weapon for keeping pain and swelling down, speeding up the healing process, and making sure your new piercing stays happy and complication-free. Think of this as your complete post-piercing playbook.
The First Few Days: Pain Management
Those initial 48-72 hours are when you’ll probably feel the most soreness and swelling. Don't worry, this is totally normal! It’s just your body’s natural reaction to its new, sparkly addition. The key is to manage it like a pro from the get-go.
Here are a few simple tricks to keep things comfortable:
- Cool It Down: A clean cold compress can be an absolute lifesaver. Just soak a clean cloth in cold water and gently apply it for 10-15 minutes at a time. It works wonders on swelling and takes the edge off that throbbing feeling.
- Hands Off: As tempting as it is to fiddle with your new jewelry, please don't! Every time you touch it, you're introducing unwanted bacteria and irritating the delicate healing tissue.
- Sleep Smart: Do your best to avoid sleeping directly on the new piercing. For ear piercings, a travel pillow can be a total game-changer—just tuck your ear into the hole!
Following these simple steps can make a massive difference in your comfort level while your body gets down to the business of healing.
Your Step-by-Step Cleaning Routine
A consistent, gentle cleaning routine is non-negotiable. The goal is to keep the area pristine without going overboard and causing more irritation. It's a delicate balance, but it's super easy once you get the hang of it.
- Wash Your Hands: Before you even think about touching your piercing, wash your hands thoroughly with soap and water. This is the #1 rule to prevent infection.
- Use Sterile Saline Solution: Forget the harsh stuff like alcohol or hydrogen peroxide—they actually do more harm than good. A sterile saline spray is your new best friend.
- Spray and Pat Dry: Lightly spray the front and back of your piercing with the saline solution twice a day. Let it work its magic for a minute, then gently pat the area dry with a fresh, disposable paper towel. Cloth towels are a no-go, as they can harbor bacteria and snag your jewelry.
That's it! Resist the urge to over-clean, which can dry out your skin and slow down the healing. For more in-depth advice, you can always check out our complete guide on using H2Ocean aftercare products for the best results.
Don't panic about "crusties!" It’s totally normal for a clear or whitish fluid to form around the jewelry. This is called lymph fluid, and it's a good sign that your body is healing. Just let your saline spray gently wash it away.
What to Avoid During Healing
Knowing what not to do is just as important as your cleaning routine. Minor issues are actually pretty common; in fact, some studies show that nearly 50% of piercing wearers run into some kind of complication within the first six months. By avoiding a few key things, you can dramatically lower your chances of becoming part of that statistic. You can discover more insights about common piercing complications to stay ahead of the game.
To keep your healing on the right track, be sure to avoid these common mistakes:
- Harsh Chemicals: Steer clear of alcohol, hydrogen peroxide, and antibacterial soaps. They are way too aggressive for a fresh wound and will only cause irritation.
- Twisting Your Jewelry: This is an old myth that just won't die! Twisting the jewelry doesn't help it heal; it just tears up the delicate new tissue trying to form inside the piercing channel.
- Changing Jewelry Too Soon: Patience is a virtue, especially with new piercings. Swapping out your starter jewelry before you're fully healed can lead to irritation, infection, or even cause the hole to close up.
- Swimming: Avoid pools, hot tubs, lakes, and oceans during the initial healing period. These bodies of water are full of bacteria that can cause a nasty infection.
Your Piercing Pain Questions Answered
We've covered a ton of ground, from the body piercing pain chart to aftercare, but you might still have a few questions rattling around. Totally normal! Getting pierced is a big deal, and it's smart to have all the facts.
This is your spot for all those common "what ifs" and "is this normal?" moments. We’ll give you the straight-up, honest answers to help you feel completely confident before, during, and after you get your new jewelry.

Should I Take A Painkiller Before My Piercing?
It sounds like a good idea in theory, but popping a painkiller like ibuprofen or aspirin right before your appointment is a big no-no. Any professional piercer will tell you to skip them.
Why? They are blood thinners. This can actually make you bleed more during and after the procedure, which is something nobody wants.
Instead of reaching for a pill, focus on getting your body ready. A good night's sleep, a solid meal about an hour or two beforehand, and plenty of water will do way more for you. A calm, nourished body handles pain much better. You can always take an over-the-counter anti-inflammatory after the piercing is done (with your doctor's okay) to help with any swelling.
Is A Piercing Gun Or A Needle Less Painful?
This is a huge one, and the answer is crystal clear: a needle is always the better choice. It's superior for both pain management and proper healing. It might seem intimidating, but a needle is far gentler on your body.
A piercing gun uses brute force. It literally shoves a blunt stud through your skin, which can shatter cartilage and cause significant tissue damage. The result is often a more painful, complicated, and longer healing journey.
A professional piercer uses a sterile, hollow, and incredibly sharp needle. It cleanly separates the tissue to create a perfect channel for the jewelry. This is far less traumatic for your body, leading to a safer, cleaner, and much healthier healing process.
Seriously, find a professional piercer who uses a needle. Your body will thank you for it.
How Can I Tell If My Piercing Pain Is Normal?
It's completely normal to experience some soreness, redness, swelling, and even see a little clear or whitish discharge for the first few days or weeks. Don't panic! This is just lymph fluid, a sign your body’s natural healing response is kicking into gear.
The signs of a real infection, however, are much more severe and should never be ignored. Here's what to watch out for:
- Intensifying Pain: Throbbing pain that gets worse over time instead of gradually getting better.
- Hot to the Touch: The skin around the piercing feels unusually hot when you touch it.
- Thick Discharge: You see thick, yellow, or green pus, which might also have an unpleasant odor.
If you spot these signs, do not remove the jewelry! Taking it out can cause the hole to close up, trapping the infection inside. Your first move should be to contact your piercer or a doctor for guidance. A solid aftercare routine is your best defense against infection from day one.
What Is The Least Painful Piercing To Get?
If you're eager to get pierced but want to dip your toes in the water first, the earlobe is your absolute best friend. On a pain scale of 1 to 10, most people put it at a 2 or 3.
It's a super quick pinch that's over in a flash. That's because the lobe is made of soft, fleshy tissue with far fewer nerve endings than cartilage or other areas. Earlobe piercings also boast one of the fastest healing times, usually settling down within 6-8 weeks.
The earlobe is the perfect starter piercing for a reason! After that, many people find a navel (belly button) piercing to be another great, low-pain option to consider.
Ready to show off your new piercing with some fresh style? BodyCandy has an incredible collection of high-quality, hypoallergenic jewelry perfect for any piercing, new or healed.
Shop our full collection today and find your next favorite piece!


