So, you did it! Welcome to the belly piercing club, bestie. The first few days with your new navel piercing are super exciting, but it's totally normal for things to feel a little strange. You can expect some mild redness, a bit of swelling, and some tenderness around the area—this is just your body getting used to its awesome new bling.
Your First 48 Hours With a New Navel Piercing
Getting a new piercing is a big deal, and these initial days set the stage for your entire healing journey. Think of the first 48 hours as the "get to know you" period between your body and your new jewelry. Your main job? Be gentle, keep it clean, and let your body work its magic.
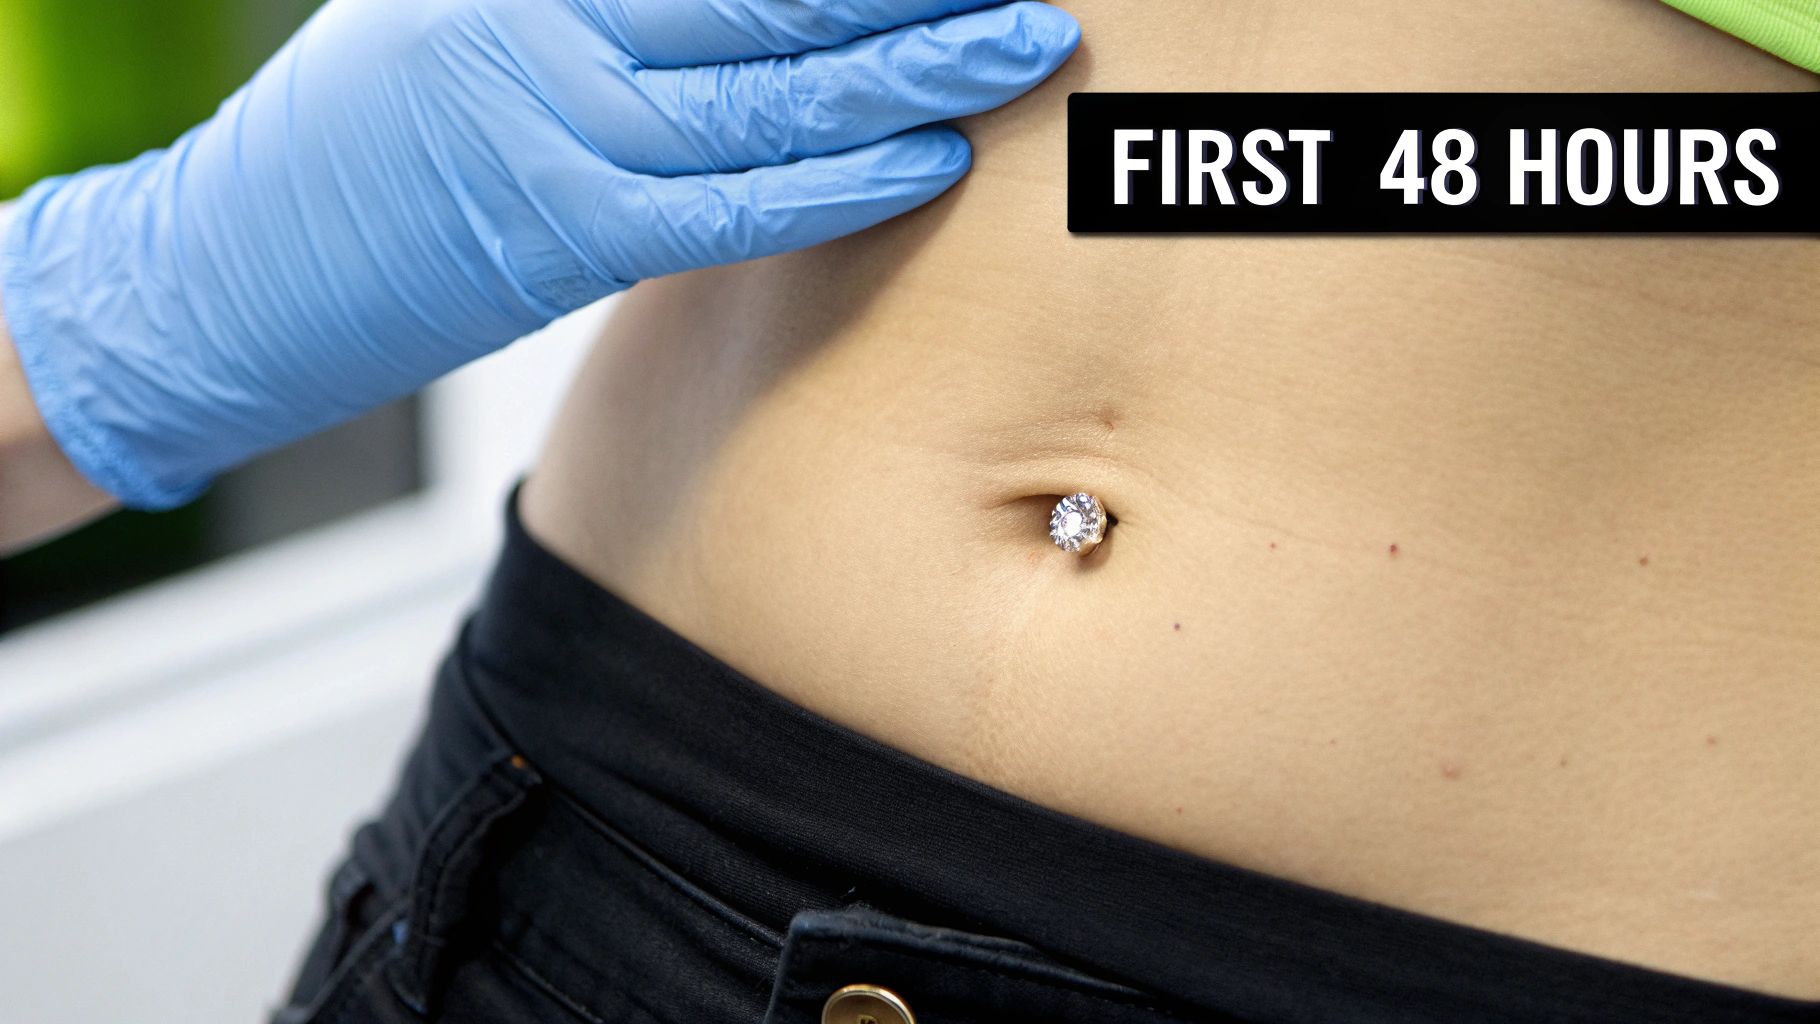
This initial reaction is your body's natural response to what it sees as a small wound. That redness and swelling are just signs that your immune system is sending healing cells to the site. It’s a completely normal part of the process and usually settles down significantly after a couple of days. For a broader look at what to expect, check out our guide on preparing for your first-time piercing experience.
What Is Considered Normal?
It's easy to second-guess every little sensation, but a few things are totally standard for a fresh navel piercing. Don't be surprised if you notice:
- Mild Tenderness: The area will likely feel sore, especially if you accidentally bump it or wear tight clothing.
- Slight Swelling: This is exactly why your piercer uses a longer initial barbell. The swelling is a good sign your body is on the job.
- A Little Redness: Pinkish or reddish skin right around the piercing holes is to be expected.
- Clear or Whitish Fluid: This fluid is called lymph, and when it dries, it forms what we lovingly call "crusties." This is not pus and is a totally normal part of healing!
You've joined a huge community of piercing lovers! In fact, navel piercings are a major fashion statement, with one survey finding that a full 24% of American women reported having one, making it one of the most popular non-earlobe choices out there.
Patience is Your Piercing's Best Friend: Remember, healing a navel piercing is a marathon, not a sprint. The full journey can take anywhere from six months to a full year. The care you take in these first few weeks is absolutely crucial for a smooth and successful heal.
Starting your journey with high-quality, hypoallergenic jewelry makes a world of difference. That's why professional piercers almost always start you off with materials like implant-grade titanium. This metal is nickel-free and biocompatible, meaning your body is much less likely to have a bad reaction to it. It gives your piercing the best possible start, seriously reducing the risk of irritation and setting you up for a happy, healthy heal.
Your Daily Navel Piercing Cleaning Routine
Alright, let's get into the most critical part of your piercing journey: the daily cleaning routine. Nailing this is the secret to a happy, healthy navel piercing, and trust me, it’s way easier than you might think. Your new best friend here is consistency.
A solid routine is all about washing away bacteria, sweat, and any other gunk before it has a chance to cause trouble. Think of it as creating the perfect, pristine environment for your body to work its healing magic. And forget everything you've heard about harsh chemicals—your new bling needs a much gentler touch.
The Only Cleaning Solution You Need
The hero product for your new piercing is a simple sterile saline solution. That's it. It’s what we call isotonic, meaning it has a salt concentration similar to your body's own fluids. This is key because it cleans without drying out or irritating the super delicate healing skin.
You've got two great options here:
- Pre-Made Saline Spray: This is hands-down the easiest and most sterile choice. A quality piercing aftercare spray is specifically formulated to be gentle yet effective. It's convenient, portable, and takes all the guesswork out of the equation. For a deeper look into why this is a piercer favorite, check out this detailed H2Ocean aftercare guide that breaks down all the benefits.
- DIY Sea Salt Soak: If you'd rather mix your own, you can make a solution at home. The absolute key is getting the ratio perfect to avoid irritation. Mix 1/4 teaspoon of non-iodized sea salt into one cup (8 ounces) of warm, distilled or bottled water until it's completely dissolved.
And a word of warning: never, ever use table salt. It’s packed with iodine and anti-caking agents that will seriously anger your piercing.
Your Step-by-Step Cleaning Guide
Ready to get started? You'll want to follow this routine twice a day—once in the morning and once at night. It might be tempting to clean more often, but over-cleaning can be just as bad as not cleaning enough. It can strip away the good cells your body needs to rebuild tissue.
Here are the golden rules:
- First, Wash Your Hands: Before you even think about touching your piercing, scrub your hands with antibacterial soap and warm water for at least 20 seconds. Dirty hands are the number one culprit behind piercing infections, no contest.
-
Next, Apply the Saline:
- Using a spray? Generously spritz the front and back of your piercing. You want to make sure the solution really gets into the piercing channel itself.
- Doing a soak? Lean forward and press the rim of your cup of warm sea salt solution over your navel to create a gentle vacuum seal. Then, lie back and just relax for 5-10 minutes. This is amazing for loosening up any of those stubborn "crusties."
- Then, Gently Clean Away Debris: After spraying or soaking, you’ll probably see some softened crusties (which is just dried lymph fluid—totally normal!). Use a fresh piece of non-woven gauze or a paper towel to gently wipe them away. Stay away from cotton balls or Q-tips; their tiny fibers can snag on your jewelry and cause a world of irritation.
- Finally, Pat It Dry: Moisture is a breeding ground for bacteria, so getting the area completely dry is a non-negotiable step. Gently pat the piercing and the skin around it with a clean, disposable paper towel. Fabric towels are a no-go for now, as they can harbor bacteria and snag your jewelry.
Pro-Tip: Whatever you do, don't twist or turn your jewelry while cleaning! This is old-school advice that's totally outdated. It actually causes tiny tears in the healing tissue, which can lead to nasty irritation bumps and a much longer, more frustrating healing process. Your body knows what it's doing and will heal around the jewelry just fine on its own.
Navel Piercing Aftercare Do's and Don'ts
Knowing what not to do is just as important as knowing what to do. Here’s a quick-glance table to help you keep things straight and avoid common mistakes that can derail your healing.
| Do | Don't |
|---|---|
| Use a sterile saline solution. | Use rubbing alcohol or hydrogen peroxide. |
| Use mild, fragrance-free soap (only if needed). | Use antibacterial ointments like Neosporin. |
| Use non-woven gauze or paper towels. | Use cotton balls, Q-tips, or bath towels. |
| Pat the area completely dry. | Let moisture sit around the piercing. |
| Be patient with your healing timeline! | Twist, turn, or play with your jewelry. |
Why avoid those things in the "Don't" column? Products like alcohol and peroxide are way too harsh for a healing piercing. They kill everything—the bad bacteria and the healthy new cells your body is working so hard to create. Likewise, thick ointments like Neosporin seem like a good idea, but they actually trap bacteria and block oxygen from reaching the piercing, which is a perfect recipe for infection.
Sticking to a simple saline routine is truly the safest and most effective path to a beautifully healed navel piercing.
Understanding the Navel Piercing Healing Timeline
So, you’ve nailed your cleaning routine—go you! Now comes the hardest part of any new piercing journey: being patient. A navel piercing is a serious commitment, and the full healing timeline is a marathon, not a sprint. You can expect it to take anywhere from six to twelve full months to heal completely.
That might sound like forever, but your body is doing some seriously cool work behind the scenes. Understanding what’s happening at each stage makes the long wait way less stressful and helps you recognize what's normal.
The healing process unfolds in a few distinct phases, and knowing what to expect can keep you from panicking over perfectly normal signs.
The Initial Inflammatory Phase
This is the "get to know you" stage, lasting for the first few weeks. Right after you get pierced, your body sends a rush of healing cells to the site. This is when you'll notice the most redness, swelling, and tenderness.
It might even ooze a bit of clear or whitish fluid (that’s just lymph) that forms those classic "crusties." This phase is all about your immune system kicking into gear. Don't worry—this is a good thing! It means your body is building the initial scaffolding for new tissue. Just focus on your gentle saline cleanings and try your best not to bump or snag your new jewelry.
The Proliferative Phase
After the initial drama dies down, you'll enter the proliferative phase, which can last for several months. During this time, your body gets busy rebuilding and strengthening the tissue inside the piercing channel, creating what’s called a fistula.
On the outside, your piercing will start to look much calmer. The redness will fade, swelling will disappear, and it won't feel nearly as tender. It's super tempting to think it's healed at this point, but the inside is still very delicate. This is a critical time to stick with your aftercare and avoid changing your jewelry too soon.
This simple infographic breaks down the core actions of your daily cleaning routine that support every stage of healing.
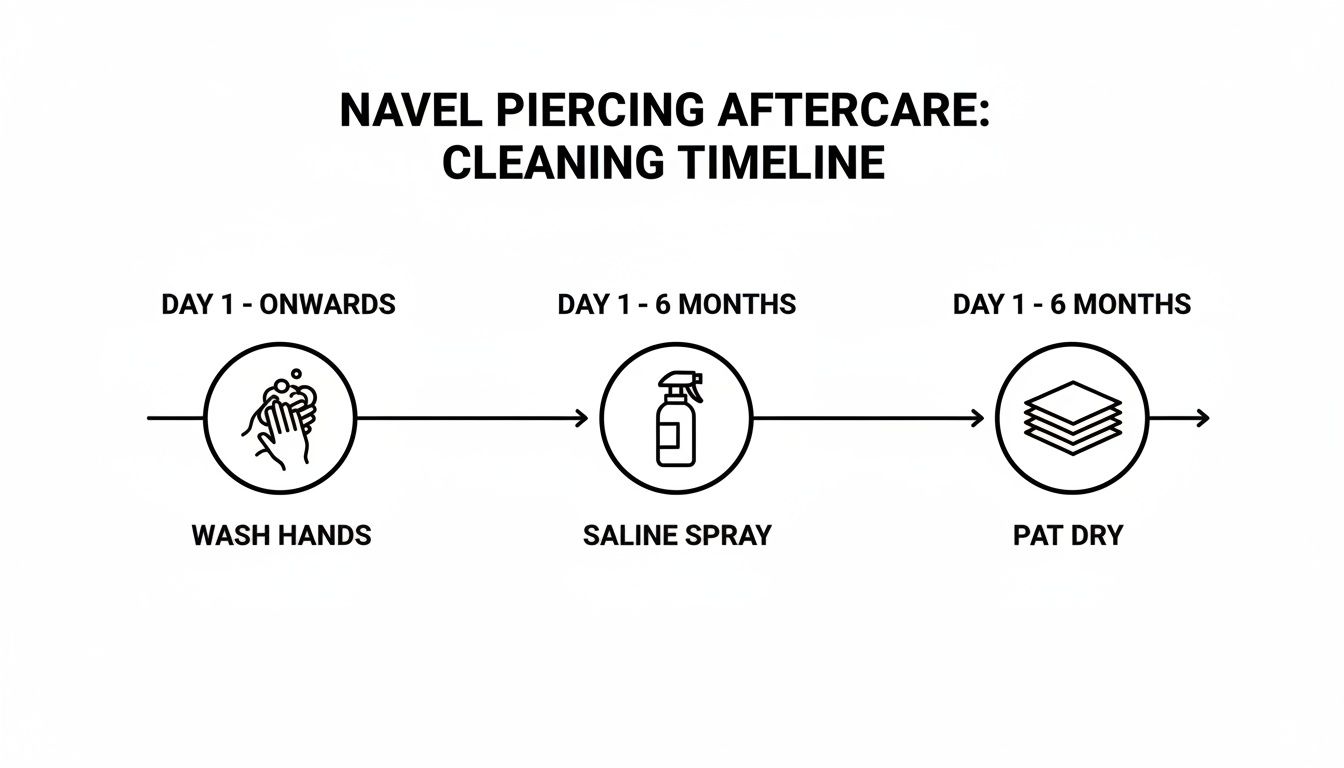
This visual really highlights that the foundation of a successful heal lies in three simple, consistent actions: clean hands, saline application, and a gentle pat dry.
Don't Rush the Process: Your piercing might look healed from the outside within a few months, but the tissue inside is still maturing. Changing your jewelry before the fistula is strong can cause irritation, tearing, and major setbacks.
The Final Maturation Phase
Welcome to the home stretch! This final phase can last from the six-month mark up to a full year or even longer for some people. During this stage, the fistula becomes strong, smooth, and fully established.
Your piercing should feel completely normal, with no pain, discharge, or tenderness, even when the jewelry is moved. Only when you've reached this point is it safe to consider swapping out your starter jewelry for all the fun styles you've been eyeing.
Remember, every body heals differently. Your friend's navel piercing might heal in seven months, while yours takes eleven—and that's totally okay! Lifestyle factors like diet, stress, and sleep all play a huge role. For more on this, explore our deeper dive into the healing times for popular piercings.
Everyday Habits for a Happy Healing Piercing
Beyond your twice-daily cleaning ritual, it's the little choices you make every day that really add up for a healing navel piercing. Mastering these simple habits is your best defense against snags, irritation, and bacteria, making the long healing journey feel like a total breeze.
Think of it this way: your cleaning routine is the direct treatment, but your daily habits are the preventative care that keeps problems from starting in the first place.

Dress for Piercing Success
Your wardrobe choices are a huge deal right now. For the next several months, your piercing’s mortal enemies are friction and pressure. Simple as that.
This means it's time to temporarily sideline your favorite high-waisted jeans, tight bodycon dresses, and anything else that puts direct pressure on your navel. Instead, embrace loose-fitting, breathable fabrics like cotton. Low-rise pants, flowy tops, and soft sweatpants are your new best friends.
This simple switch does two crucial things:
- It cuts down on snags. A loose shirt is way less likely to catch on your new jewelry than a tight, ribbed tank top.
- It lets the piercing breathe. Breathable fabrics stop moisture and sweat from getting trapped around the piercing, which is a major win for keeping bacteria away.
The Clothing Test: If you can see the indent of your belly ring through your clothes when you stand up, it's too tight. This constant pressure can lead to migration, where your body slowly pushes the jewelry closer to the surface of the skin.
Sleeping Soundly Without Snags
You spend about a third of your life sleeping, so how you do it definitely matters for your piercing. The golden rule here is to avoid sleeping on your stomach at all costs. Putting direct pressure on your navel all night long is just asking for irritation, swelling, and a much longer healing time.
If you’re a natural stomach sleeper, I know this can be tough. Try using pillows to build a little fortress around your torso to stop you from rolling over in your sleep. Some people find that hugging a large body pillow is the perfect fix.
Navigating Workouts and Physical Activity
Just because you have a new piercing doesn't mean you have to stop moving your body! You just need to be a little smarter about it. Intense core exercises like crunches or sit-ups are probably off the table for the first few weeks, as they can put a ton of strain on the area.
For any workout, wear clean, breathable clothing. Afterward, it's a great idea to do a quick saline rinse to wash away any sweat that has built up around the piercing. A sweaty environment is a perfect playground for bacteria, so cleaning up post-exercise is non-negotiable.
Why You Must Avoid Swimming
This one is a big deal, and there are absolutely no exceptions. You have to avoid submerging your healing piercing in any body of water. That includes:
- Pools: Chlorine is a harsh chemical that will seriously irritate your piercing.
- Hot Tubs: That warm, bubbly water is a five-star resort for bacteria.
- Oceans, Lakes, and Rivers: These natural bodies of water are teeming with countless types of bacteria that can easily lead to a nasty infection.
You’ll need to stay out of the water for the entire healing period, which can be up to a year. If you absolutely must go for a dip after a few months and your piercer gives you the okay, cover the piercing with a large, waterproof wound-sealing bandage. Take it off immediately after you get out of the water and clean the piercing thoroughly with saline solution.
Dealing With a Fussy Navel Piercing
Even when you follow your aftercare routine to the letter, piercings can get a little fussy sometimes. Don't panic! More often than not, what you're seeing is simple irritation, not a full-blown crisis. Learning to read the signs is your superpower for a stress-free healing journey.
Let's break down the common hiccups you might run into and figure out what your body is trying to tell you. Knowing the difference between a minor setback and a real problem will help you stay calm and in control.
Irritation vs. Infection: What’s the Difference?
This is the number one question on every new piercing owner's mind. It’s easy to get them mixed up, but they have some very distinct signs that can help you tell them apart.
Normal Irritation is usually just your piercing’s way of saying, "Hey, something is bugging me!" This could be anything from a snag on your clothes, sleeping on it funny, or even just a bit of extra friction from your high-waisted jeans.
You might notice:
- Redness that comes and goes, especially after it's been bumped.
- Mild swelling that isn't getting progressively worse.
- Tenderness when you touch the area.
- Clear or whitish fluid (this is lymph fluid) that dries into "crusties." This is totally normal and a sign of healing!
An Infection, on the other hand, is a much bigger deal that needs attention. This happens when bacteria have set up camp in your piercing, and your body is in full-on fight mode.
Look for these red flags:
- Intense, worsening pain and a throbbing sensation.
- Extreme redness and heat that radiates out from the piercing site.
- Thick, smelly discharge that’s yellow, green, or dark in color.
- Fever or chills. If you start feeling sick, it’s time to see a doctor right away.
Key Takeaway: Irritation is a temporary annoyance, while an infection is a persistent, worsening problem. If you even suspect an infection, do not remove the jewelry! This can trap the infection inside and make things worse. Instead, see a reputable piercer or a doctor for guidance.
Common Problems and How to Fix Them
Okay, so it's probably just irritation. But what's causing it, and how do you get your piercing happy again? Let's troubleshoot some of the usual suspects.
The Dreaded Irritation Bump
Those small, reddish bumps that pop up right next to the piercing hole are incredibly common. They're usually caused by a combination of moisture, pressure, or friction. The fix? Double-check that you're drying your piercing completely after every cleaning, avoid tight high-waisted pants for a while, and be extra careful not to snag it.
Allergic Reactions and Metal Sensitivity
Is your piercing itchy, flaky, or just stubbornly red no matter what you do? You might be having a reaction to the jewelry material itself. A sensitivity to nickel is super common and can completely stall your healing process. The best solution is to switch to a higher-quality, hypoallergenic material.
We always recommend starting with and sticking to materials your body will love. Consider upgrading to an implant-grade titanium belly ring or a beautiful piece made from 14k gold. These materials are biocompatible and nickel-free, making them the safest and most comfortable choice for a happy piercing.
Accidental Snags and Trauma
It happens to the best of us. You catch your belly ring on a towel, your seatbelt, or your favorite sweater. Ouch! If you snag your piercing, stay calm. Just give it a gentle clean with your saline spray and treat it with extra care for the next few days. It might be a little sore and swollen, but it should calm down quickly if you baby it.
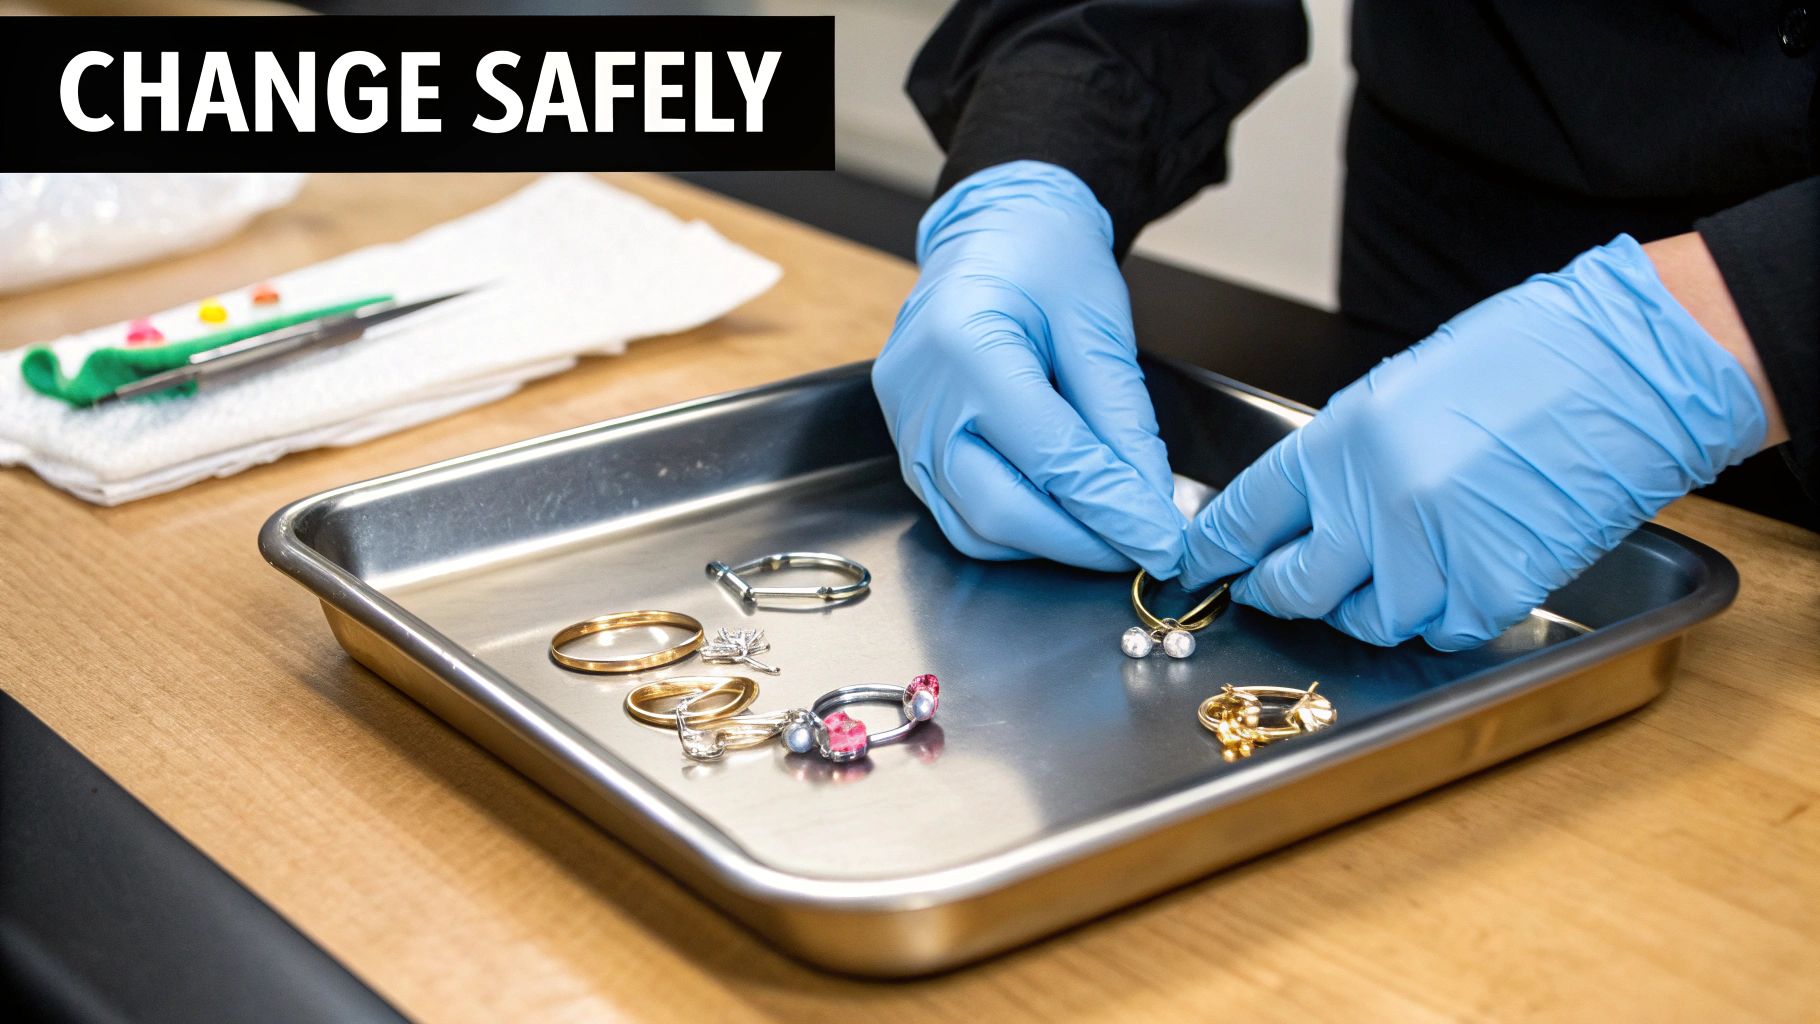
When and How to Change Your Belly Ring
Okay, let's get to the moment you've been dreaming of since day one—swapping out that starter barbell for a piece of jewelry that truly screams you. This is the ultimate payoff for all your patience and diligent aftercare, and trust me, it's super exciting!
But before you start adding gorgeous new pieces to your cart, we need to get the timing right. The absolute golden rule here is to wait until your piercing is 100% fully healed. We're talking a minimum of six months, but for a lot of people, it's closer to a full year. Be patient!
Are You Ready for a Change?
So how do you know for sure that you've crossed the healing finish line? It's pretty straightforward: a fully healed navel piercing should show zero signs of irritation. None.
Here’s what to look for:
- No Pain or Tenderness: You should be able to gently press on the area around the piercing without wincing or feeling any soreness.
- No Redness or Swelling: The skin tone around both piercing holes should look completely normal and match the rest of your stomach.
- No Discharge: You shouldn't see any fluid—not even clear lymph—or find any "crusties" forming around the jewelry.
- The Fistula is Formed: This is the healed tunnel of skin on the inside. When you gently move the jewelry, the tissue should feel smooth and stable, not raw or tender.
Rushing this is the fastest way to undo all your hard work. Trying to force new jewelry into a still-delicate piercing can tear the fragile new skin, trigger angry irritation bumps, and even introduce bacteria that could lead to a nasty infection. It's just not worth it!
Your First Jewelry Swap: A Step-by-Step Guide
Ready to make the switch? Awesome. Your first jewelry change can feel a little intimidating, but with a bit of prep, it’ll be a smooth experience. A great tip is to do this right after a warm shower when your skin is soft and relaxed.
- Wash Your Hands Thoroughly: First things first, scrub your hands with antibacterial soap for at least 20 seconds. This is non-negotiable. Clean hands keep bacteria far, far away from your piercing.
- Sanitize Your New Jewelry: That shiny new belly ring needs to be just as clean as your hands. Give it a good wipe-down with a sterile alcohol pad and let it air dry completely.
- Carefully Remove the Old Jewelry: Stand in front of a mirror so you can see what you're doing. Gently unscrew the top ball of your current barbell and slowly, carefully guide the bar out of the piercing. Don't ever force it!
- Insert the New Jewelry: Here’s a little trick of the trade: a tiny dab of water-based lubricant on the tip of the new barbell can help it glide through the fistula smoothly. Gently guide the new piece in and securely screw on the top ball.
- Give It a Final Clean: Once your new bling is in place, give the whole area a quick spritz with your sterile saline solution, just for good measure.
For your very first change, it's never a bad idea to pop back in to see your piercer. They can do the swap for you, confirm that you're fully healed, and show you exactly how to handle your jewelry safely for all future changes.
Choosing the Best Materials for Your Body
Now for the really fun part—picking out new styles! Once you're fully healed, a whole world of navel jewelry opens up. But even with a healed piercing, the material you choose still matters a lot, especially if you have sensitive skin.
- Implant-Grade Titanium: This is the gold standard for a reason. It's 100% nickel-free, super lightweight, and biocompatible, which means your body is highly unlikely to have a bad reaction to it. It's the safest bet for absolutely everyone.
- Surgical Steel: This is a popular and affordable choice. Just make sure you're getting a high-quality grade like 316L or 316LVM surgical steel. Be aware that surgical steel does contain a small amount of nickel, which can be an issue if you have a known sensitivity.
- 14k or 18k Gold: If you love the look of gold, always choose solid gold, not gold-plated. Plating can flake off over time, exposing your skin to the cheaper (and often irritating) base metals underneath.
When you take good care of it, a navel piercing can be with you for life. One detailed study found that 59.8% of women had their navel piercing for over five years, with some lasting as long as 24 years! You can read the full study about long-term piercing outcomes on pmc.ncbi.nlm.nih.gov to see just how crucial proper care is.
Ready to find that perfect piece for your grand reveal? At BodyCandy, we have a massive collection of high-quality, stunning belly rings in materials your body will love. Explore our styles and get ready to show off your beautifully healed piercing! Shop our full collection of belly rings today!