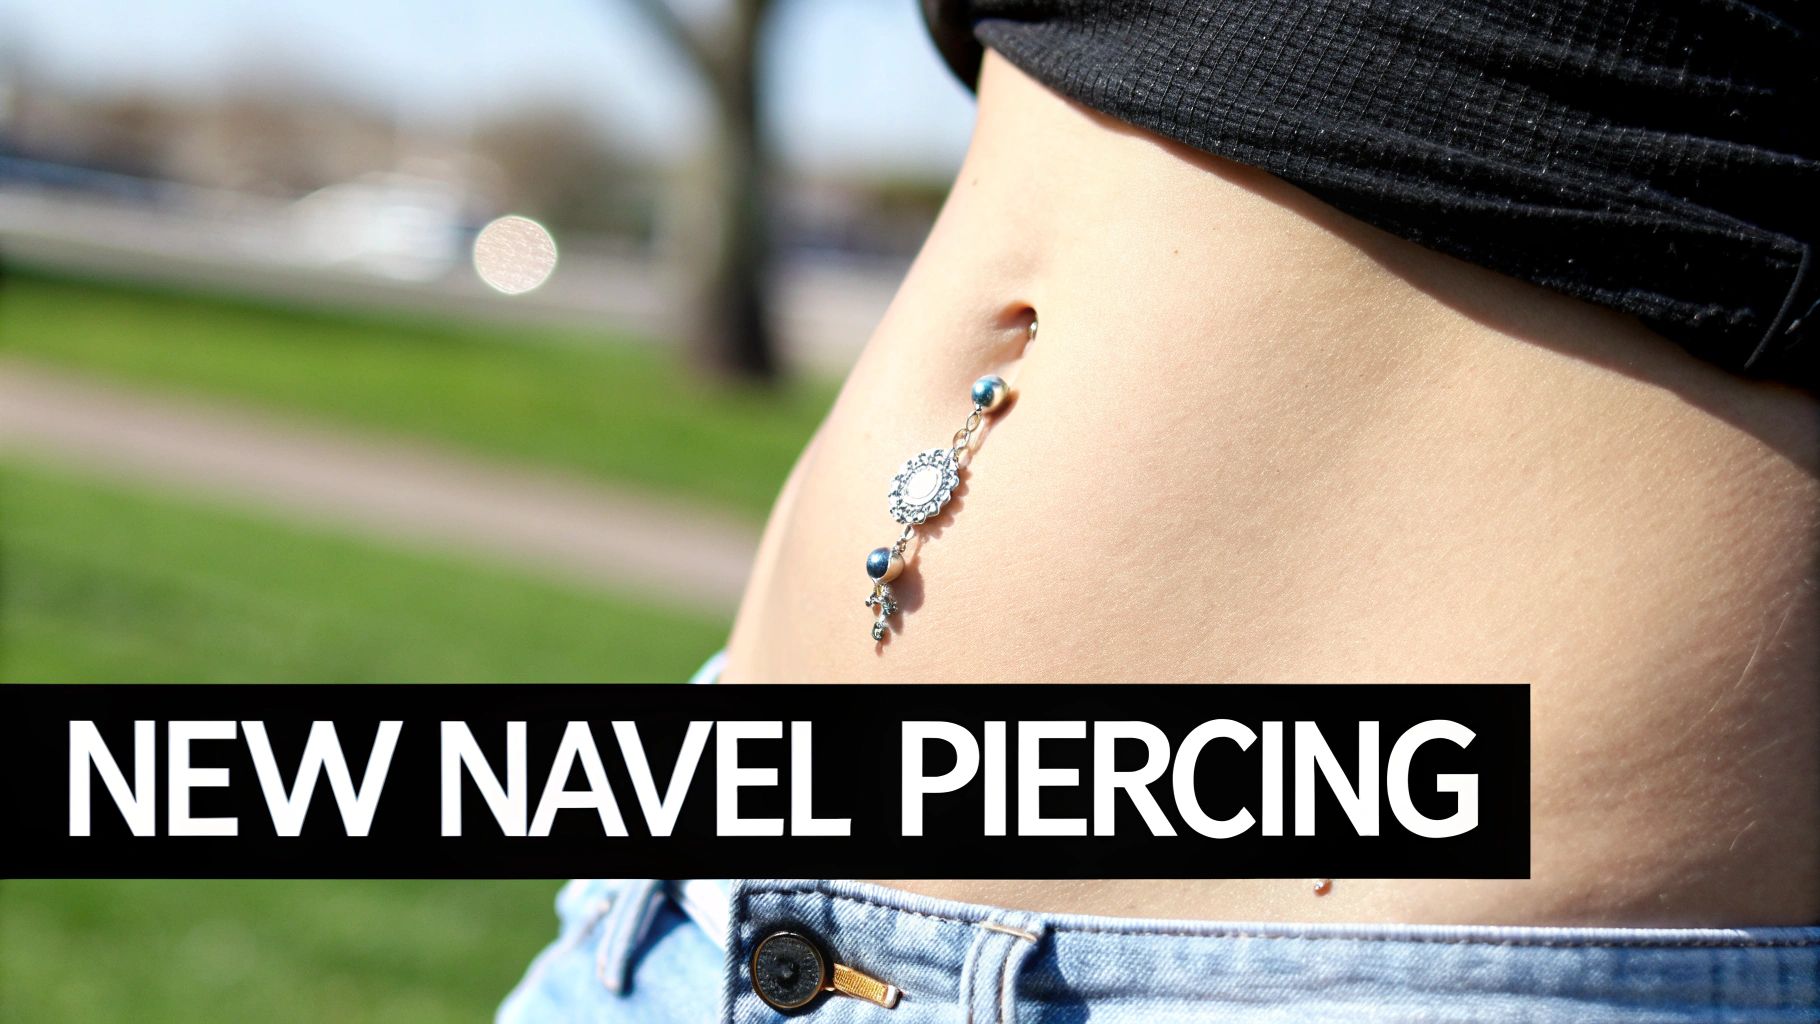
So you did it! That amazing belly button piercing you've been dreaming of is finally yours. Yasss! Now, the key to showing it off for years starts right now with proper aftercare. Seriously, good aftercare is what separates a beautifully healed piercing from a total drama queen.
Don't sweat it, though. This guide is your new BFF for a happy, healthy navel piercing that heals like a dream.
Your Navel Piercing Journey Begins Now
The excitement is REAL, and you’re probably already browsing all the stunning BodyCandy belly rings you'll wear. But before you start adding to your cart, let’s talk about the most important part of your new piercing: the first few days and understanding why your body is unique.
This isn't just about cleaning; it's about setting yourself up for success from day one. Think of this as your personal cheat sheet. We'll skip the confusing jargon and get straight to what works, so you can get back to planning your new look.
Why Your Anatomy Is a Big Deal
Ever wondered why your piercer was so focused on the shape of your navel? It’s because the right anatomy is everything for a successful piercing. Not everyone has that ideal "innie" with a distinct ridge of skin for the jewelry to sit comfortably.
This is exactly why a good piercer is picky.
Did you know that true navel piercings can be surprisingly uncommon? For example, one busy studio reported that navel piercings made up only 1% of their total piercings in a year. It's not because they aren't popular; it's because responsible piercers only perform them on anatomy that can support healing and avoid nasty issues like migration or rejection.
Your piercer chose your placement specifically for you, considering how your body moves. This ensures your jewelry looks amazing whether you're standing, sitting, or dancing. For a deeper dive, check out our guide on how to prepare for your first-time piercing.
Key Takeaway: Your belly button's unique shape is the most important factor in a successful piercing. Trust your piercer's judgment—they chose the perfect spot to ensure your piercing heals beautifully and lasts a lifetime.
Nailing Your Daily Cleaning Ritual
Okay, let's dive into the most important part of your new piercing journey: the daily cleaning. This is the one thing you absolutely can't skip. It’s your best defense against irritation and nasty bacteria, making sure your piercing heals beautifully so you can show it off.
Think of this as a quick, twice-daily self-care moment. It’s not a chore; it’s the secret to confidently rocking that stunning BodyCandy jewelry you’ve been eyeing. The whole point is to be gentle and consistent.
Picking Your Perfect Cleaning Solution
First things first, forget everything you've heard about using harsh soaps, alcohol, or hydrogen peroxide. Those are way too aggressive for a fresh piercing. They can seriously irritate the delicate, healing tissue and actually make the healing process take longer. No thanks!
You really only need one of these two super simple options:
- Sterile Saline Spray: Honestly, this is the easiest and most recommended method. A pre-packaged sterile saline solution is perfectly balanced, totally sterile, and ready to go. No mixing, no fuss.
- Sea Salt Soak (DIY): If you can't get a saline spray, you can mix your own. Just dissolve 1/4 teaspoon of non-iodized sea salt into one cup (8 ounces) of warm, distilled or bottled water. Make sure the salt is completely dissolved before you use it.
Anything more complicated is just overkill. For a deep dive on a piercer-approved option, check out why H2Ocean aftercare is a favorite among piercing pros.
The Foolproof Twice-Daily Routine
Consistency is everything. Cleaning your piercing twice a day—once in the morning and once at night—is the magic number. Over-cleaning can be just as bad as not cleaning it enough, so stick to the schedule.
Before you do anything, always wash your hands thoroughly with antibacterial soap. Don't even think about touching your piercing without clean hands!
Next, grab your saline and liberally spray it directly onto the top and bottom of your piercing. Let the solution really flush the area. This helps soften and rinse away any of those little "crusties" (which is just dried lymph fluid and totally normal) without you having to pick at them.
After spraying, gently pat the area dry with a clean, disposable paper towel. You'll want to avoid fabric towels for now, as they can harbor bacteria and snag on your new jewelry. And that's it! Easy, right?
To keep things simple, here's a quick cheat sheet for your cleaning routine.
Belly Piercing Cleaning Dos and Don'ts
| Do ✅ | Don't ❌ |
|---|---|
| Wash your hands before touching your piercing. | Twist or turn your jewelry. |
| Use sterile saline spray or a proper sea salt solution. | Use alcohol, hydrogen peroxide, or harsh soaps. |
| Clean twice daily—no more, no less. | Submerge your piercing in pools or hot tubs. |
| Pat the area dry with a clean paper towel. | Wear tight, high-waisted clothing that rubs the area. |
| Be patient! Healing takes time. | Pick at or remove crusties with your fingers. |
Sticking to these simple guidelines will make a world of difference in your healing journey.
The Golden Rule: Hands off! The single biggest mistake people make is twisting, turning, or just fiddling with their jewelry. Your body is smart and knows how to heal. Moving the jewelry around just invites bacteria in and irritates the piercing.
Navigating the Navel Piercing Healing Timeline
When it comes to healing a new belly button piercing, patience is everything. Seriously. This isn't a piercing that heals in a few weeks; you're looking at a journey that typically takes anywhere from six months to a full year. Understanding what's normal (and what's not!) will save you a ton of stress.
Think of the healing process in stages. Knowing what to expect at each milestone helps you relax and spot any potential issues before they become real problems. It's all about giving your body the time it needs to build a strong, healthy little tunnel for your awesome new jewelry.
Here’s a quick overview of what you can generally expect as your piercing heals.
Healing Timeline and Key Milestones
This table breaks down the typical stages of healing, from the initial tenderness to the point where you can finally (and safely!) swap out your jewelry.
| Timeframe | What to Expect | Care Focus |
|---|---|---|
| Week 1-4 | Redness, swelling, tenderness, and some clear or whitish fluid (lymph) are all normal. You'll also see "crusties" forming around the jewelry. | Gentle cleaning 2 times a day with saline spray. Avoid friction from clothing and any twisting or turning of the jewelry. |
| Month 2-4 | The piercing will look and feel much better. Redness and swelling should be mostly gone. It might seem healed on the outside, but it's still very fragile internally. | Continue daily cleanings. This is the "don't touch it!" phase. Resist the urge to change the jewelry, as the fistula (the piercing channel) is still forming. |
| Month 5-9 | The piercing should be comfortable with minimal to no discharge. It's starting to feel like a part of you! Some occasional flare-ups or irritation can still happen. | You can likely reduce cleaning to once a day. Still, be mindful of snags and pressure. Check with your piercer before considering a jewelry change. |
| Month 9-12+ | For most people, the piercing is now fully healed. The fistula is strong and stable. You can now safely change your jewelry. | Continue to clean the piercing and jewelry regularly (a few times a week) to keep it healthy and fresh. |
Remember, this is just a general guide. Everyone's body heals at its own pace, so don't worry if yours takes a little longer.
What to Expect in the Early Weeks
Those first few weeks are when your body is in major repair mode. It's totally normal to see some redness, a bit of swelling, and maybe even some slight bruising right after you get pierced.
Don't be surprised if you see a clear or whitish fluid, too. This is called lymph, and it’s a good sign that your body is doing its healing thing. It often dries into little "crusties" around the jewelry. This is not pus, so don't panic! Just let your saline spray gently wash them away.
Keeping that cleaning routine simple is your best bet.
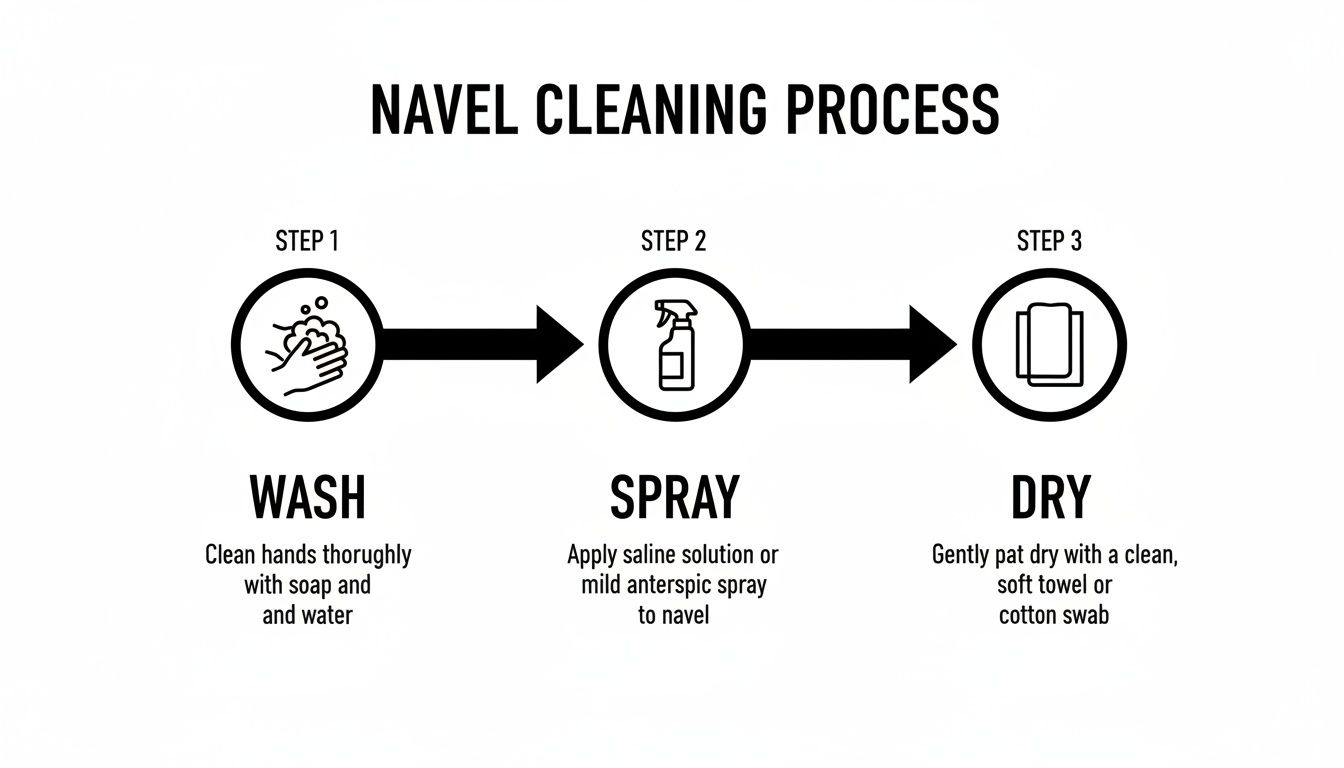
This visual just reinforces how straightforward aftercare should be. Wash, spray, dry. There’s no need for complicated steps or harsh products that can do more harm than good.
The Long Haul: Months Two to Six
After that initial phase, your piercing will start to look and feel a lot better. The angry redness and swelling should have calmed down significantly. It might even trick you into thinking it’s fully healed from the outside. Don't be fooled!
Healer's Tip: Piercings heal from the outside in. Even if the surface looks perfect, the tissue on the inside is still super delicate and working on building strength. This is the most crucial time to leave it alone.
Changing your starter jewelry too soon is one of the biggest mistakes you can make. That long bar your piercer used is there for a reason—to accommodate any swelling. It’s essential to keep it in for the entire initial healing period.
Trying to force in a new, shorter bar from your BodyCandy wishlist before it’s ready can cause major irritation and set you back weeks in healing. So, resist the temptation and let your body work its magic.
Lifestyle Adjustments for a Happy Piercing
Great aftercare is more than just a daily saline spray. How you live your life for the next few months can seriously make or break your healing journey. A few small tweaks to your daily routine can protect your new piercing from snags, pressure, and irritation.
Think of your new piercing as a delicate little wound that's trying its best to heal. Your job is to create the perfect, stress-free environment for it to do just that.
Your Wardrobe Is Your Piercing's Best Friend (or Worst Enemy)
For the next few months, your clothing choices really, really matter. Anything that rubs, presses, or snags on your new belly ring is officially off-limits. Consider this your official excuse to live in comfy, breathable clothes!
Your new closet staples should be:
- Loose-fitting tops and dresses: Anything that flows away from your midsection is your best bet. Think oversized t-shirts, breezy blouses, and A-line dresses.
- Low-rise pants and skirts: High-waisted everything is a major no-go for now. That trendy waistband can sit right on top of your piercing, causing constant friction.
- Breathable fabrics: Stick with cotton and other natural materials. They let air circulate around the piercing, which is crucial for keeping the area happy and healthy.
Basically, if it's tight around your stomach, shove it to the back of the closet for a bit. Protecting your piercing from that constant rubbing is one of the most important things you can do for it.
Pro Tip: When you're trying on clothes, actually move around in them. Sit down, bend over, and see if the fabric rubs or catches on your jewelry. This simple little test can save you from a world of hurt.
Navigating Daily Activities and Exercise
Life doesn't just stop for a new piercing, but you will need to be a bit more mindful during certain activities. The main goal is always to keep the area clean, dry, and free from any unwanted bacteria.
This means you have to put swimming on hold for a while. Pools, hot tubs, lakes, and oceans are basically giant petri dishes full of bacteria. You'll need to avoid submerging your belly button for the entire healing period, which can be anywhere from 6 months to a full year. If a beach trip is on your horizon, you can learn more about how to rock bikinis and belly rings safely once you're fully healed up.
When it comes to exercise, sweat is the main enemy. After any workout, make sure you rinse your piercing with water and gently pat it dry, or just do your full saline clean. For sleeping, try your best to stay off your stomach to avoid putting pressure on the piercing all night long.
Troubleshooting Common Piercing Problems
Even when you're doing everything right, your new piercing can hit a bump in the road. Don't panic! An unexpected bit of swelling or a mysterious little bump is pretty common, and knowing how to handle it is key.
Sometimes, a simple snag on your jeans or accidentally sleeping on your stomach is all it takes to make it angry. This section is your go-to guide for figuring out what's normal and what needs a little extra attention.

Irritation vs. Infection: Knowing the Difference
First things first, let's clear up the biggest source of panic: telling the difference between a simple irritation and a full-blown infection. They can look similar at first, but the signs are worlds apart.
An irritated piercing is usually just annoyed. It might be:
- A little red or swollen, especially after you've snagged it.
- Sporting a small bump (an "irritation bump") right near one of the piercing holes.
- Leaking a clear or whitish fluid (this is just lymph fluid) that dries into "crusties."
This is your piercing’s way of saying, "Hey, back off!" It’s almost always caused by physical trauma like a bump, too much pressure from clothing, or trapping moisture.
An infected piercing, on the other hand, is a much bigger deal and needs immediate attention. The signs are way more severe.
Red Flag Alert: An infection isn’t just a little redness; it’s a serious medical issue. If you're dealing with intense, throbbing pain, thick yellow or green pus, a foul odor, or you feel feverish, it’s time to stop troubleshooting and see a doctor ASAP.
Soothing an Angry Piercing
If you've ruled out an infection and are just dealing with some piercing drama, the fix is usually pretty straightforward. The first step is to play detective and find the culprit. Did you wear those super high-waisted jeans? Catch it with a loofah in the shower? Finding the source of the problem is half the battle.
Once you know what's bothering it, you can take steps to fix it. This usually just means getting back to basics with your aftercare and removing whatever is causing the stress.
- Stick to your saline spray: This isn't the time to slack on your twice-daily cleanings. A gentle saline spray will soothe the area and flush out any irritants.
- Give it space: Switch back to loose, breathable clothing. Be extra mindful not to put any pressure on the piercing.
- Don't touch it! It’s so tempting to poke and prod at a bump, but seriously, this only makes it worse. Hands off!
Most of the time, minor irritations calm right down within a few days once the cause is gone. It's just your body's way of asking for a little more TLC.
When to Call Your Piercer
While you can handle many issues at home, you should never, ever hesitate to reach out to a professional. Your piercer is an expert who has truly seen it all before.
You should definitely give your piercer a call if:
- The irritation isn't getting better after a few days.
- You're suspecting your jewelry is the problem (maybe it's too short or you're reacting to the material).
- You’re just not sure what’s going on and need a professional opinion to ease your mind.
Remember, trying to self-diagnose can be tricky. A quick visit to your piercer can give you peace of mind and get your piercing on its way to showing off some stunning new BodyCandy jewelry.
Your Burning Questions Answered
We get it—even after reading a full guide, you've probably still got a few questions buzzing around in your head. From changing your jewelry for the first time to navigating big life events, let's tackle the most common questions we hear.
Think of this as your go-to FAQ for all those "but what if..." moments.
When Can I Finally Change My Jewelry?
This is the number one question on everyone's mind! You're dying to swap out that plain starter barbell for something with a little more sparkle.
The honest answer? You absolutely have to wait until your piercing is 100% fully healed. For a navel piercing, this can take anywhere from six months to a full year.
Changing it too early is a recipe for disaster. It can tear the delicate new skin forming inside, introduce nasty bacteria, and set your healing time back by months. We know it's a bummer, but patience is your best friend here.
How Do I Know It's Really Healed?
A healed piercing is more than just looking good on the outside; the real magic has to happen on the inside, too.
You'll know you're finally ready for a jewelry swap when:
- There's absolutely no redness, swelling, or tenderness.
- You haven't seen any of those yellowish "crusties" or fluid for several weeks.
- The jewelry feels totally comfortable and moves freely without any pinching or pain.
- It's been at least six to nine months since you were first pierced.
When in doubt, the best move is to just pop back into your piercer’s studio. They can take a quick look and give you the professional green light to start exploring all the amazing belly rings you've been dreaming of.
What About Pregnancy and Piercings?
So, you’ve got a little one on the way—congrats! A common worry is whether you'll have to say goodbye to your beloved navel piercing. The good news is, you probably don't have to.
As your belly grows, your standard metal barbell is going to get uncomfortable. Instead of taking it out and risking it closing up, you can switch to a long, flexible pregnancy belly ring. These are usually made from materials like PTFE or BioPlast, which are super bendy and can be trimmed to the perfect length for your changing body.
This keeps your piercing open and comfortable all the way through your pregnancy. After giving birth, give your body about three months to settle down before switching back to your regular metal jewelry.
A navel piercing is a long-term commitment, but one people cherish. One study found that 91.4% of people wore their navel piercing for over five years without major issues. Proper aftercare really pays off! You can learn more about piercing safety from the Association of Professional Piercers.
Do I Have to Take It Out for Sports or Surgery?
For most sports, you can definitely keep your piercing in, but it’s a smart idea to protect it. Taping it down with a breathable bandage can prevent it from getting snagged.
When it comes to medical procedures like an MRI or surgery, you will almost always be asked to remove all metal jewelry. In this case, ask your piercer about getting a non-metallic retainer. A simple glass or plastic retainer will keep your piercing from closing up while you're getting your procedure done. Just be sure to get your favorite jewelry back in as soon as your doctor gives you the all-clear!
Ready to find your new look? Your piercing journey has just begun, and the best part is right around the corner. Once you're healed, it's time to treat yourself! Shop the full collection of belly rings now!