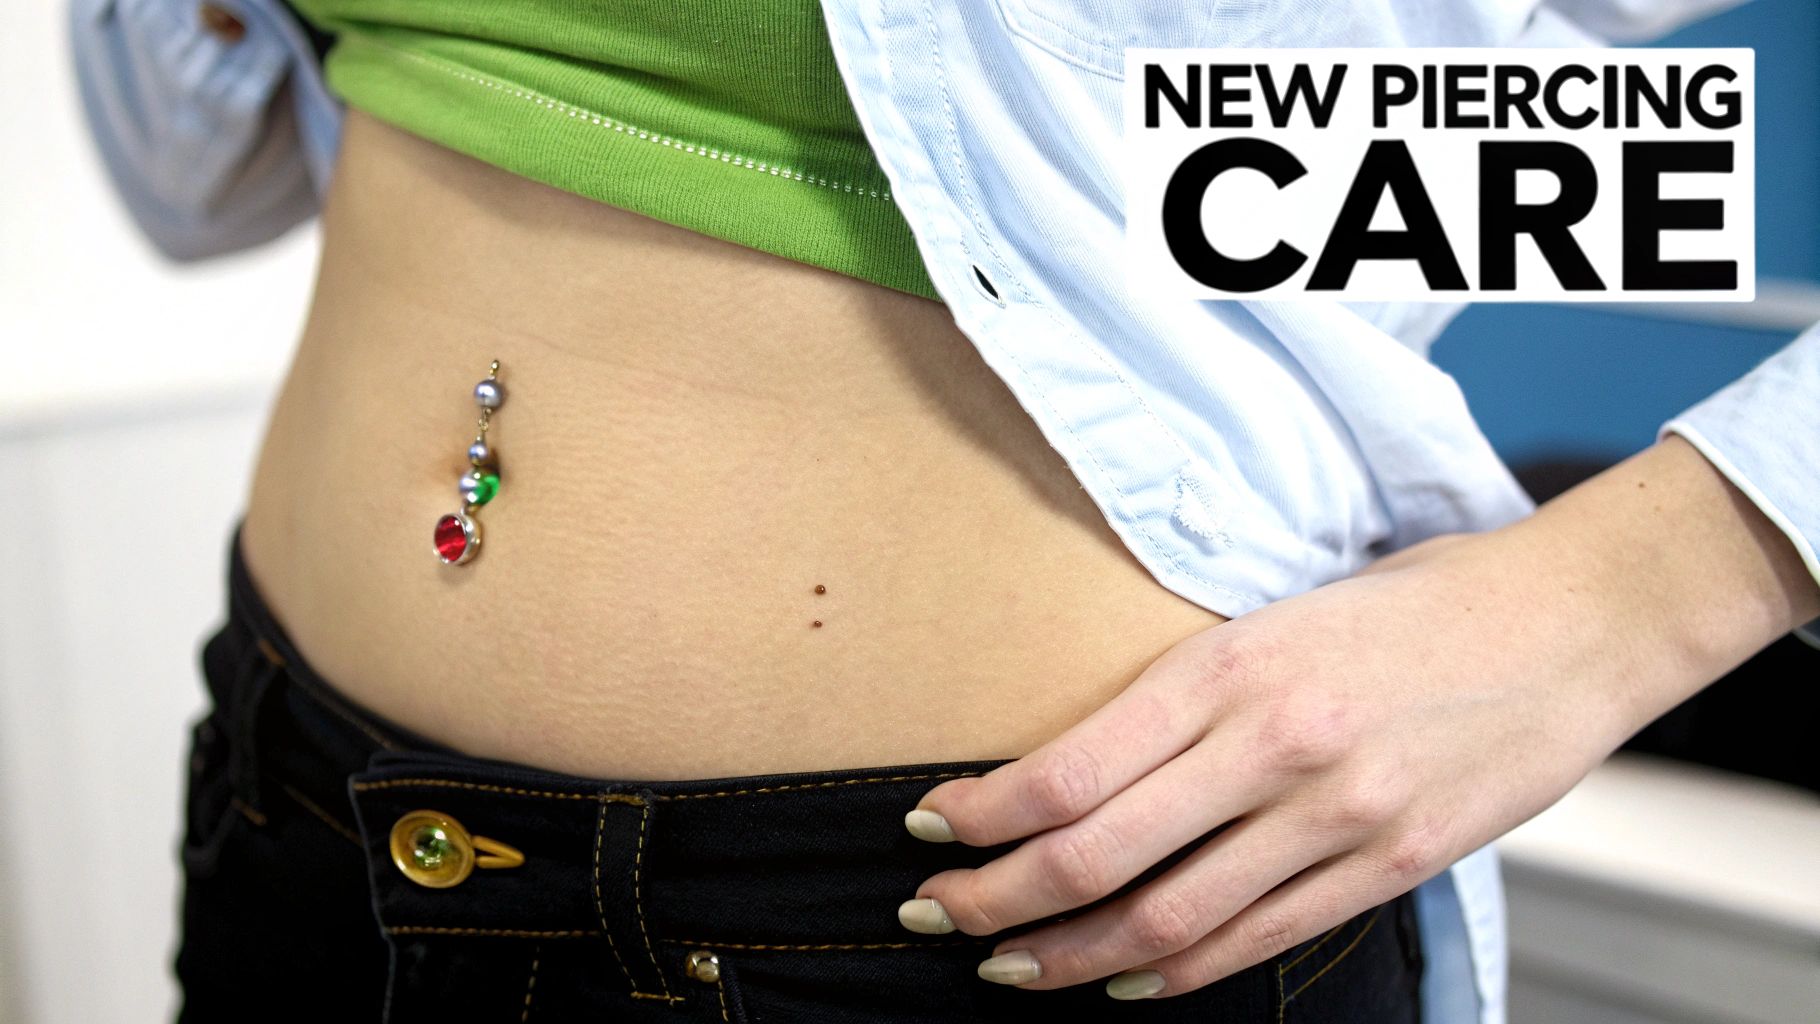
So, you finally did it! Welcome to the belly piercing club. That awesome new navel jewelry looks fantastic, but right now, it's a fresh wound that needs some serious TLC. Your aftercare journey starts the second you walk out of the piercing studio, and these first 48 hours are the most critical.
Your main job is deceptively simple: keep it clean, dry, and leave it alone. This initial period is all about protecting your piercing from irritation, snags, and bacteria to set the stage for a smooth, easy healing process.
What To Expect In The First 48 Hours
Don't be alarmed if the area feels tender, looks a little red, or is slightly swollen. This is your body's totally normal and healthy reaction to being pierced.
You might even see a tiny bit of bleeding or some clear, yellowish fluid (this is just lymph fluid, a good sign!). Your body is just kicking off its natural healing response. The key right now is to manage your expectations and focus on creating the perfect, hands-off environment for your new piercing to thrive.
Hands Off Your New Bling
This is the golden rule of fresh piercing care: do not touch it!
Seriously, your hands are covered in germs. Every time you poke, prod, or fiddle with your new jewelry, you're basically inviting bacteria directly into an open wound. This also means no twisting, turning, or sliding the jewelry back and forth. Old advice used to suggest this, but we now know it just causes damage.
Your piercer used a longer barbell for a reason—to leave room for swelling. Twisting it only irritates the delicate new tissue (called a fistula) that's trying to form inside the piercing channel. Just let it be. The only time your fingers should get near it is when you're cleaning it, and only after you've thoroughly washed your hands.
Protect Your Piercing From Snags
For the next couple of days (and really, the next few months), your new belly ring's biggest enemies are friction and getting snagged on things. You’ll need to be a little more mindful of what you wear and how you move.
- Clothing Choices: Now is the time for low-rise pants, soft joggers, and loose-fitting tops. High-waisted jeans, tight leggings, chunky belts, and scratchy fabrics are a definite no-go for now. They'll rub against the jewelry and cause some major irritation.
- Sleeping Position: Try to sleep on your back or side. Sleeping on your stomach puts direct pressure on the piercing, which can be pretty painful and definitely slows down healing.
- Daily Activities: Be extra careful with towels after you shower—pat the area dry, don't rub. Watch out for seatbelts, loofahs, and even your own hands during a workout. Anything that could potentially catch on the jewelry is a risk you want to avoid.
The goal for these first two days is to be as gentle as possible. Think of your piercing as a delicate project your body is working on—your job is to protect the construction zone from any outside interference.
By being extra cautious right from the start, you're getting ahead of common problems like those dreaded irritation bumps and a healing time that seems to drag on forever. You've got this! Just be patient and let your body do its thing. Next up, we’ll dive into establishing a solid cleaning routine.
Your Daily Piercing Cleaning Routine
Alright, let's get into the most critical part of healing your new belly button piercing: the daily cleaning routine. Nailing this is the secret sauce for a happy, healthy piercing that heals up looking amazing. Don't think of it as a chore—it's more like a simple, five-minute ritual to take care of your new bling.
The whole point isn't to nuke the area with harsh chemicals. It's simply to keep things clean so your body can work its healing magic without any drama. Consistency is everything here. A gentle cleaning twice a day will do way more for you than a random, aggressive scrub-down.
What To Use And What To Avoid
When it comes to cleaning supplies, simple is always better. You really only need one thing to do the job right.
Your new best friend is a sterile saline solution. This is just a medical-grade saltwater spray that's perfectly balanced to match your body's natural fluids, which makes it incredibly gentle and effective. It's perfect for washing away debris and bacteria without drying out or bugging that delicate healing tissue. You can grab a can of sterile saline wound wash at just about any pharmacy.
Now for the "do not use" list. This is just as important.
- Harsh Soaps: Put down the antibacterial soap, Dial, and scented body washes. They are way too aggressive, stripping the good bacteria and causing major dryness and irritation.
- Alcohol and Hydrogen Peroxide: These are old-school piercing no-nos for good reason. They're incredibly damaging to new, healing cells and will seriously set back your recovery time.
- Ointments: Things like Neosporin might seem helpful, but they're not meant for puncture wounds. They create a suffocating barrier that traps moisture and bacteria right where you don't want it.
Your piercing is a wound that needs to heal from the inside out. The best thing you can do is support that natural process with a simple saline solution, not fight it with aggressive chemicals.
The Perfect Cleaning Technique
Ready to make this a super easy habit? Here’s how to get a perfect clean, every single time. Plan on doing this twice a day—once when you get up and once before bed.
First things first, and this is non-negotiable: wash your hands thoroughly with soap and water before you even think about touching your piercing. You don't want to introduce any outside germs to the party.
Once your hands are clean, give the top and bottom of your piercing a generous spray with the sterile saline solution. You really want to saturate the area to help soften up any "crusties" (that dried lymph fluid we talked about). Don't try to pick them off! Just let the saline do its thing.
After letting the solution sit for a minute or so, you can take a clean piece of non-woven gauze or a paper towel to gently wipe away any softened crust. Try to avoid using cotton balls or Q-tips, since their little fibers can get tangled in the jewelry and cause a world of irritation.
To make your daily routine even easier, here’s a simple checklist to keep you on track. Following these steps consistently is the key to a smooth healing journey.
Daily Aftercare Checklist For A Happy Piercing
| Action Item | Frequency | Why It's Important |
|---|---|---|
| Wash Hands Thoroughly | Before every cleaning | Prevents transferring bacteria to the open wound. |
| Spray with Saline Solution | 2x per day | Gently cleanses, removes debris, and promotes healing. |
| Gently Wipe Away Debris | 2x per day | Removes "crusties" without causing irritation. |
| Pat the Area Completely Dry | After every cleaning | A dry environment discourages bacterial growth. |
Sticking to this simple checklist will help you build a solid routine that supports your body's natural healing process from day one.
The Importance Of Keeping It Dry
After you've cleaned your piercing, the final step is a big one: drying the area completely. A damp piercing can become a breeding ground for bacteria, leading to some nasty irritation bumps or even an infection.
Gently pat the area dry with a fresh, disposable paper towel. Your regular bath towel is a no-go, as towels can harbor bacteria and snag your new jewelry—ouch! For an extra-thorough dry, you can even use a hairdryer on the cool setting, holding it a few inches away.
Is Over-Cleaning A Real Thing?
Oh, absolutely. It might seem logical that cleaning more is better, but it's actually the opposite. Cleaning more than twice a day can strip your skin of its natural oils, leading to dryness, redness, and a very unhappy piercing. Your body is smart, so trust the process and stick to the twice-a-day routine unless your piercer tells you otherwise.
For a deeper dive into the best aftercare products on the market, you can learn more about the benefits of specialized solutions like H2Ocean in our detailed guide. Understanding why the right product is a game-changer can make all the difference.
Ultimately, a successful healing journey comes down to being gentle, consistent, and patient. You've got this!
Understanding The Navel Piercing Healing Timeline
So, let's talk about the one thing that trips up almost everyone with a new belly button piercing: the healing time. You’re probably beyond excited to swap out that plain starter bar for some dazzling, dangly jewelry, but this is exactly where patience becomes your most important aftercare tool. A navel piercing is a marathon, not a sprint. We're talking anywhere from six months to a full year to heal completely.
That might sound like forever, but your body is doing some seriously complex work on the inside. It's building a brand-new tunnel of skin, called a fistula, right through your navel. Understanding what’s happening during each stage makes the long wait a lot more manageable and helps you know the difference between what's normal and what's a red flag. Honestly, rushing this process is the number one reason people end up with irritation bumps or other setbacks.
This visual guide breaks down the simple daily steps you'll be following throughout the entire healing journey.
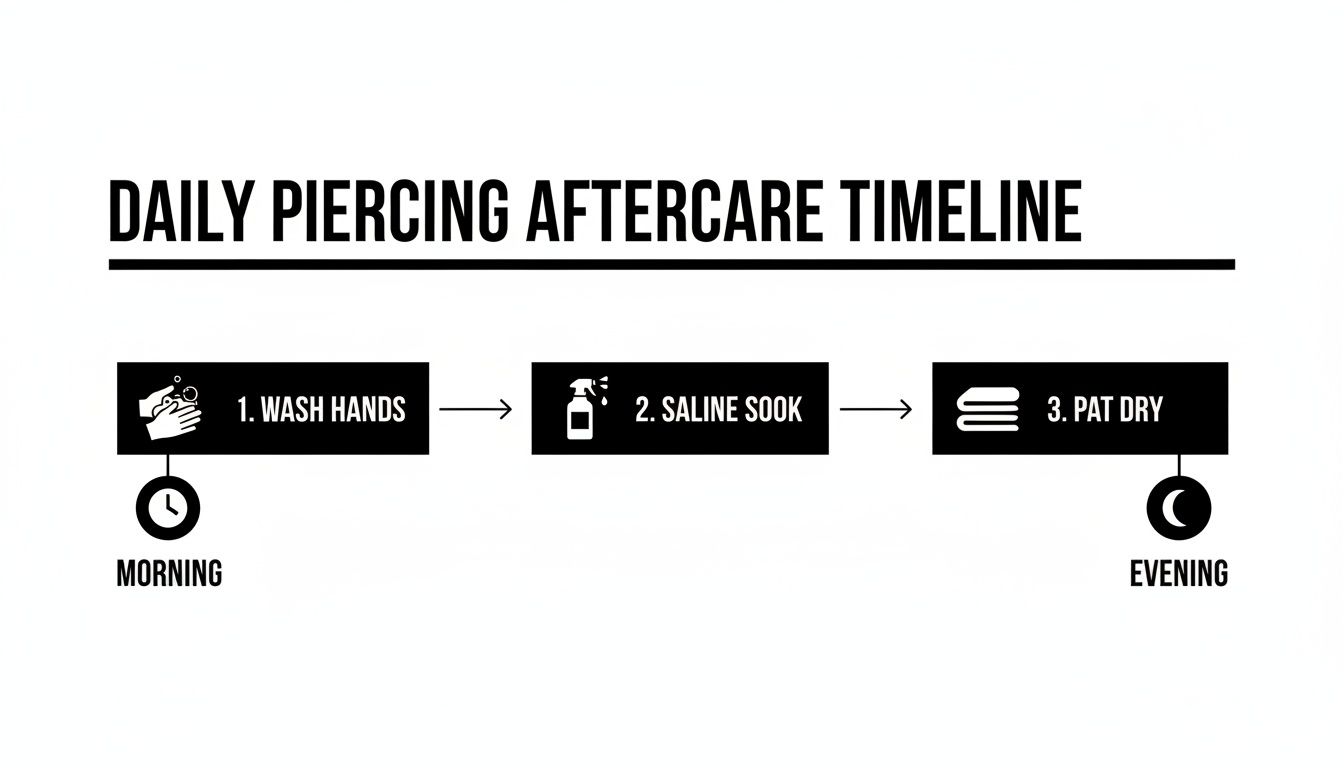
As you can see, consistency is everything. A simple, faithful routine of washing your hands, doing a saline soak, and gently patting the area dry twice a day is what sets you up for success.
Weeks 1-4: The Inflammatory Stage
Welcome to the start of your piercing journey! For the first month or so, your new piercing is basically an open wound, and your body's first responders are on the scene. It's completely normal to see some redness, swelling, and tenderness during this time.
You'll also notice some clear or whitish-yellow fluid that dries into "crusties" around your jewelry. Don't panic, and whatever you do, don't pick at them! This is just lymph fluid, which is a great sign that your immune system is working hard to clean the site and start rebuilding tissue. Your only job right now is to be gentle, stick to your cleaning schedule, and protect it from getting snagged on clothes.
Weeks 4-16: The Proliferative Stage
This is when the real construction project begins. Once that initial inflammation calms down, your body gets busy building that new skin tunnel. During this phase, which can last for several months, you'll see the redness and swelling go way down. From the outside, the piercing might even look pretty healed. Don't be fooled—the inside is still incredibly delicate.
This is a tricky period because feeling better can tempt you into slacking on your aftercare or trying to change the jewelry way too soon. This is a huge mistake! The new tissue is fragile and can be damaged easily, which would send you right back to square one with an angry, irritated piercing. Keep up with your saline soaks and avoid any friction from tight, high-waisted clothing.
Even when your piercing looks and feels good on the surface, remember that healing happens from the outside in. The internal tissue is the very last part to strengthen, so patience during this stage is absolutely critical for a healthy, long-lasting piercing.
Month 4 to 1 Year: The Maturation Stage
You're in the home stretch! This final and longest phase is all about the fistula maturing and strengthening. The tissue inside the piercing channel becomes much more robust, and any discharge should have stopped completely. The piercing site will look calm, and the skin color around it should return to normal.
Only when you've reached the end of this stage is your piercing considered fully healed. This is when you can finally—and safely—start experimenting with new jewelry. Changing it any sooner can tear that delicate fistula, introducing bacteria and leading to some painful complications.
For a great comparison of how this timeline stacks up against other piercings, take a look at our guide on healing times for popular piercings.
Belly button piercings have a pretty cool history, from their peak in the '90s and 2000s to their major comeback today. They've always been a symbol of confidence and self-expression, now being rocked by a whole new generation. Understanding why this piercing is so iconic helps you appreciate why giving it the proper time to heal is essential for showing off your style safely.
How To Tell If Your Piercing Is Irritated Or Infected
Okay, let's talk about that moment of panic every new piercing owner has. You wake up, look down at your belly button, and see some redness. Your mind immediately jumps to the worst-case scenario: INFECTION!
Before you spiral, take a deep breath. While it’s smart to be vigilant, most of the time, what you’re seeing is just simple irritation. It happens to the best of us.
Knowing the difference between an angry piercing and a truly infected one is a superpower. It saves you from unnecessary stress and helps you take the right steps to get your healing journey back on track. Let's break down the clues your body is giving you so you can become a pro at piercing first aid.
Common Signs Of Irritation
Think of irritation as your piercing throwing a temporary tantrum. It’s not happy about something, but it’s usually a problem you can solve pretty easily. Most irritation is caused by physical trauma (like a snag), friction from clothing, or a reaction to a cleaning product you're using.
Here’s what a simply irritated piercing usually looks like:
- Mild Redness: The skin right around the piercing holes might look pink or slightly red. This often happens after cleaning or if you accidentally bump it.
- Soreness or Tenderness: It might feel a bit achy, like a bruise, particularly when you move or if your high-waisted jeans are rubbing against it all day.
- Itching: A little bit of itching can be a normal part of the healing process as new skin cells form around the jewelry.
- Clear or White Fluid: Seeing some clear or slightly whitish fluid that dries into "crusties" is 100% normal. This is just lymph fluid, not pus.
Irritation is your piercing’s way of saying, "Hey, be more careful!" It’s a sign to reassess your habits. Are you wearing tight clothing? Did you accidentally sleep on it? Going back to basics with your caring for belly button piercing routine is often all it takes to calm things down.
Don't mistake normal healing signs for a crisis. A little redness and some crusties are part of the deal. The key is to pay attention to whether the symptoms are getting progressively worse over time.
Red Flags For A True Infection
Now, let's get serious. An infection is a whole different beast. It happens when bacteria get into the wound and start to multiply, and you absolutely cannot just ignore it and hope it goes away.
An infection will feel and look dramatically different from simple irritation. The signs are much more intense and often come on quickly.
Here are the major warning signs that you're dealing with a legitimate infection:
- Intense, Throbbing Pain: This isn't just soreness. It's a deep, persistent, and often throbbing pain that gets worse, not better.
- Extreme Redness and Swelling: The redness will likely spread far beyond the piercing holes. The whole area will be noticeably swollen and puffy.
- Hot to the Touch: The skin around the piercing will feel unusually warm or hot when you touch it. This is a classic sign of your body fighting something off.
- Thick, Colored Discharge: This is the biggest giveaway. Instead of clear lymph fluid, you’ll see thick, opaque discharge that might be yellow, green, or even brownish.
- A Bad Odor: An infection often comes with an unpleasant smell coming from the piercing site itself.
- Fever or Chills: If the infection is getting serious, you might start to feel sick all over, with symptoms like a fever, chills, or nausea.
If you are experiencing any of these serious symptoms—especially thick, colored discharge or skin that's hot to the touch—it's time to take action immediately.
And please, do not remove the jewelry! I can't stress this enough. Taking it out can allow the piercing holes to close, trapping the infection inside. This can lead to a much more serious problem, like an abscess.
Instead, your first step should be to contact your piercer or, better yet, a doctor. A medical professional can properly diagnose the issue and prescribe antibiotics if necessary to clear up the infection safely.
Lifestyle Habits For A Smooth Healing Process
You’ve got your cleaning routine down, and that's a huge win! But the secret to a happy, healthy piercing goes beyond your twice-daily saline soaks. The little things you do every day—what you wear, how you sleep, when you hit the gym—play a massive part in whether your healing journey is smooth sailing or a constant battle.
Think of it like this: your new piercing is a delicate wound that needs space and peace to heal properly. Your daily habits are all about creating that perfect, low-stress environment for it. By making a few simple adjustments, you can dodge the most common irritations and keep your healing on track. Let's dive into the real-world stuff that actually makes a difference.
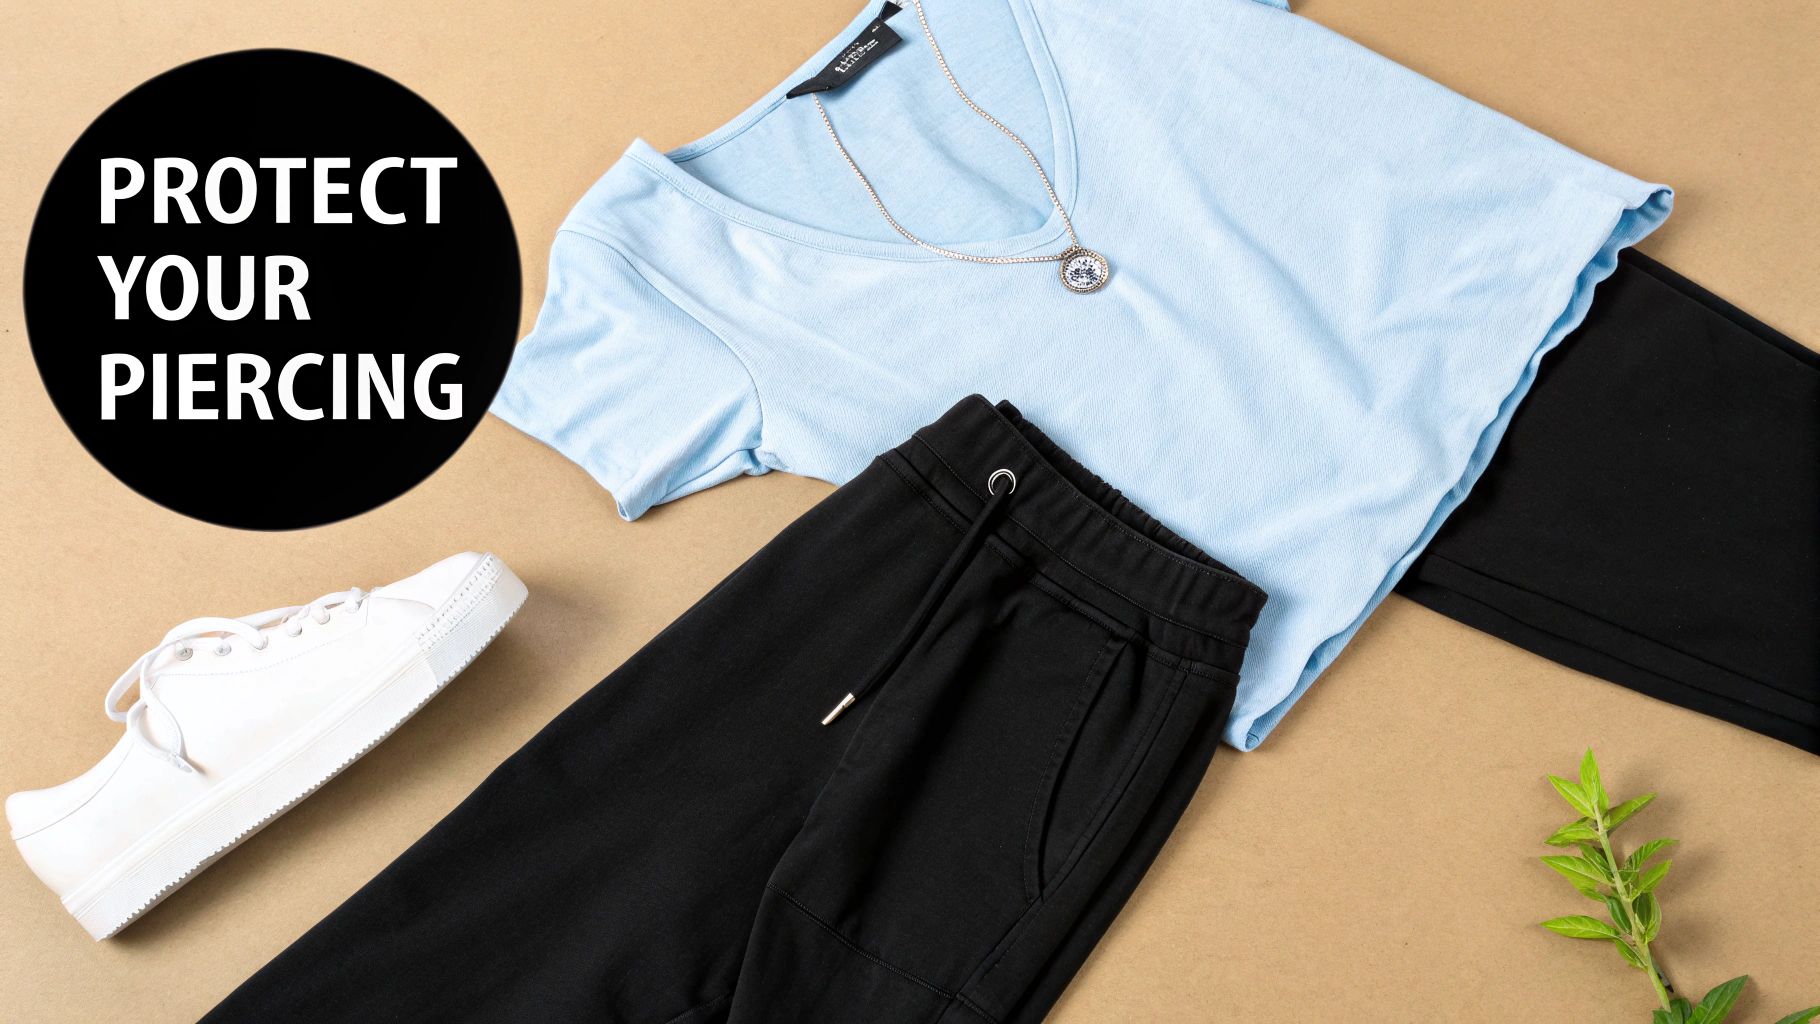
Dress For Piercing Success
Your closet is your first line of defense against an angry piercing. For the next few months, friction is public enemy number one. Anything that rubs, presses, or snags on your new jewelry is a recipe for irritation.
This means it's time to embrace a new fashion mantra:
- Low-Rise Everything: Those super cute high-waisted jeans and leggings? They need to take a break. The waistband sits directly on top of a navel piercing, creating constant pressure that can seriously set back your healing.
- Loose and Flowy: Opt for baggy t-shirts, flowy dresses, and comfy joggers. You want fabrics that skim right over your stomach, not ones that cling to it.
- Breathable Fabrics: Cotton and other natural, breathable materials are your best friends right now. They allow for better air circulation, which helps keep the area dry and happy.
This one simple change can be a total game-changer, especially in the first few critical months. Protecting your piercing from constant rubbing gives it the best shot at healing up without any frustrating bumps or delays.
Working Out And Staying Active
Getting a new piercing doesn't mean you're sentenced to the couch. You can absolutely stay active, you just have to be a little smarter about it. When you're exercising with a healing belly button piercing, sweat and movement are the two main things you need to manage.
First, sweat is unavoidable, but letting it hang around your piercing is a bad idea. The salt and bacteria in sweat can be incredibly irritating. The solution is simple: clean your piercing with your sterile saline spray as soon as you finish your workout.
Second, think about the exercises you're doing. Intense core workouts like crunches or sit-ups cause your stomach to fold repeatedly, which puts a lot of stress on the piercing. You might want to switch things up for a few weeks and focus on exercises that don't involve so much bending at the waist.
Pro Tip: Try wearing a hard, vented eye patch (you can grab one at any pharmacy) over your piercing while you work out. Taping it down securely creates a protective shield, guarding your jewelry against bumps and friction from your clothing.
Navigating Showers, Baths, And Swimming
Water hygiene is a massive deal when you’re caring for your belly button piercing. For the time being, you'll need to tweak your routine.
Showers are your best bet. Soaking in a bathtub, even if you think it's clean, means your fresh piercing is submerged in water full of soap residue and bacteria from your skin. Stick to showers until you're fully healed.
When you are in the shower, try to keep harsh shampoos and scented body washes away from the piercing itself. The chemicals and fragrances can be major irritants. Once you're done rinsing, make cleaning your piercing with saline the very last step.
And what about swimming? That's a hard "no" for a while. Pools, hot tubs, lakes, and oceans are breeding grounds for bacteria that are just waiting to cause an infection. You must avoid submerging your piercing in these bodies of water for at least the first 6-8 weeks—and honestly, waiting even longer is the safest move.
Your Belly Button Piercing Questions Answered
We get it—even with the best aftercare guide, questions are going to pop up. When you're dealing with a new piercing, it’s completely normal to wonder about every little twinge and detail.
Think of this as your go-to piercing FAQ. We’ve rounded up the most common questions we hear from people healing a new navel piercing and are giving you the straight-up answers you need to feel confident.
When Can I Finally Change My Belly Button Ring?
This is the big one! We know you're dying to swap out that plain initial barbell for something with a bit more sparkle, but patience is absolutely critical here.
You must wait until your piercing is 100% healed before attempting to change the jewelry yourself. For a navel piercing, this healing journey can take anywhere from 6 to 12 months. Yes, you read that right—it can take up to a year!
Changing it too soon can rip the delicate, newly-formed skin tunnel (called a fistula) that your body worked so hard to create. This can trigger major setbacks like irritation bumps, swelling, and even infection, forcing you to start the entire healing clock over from day one.
The only exception is downsizing. Your piercer will start you with a longer bar to accommodate for initial swelling. After a few weeks, they can swap it for a shorter, more comfortable bar. This should only be done by a professional.
What Jewelry Material Is Best For A New Piercing?
For a fresh piercing, the material of your jewelry isn't just a style choice—it's a safety requirement. A reputable piercer will only use implant-grade, body-safe metals to sidestep allergic reactions and healing complications.
Here are the top-tier options for initial jewelry:
- Implant-Grade Titanium (ASTM F-136): This is the undisputed champion of piercing materials. It's incredibly lightweight, completely nickel-free, and biocompatible, meaning your body is very unlikely to react negatively to it.
- Implant-Grade Surgical Steel (ASTM F-138): While a common and safe option, it does contain trace amounts of nickel. If you have sensitive skin or a known metal allergy, titanium is always the better bet.
- 14k-18k Solid Gold: If you love the look of gold, ensure it’s 14k or 18k solid gold—never plated. It must also be nickel-free and specifically alloyed to be body-safe.
Stay far away from mystery metals, sterling silver, or anything with a "plated" finish while you're healing. These can tarnish, flake off, and cause serious irritation that can put your new piercing at risk. Want to learn more? Check out our complete crash course on navel ring styles and materials for a deeper dive.
Is It Okay To Go Swimming With A New Navel Piercing?
You'll need to put your swimming plans on hold for a while. Pools, hot tubs, lakes, and oceans are breeding grounds for bacteria, chlorine, and other irritants that can easily infect an open wound like a new piercing.
The general rule is to avoid fully submerging your piercing for at least 6-8 weeks, though honestly, waiting longer is always safer.
When you're finally ready to take a dip, protect it. Use a waterproof, sealed bandage (like Tegaderm) to completely cover the area. The moment you're out of the water, take the bandage off and give the piercing a thorough cleaning with your sterile saline spray to rinse away any germs that might have snuck in.
What Do I Do If I Snag Or Hit My Piercing?
First things first: don't panic. It happens to literally everyone. Catching your piercing on a loofah or bumping it with a seatbelt can feel like a catastrophe, but it's usually not as bad as it seems.
If it was just a minor snag, the area will probably be red, sore, and a bit swollen for a couple of days. Your job is to go back to babying it. Treat it like it's brand new again—be extra gentle and stay on top of your saline soaks. An ice pack wrapped in a clean paper towel can also work wonders for the swelling and soreness.
However, if you had a serious snag that caused a lot of bleeding, or if the jewelry looks crooked or out of place, call your piercer immediately. They can assess the damage and make sure it’s still positioned to heal correctly. Don't try to fix a major issue yourself.
Ready to find the perfect piece for your healed piercing? At BodyCandy, we have a huge collection of navel jewelry in every style you can imagine, made from high-quality materials your body will love. Explore our full collection of belly button rings at Bodycandy.com today and get ready to show off your style