
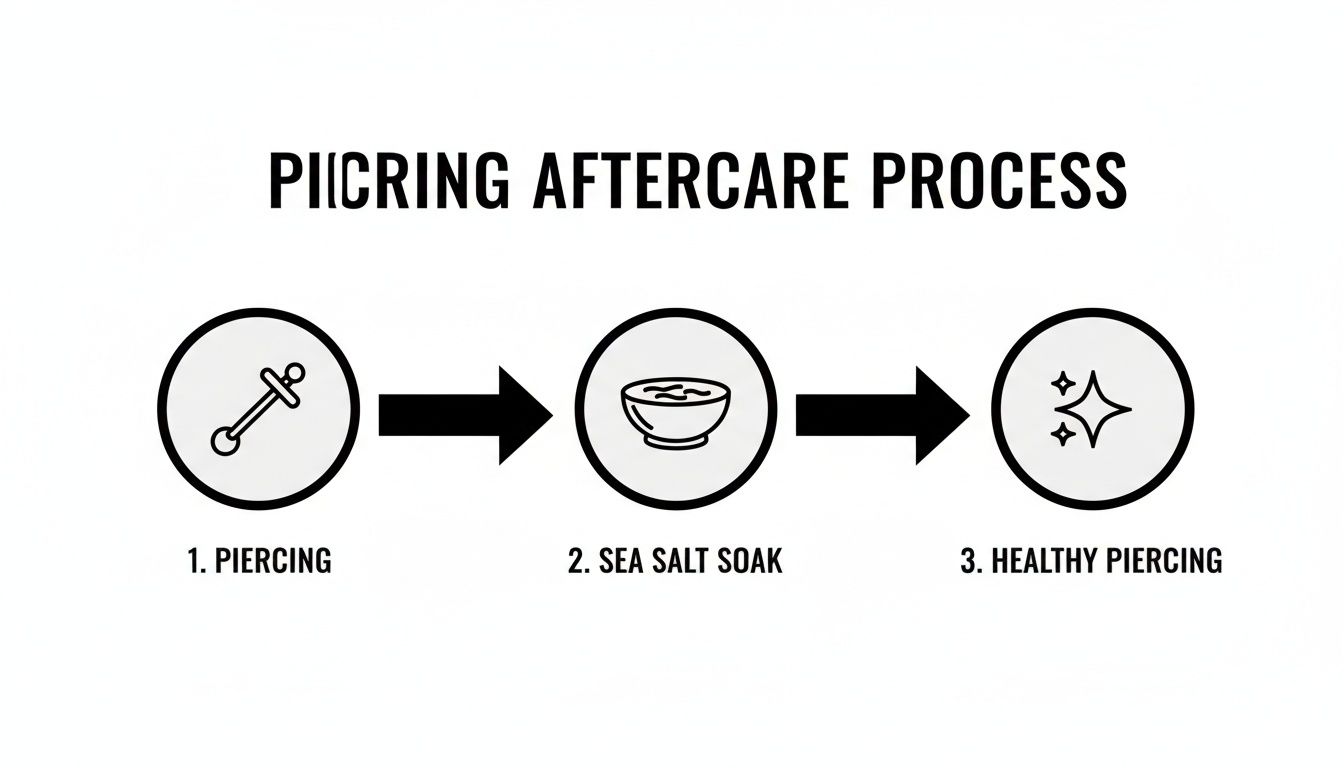
So you got the piercing—awesome! Welcome to the club. Now for the most important part: aftercare. The absolute gold standard for happy healing is a simple sea salt soak piercing routine.
This isn't just about splashing some salt water on it and hoping for the best. It’s about creating the perfect healing environment for your new bling, one that mimics your body’s own fluids. A good soak gently flushes away debris and soothes that initial tenderness without any harsh, irritating chemicals.
Why A Sea Salt Soak Is Your Piercing's Best Friend
Let's cut through the noise and talk about what really works for healing that new bling. You'll hear all sorts of advice, but for decades, professional piercers have sworn by sea salt soaks. There's a good reason it's the go-to method, and we're here to give you the inside scoop.
Think of it this way: your body is already doing the hard work of healing around your new jewelry. A proper sea salt soak is the perfect wingman for the job. The warm, mild saline solution boosts blood flow to the area, which is critical for healing. It also softens and lifts away any "crusties" (that's just dried lymph fluid, and it's totally normal!) without you having to pick or twist the jewelry—a huge no-no.
The Foundation Of Happy Healing
Sea salt soaks aren't just a trend; they're a time-tested technique rooted in simple science. This method became the standard when body piercing culture really took off in the 1990s because it's both incredibly effective and super gentle.
In fact, the entire piercing aftercare saline mist market—which hit a staggering USD 312.6 million globally—is built on this very principle. A homemade soak is just the original, OG version of those convenient sprays. You can dive deeper into the growth of piercing aftercare products in DataIntelo's market report.
The goal of a sea salt soak isn’t to blast your piercing with harsh chemicals. It's to create an ideal, soothing environment for your body to do what it does best: heal itself.
By mixing up a solution that matches your body's natural salinity, you're helping to:
- Gently clean the piercing channel without causing irritation.
- Soothe inflammation and calm down that initial redness and swelling.
- Prevent gunk and debris from building up, which can lead to nasty complications.
Ultimately, mastering this simple routine is the secret to a happy, healthy piercing. It's what will let you show off that amazing BodyCandy jewelry for years to come.
How To Mix The Perfect Saline Solution At Home
Ready to mix up some healing magic? Getting your homemade solution just right is the most critical part of a successful sea salt soak piercing routine. Too much salt, and you'll dry out and irritate your fresh piercing. Too little, and the soak just won't do its job. Don't worry, though—the perfect recipe is incredibly simple.
The goal is to create what's known as an isotonic saline solution. That's just a fancy way of saying we want to match the salt concentration of our own bodies, which is about 0.9%. This perfect balance is what makes the soak so soothing and effective.
The Foolproof Recipe For Success
Forget about guessing—when it comes to your body, precision is your BFF. For the ideal mix, you only need two things: the right kind of salt and pure water.
- Non-Iodized Sea Salt: Grab a bag of pure, fine-grain sea salt. Check the label to make sure it contains no iodine, anti-caking agents, or other additives. Regular table salt is a huge no-no; the iodine and other chemicals can be incredibly harsh on a healing wound.
- Distilled or Bottled Water: Your tap water can have bacteria, chlorine, and minerals that will only cause problems for a new piercing. Always play it safe and use distilled or bottled water to keep your soak pure and clean.
To whip up your solution, just dissolve 1/4 teaspoon of non-iodized sea salt into 8 ounces (1 cup) of warm distilled water. Stir until every last grain disappears. And that's it! You’ve just made the perfect healing concoction.
This simple journey—from a fresh piercing to a happy, healed one—is exactly what proper sea salt soaks are designed for.
Why The Right Ingredients Matter So Much
You might be tempted to reach for the table salt shaker or that bag of relaxing Epsom salts in your bathroom, but please, don't! Using the wrong salt is one of the most common mistakes people make, and your piercing will not thank you for it.
To put it simply, not all salts are created equal when it comes to piercing aftercare.
Sea Salt vs. Other Salts: What You Must Know
| Salt Type | Why It's Good/Bad for Piercings | Our Recommendation |
|---|---|---|
| Non-Iodized Sea Salt | It's pure sodium chloride, mimicking your body's natural salinity without harsh additives. This is gentle and promotes healing. | The Gold Standard. This is the only salt you should be using for a DIY soak. |
| Table Salt | Usually contains iodine and anti-caking agents. These additives can cause significant irritation, redness, and dryness on a healing piercing. | Avoid at all costs. Seriously, just step away from the shaker. |
| Epsom Salt | This is magnesium sulfate, not sodium chloride. It's great for sore muscles but is extremely drying for a piercing and will hinder healing. | Absolutely not. Keep it for your bath, far away from your piercing. |
| Himalayan/Kosher Salt | While often pure, their large grain size makes them very difficult to dissolve properly, which can throw off your salt-to-water ratio. | Not recommended. Stick with fine-grain sea salt for easy and accurate mixing. |
Even the pros at the Association of Professional Piercers (APP) are cautious about DIY soaks. They often recommend sterile saline sprays because it's so easy to make a homemade mix too salty, which can irritate up to 20-30% of new piercings. But when you measure carefully, a homemade soak is a fantastic and gentle option.
Pro Tip: Mix a fresh batch for every single soak. Making a big container to use over a few days might seem like a good shortcut, but it's a terrible idea. It can quickly become a breeding ground for bacteria, which is the last thing you want anywhere near a healing piercing.
If making a fresh mix every time sounds like too much of a chore, a pre-made sterile saline wash might be a better fit. Check out our guide on H2Ocean aftercare products to see if it works for your lifestyle.
The Two Best Ways To Do A Sea Salt Soak
Alright, you've mixed up the perfect batch of saline solution—so, now what? It's time for the hands-on part. Don't worry, this is way easier than it sounds, and you'll be a pro at your sea salt soak routine in no time.
The key to a good soak is simple: get the solution to make direct, gentle contact with the piercing. You're looking for a comfortably warm temperature, like a nice cup of tea. If it's too hot to touch, it's way too hot for your piercing. That soothing warmth is what encourages blood flow and helps soften any "crusties."
The Immersion Method: For Easy-to-Dunk Spots
This technique is fantastic for any piercing you can easily submerge, like your navel, nipples, or even earlobes. It's super effective because it fully surrounds the area, letting the saline work its magic from every angle.
For a navel or nipple piercing, grab a small, clean cup—a shot glass or a little Dixie cup works perfectly. Fill it with your warm saline, lean forward, and press the cup's rim firmly against your skin to create a seal. Then, just carefully lie back and chill out for 5 to 10 minutes. Let gravity do the work!
The Compression Method: For Tricky Placements
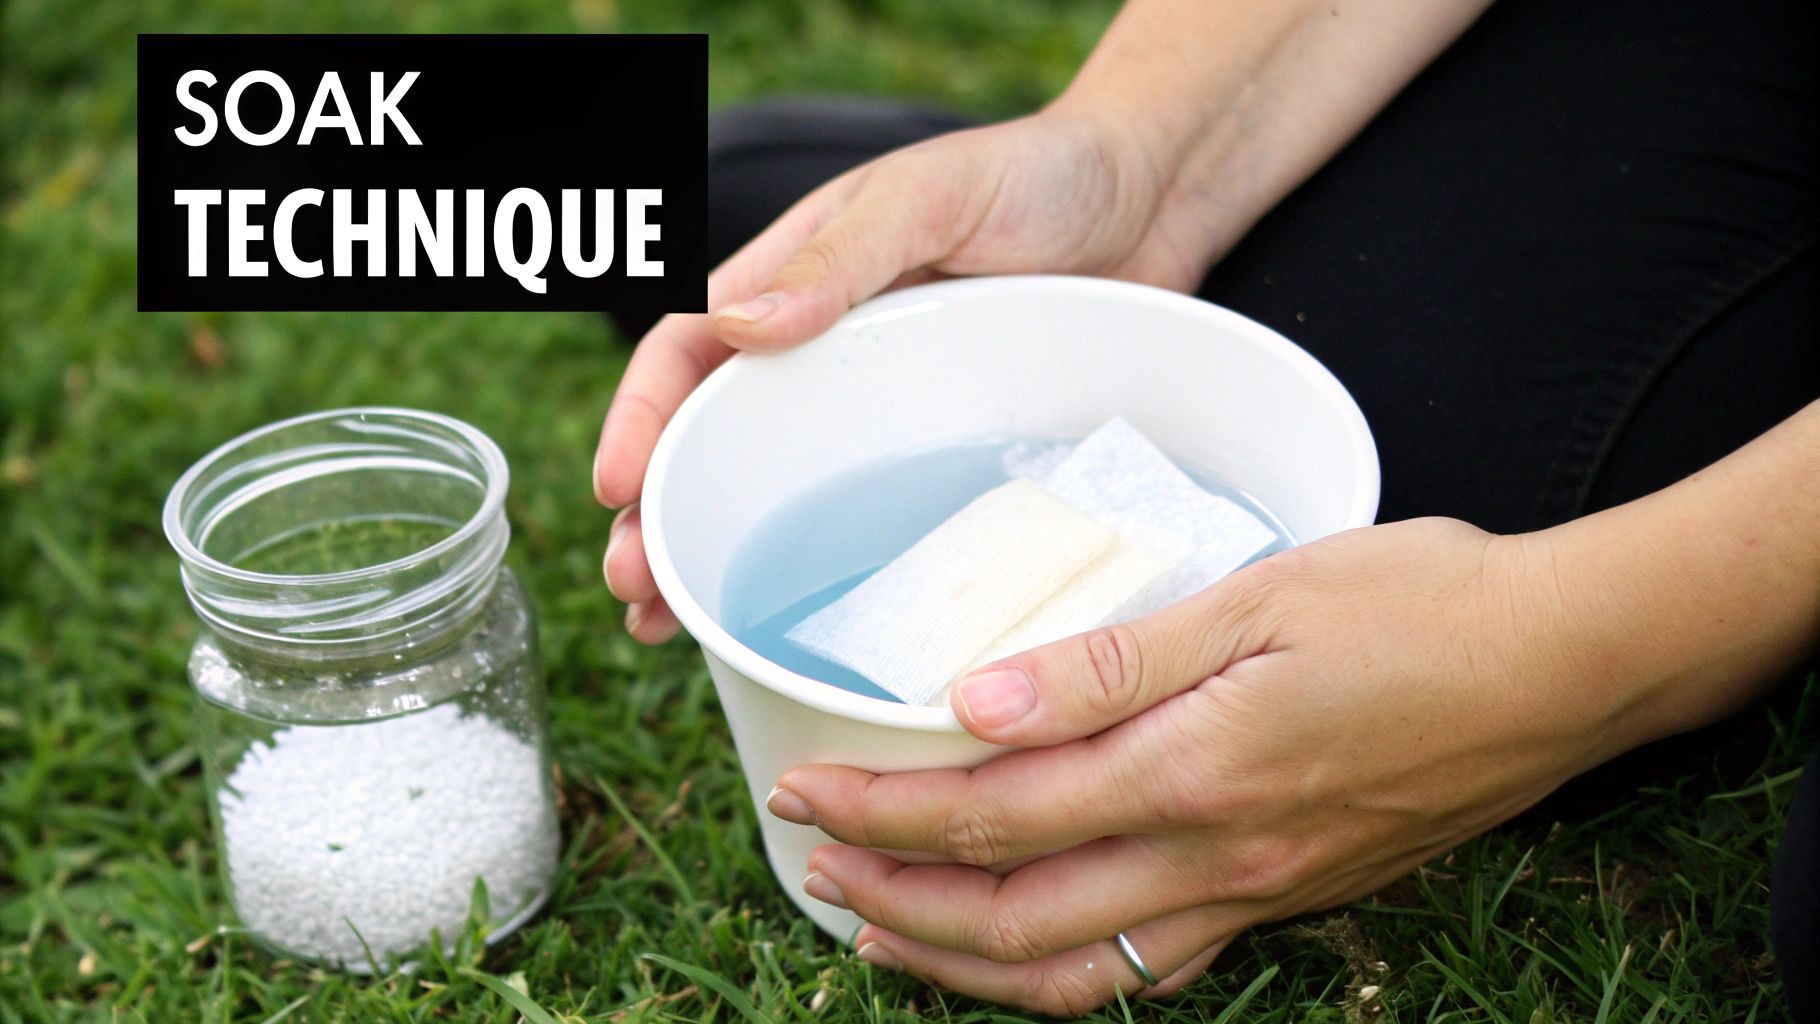
Let's be real, some piercings are just too tricky to submerge. Trying to dip your nostril or a cartilage piercing into a cup is a recipe for a salty mess. That’s where the trusty compression method comes in to save the day.
For this, you just need something clean and absorbent that won't leave fuzzy bits behind. Sterile gauze pads are ideal, but a clean paper towel can also work in a pinch. Avoid cotton balls; their tiny fibers can get snagged on your jewelry and cause major irritation.
Simply soak your gauze pad in the warm saline solution, then gently hold it right against your piercing. Apply very light pressure, just enough to keep it in place. Hold it there for 5 to 10 minutes, re-soaking the pad if it starts to cool down. This is the go-to method for:
- Nostril and septum piercings
- Most ear cartilage piercings (helix, tragus, conch)
- Eyebrow piercings
- Lip piercings
Remember, the goal here is consistent, gentle contact. Whether you're dunking or compressing, the warm saline needs time to soften up debris and soothe the tissue. Rushing through it won't give you the same healing benefits.
Finding Your Soaking Sweet Spot
So, how often should you be doing this whole routine? For a brand-new piercing, twice a day is the sweet spot. A soak in the morning and another at night is usually perfect. Over-soaking can actually backfire by drying out your skin.
Each soaking session should last between 5 and 10 minutes. Any less, and the solution doesn't have enough time to do its job. Any longer, and you risk drying out the surrounding skin.
Once your time is up, gently rinse the area with clean water to wash away any salt residue and loosened crusties. Then, carefully pat it dry with a fresh paper towel. Steer clear of your bath towel, which can harbor bacteria and snag on your gorgeous new jewelry.
Common Aftercare Mistakes You Need To Avoid
Even with the best intentions, it's surprisingly easy to slip up during the healing process. We've seen it all, so think of us as your piercing bestie, here to help you sidestep the most common blunders we see with a sea salt soak piercing routine. Getting this right is all about setting you up for a smooth, drama-free heal.
One of the biggest issues is falling into the "more is better" trap. Soaking your piercing too often or for too long can seriously dry out your skin. This leads to cracks, irritation, and a much longer healing time. Stick to the 5-10 minute soak, twice a day, and let your body do its thing.
Overdoing It With The Salt
Another major no-no is messing up the salt-to-water ratio. We get it, it’s tempting to add an extra pinch of salt for "good measure," but this is a huge mistake. A solution that's too salty, also known as hypertonic, will actually pull moisture out of your delicate, healing cells. This causes the exact irritation you're trying to prevent.
This is a key reason many professional piercers have moved away from recommending DIY soaks. In fact, some studies showed that improper ratios led to 25% more drying and irritation in healing piercings. While the commercial piercing aftercare spray market was valued at USD 59.9 million in 2023, you can absolutely get great results with a DIY soak by being precise.
That 1/4 teaspoon to 8 ounces of water ratio is non-negotiable. Measure carefully! Read the full market insights on piercing aftercare sprays at Verified Market Research.
Using The Wrong Products
This is a big one. Your fresh piercing is an open wound, and it needs to be treated gently. A lot of common bathroom products will do more harm than good, so make sure to avoid these culprits:
- Harsh Soaps: Antibacterial soaps, alcohol, and hydrogen peroxide are way too aggressive. They don't just kill bad bacteria; they wipe out the good bacteria your body needs to heal.
- Ointments: Thick creams like Neosporin or Vaseline are a bad idea. They can trap bacteria inside the piercing channel, creating the perfect environment for an infection. Your piercing needs to breathe!
- Essential Oils: We love a good tea tree oil moment, but not on a fresh piercing. These oils are incredibly potent and can cause serious chemical burns and allergic reactions on sensitive, healing tissue.
Sticking to just pure, non-iodized sea salt and distilled water is the safest and most effective path. Your piercing doesn't need anything extra to heal beautifully.
Lastly, stop fiddling with your jewelry! Twisting, turning, or playing with it can tear the delicate new tissue (the fistula) that's forming inside. This can lead to irritation bumps, scarring, and a much longer healing period. If you’re noticing persistent redness or bumps, check out our guide on allergic reactions and piercing irritation.
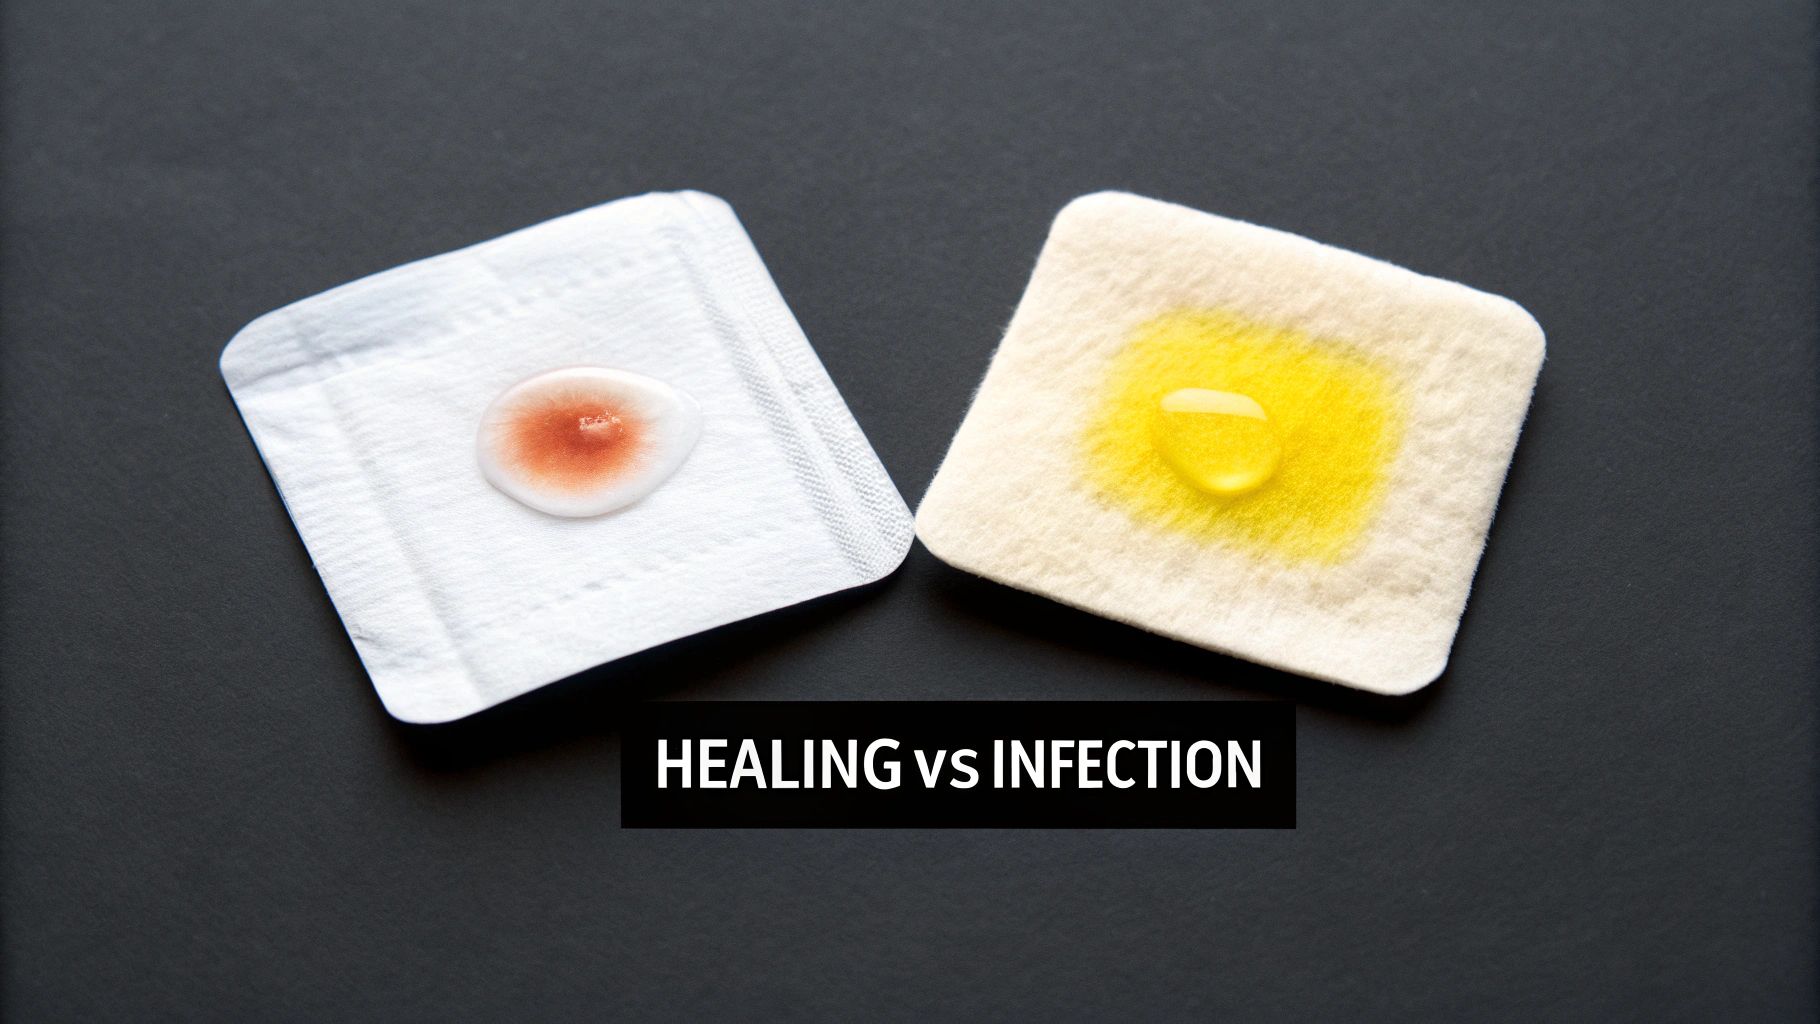
Knowing The Signs Of Healing Versus Infection
Your sea salt soak routine is a fantastic tool for healing, but it's important to remember it’s part of a process, not a magic cure-all. Being able to tell the difference between a happy, healing piercing and one that’s waving a red flag is a crucial skill. It's easy to get a little paranoid, but knowing what to look for will keep you calm and in control.
During the first few weeks, your body is working overtime. It's totally normal to see some mild symptoms as it adjusts to the new jewelry. You’ll likely notice some clear or whitish-yellow fluid that dries into "crusties." This fluid is called lymph, and it's a great sign that your body is doing its job.
What Normal Healing Looks Like
Think of the healing process as a journey. Knowing the timeline can make all the difference. To get a better idea of your specific piercing’s journey, explore the typical healing times for popular piercings in our detailed guide.
A healthy, healing piercing will generally show these signs:
- Mild Redness and Swelling: Especially in the first week or two, some localized puffiness is normal.
- Tenderness or Itching: The area might feel a little sore or get itchy as the skin repairs itself. This is a good thing!
- Clear or Whitish Fluid: This is lymph. It's thin and watery and will form those normal, easy-to-clean crusties.
When To Worry About Infection
An infection is a whole different ballgame. It goes way beyond mild irritation and requires prompt attention. A sea salt soak can't fix a true infection; it’s time to seek professional advice if you notice these warning signs.
A piercing that is truly infected will feel different—the pain is often throbbing and constant, not just when you accidentally bump it. Trust your gut; if something feels seriously wrong, it probably is.
Keep an eye out for these tell-tale symptoms:
- Intense, Spreading Redness: If the redness extends far beyond the piercing site or you see red streaks, that's a major red flag.
- Severe or Worsening Pain: An infected piercing will likely have a throbbing, constant pain that gets worse over time.
- Thick, Colored Discharge: Unlike clear lymph, pus from an infection is often thick, opaque, and yellow, green, or even brownish. It may also have a foul odor.
- Excessive Swelling: Swelling that makes the jewelry feel painfully tight is a serious concern.
- Feeling Hot to the Touch: If the skin around the piercing is significantly warmer than the rest of your skin, it can signal an infection.
If you're ticking boxes on the infection list, stop your soaks and call your professional piercer or a doctor right away. Your health is the top priority.
Your Top Sea Salt Soak Questions Answered
We get it—even after you've got the basics down, a few questions are probably still buzzing around in your head. Let's tackle some of the most common things we hear so you can feel totally confident in your piercing aftercare. Think of this as your go-to FAQ for everything related to your sea salt soak piercing routine.
Can I Use A Pre-Made Saline Spray Instead Of A DIY Soak?
Absolutely! Sterile saline sprays are a fantastic, super-convenient alternative, especially if you're busy or traveling. They completely take the guesswork out of mixing, which is a huge plus.
Just be sure to grab one that only contains sterile water and 0.9% sodium chloride. Check the label for weird additives or perfumes. While a warm soak is extra soothing, a quality spray is an excellent, APP-approved way to clean your piercing. Many people use both: a quick spray for daytime cleanings and a warm, relaxing soak at night.
How Long Should I Keep Doing Sea Salt Soaks?
This is a great question, and the answer really comes down to listening to your body. As a general rule, stick with your soaks twice a day for the first 4 to 8 weeks. This is the most critical healing period.
After that initial phase, if everything is looking good, you can often cut back to once a day. Eventually, you might switch to just using a quick saline spray as needed. Remember, every piercing and every person heals differently, so don't rush it! When in doubt, stick to the timeline your professional piercer gave you.
A Quick Word on "Crusties": Those little crusty bits you see are a totally normal part of healing! It's just dried lymph fluid, which means your body is doing its job. Your warm sea salt soak is perfect for softening them up so they wash away gently. Whatever you do, never pick at them with your fingers—that’s a fast track to introducing bacteria and causing irritation.
What If My Skin Feels Dry After Soaking?
If the skin around your piercing feels tight or flaky, your saline solution is likely a little too salty. This is a super common hiccup with DIY soaks, but it's an easy fix.
First, double-check your measurements. You need to be strict with the ratio: 1/4 teaspoon of non-iodized sea salt per 8 ounces (1 cup) of warm distilled water. Anything more is overkill.
You can also try cutting back your soaks to just once a day to see if that gives your skin a break. If the dryness persists even after you've perfected your ratio, check in with your piercer for some personalized advice.
Ready to find the perfect piece to show off in your beautifully healed piercing? BodyCandy has an incredible collection of high-quality, stylish jewelry for every piercing imaginable. Shop our full collection today and express your unique style!


