Got a new piercing and now a mysterious bump has popped up? Don't panic! Seriously, take a deep breath. We've all been there, staring in the mirror, wondering what that uninvited guest is doing on our fresh bling.
The key difference between a piercing bump vs a keloid is pretty simple: a piercing bump is a temporary irritation that stays small and eventually goes away. A keloid, on the other hand, is a type of aggressive, permanent scar that grows much larger than the original piercing site. Figuring out which one you're dealing with is the first step to getting your piercing back on track.
What Is That Bump on Your New Piercing?
Okay, let's get you some peace of mind. Seeing an unexpected bump on your fresh piercing is super common, but it's totally understandable to feel a little worried.
Most of the time, what you're seeing is just your body's way of saying, "Hey, something is bothering me here!" This little reaction is an irritation bump, and it's a temporary response to friction, getting snagged, or even wearing the wrong jewelry.
A keloid is a completely different situation. It's a genetic response where your body goes into overdrive producing scar tissue, creating a firm, rubbery growth that spreads far beyond the piercing itself. Unlike a temporary bump, a keloid won't just go away on its own and needs professional help.
The good news? True keloids are much rarer than simple irritation bumps. The first step is to correctly identify what's going on so you can kick that anxiety to the curb.
Quick Guide Piercing Bump vs Keloid at a Glance
Here’s a fast way to compare a common piercing bump and a keloid. Understanding these key differences will help you figure out your next steps without the stress.
| Characteristic | Irritation Bump | Keloid |
|---|---|---|
| Size & Shape | Small, localized, and stays close to the piercing hole. | Grows larger over time, spreading beyond the original piercing site. |
| Color | Reddish or pinkish, similar to a pimple. | Can be pink, red, or dark brown and often looks shiny. |
| Texture | Soft, sometimes fluid-filled, and tender to the touch. | Firm, dense, and rubbery. Usually not painful, but can be itchy. |
| Timing | Appears relatively quickly, often within weeks of piercing. | Develops slowly, appearing months after the initial piercing. |
This at-a-glance guide should give you a better idea of what you might be looking at. Remember, when in doubt, your piercer is your best resource!
Understanding Why Piercing Bumps Appear
So, that little bump decided to crash your piercing party. Before you get too worked up, let’s figure out why it showed up in the first place. Getting to the root cause is always the first step in knowing how to handle a piercing bump vs. a keloid.
Most of the time, a piercing bump is just your body’s way of throwing a little fit. Think of it as a temporary overreaction because something is bothering your piercing. It’s your body sending up a flare signal that something isn't quite right.
What Causes an Irritation Bump
The list of culprits behind these annoying bumps is pretty common, and the good news is, they're usually things you can control. The source of the irritation is often something simple you might not even have realized was a problem.
Here are some of the usual suspects:
- Physical Trauma: Accidentally snagging your jewelry on clothes, a towel, or even your hair is a classic. Sleeping on a new ear piercing can also put enough pressure on it to cause a bump to form.
- Poor Quality Jewelry: Your body can have a really bad reaction to certain metals. If your jewelry isn't made from high-quality material like implant-grade titanium or surgical steel, you might be looking at a metal sensitivity.
- Harsh Cleaning Products: Over-cleaning with alcohol, hydrogen peroxide, or strong antibacterial soaps does more harm than good. These can strip away good bacteria and seriously irritate the delicate, healing tissue, leading to a bump.
- Incorrect Jewelry Size: Jewelry that’s too tight can essentially suffocate the piercing. On the flip side, a bar that’s too long can move around too much. Both scenarios cause friction and irritation.
"At its core, an irritation bump is just localized inflammation. It's your body building a tiny protective barrier around an area that’s being aggravated. Remove the aggravation, and the barrier usually comes down."
The Genetic Factor Behind Keloids
This is where the conversation about piercing bumps vs. keloids takes a sharp turn. Unlike irritation bumps, which are almost always triggered by something external, keloids are a genetic issue.
If you get a keloid, it means your body’s healing process has gone into overdrive. Instead of just producing enough collagen to patch up the piercing wound, it goes overboard and produces way too much scar tissue. This excess tissue then grows well beyond the original piercing site, creating a firm, raised scar that won't go away on its own.
The distinction is critical. While you can take steps to avoid irritating a piercing, whether you form a keloid is largely out of your hands—it’s written in your DNA. In fact, keloid prevalence varies dramatically around the globe, with studies showing higher susceptibility in Black populations and those with darker skin. Understanding this genetic link can help you manage your expectations and seek the right kind of professional help.
If you're running into other issues with your piercing, you should check out our guide on allergic reactions and piercing irritation for more vital information.
A Detailed Visual and Symptom Comparison
Alright, let's play detective. How can you actually tell the difference between a pesky piercing bump and a more serious keloid just by looking at it? Getting up close and personal with the bump is your best bet for figuring out what’s really going on.
The easiest place to start your investigation is by checking out the bump's size and where it's decided to set up shop. An irritation bump is a bit of a homebody—it stays right next to your piercing.
Location and Growth Patterns
An irritation bump, which is technically a hypertrophic scar, almost always pops up directly beside the piercing hole. It’s a localized reaction, meaning it knows its boundaries and won't start wandering across your skin. It might puff up if the irritation doesn't stop, but it will stay put.
A keloid, on the other hand, is a total rebel. It starts at the piercing site but then grows outward, spreading way beyond the original wound. Think of it this way: an irritation bump is like a small ant hill right at the piercing hole, while a keloid is more like a mountain range that just keeps expanding.
A key giveaway is the boundary. If the bump is growing over healthy, un-pierced skin, you're most likely looking at a keloid. An irritation bump will almost always stay within the immediate area of the piercing hole.
Color and Texture Differences
Next up: what does the bump look and feel like? The color and texture can drop some serious hints.
An irritation bump is usually reddish or pinkish, and sometimes it might even blend in with your skin tone. It often looks like a small, angry pimple that’s shown up to protest. If you touch it, it’s typically soft, a little squishy, and might even have some clear or whitish fluid inside (that’s just lymph fluid, not pus!).
A keloid has a completely different vibe. It can be pink, red, or even a dark brown, and its surface is often smooth and shiny. The texture is the biggest tell: keloids are firm, dense, and rubbery. They don't have that soft "give" like an irritation bump and feel more like a solid chunk of tissue under your skin.
To make things easier, here's a quick side-by-side to help you spot the differences.
Symptom Checker Detailed Feature Comparison
| Feature | Irritation Bump (Hypertrophic Scar) | Keloid |
|---|---|---|
| Location | Stays right next to the piercing hole. It does not spread. | Starts at the piercing but grows beyond the original wound boundaries. |
| Size | Small, pimple-like. May grow slightly if irritation continues but remains localized. | Can grow to be significantly larger than the original piercing site over time. |
| Color | Reddish, pinkish, or skin-toned. | Can be pink, red, or dark brown/purple. Often darker than surrounding skin. |
| Texture | Soft, squishy, and sometimes fluid-filled. | Firm, rubbery, and dense. Often has a smooth or shiny surface. |
| Pain Level | Often tender or painful to the touch, especially when snagged. | Usually painless after the initial growth phase, but can be tender at first. |
| Other Sensations | General soreness and sensitivity related to the irritation. | Persistent, often intense itching is a very common symptom. A burning or pulling sensation can also occur. |
| Growth Speed | Appears relatively quickly after an irritation but can also disappear quickly once the cause is removed. | Grows slowly and progressively over months or even years. Does not go away on its own. |
This table should give you a clearer picture of what you might be dealing with, but remember, it’s always best to get a professional opinion if you're unsure.
Pain and Other Sensations
Finally, how the bump feels from day to day is a huge piece of the puzzle. An irritation bump is often tender and can definitely be painful if you touch it or snag your jewelry. The pain is directly tied to inflammation—the more ticked off it is, the more it’s going to hurt.
Keloids are a different story. While they might be a little tender when they first start growing, they're often completely painless once they're established. Instead of pain, a classic symptom of a keloid is persistent itching. This isn't just a little tickle; it can be quite intense and is a sign that the scar tissue is still actively growing. Some people also feel a burning or pulling sensation as the keloid gets bigger and tightens the skin.
Your Action Plan for Treating Piercing Bumps
Okay, you've done the detective work and you're pretty sure you're dealing with a standard irritation bump. That's great news! It means you can officially stop panicking because this is totally manageable. The game plan from here is simple: find the source of the irritation and get rid of it.
Think of it as a "less is more" mission. Your piercing is essentially throwing a little tantrum, and our job is to calm it down. We’ll start with the basics of gentle care, which means absolutely no harsh chemicals, no picking, and definitely no twisting your jewelry.
The Gentle Approach to Healing
The first rule of treating a piercing bump is to be kind to your skin. Going after it with aggressive cleaning products is only going to make it angrier. Instead, let's focus on a simple, effective routine that actually works.
- Sterile Saline Soaks: This is your new best friend, seriously. Soaking the area with a sterile saline solution twice a day is the gold standard for a reason. It gently flushes away any gunk or irritants without stripping your skin of moisture.
- Hands Off! This one is crucial. Don't touch, twist, or fiddle with your jewelry. Every single time you move it, you're creating tiny tears in the healing tissue, which is just an open invitation for more irritation.
- Patience is Key: An irritation bump didn’t just pop up overnight, and it’s not going to vanish overnight either. You have to stick with your gentle routine and give your body the time it needs to heal itself.
If you want to do a deeper dive into the best aftercare products out there, check out our detailed guide on why pros often recommend options like H2Ocean for piercing aftercare.
Check Your Jewelry Game
If you've been consistent with gentle cleaning and the bump isn't backing down, it’s time to take a hard look at your jewelry. The problem could be the metal itself, or the size and style might be causing unnecessary friction.
Switching to high-quality, implant-grade titanium is often the single most effective step you can take. It’s hypoallergenic, which completely eliminates the risk of a metal sensitivity causing the bump.
This simple decision tree can help you quickly assess whether you're likely dealing with a piercing bump vs keloid.
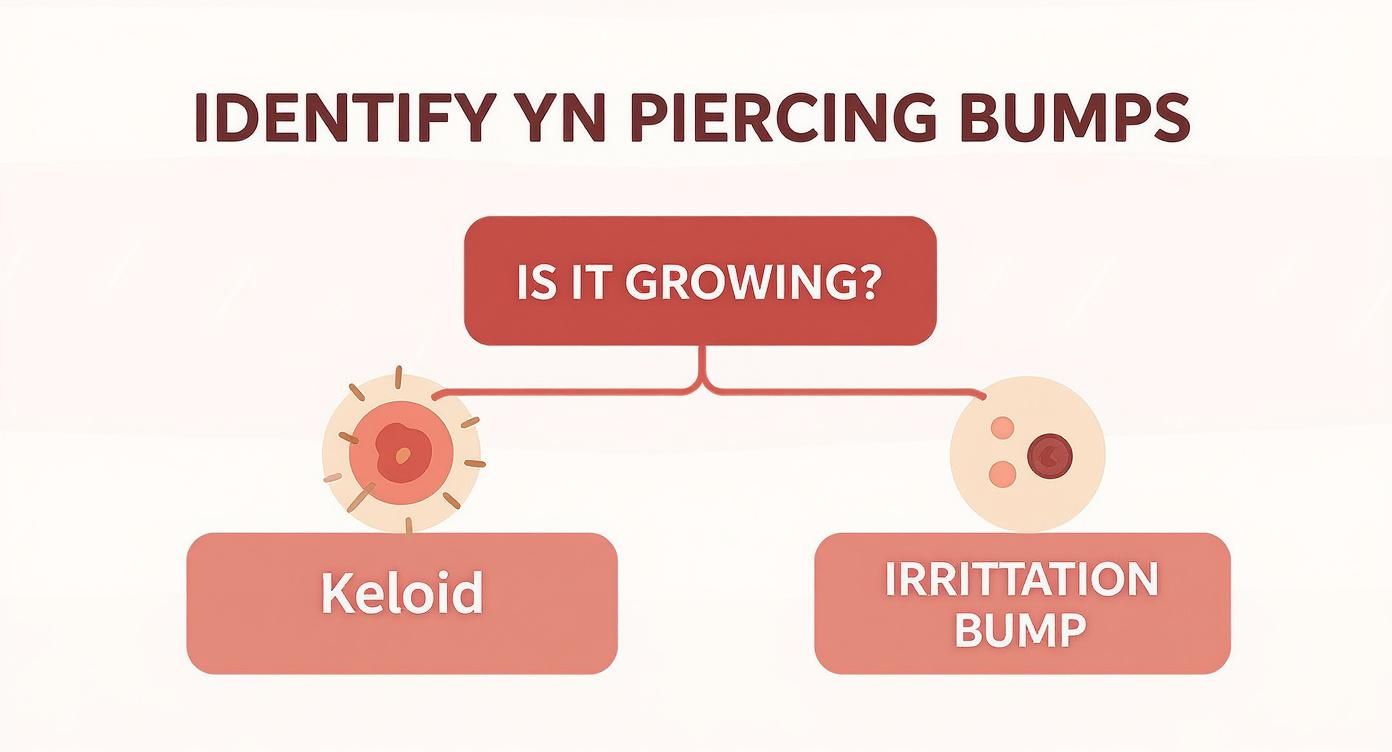
As the visual guide shows, the most critical difference is that an irritation bump stays put, right around the piercing site. A keloid, on the other hand, will actually grow beyond the original boundaries of the piercing.
Also, think about the fit. A barbell that's too short can squeeze the tissue, while one that's too long is just begging to get snagged on everything. A quick trip back to your piercer for a jewelry change-up can often make all the difference in the world.
When It's Time to See a Doctor for a Keloid
If you’ve been staring at that bump on your piercing, wondering if it's something more serious, and the word "keloid" has crossed your mind, it's time to stop what you're doing. Put down the saline solution, step away from the tea tree oil, and book an appointment with a professional.
This is one of those times where DIY fixes can do more harm than good. A keloid isn't just a stubborn irritation bump that will go away with better jewelry or more cleaning. It's a medical condition, a type of aggressive scar tissue that requires a doctor's diagnosis and a targeted treatment plan. Trying to handle it yourself is a non-starter.
Why You Need a Professional Diagnosis
First things first: you need to know exactly what you're dealing with. A dermatologist can tell you for sure if that bump is a keloid, a piercing bump, or something else entirely. This is the most critical step because the way you treat them couldn't be more different.
Piercing bumps usually clear up with basic aftercare tweaks. Keloids? Not so much. They're in a whole different league and require medical intervention. The data doesn't lie—one study found that 77% of post-piercing ear keloids were treated with surgical removal followed by corticosteroid injections. Even with that level of intervention, recurrence rates can hit 15%, which is why professional guidance is non-negotiable. You can read more about the study on post-piercing keloids here.
Common Medical Treatments for Keloids
Once a doctor confirms it's a keloid, they'll walk you through the options. The goal is usually to flatten the scar, ease symptoms like itching or pain, and stop it from getting any bigger.
Here are a few of the go-to treatments a dermatologist might recommend:
- Corticosteroid Injections: This is often the first line of attack. A doctor injects a steroid solution directly into the keloid. Over a series of sessions, this helps break down the dense collagen fibers and flatten the scar.
- Silicone Gel Sheets or Gels: Simple but effective. These are applied directly to the keloid and worn for several hours a day. The silicone helps hydrate the scar tissue, which can slowly reduce its size, hardness, and color.
- Cryotherapy: This involves freezing the keloid with liquid nitrogen. It's particularly useful for smaller keloids and works by destroying the scar tissue cells, which stops their growth in its tracks.
- Surgical Removal: While cutting the keloid out seems like an obvious fix, it's tricky. Surgery itself is a form of trauma, and there's a high risk the keloid will grow back—sometimes even bigger than before. Because of this, it's almost always paired with other treatments like steroid injections or radiation to keep the scar tissue from returning.
It's so important to have realistic expectations. Treating keloids is often a long game that requires a lot of patience. The aim is management and improvement, not necessarily a complete disappearance. Your best first move is always getting that expert opinion.
How to Prevent Bumps for Healthy Piercings
The best way to handle a piercing bump or keloid is to make sure they never show up in the first place. A little proactive care from day one is your secret weapon for a smooth, drama-free healing journey. And it all starts before the needle even touches your skin.
Your very first move is the most important one: choose a reputable, professional piercer. A skilled pro knows what they're doing. They use sterile techniques, single-use needles, and high-quality starter jewelry, which dramatically cuts down your risk of infection and irritation right from the get-go. This isn't the time to bargain hunt—never settle for less when it comes to your body!
Once you leave the studio, the ball is in your court. A solid aftercare routine is completely non-negotiable if you want to keep those pesky bumps away.
Master Your Aftercare Routine
Think of your healing piercing as an open wound that needs some serious TLC. The best thing you can do is ditch the outdated advice and just stick to the basics. That's how you support your body's natural healing process.
- Sterile Saline Solution is Your Best Friend: Gently clean your piercing twice a day using a sterile saline spray. Stay far away from harsh stuff like alcohol or hydrogen peroxide; they can actually kill healthy tissue and cause major irritation.
- Protect Your Piercing: Be mindful of snags! Your clothes, towels, and even your hair can catch on new jewelry, causing trauma that often leads to bumps. For ear piercings, try sleeping on the opposite side or using one of those travel pillows with the hole in the middle.
- Hands Off: This is a big one. Resist every urge to touch, twist, or fiddle with your new jewelry. Every time you touch it, you're introducing bacteria and potentially messing up the delicate healing channel (called a fistula).
A Special Note on Keloid Prevention
If keloids run in your family, you need to be extra cautious. The risk of developing one is much higher for anyone with a genetic predisposition, especially in high-risk areas like the earlobes, chest, and shoulders.
Ear piercing is a super common trigger for keloids, and they can appear months after you thought you were all healed up. One study found that things like at-home piercing (56% of cases) and poor aseptic conditions significantly boosted the risk. If you know you have a family history, you really need to consider these risks before getting pierced. You can learn more about the research on post-piercing keloids.
Picking jewelry made from hypoallergenic materials is also a huge help. Check out our guide on finding the best body jewelry for sensitive skin to give your piercing the best possible start.
A Few More Things You're Probably Wondering...
Got a few more questions rattling around in your head about piercing bumps vs. keloids? You're definitely not the only one! Let's tackle some of the most common worries so you can feel totally confident in your piercing's healing journey.
Can a Piercing Bump Turn into a Keloid?
This is a huge fear for a lot of people, but thankfully, it's extremely rare. Think of it this way: a standard irritation bump is just your body's temporary, grumpy reaction to something bothering your piercing. A keloid, on the other hand, is a genetic condition. Your body is basically hardwired to go into overdrive with scar tissue production.
An irritation bump won't just magically morph into a keloid if you aren't genetically predisposed to them. Instead, it will either calm down and disappear once you remove the source of the irritation or, in some stubborn cases, settle into a hypertrophic scar. These look similar but—and this is the key difference—they don't grow beyond the original piercing site like a keloid does.
How Long Does It Take for a Piercing Bump to Go Away?
Okay, this is where you need to practice some serious patience! The timeline really hinges on what caused the bump in the first place and how fast you deal with the problem. If you nail down the source of irritation—maybe by switching to better jewelry or finally stopping yourself from sleeping on it—you could see that bump start to shrink within just a few weeks.
Realistically, though, it can sometimes take a couple of months to vanish completely. Consistency with your aftercare is absolutely everything here. Sticking to your gentle saline soaks and just leaving the area alone gives your body the best possible chance to sort itself out.
Should I Use Tea Tree Oil or Aspirin Paste?
Nope! Please don't. This is some seriously outdated and genuinely harmful advice that, for some reason, just won't die online. Both of these so-called "remedies" are way too harsh for a fresh or healing piercing and will almost certainly make things much, much worse.
Tea tree oil can lead to chemical burns and major dryness, while a paste made from aspirin is a massive irritant that can destroy the delicate new tissue your body is trying to build. Ditch the DIY disasters and stick to the professional-approved basics: sterile saline solution and high-quality, implant-grade jewelry. Trust us, your piercing will thank you!
Ready to give your piercing the best chance to heal happy and bump-free? High-quality jewelry makes all the difference. Explore our massive collection of implant-grade titanium and surgical steel options at Bodycandy and find the perfect piece for your piercing today! Shop now at bodycandy.com.