
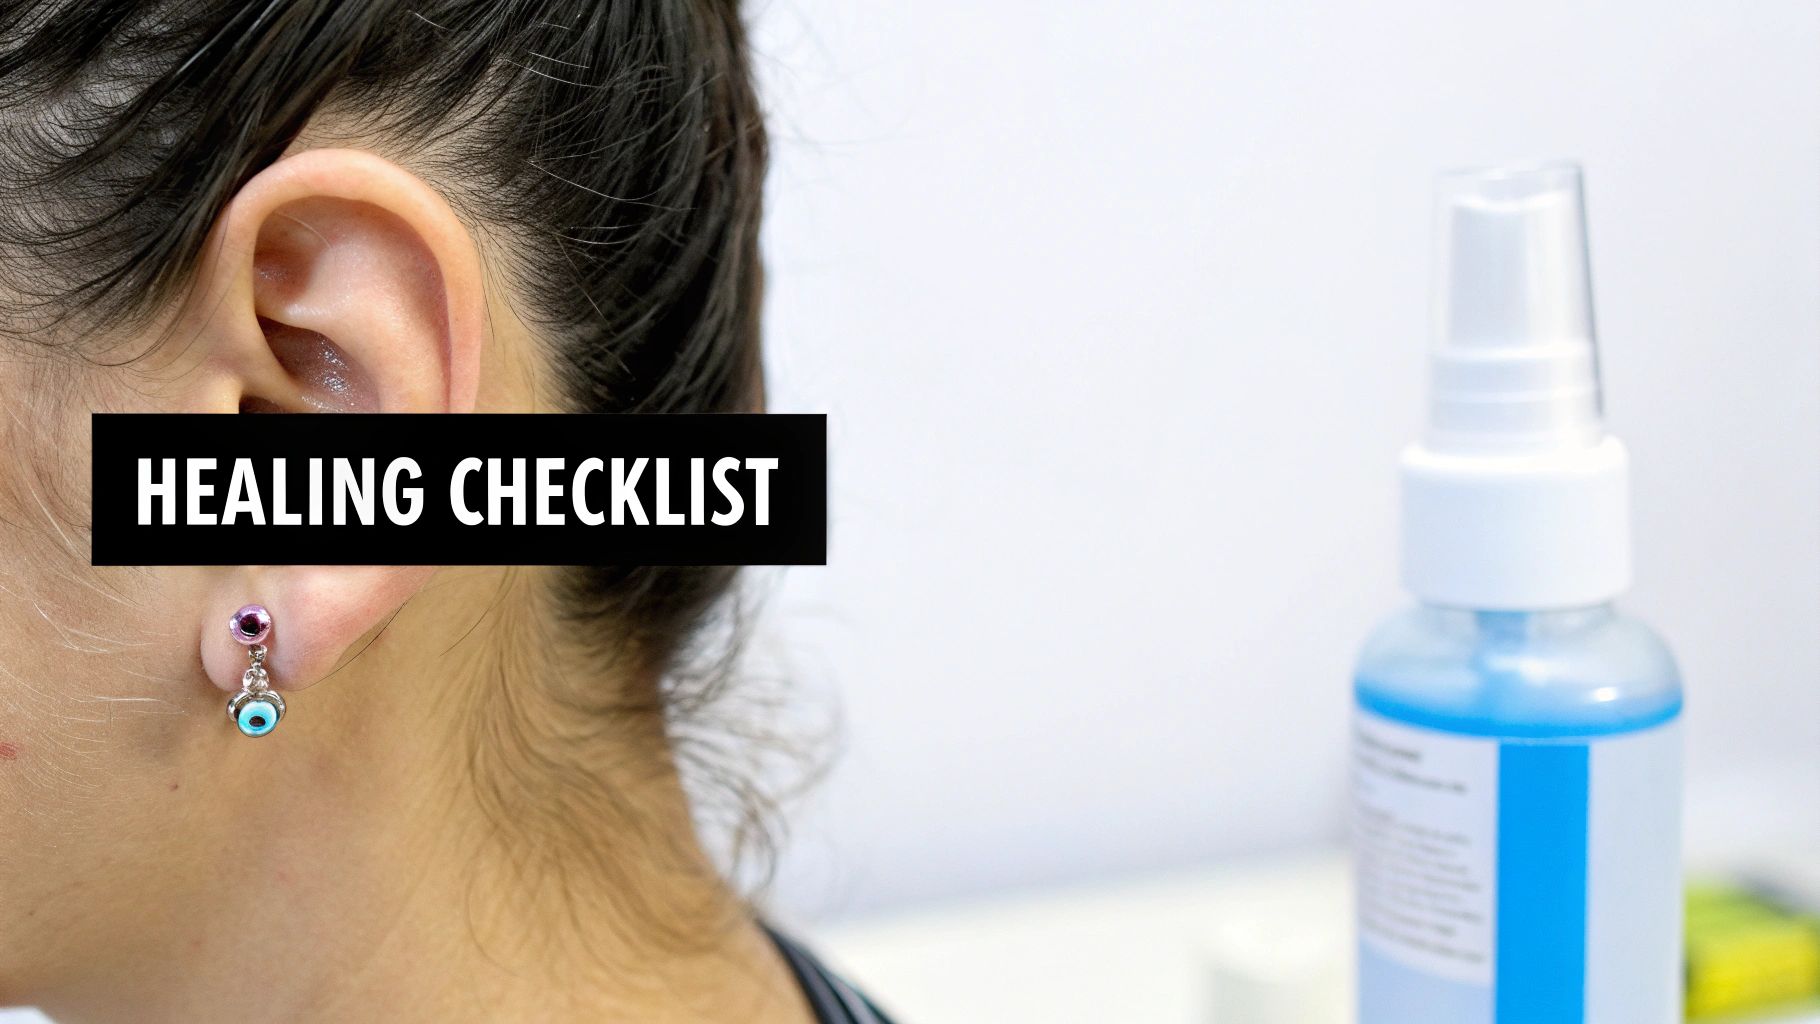
So you did it—you got that amazing new helix or tragus piercing. Welcome to the club! Now for the most important part: keeping it clean. The absolute key to a perfectly healed piercing is simple: clean it twice daily with a sterile saline solution and, for the love of all things shiny, avoid touching it. This simple routine is your secret weapon against irritation and those dreaded piercing bumps.
Your Guide To A Perfectly Healed Piercing
Getting a new cartilage piercing is incredibly exciting, but the real journey begins with aftercare. Unlike lobe piercings that heal up in what feels like five minutes, cartilage has way less blood flow. That makes the healing process a much longer commitment.
Think of it as a marathon, not a sprint. Your patience and consistency over the next several months are what will make all the difference between a happy piercing and a total headache.
This guide is your new best friend for the entire healing journey. We’ll cover everything you need to know, from the one product that's non-negotiable to the simple daily steps that will keep your new addition happy and healthy.
Why Cartilage Piercings Need Extra Love
Cartilage piercings are a favorite for a reason, but they demand respect. Proper cleaning is crucial since they take a minimum of 6-9 months to heal fully, and honestly, it's not uncommon for them to take up to a year. According to the experts at NeilMed PAC, a huge percentage of complications—up to 50%!—come from people stopping their cleaning routines too soon because they think it's healed.
Don't be that person. Proper technique and commitment are non-negotiable for a beautiful, healthy piercing.
To set you up for success from day one, we've put together a quick guide to the absolute must-dos and the definite don'ts.
Here's a quick cheat sheet to keep you on the right track. Think of it as the ten commandments of cartilage care.
Cartilage Cleaning Quick Guide
| Action | Why It Matters | Frequency |
|---|---|---|
| Use Sterile Saline Spray | It's the only thing you should use. It gently cleans without irritating the fragile healing tissue. | 2x per day |
| Wash Hands Thoroughly | Your hands are covered in bacteria. Never touch your piercing without scrubbing up first. | Before every cleaning |
| Pat Dry with Gauze | Towels harbor bacteria and can snag your jewelry. Non-woven gauze is your best friend. | After every cleaning |
| Leave It Alone (LITHA) | Twisting, turning, and touching your jewelry just introduces bacteria and causes irritation bumps. | Always! |
| Avoid Harsh Chemicals | No alcohol, hydrogen peroxide, or antibacterial soaps. They are way too harsh and delay healing. | Always! |
| Protect While Sleeping | Try not to sleep on your new piercing. A travel pillow with a hole can be a lifesaver. | Every night |
Sticking to these basics will help you avoid the most common pitfalls and get your piercing on the fast track to looking fantastic.
Pro Tip: Your number one goal is to create a clean, low-irritation environment for your body to do its healing magic. Less is more—avoid harsh chemicals, excessive touching, and changing the jewelry too soon.
Now, let's dive into exactly what you need to get started.
Building Your Piercing Aftercare Toolkit
Let's talk about what you actually need to keep your new cartilage piercing happy. The good news? It’s not a long or complicated list. You don’t need a medicine cabinet full of potions, just a few key items to get you through the healing process without any drama.
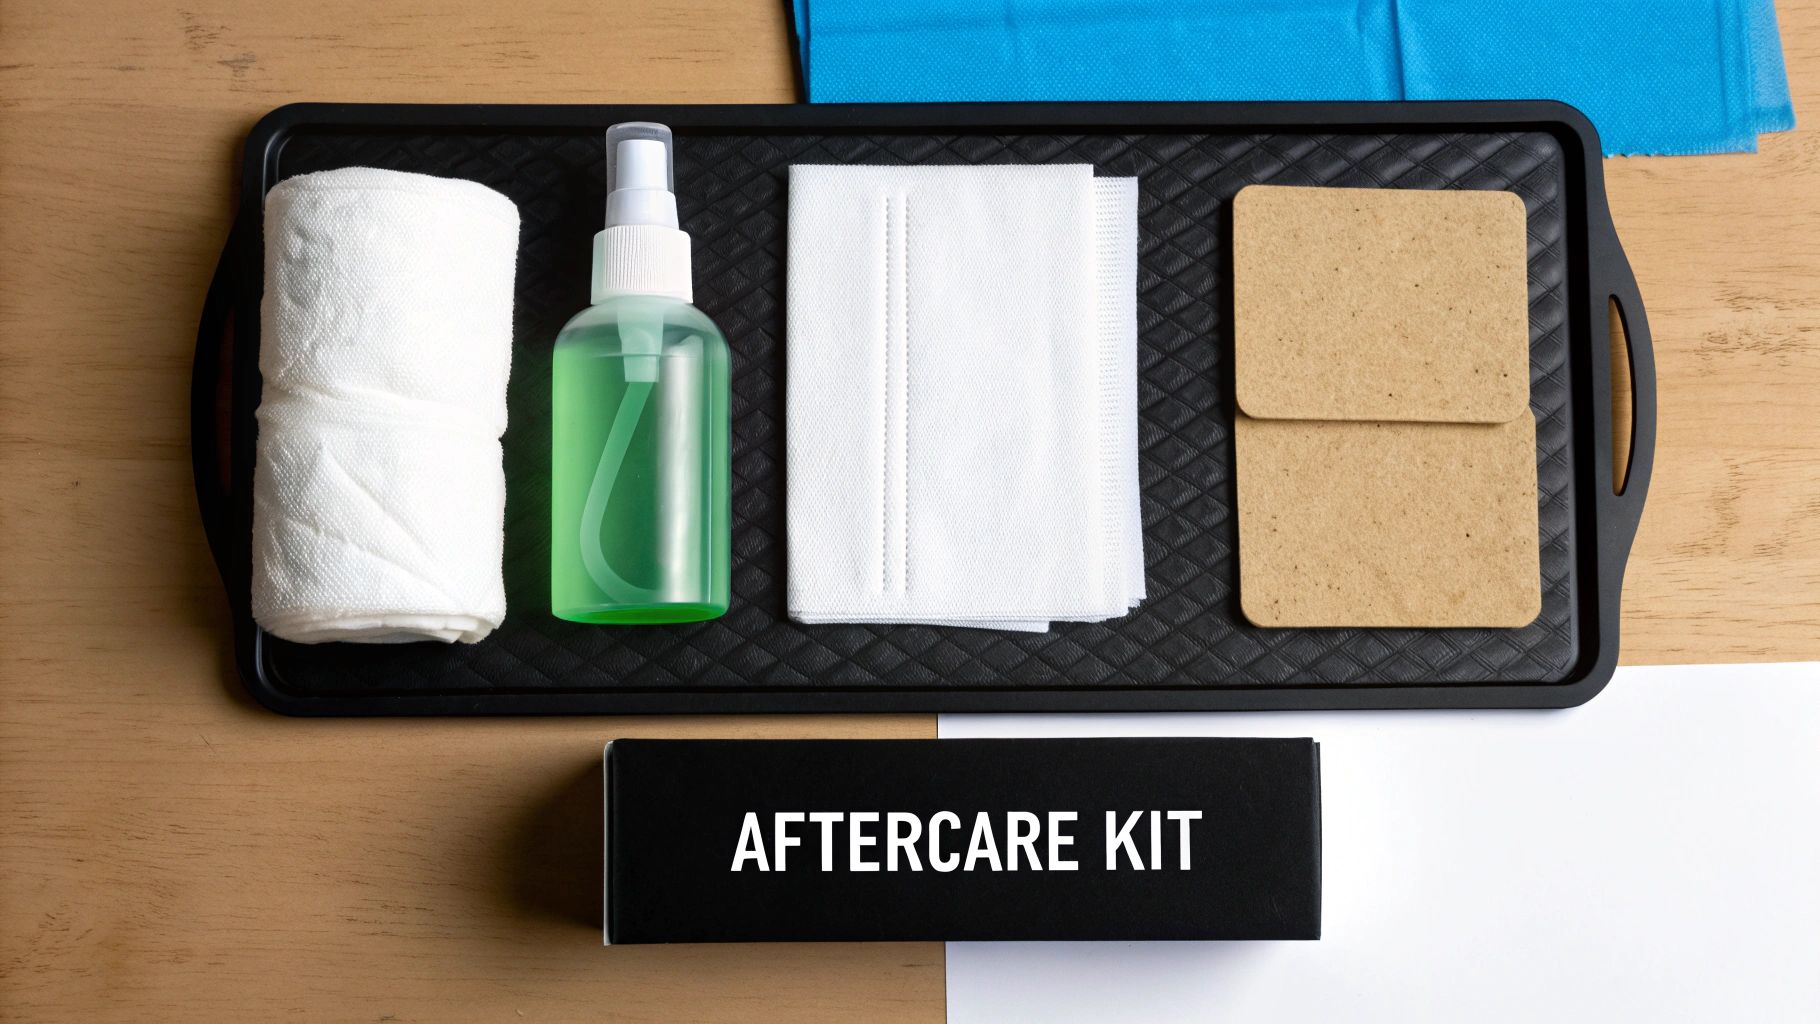
The absolute star of your aftercare show is a sterile saline solution. I'm not talking about DIY saltwater here; this is a specific formula made to be incredibly gentle and effective, perfectly mimicking your body’s own fluids.
The Only Cleaner You Need
When you’re at the store, you're looking for something that says "sterile saline wound wash" on the label, and it should come in a pressurized spray can. Flip it over and check the ingredients—it should be a super short list: just 0.9% sodium chloride and purified water. That's it. Anything else is unnecessary.
So, why is a pre-made spray a non-negotiable? Two huge reasons:
- It's actually sterile. That pressurized can is sealed up tight, meaning zero bacteria can sneak in. Every single spritz is completely clean, which is exactly what you want for a fresh, open wound.
- The concentration is perfect. That 0.9% ratio is the magic number. When you try to mix your own at home, it's almost impossible to get it right. Too much salt will seriously irritate your piercing, and too little won't be effective at cleaning.
Using a pre-made sterile saline spray takes all the guesswork out of the equation. It guarantees you're using a perfectly balanced, sterile solution every single time, setting your piercing up for the smoothest healing process possible.
Choosing Your Applicators
Okay, you've got your saline. Now, what do you use to actually clean and dry your piercing? This is just as important as the solution itself. You need something clean, disposable, and—this is critical—lint-free.
Here’s a quick rundown of what to grab and what to avoid:
- DO Use Non-Woven Gauze: This is the gold standard for a reason. It's sterile, absorbent, and won't shred or leave behind tiny fibers that can get tangled in your jewelry and cause major irritation.
- DO Use Clean Paper Towels: In a pinch, a fresh, good-quality paper towel (the sturdy kind) works great for gently patting the area dry after cleaning.
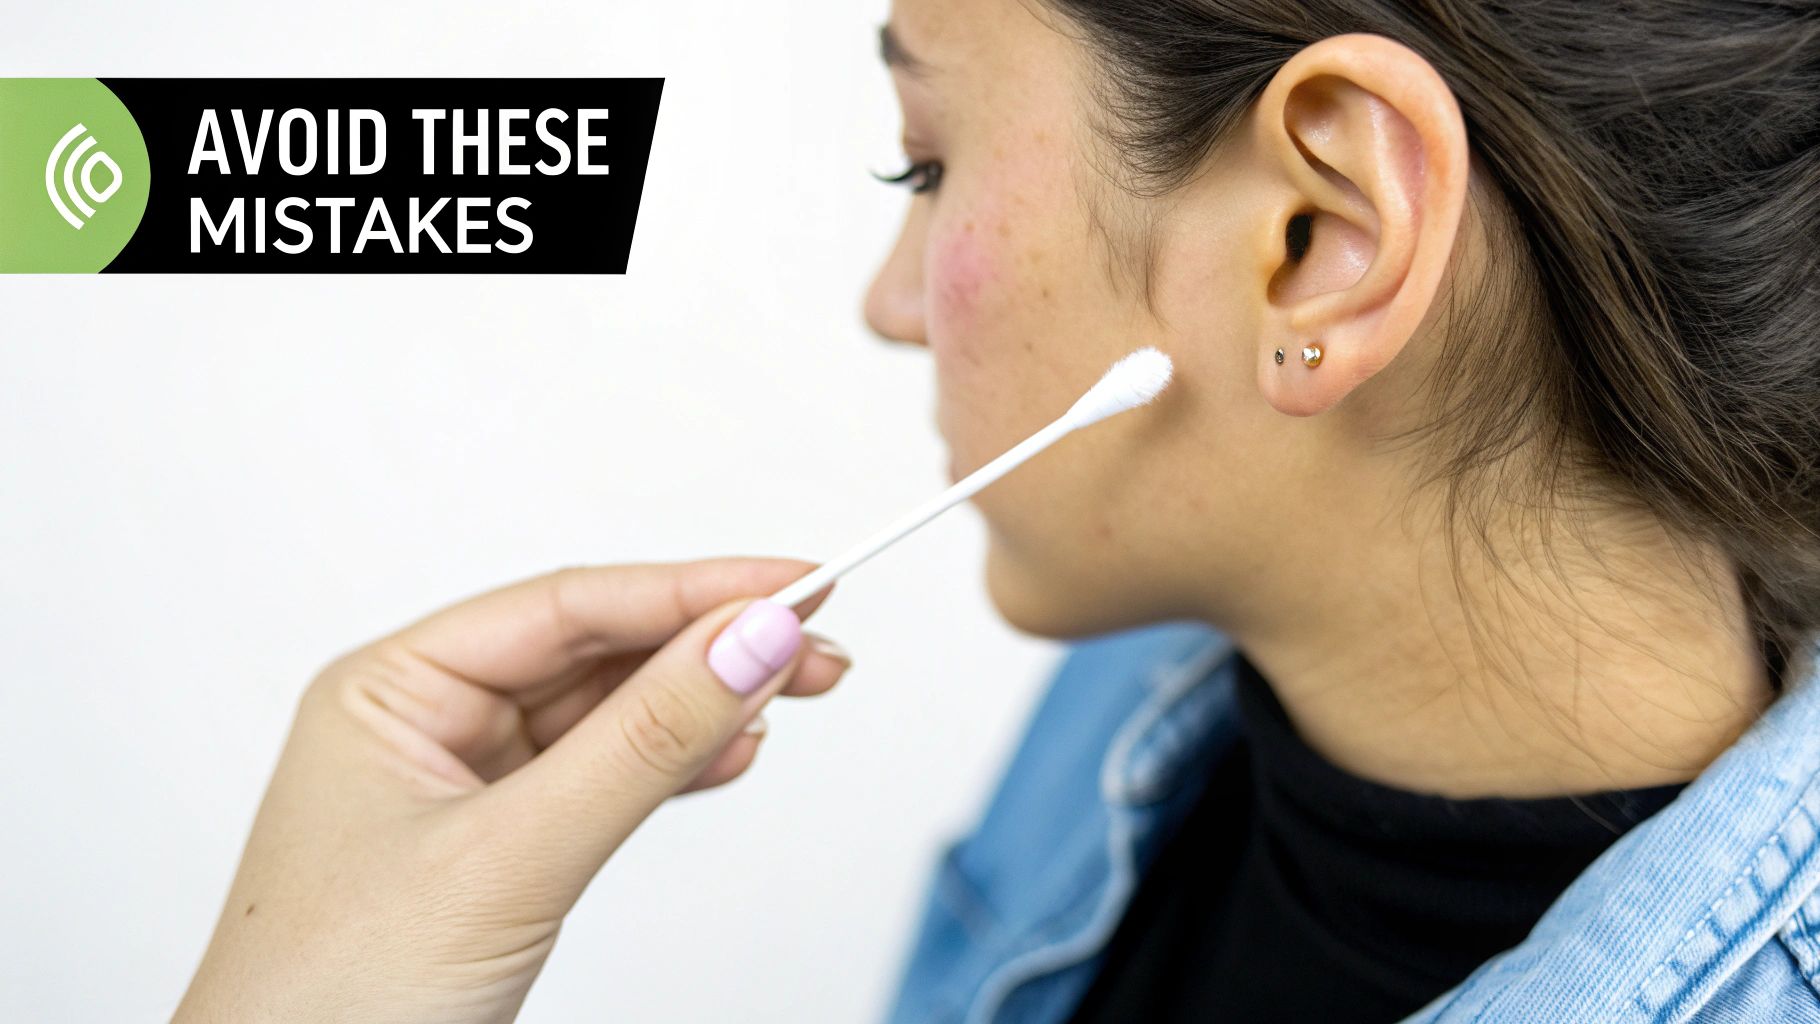
- DON'T Use Cotton Balls or Swabs: Please, just leave these on the shelf. They are notorious for shedding little cotton fibers that wrap around your jewelry and get stuck inside the piercing channel. This is a one-way ticket to irritation bumps and potential infection.
With the right spray and the right applicators, you're all set for your daily cleaning routine. If you want to dive deeper into a piercer-approved brand, check out our guide on H2Ocean aftercare products, which are formulated specifically for piercings.
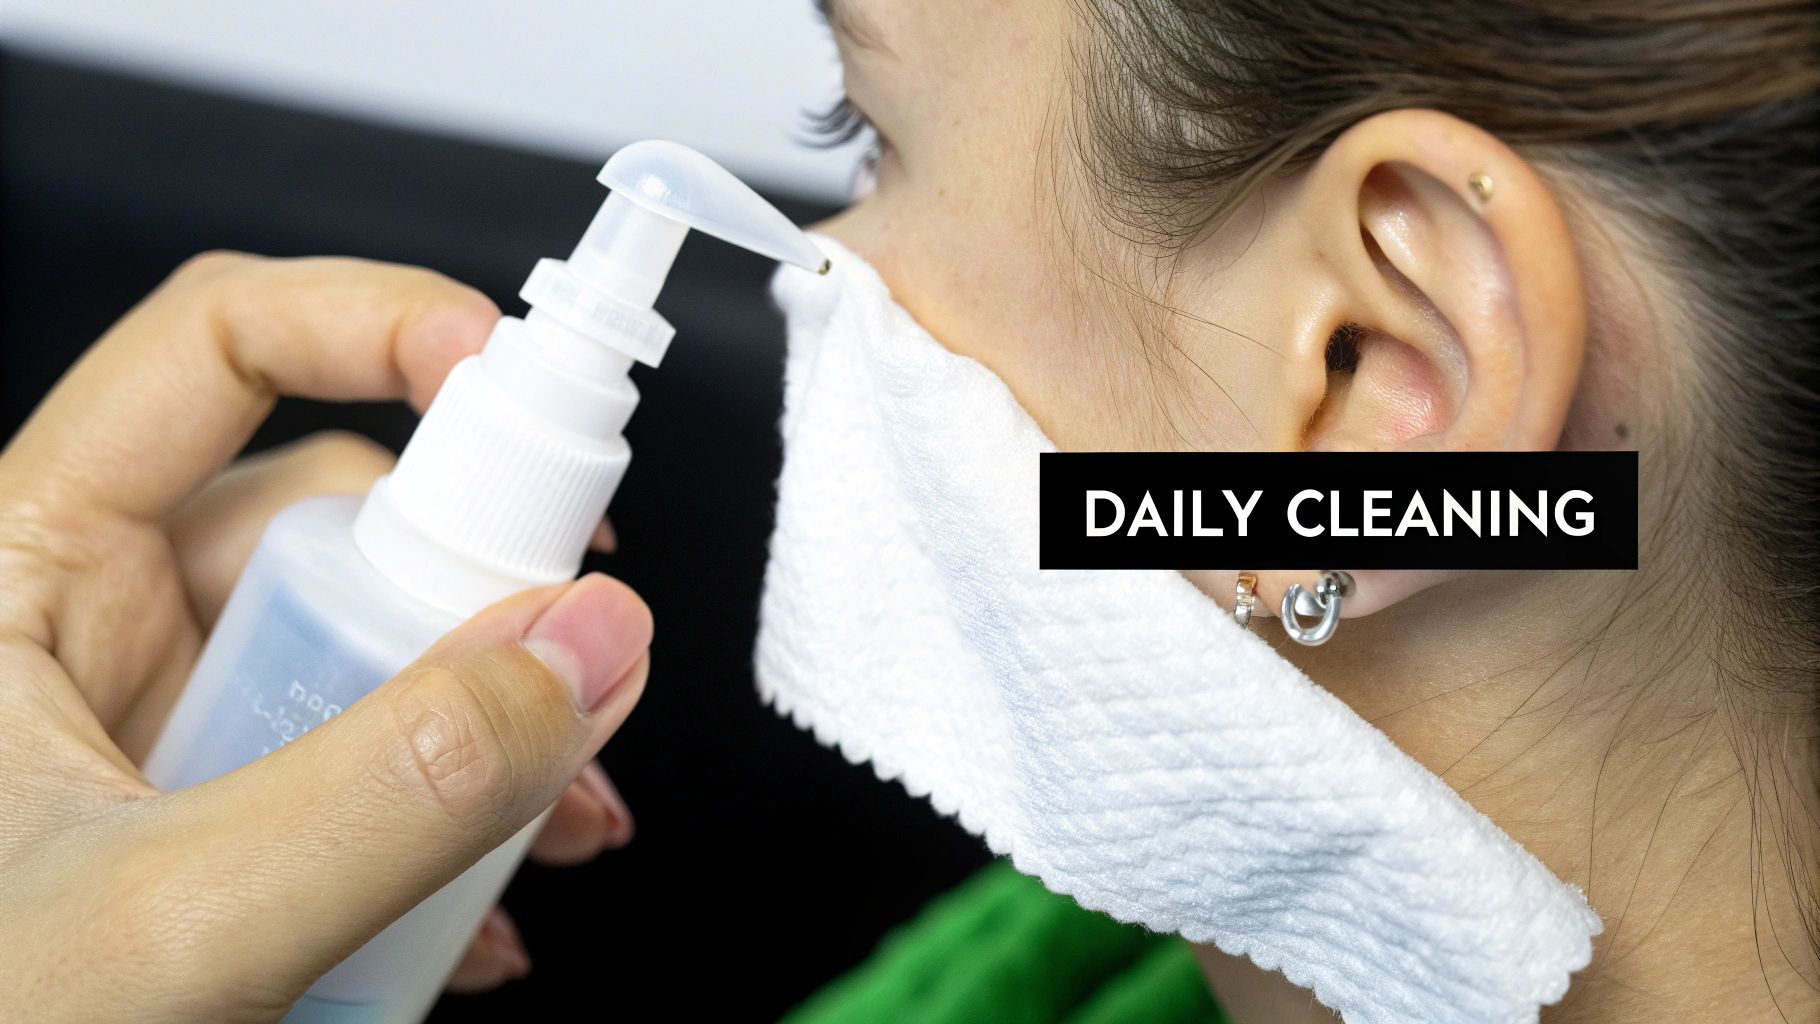
The Daily Cartilage Cleaning Ritual
Alright, you've got your aftercare supplies. Now it's time to turn the cleaning process into a quick, stress-free habit you can knock out in just a few minutes, twice a day.
Think of it like this: your body is working hard to heal, and your job is to create the cleanest possible environment for it to do its thing. Consistency is everything here. Sticking to this routine is your ticket to a happy, healthy cartilage piercing.
Wash Your Hands First. Always.
Before you even think about touching your ear, stop and wash your hands. This isn't just a friendly suggestion—it’s the absolute golden rule of piercing aftercare.
Think about all the things you touch: your phone, doorknobs, your keyboard. Your hands are covered in bacteria, and introducing that to a fresh wound is asking for trouble. Grab some soap, lather up for a solid 20 seconds, and rinse well.
Saturate with Saline
Now for the main event. Grab that sterile saline spray and get ready to give your piercing a gentle shower.
Hold the can a few inches from your ear and give the front and back of the piercing a light spray. You want the whole area to be saturated, but you don't need to drench it. That fine mist is perfect for flushing away debris without being too aggressive.
Don’t Rotate Your Jewelry! This is an old myth that actually does more harm than good. Twisting or turning your earring tears the delicate new tissue your body is forming, introduces bacteria, and can seriously set back your healing time. Just let the saline do the work.
Dealing with "Crusties"
You’ll probably notice some yellowish crust forming around your jewelry, especially in the first few weeks. Don’t panic! This is just dried lymph fluid, a totally normal part of the healing process. We lovingly call them "crusties" in the piercing world.
Whatever you do, don't pick at them with your fingernails. The saline spray you just applied will soften them right up, making them easy to remove safely.
Here's how to handle them:
- Let the saline soak in for a minute or so to work its magic.
- Take a piece of fresh, non-woven gauze or a clean paper towel.
- Gently wipe away the softened crust. If it doesn’t come off easily, it’s not ready. Just leave it alone and try again during your next cleaning.
The Most Overlooked Step: Pat It Dry
This last step is the one people forget all the time, but it’s absolutely critical for preventing those dreaded irritation bumps. Lingering moisture creates the perfect breeding ground for bacteria and can lead to all sorts of issues.
After you’ve cleaned the area, take a fresh paper towel or another piece of non-woven gauze and gently pat everything completely dry. Make sure you get the front and the back of the piercing. A dry piercing is a happy piercing.
Common Aftercare Mistakes You Need To Avoid
We've all heard some wild advice about piercing aftercare floating around the internet. It's time to bust some myths and help you dodge the common mistakes that can lead to irritation, dreaded bumps, and a seriously prolonged healing journey. Getting this part right is just as crucial as the daily cleaning itself.
Think of your new piercing as a delicate project. Your body is trying to build a perfect, smooth tunnel of skin called a fistula, and a single misstep can undo weeks of hard work.
Ditching The Harsh Chemicals
First things first: step away from the harsh chemicals. We're looking at you, rubbing alcohol, hydrogen peroxide, and antibacterial soaps. While these might seem like a good idea to "kill germs," they are far too aggressive for a healing piercing.
These products don't just kill bad bacteria; they destroy the healthy, new cells your body is working overtime to create. Using them can lead to extreme dryness, chemical burns, and can actually delay your healing process significantly.
Your piercing isn't dirty, it's wounded. Treat it gently with a sterile saline solution and let your body handle the rest.
The Myth of Twisting Your Jewelry
This is probably the most persistent piercing myth out there—the idea that you need to twist or turn your jewelry to keep the hole from "closing around it." This is 100% false and actively harmful.
Every time you rotate that stud, you're essentially re-injuring the delicate, healing fistula. This action drags in external bacteria, causes trauma to the fragile tissue, and is a leading cause of those dreaded irritation bumps. Seriously, just let it be!
Your jewelry is not going to get "stuck." The best thing you can do for your healing piercing is to follow the LITHA method: Leave It The Heck Alone!
Finding The Cleaning Sweet Spot
While cleaning is crucial, there's definitely such a thing as over-cleaning. Healing stats reveal that cartilage piercings demand 2 cleanings daily with saline for optimal results, a stark contrast to the quick 6-8 week healing time for earlobes. Cartilage can take a slow 6-12 months due to its limited blood supply.
In fact, industry surveys show that 65% of users who followed a strict saline protocol healed without issues, compared to only 25% of those with inconsistent routines. Stick to your twice-daily schedule and trust the process.
Common Aftercare Myths Vs Reality
A lot of old-school "advice" still circulates, and it can be tough to know what's right. Let's clear up a few of the most common—and most damaging—myths you'll hear about piercing aftercare.
| The Myth | The Reality | Why It's Harmful |
|---|---|---|
| "Use rubbing alcohol to disinfect it." | Only use sterile saline solution. | Alcohol and peroxide are far too harsh, killing the new cells your body needs to heal and causing severe irritation. |
| "Twist the jewelry so it doesn't get stuck." | Never twist or turn your jewelry. | Twisting re-injures the site, drags in bacteria, and is a primary cause of irritation bumps and delayed healing. |
| "Clean it with antibacterial soap." | Stick to saline only. | Soaps contain chemicals, fragrances, and dyes that are irritating. Plus, they're difficult to rinse fully, leaving residue behind. |
| "Apply ointments like Neosporin to help it heal." | Ointments are a no-go. | Ointments trap bacteria, block oxygen flow to the wound, and create a moist environment that can actually promote infection. |
Sticking to the basics—gentle saline soaks and leaving it alone—is always the safest bet for a happy, healthy piercing.
More Common Pitfalls to Dodge
Beyond the big mistakes, a few other habits can cause trouble for a new cartilage piercing. Dodging these is key to a smooth ride.
- Sleeping On It: Putting pressure on a new piercing all night is a recipe for irritation, swelling, and can even cause the piercing angle to shift permanently. A travel pillow with a hole for your ear can be a total game-changer.
- Changing Jewelry Too Soon: We get it, you're excited to swap in that sparkly new hoop! But changing your starter jewelry before the piercing is fully healed (we're talking 6-12 months) can cause serious trauma and set you back to square one. Patience is a virtue here.
- Using Low-Quality Jewelry: Not all metals are created equal. Poor quality jewelry can contain nickel and other alloys that cause allergic reactions, even in piercings that were healing perfectly. If you're dealing with persistent irritation, it might be time to learn more about how different piercing materials can affect you.
When To See Your Piercer Or A Doctor
Most of the time, your cartilage piercing will heal just fine with your daily saline spritz and a little patience. But it's super important to know the difference between your body’s normal healing antics and the signs that it’s waving a little red flag for help.Knowing what to look for takes all the anxiety out of the healing process. When you know what's normal and what isn't, you can take the right action at the right time, keeping both you and your awesome new piercing safe and sound.
Normal Healing vs Red Flags
First, let's talk about what's totally normal. It’s common to see some mild redness, initial swelling, and a bit of tenderness, especially in the first few weeks.
And those "crusties" we talked about? They're just dried lymph fluid and are a positive sign that your body is doing its healing thing. Annoying, maybe, but perfectly normal.
But what isn't normal? It's time to pay close attention if you notice any of the following signs. These are your body's signals that something more than just standard irritation might be going on.
Signs of a Potential Infection:
- Intense, Throbbing Pain: We're not talking about a little soreness when you bump it. This is a deep, persistent ache that doesn't seem to let up.
- Radiating Heat: The area around your piercing feels noticeably hot to the touch, not just slightly warm from initial swelling.
- Thick, Smelly Discharge: Normal healing fluid is thin and clearish-white or pale yellow. If you see thick discharge that’s a vibrant yellow, green, or has an unpleasant odor, that’s a major red flag.
- Excessive Swelling: Initial swelling is a given, but if it gets worse after the first week or is so severe it starts to "swallow" your jewelry, it's time to get help.
Who To Call And When
If you’re just dealing with a stubborn irritation bump or have a question about your jewelry, your professional piercer should be your first call. They are absolute experts in troubleshooting healing issues and can offer solid advice on downsizing jewelry or tweaking your aftercare routine.
For a deeper dive into what to expect, check out our guide on healing times for popular piercings.
However, if you're experiencing any of the signs of a true infection listed above, do not take out the jewelry. Removing it can trap the infection inside, which can lead to a much bigger problem like an abscess.
In this case, it's time to see a doctor. They can properly diagnose the issue and prescribe antibiotics if you need them.
Don't Guess, Get Help: If you're ever truly worried about your piercing, it's always better to get a professional opinion from your piercer or a doctor. Please never rely on advice from friends or online forums when it comes to your health!
While scary-sounding, infections are mostly preventable. Studies show that infections can plague 10-20% of new cartilage piercings, but a consistent, twice-daily sterile saline cleaning routine dramatically slashes this risk. This simple prevention step is far easier than dealing with an infection after the fact. Your dedication to clean, happy healing is your best defense.
Your Cartilage Piercing Questions Answered
Still have some questions buzzing around? We've totally got you covered. We get tons of questions here at Bodycandy about healing a new cartilage piercing, so we've compiled the most common ones right here.
From wondering how long you really need to stick with your cleaning routine to what to do if you accidentally snag your brand-new stud, think of this section as your personal piercing FAQ. We're serving up clear, straightforward advice to help you navigate every stage of the healing process with total confidence.
How Long Do I Need To Clean My Cartilage Piercing?
This is the big one! You should be cleaning your cartilage piercing with a sterile saline spray twice a day for the entire healing period. For cartilage, that’s typically a long haul: 6 to 12 months. Yes, you read that right—up to a whole year!
It's a super common mistake to stop cleaning once it looks and feels better, which often happens around the three-month mark. But here's the thing: while the outside might look perfectly fine, the delicate tissue forming the tunnel inside your piercing is still fragile and strengthening.
Think of it like a road tunnel being built. The entrances might look complete, but the internal supports are still being put in place. Stopping your aftercare routine early is like inviting irritation and infection to a party you definitely didn't plan. Consistency is your absolute best friend here.
Key Takeaway: The healing journey is a marathon, not a sprint. Committing to the full 6-12 months of aftercare is the single best thing you can do to ensure a happy, healthy piercing for life.
Can I Use Soap Or Other Cleaners On My Piercing?
Let's make this super clear: absolutely not! Harsh cleaners like antibacterial soap, rubbing alcohol, and hydrogen peroxide are way too aggressive for a healing piercing and should be avoided at all costs.
These products are designed to kill everything in their path, including the healthy new cells your body is working hard to build. Using them can seriously dry out your skin, cause nasty chemical irritation, and bring your healing process to a screeching halt.
Your piercing isn't dirty—it's a wound. Your only job is to keep the area clean and let your body work its magic. Sticking to a sterile saline solution is the only safe and effective way to do this. It's perfectly balanced to gently clean the piercing without causing any damage.
What's The Difference Between Irritation And An Infection?
It's so easy to confuse the two, and the panic is real! Knowing the difference helps you take the right action without freaking out over every little bit of redness.
- Irritation: This is by far the more common issue. It usually looks like localized redness, maybe a small bump right next to the piercing (that infamous "irritation bump"), and the normal clear or whitish fluid that forms "crusties." It's typically caused by something physical—like snagging your jewelry, sleeping on it, or even wearing low-quality earrings.
- Infection: This is a much more serious problem that involves your body's immune system fighting back. The signs are more intense and widespread. Look for throbbing pain, heat radiating from the piercing site, significant swelling that doesn't go down, and thick, smelly discharge that is bright yellow or green.
If you suspect an infection, leave your jewelry in to keep the hole from closing and trapping the infection, and see a doctor right away.
When Can I Finally Change My Cartilage Jewelry?
We know, the excitement to swap in a cute new hoop is intense, but patience is a virtue when it comes to cartilage. You must wait until your piercing is 100% fully healed before changing the jewelry just for fun.
For cartilage, this means waiting a minimum of 6 months, but many people need closer to a full year. Trying to change it too early can cause major trauma to that delicate healing tunnel, which often leads to bumps, swelling, and a major setback in your healing timeline.
Your best bet? Schedule a check-up with your piercer when you think it's ready. They can take a professional look to confirm you're good to go, and they can even perform the first jewelry change for you. This ensures it's done safely and with high-quality, body-safe jewelry.
Ready to find the perfect piece for when your piercing is finally healed? The Bodycandy team has a massive collection of high-quality, implant-grade titanium and surgical steel cartilage jewelry waiting for you. Shop our full collection today and start planning your dream ear setup


