So you just got some amazing new bling? Congrats! The journey to a beautifully healed piercing starts the second you walk out of the studio. Honestly, the most important part of caring for your new piercing is simple: keep it clean, dry, and leave it alone.
This means getting friendly with a sterile saline solution twice a day and fighting every urge to touch, twist, or fiddle with your new jewelry. Welcome to the club!
Your Essential Piercing Aftercare Kickstart
Getting a new piercing is an incredible way to express yourself, but that initial excitement comes with a super important responsibility—aftercare. Think of the next few weeks as laying the foundation for a happy, healthy piercing that will look amazing for years. If you slack on this part, you could be in for a world of irritation.
But don't worry, we've got your back. This guide is your cheat sheet to starting your healing journey on the right foot. We're cutting through the noise and busting old myths (no, you really do not need to twist your jewelry!) to give you the straight-up, non-negotiable rules of piercing care.
The Golden Rules of Healing
First things first, let's talk hygiene. Keeping your new piercing clean is the most critical part of the entire process. Without proper care, you're just inviting trouble. In fact, some studies show that bacterial infections can pop up in roughly 10-30% of new piercings when aftercare is neglected. Nobody wants that!
The absolute best way to prevent this is by cleaning the area twice a day with a sterile saline wound wash. Forget what you’ve heard about using harsh chemicals; alcohol and hydrogen peroxide are way too aggressive for a healing piercing and will only irritate your skin and slow things down.
With that in mind, here are the core principles you need to live by for the next few weeks:
- Hands Off! This is the hardest rule but the most important. Only touch your piercing when you are actively cleaning it, and only after you’ve washed your hands thoroughly. Your hands carry all sorts of bacteria that can easily lead to an infection.
- Clean Twice Daily. Grab a sterile saline spray and gently mist the front and back of your piercing. More is not better here—over-cleaning can lead to some serious dryness and irritation.
- Pat, Don't Rub. After cleaning or showering, gently pat the area dry with a fresh, disposable paper towel or a piece of non-woven gauze. Your regular bath towels are a no-go; they can harbor bacteria and snag your new jewelry.
- Patience is Everything. Your body is doing some amazing work creating a new channel, or "fistula." This takes time. Don't get impatient and try to change your jewelry early, and just be gentle with the area as it heals.
Remember: A new piercing is essentially an open wound. Treating it with the same care and attention you would any other wound is the real secret to a smooth and successful healing process.
If you're new to this whole experience, getting the prep and initial aftercare right is crucial. For a deeper dive into what to expect, check out our guide on how to prepare for your first piercing appointment. It's packed with tips to make your day go smoothly.
The Dos and Don'ts of Early Piercing Care
Feeling a little overwhelmed? It's a lot to remember, we get it. Here’s a quick-reference table to keep you on the straight and narrow during those crucial first few weeks.
| Do This ✅ | Don't Do This ❌ |
|---|---|
| Clean twice daily with sterile saline solution. | Use harsh chemicals like alcohol or peroxide. |
| Pat the area dry with a clean paper towel. | Twist, turn, or play with the jewelry. |
| Wash your hands before any necessary contact. | Submerge the piercing in pools or hot tubs. |
| Be patient and let your body heal. | Change the jewelry before it's fully healed. |
| Sleep on clean bedding and pillowcases. | Let hair products or makeup get into the piercing. |
Think of this table as your pocket guide. Following these simple rules is the best thing you can do to ensure your piercing heals up perfectly without any drama. Happy healing!
Mastering Your Daily Cleaning Routine
Alright, let's get into the nitty-gritty of your daily cleaning ritual. This isn't just a suggestion—it's the single most important habit you'll build that will make or break your healing process. A solid routine keeps your new piercing clean, happy, and on the fast track to looking amazing.
Think of it like any other healthy habit: consistency is everything. Skipping cleanings lets pesky bacteria throw a party, but overdoing it can cause a whole lot of unnecessary irritation. The sweet spot we're aiming for is a gentle cleaning twice a day.
Your Go-To Cleaning Method: Sterile Saline Spray
Honestly, the easiest and most effective way to clean your piercing is with a sterile saline spray. It's gentle, it’s sterile, and it’s perfectly balanced for your healing skin. No mixing, no guessing—just a quick, effective clean.
Here's the right way to do it:
- Wash Up! Before you even think about touching your piercing, wash your hands thoroughly with soap and water. Seriously. Don't skip this.
- Spray It Down: Lightly spray the front and back of your piercing with the saline solution. You want to saturate the area enough to help loosen up any "crusties" that have formed.
- Give It a Minute: Let the solution sit for about 30-60 seconds. This gives it time to work its magic and soften any dried lymph fluid (those crusties we mentioned).
- Pat Dry with Care: Gently pat the area completely dry using a fresh piece of non-woven gauze or a clean paper towel. Ditch your regular bath towel for this—it can harbor bacteria and snag your jewelry, which is a total healing nightmare.
For a deeper dive into the benefits, you can explore more about why H2Ocean aftercare products are a piercer favorite.
The DIY Sea Salt Soak Alternative
If you don't have a saline spray on hand, a proper sea salt soak (SSS) is the next best thing. But you have to get the ratio right, otherwise you'll create a solution that's either useless or way too harsh.
Pro Tip: The perfect mix is 1/4 teaspoon of non-iodized sea salt dissolved in one cup (8 ounces) of warm distilled or bottled water. Using too much salt is a fast track to drying out and seriously irritating your new piercing.
To do a soak, just fill a small, clean cup with your freshly mixed solution. Lean over and create a vacuum seal with the cup over your piercing, then just hang out for about 5-10 minutes. This method works great for spots like navel or nipple piercings but can get a little awkward for others.
Dealing With Those Pesky "Crusties"
Seeing some yellowish, crusty stuff forming around your jewelry? Don't freak out! This is just dried lymph fluid, and it’s a completely normal part of the healing process. That said, you do need to remove it gently.
Whatever you do, never pick at crusties with your fingernails. This can tear the delicate, healing skin and introduce a ton of bacteria. Instead, let your saline spray or the warm water from your shower soften them up until they can be wiped away effortlessly with clean gauze. If they don't come off easily, they aren't ready. Leave them be.
Cleaning Tricky Piercing Placements
Got a piercing tucked away in a hard-to-reach spot? We've all been there. Don't sweat it.
- For Daith or Rook Piercings: These can be a real pain to see properly. Use your saline spray as directed and just let the water run over the area in the shower to rinse away any residue. When you're drying it, be extra gentle and focus on dabbing carefully with the corner of your gauze.
- For Nostril Piercings: Be super careful not to let makeup or face wash seep into the piercing site. Clean the outside as usual. For the inside, you can dip a piece of clean gauze in saline and gently wipe around the jewelry.
As body piercings have become a major form of self-expression, professional studios have doubled down on emphasizing strict aftercare. This always includes daily cleaning with sterile saline, keeping lotions and makeup away, and watching for any signs of trouble—advice that's widely supported by dermatologists and pro piercers everywhere.
Navigating the Piercing Healing Journey
Getting a new piercing is an experience, but the real journey begins right after you leave the studio. Think of healing as a marathon, not a sprint. The process looks a little different for everyone and for every piercing type, but knowing what to expect can give you major peace of mind when things get a little weird—and trust us, they sometimes do!
Understanding the stages of healing helps you know if you're on the right track. Your body is doing some seriously cool work building a brand-new tunnel of skin (called a fistula) around your jewelry. This process involves a few distinct phases, each with its own set of totally normal quirks.
What to Expect Day by Day
The first few days to a couple of weeks are all about the initial reaction. Your body recognizes a new object and immediately sends blood to the area to kickstart the healing process.
This is why you'll see some classic signs right away:
- Redness and Swelling: It's completely normal for the area to be red, tender, and a bit puffy. This is just your body's natural inflammatory response doing its job.
- Minor Bleeding: A tiny bit of bleeding or even some bruising right after you get pierced is also common. It should stop fairly quickly.
- Tenderness: The piercing will likely be sore to the touch. This is exactly why that "hands-off" rule we talked about earlier is so important!
This initial phase is where your diligent cleaning routine pays off the most. It keeps the area free of irritants and bacteria while your body gets down to business.
The Infamous "Crusty" Phase
After the initial swelling calms down, you'll enter what we lovingly call the "crusty" phase. You'll probably start to notice a yellowish, crusty substance forming around your jewelry. Don't panic!
This stuff is just dried lymph fluid, and it is 100% normal. It's actually a sign that your body is healing correctly. The key is to never, ever pick at these crusties with your fingers. Instead, let your saline spray or the warm water from your shower soften them until they can be gently wiped away with a clean piece of gauze.
To help you visualize the key aftercare steps, here's a simple look at what your focus should be during the initial healing period.
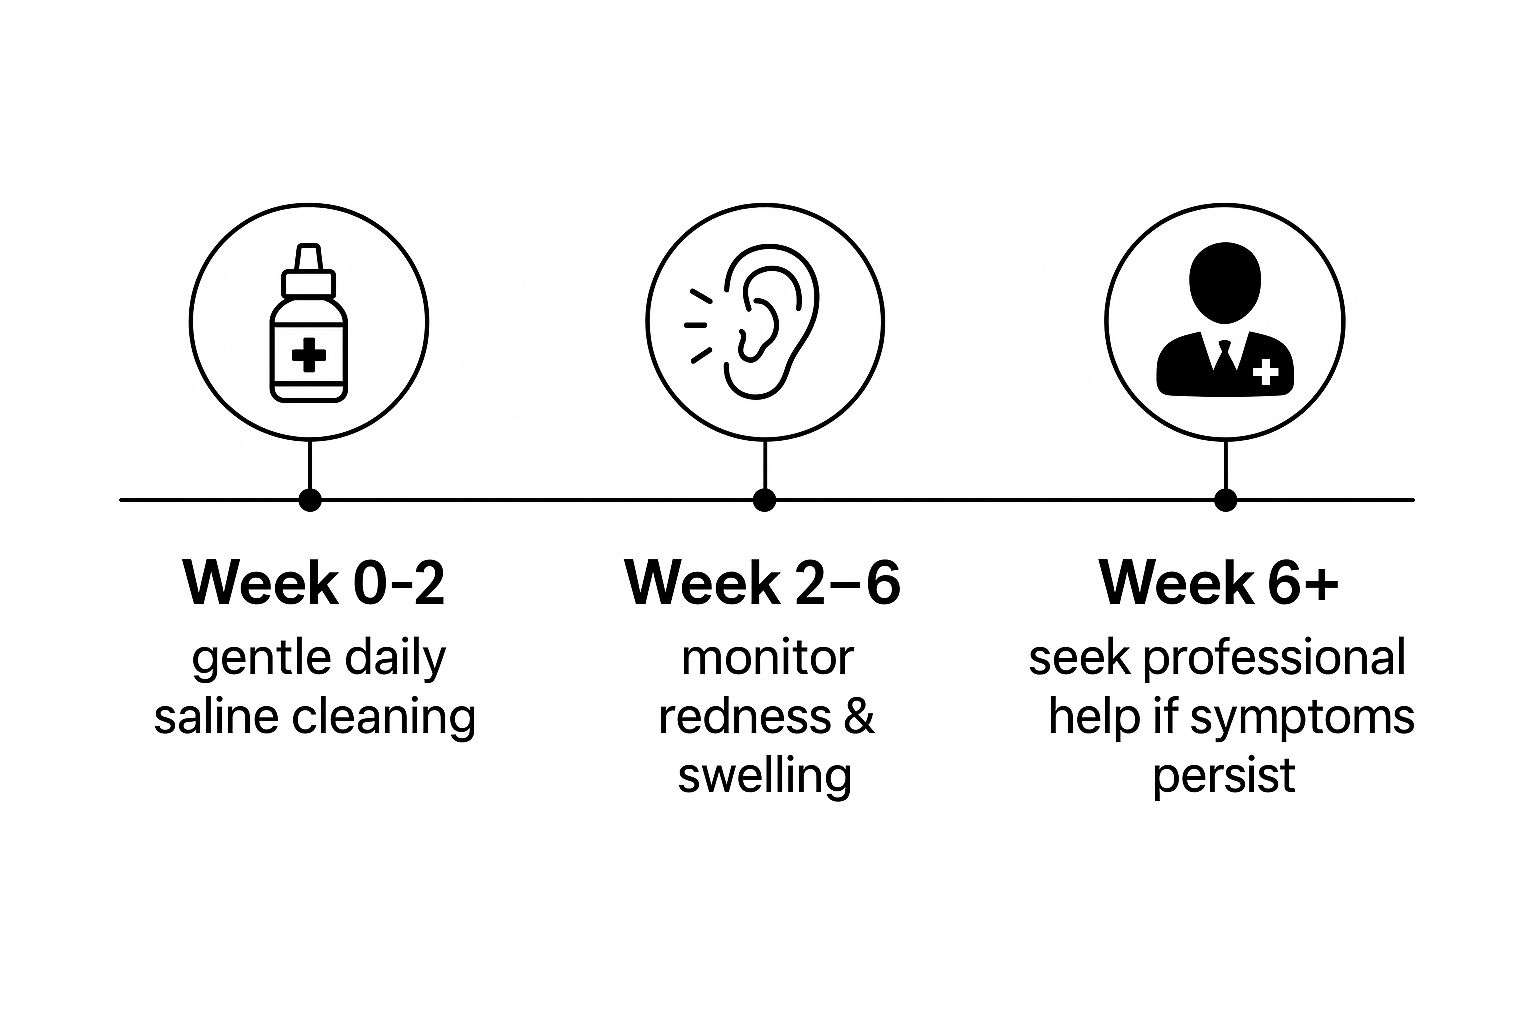
This timeline highlights that consistent, gentle care is the foundation for a happy piercing, followed by careful monitoring as you move through the initial healing phase.
Healing Timelines for Popular Piercings
So, how long does this all take? That's the million-dollar question! The honest answer is that it varies wildly depending on the piercing's location, your own body's healing ability, and how well you stick to your aftercare routine.
A simple earlobe piercing might feel totally fine in a few weeks, but cartilage piercings like a helix or industrial can take a year or more to fully mature. Blood flow is a huge factor here—areas with less blood flow, like cartilage, simply heal more slowly.
Don't Be Fooled: Just because a piercing stops feeling sore doesn't mean it's fully healed on the inside. That fistula takes a long time to become strong and stable, so changing your jewelry too early can set your progress way back.
To give you a better idea of what you're in for, here are some average healing times. But remember, these are just estimates!
Average Healing Times for Popular Piercings
This table offers a general guideline for how long you can expect the healing process to take for some of the most common piercings. Use it to set your expectations, but always listen to your body first and foremost.
| Piercing Type | Average Healing Time |
|---|---|
| Earlobe | 6-8 Weeks |
| Nostril | 4-6 Months |
| Septum | 2-3 Months |
| Helix/Cartilage | 6-12 Months |
| Navel | 9-12 Months |
| Nipple | 6-12 Months |
| Industrial | 9-12+ Months |
As you can see, patience is truly a virtue in the piercing world. For a more complete list, be sure to check out our detailed guide on the healing times for popular piercings.
When Bumps Appear
One of the most common freak-outs during healing is the sudden appearance of a small bump near the piercing site. More often than not, this is an irritation bump, not a dreaded infection or a keloid.
These bumps are usually your piercing's way of telling you something is bothering it. Common culprits include:
- Moisture: Not drying your piercing thoroughly after cleaning or showering.
- Pressure: Sleeping on the piercing, or wearing tight clothing or headphones that press on it.
- Movement: Accidentally snagging the jewelry on hair, clothes, or towels.
The best way to deal with an irritation bump is to play detective and eliminate the cause. Double-down on your aftercare, be extra careful not to bump it or sleep on it, and give it some time. In most cases, the bump will disappear on its own once the source of irritation is gone.
Lifestyle Adjustments for a Happy Piercing
Properly caring for a new piercing is so much more than just the twice-a-day cleaning session. Your everyday habits—like how you sleep, what you wear, and even how you style your hair—play a massive role in whether your healing journey is smooth sailing or a total nightmare. Let’s get into the real-world, practical advice that seasoned piercing lovers swear by.
Think of your new piercing as a delicate little buddy that needs to be babied. It's vulnerable to bumps, snags, and pressure from the outside world. A few simple tweaks to your daily life can make a world of difference, helping you sidestep irritation and keep your new bling happy. These are the insider tricks that will help you avoid those common healing headaches.
Sleeping Soundly Without the Drama
One of the biggest culprits of angry ear and facial piercings is sleeping on them. Tossing and turning directly on a fresh helix or nostril piercing is a surefire way to wake up with a dreaded irritation bump.
So, what’s the secret weapon? A travel pillow. Seriously, this is about to be your new best friend. By placing your ear in the donut hole, you can sleep on your side without putting any direct pressure on the piercing. It's an absolute game-changer!
Beyond that, clean bedding is non-negotiable. Make a habit of changing your pillowcase every couple of days to keep bacteria at bay. If you're out of fresh cases, just slip a clean t-shirt over your pillow—it works like a charm.
Dress Code for a Healing Piercing
Your wardrobe can either be your piercing’s best friend or its worst enemy, especially for body piercings like navels or nipples. The last thing you want is that gorgeous new navel ring getting constantly caught on the waistband of your favorite high-waisted jeans.
For the first few months, you’ll want to give your piercing some breathing room.
- For Navel Piercings: Stick with loose-fitting shirts and low-rise pants or skirts. Ditch the tight leggings, high-waisted jeans, and any belts that sit directly on top of your piercing.
- For Nipple Piercings: A clean, soft cotton bra or bralette can actually be beneficial, offering a protective barrier against snags. Just stay away from lace or mesh materials that your jewelry can easily catch on. For some people, going braless with a loose shirt feels better—listen to what your body tells you.
The key takeaway is simple: avoid friction and pressure at all costs. Any clothing that rubs, pulls, or squishes a new piercing is going to cause irritation and seriously delay your healing.
Beauty Routines and Physical Activities
You don't have to put your life on hold for a new piercing, but you definitely need to be more mindful. Things like hair products, makeup, and your workout routine all require a little extra thought.
Be super careful with hairspray, dry shampoo, and any other aerosols. These products can easily drift into a healing ear piercing and cause a world of hurt. Always cover your piercing with a clean hand or a paper towel before you spray. In the same vein, keep foundation, powders, and lotions far away from any new facial piercings.
If you’re active or play sports, protecting your piercing is a must. For activities where it might get hit, you can cover it with a breathable bandage. The trick is to avoid trapping moisture, so make sure to clean your piercing immediately after any workout to wash away sweat and bacteria.
And finally, the big one: swimming. You have to avoid submerging your new piercing in pools, hot tubs, lakes, and oceans for the entire healing period. These bodies of water are basically breeding grounds for nasty bacteria that can lead to serious infections. Trust us, a healthy, fully healed piercing is worth waiting a few months for a swim.
Troubleshooting Common Piercing Problems
Look, even when you follow every aftercare rule to the letter, sometimes your new piercing just decides to get a little… grumpy. Before you spiral down a panic-Googling rabbit hole, take a deep breath. Most of the time, these little flare-ups are just your body’s way of telling you something is off, and they’re often surprisingly easy to fix.
Think of this as your guide to playing piercing detective. We’ll help you figure out what’s a normal healing quirk and what’s a sign that you need to take action.
Is It Irritation or an Infection?
This is the big one. The question that sends everyone into a frenzy. It is absolutely crucial to know the difference between a simply irritated piercing and one that's genuinely infected, because how you handle them is completely different.
An irritated piercing is just annoyed. It might look a little red or be slightly swollen, and you'll probably see a small, pesky bump forming near the piercing site. The cause is usually something physical bugging it.
Common culprits for irritation include:
- Pressure: Yep, sleeping on that brand-new helix piercing is the number one suspect.
- Snagging: We’ve all done it. Catching your nostril stud on a towel or your navel ring on your waistband is a classic.
- Harsh Products: Using anything other than sterile saline—like alcohol, peroxide, or scented soaps—will absolutely upset your piercing.
On the other hand, a true infection is a bacterial issue and it’s no joke. The signs are much more intense and can even affect how you feel overall.
Be on the lookout for these clear signs of infection:
- Intense Pain: We're talking throbbing, radiating pain that goes beyond simple tenderness.
- Yellow or Green Discharge: This isn’t the normal clearish 'crusties'. It’s thick, opaque, and looks like pus.
- Hot to the Touch: The entire area around the piercing will feel noticeably warmer than the rest of your skin.
- Red Streaks: This is a major red flag. If you see red lines spreading out from the piercing site, it's serious.
- Fever or Chills: If you feel sick all over, that’s a sign the infection might be spreading.
Crucial Tip: If you even suspect you have an infection, do not remove your jewelry. I know it’s tempting, but taking it out can allow the piercing channel to close, trapping the infection inside. This can lead to a painful abscess. Leave the jewelry in and see a doctor right away.
The Battle of the Bumps: Hypertrophic Scars vs. Keloids
Ah, the dreaded piercing bump. When one of these pops up, it’s easy to assume the worst. But take heart—most of these bumps are just harmless hypertrophic scars, which piercers usually call irritation bumps.
These are small, localized bumps that form right next to the piercing hole. Think of them as your body's over-enthusiastic healing response to ongoing irritation. The fantastic news? If you can figure out what’s annoying it and stop it (quit sleeping on it, be more careful with clothes), these bumps will almost always go away on their own. Patience and consistent, gentle aftercare are your best weapons here.
Keloids, however, are a different beast entirely. They’re a type of raised scar caused by an overproduction of collagen, and honestly, they're much rarer than people think. Unlike irritation bumps that stay put, keloids grow well beyond the original piercing site and can become quite large. They don't typically go away on their own and often require a dermatologist's help to treat. The biggest clue is that keloids are often linked to a genetic predisposition.
When to Call in the Pros
Part of smart piercing care is knowing when you’re out of your league and need to ask for help. While you can handle minor irritation at home, some situations call for a professional eye.
See your piercer if:
- You have an irritation bump that just won’t budge after a couple of weeks of diligent care.
- You think your jewelry might be too tight due to swelling and you need a longer bar.
- You’re just not sure if what you’re experiencing is normal healing or something more.
See a doctor if:
- You have any of the signs of an infection we listed above (hot to the touch, green pus, red streaks).
- The swelling is excessive and comes with severe pain.
- You have a growing bump that you suspect might be a keloid.
Remember, your piercer is an incredible resource for troubleshooting, but they are not a medical professional. For anything that looks like a real infection, a doctor is your only port of call.
Your Piercing Aftercare Questions Answered
We get it—even with a full guide, you still have those specific, nagging questions buzzing around in your head. Don't worry, you're not alone! We've rounded up the most common piercing aftercare questions we hear all the time to give you quick, clear, and straight-to-the-point answers.
Think of this as your personal piercing FAQ session. We’re here to clear up any lingering confusion so you can feel totally confident in your healing journey.
Can I Use Alcohol or Hydrogen Peroxide to Clean My Piercing?
Let's make this one crystal clear: absolutely not. This might be the biggest and most outdated piercing myth still floating around. While you might think these products are great for disinfecting, they are way too harsh for a delicate, healing piercing.
Using alcohol, hydrogen peroxide, or even antibacterial soaps can strip the area of its natural moisture, kill off the good bacteria your body needs to heal properly, and cause a ton of irritation. This will only make your healing process longer and more complicated. The golden rule? Stick with a gentle, sterile saline solution. It's all you need.
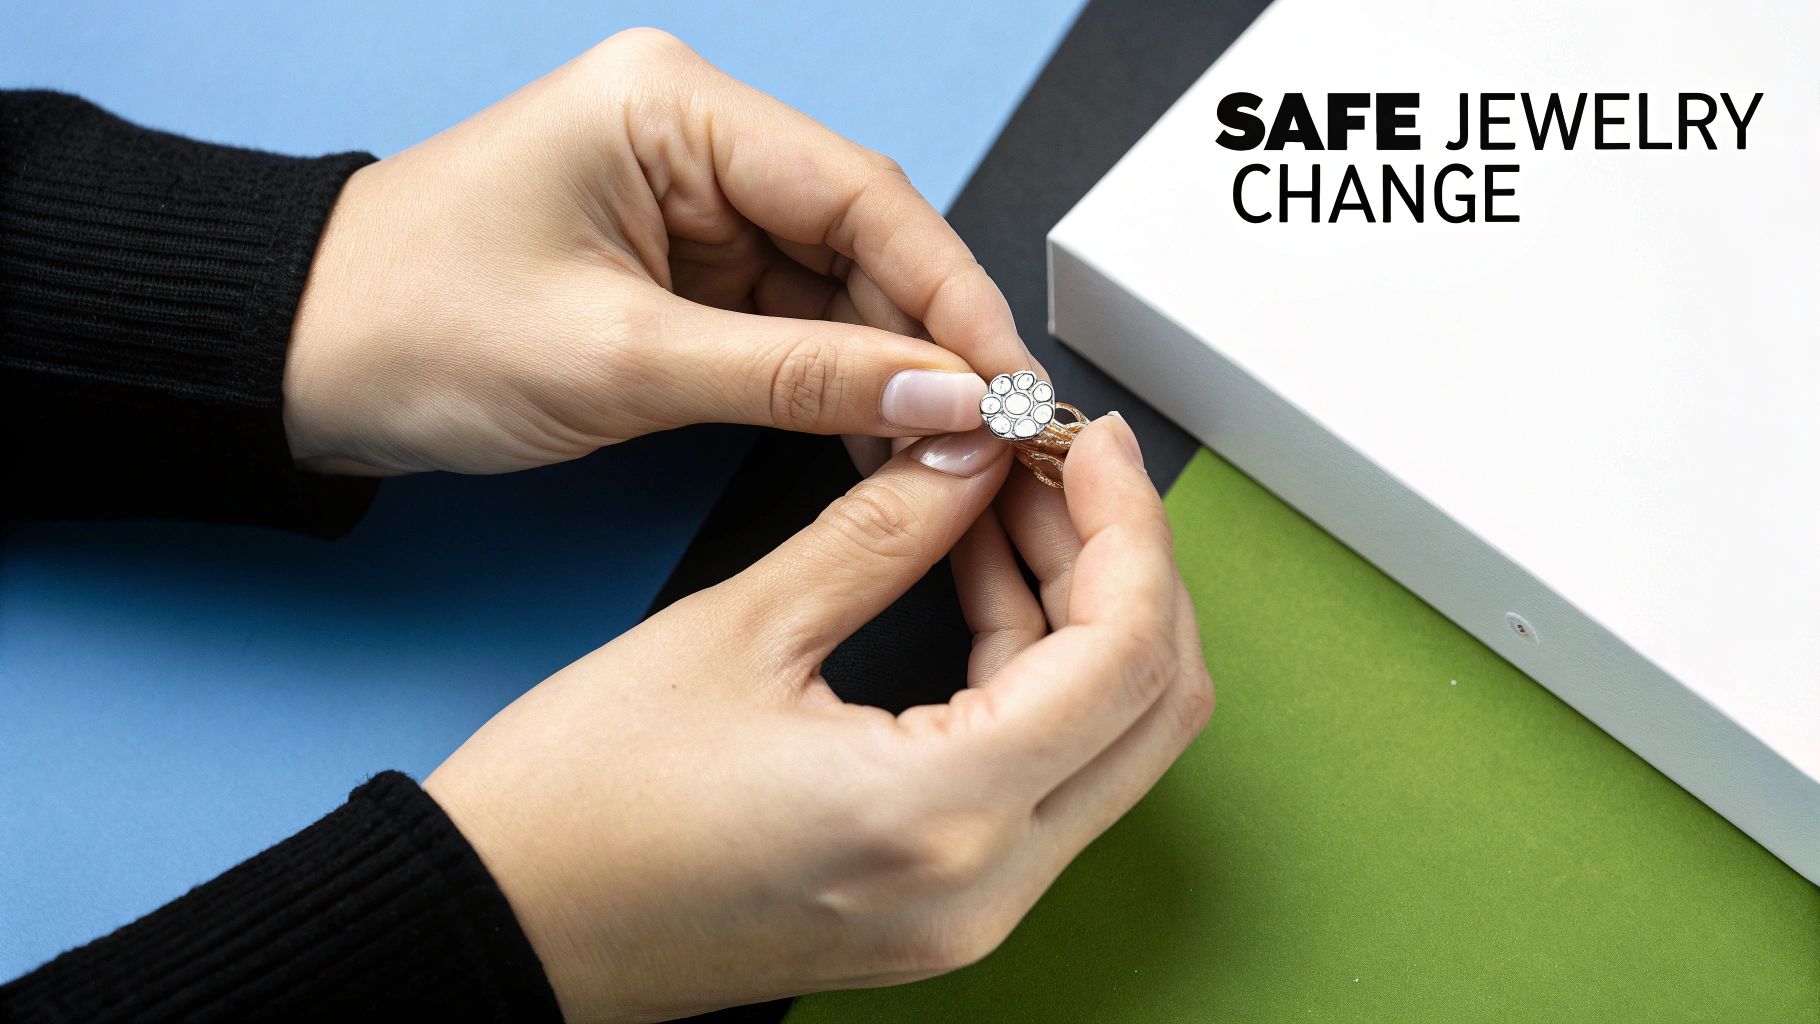
When Can I Change My Jewelry?
We know how exciting it is to eye up all the gorgeous jewelry you want to wear, but patience is your best friend here. You absolutely must wait until your piercing is 100% fully healed before swapping out that initial jewelry.
Changing it too soon is a recipe for disaster. It can tear the delicate new skin tunnel (the fistula), introduce bacteria into a still-open wound, and trigger massive irritation bumps. Your piercer gave you an estimated healing time for a reason—respect it!
Pro Tip: When you think you're healed and ready for your first swap, go see your piercer. They can confirm if you're good to go and can even help you change the jewelry safely for the first time, ensuring you don't damage anything in the process.
Is It Normal for My Piercing to Have Crusties?
Yes, this is totally normal and actually a good sign! Those little crusty bits you see forming around your jewelry are just dried lymph fluid, which your body naturally produces as part of the healing process.
The key is how you deal with them. Never, ever pick at crusties with your fingernails. This can cause tiny tears in the healing skin and introduce a ton of bacteria. Instead, just let your saline spray or the warm water in the shower soften them. After a minute or so, they should be soft enough to be gently wiped away with a clean piece of non-woven gauze. If they don't come off easily, they aren't ready—leave them alone.
What Should I Do If I Get an Irritation Bump?
First off, don't panic. Irritation bumps are incredibly common and are usually not a sign of infection. Think of them as your piercing's way of throwing a tiny tantrum because something is bothering it.
Most of the time, the cause is one of three things:
- Moisture: Not drying your piercing thoroughly after cleaning or showering.
- Pressure: The classic culprit is sleeping directly on your new piercing.
- Movement: Constantly snagging your jewelry on your hair, clothes, or towel.
The best way to fix it is to play detective and eliminate the cause. Be extra diligent about keeping the area dry, stop sleeping on it (a travel pillow is a lifesaver for ear piercings!), and be super mindful of snags. If you remove the source of the irritation and stick to your aftercare routine, the bump will almost always disappear on its own. If it persists for more than a couple of weeks or gets worse, it's time to check in with your piercer for some personalized advice.
Ready to find the perfect piece for your healed collection? Bodycandy has you covered with thousands of styles to express yourself. Explore our massive collection of high-quality body jewelry today and show off your new look