So, you’re ready to dive into the awesome world of stretched ears? That's a killer way to express your style, but let's be real—the lingo can feel a little weird at first. Simply put, gauge sizes for ears refer to the thickness of your jewelry—and the sizing system works backward, with smaller numbers meaning thicker jewelry.
Your Ear Stretching Journey Starts Here
Welcome to the exciting world of ear stretching! It's a unique form of self-expression, but the terminology can feel like learning a new language. What is a "gauge," and why does a 16g plug seem smaller than an 8g one? Think of us as your trusted friend who's here to demystify it all for you.
A gauge is just a unit of measurement for your jewelry's thickness. Getting a handle on this system is the single most important step for a safe and successful journey. This is your foundation for getting the look you want without compromising the health of your precious lobes. Before you even think about buying your first taper or plug, getting comfortable with the basics is key.
Why Sizing Is So Important
Jumping into stretching without a plan is a recipe for disaster. Getting the sizing right from the very beginning helps you avoid common and painful mistakes that can mess up your lobes for good.
- Prevents Damage: Stretching too quickly or skipping sizes can lead to tearing, blowouts, and permanent scar tissue. Nobody wants that.
- Ensures a Healthy Process: Following a proper size progression gives your lobes the time they need to heal and adapt between stretches.
- Builds Confidence: Knowing your current size and your next step empowers you to shop for awesome jewelry with certainty.
You're not just buying jewelry; you're joining a huge community of enthusiasts. The United States ear products market was valued at USD 322.8 million and is expected to hit USD 595.5 million by 2032, showing just how popular this form of expression is. You can read the full research on the market's growth to see the trends for yourself.
Think of stretching like leveling up in a game. You can't just skip to the final boss. Each gauge size is a level you have to complete, allowing your ears to get stronger and ready for the next stage. Rushing only leads to starting over.
How to Read Ear Gauge Sizes and Charts
Ready to crack the code of gauge sizes for ears? The first thing you'll probably notice is the sizing system feels totally backward at first. A higher number, like a 16 gauge (16g), is actually a much thinner piece of jewelry than an 8 gauge (8g). It's weird, we know!
Think of it like this: the term "gauge" originally came from the process of making wire. The number represented how many times a wire was pulled through a sizing plate to make it thinner. So, a 16g wire was pulled through more times than an 8g wire, making it smaller in diameter. Once you get that little history nugget, the whole system starts to make a lot more sense.
Understanding the Conversion
To make things easy, the body jewelry world uses a standard chart to convert these gauge numbers into familiar units like millimeters (mm) and inches. This is your ultimate cheat sheet for shopping online or planning your next stretch. It takes all the guesswork out of the process, ensuring you always know exactly what size you’re looking at.
Most standard ear piercings start at 20g or 18g. As you stretch your lobes, the gauge number gets smaller and smaller until you hit 0g. After that point, the system flips, and sizes are measured directly in millimeters or fractions of an inch, like 9mm or 1/2 inch. Hitting that milestone is a pretty big deal in your stretching journey!
Ear Gauge Size Conversion Chart
Bookmark this page, screenshot this chart—do whatever you need to do! This is your go-to reference for making sure the jewelry you're eyeing is the perfect fit.
| Gauge (AWG) | Millimeters (mm) | Inches (") |
|---|---|---|
| 20g | 0.8mm | 1/32" |
| 18g | 1.0mm | - |
| 16g | 1.2mm | 3/64" |
| 14g | 1.6mm | 1/16" |
| 12g | 2.0mm | 5/64" |
| 10g | 2.4mm | 3/32" |
| 8g | 3.2mm | 1/8" |
| 6g | 4.0mm | 5/32" |
| 4g | 5.0mm | 3/16" |
| 2g | 6.0mm | 1/4" |
| 0g | 8.0mm | 5/16" |
| 00g | 10.0mm | 3/8" |
| - | 11.0mm | 7/16" |
| - | 12.0mm | 1/2" |
This chart is your new best friend. For a deeper dive into how these measurements became the industry norm, check out our quick take on the standards of gauge sizing for body jewelry. Knowing these conversions empowers you to shop for any style with total confidence.
The market for ear products is expanding, which means more options and styles for everyone.

This impressive growth just highlights how popular ear modifications and jewelry have become. It's a fantastic time to get creative and explore your personal style.
Measuring Your Lobes for the Perfect Fit
So, you're ready to size up, but how do you know what size you actually are? Eyeballing it is a massive no-no in the stretching world. Knowing your current size is absolutely crucial for a safe and successful journey, whether you're just starting out, somewhere in the middle of your adventure, or even coming back after taking a break.
Measuring properly saves you from the frustration of buying jewelry that's too big (ouch!) or too small (what a waste of money). It makes sure every new piece of Bodycandy jewelry you snag is a perfect, comfortable match for your lobes. Let's break down the best ways to get an exact reading.
Your Measurement Toolkit
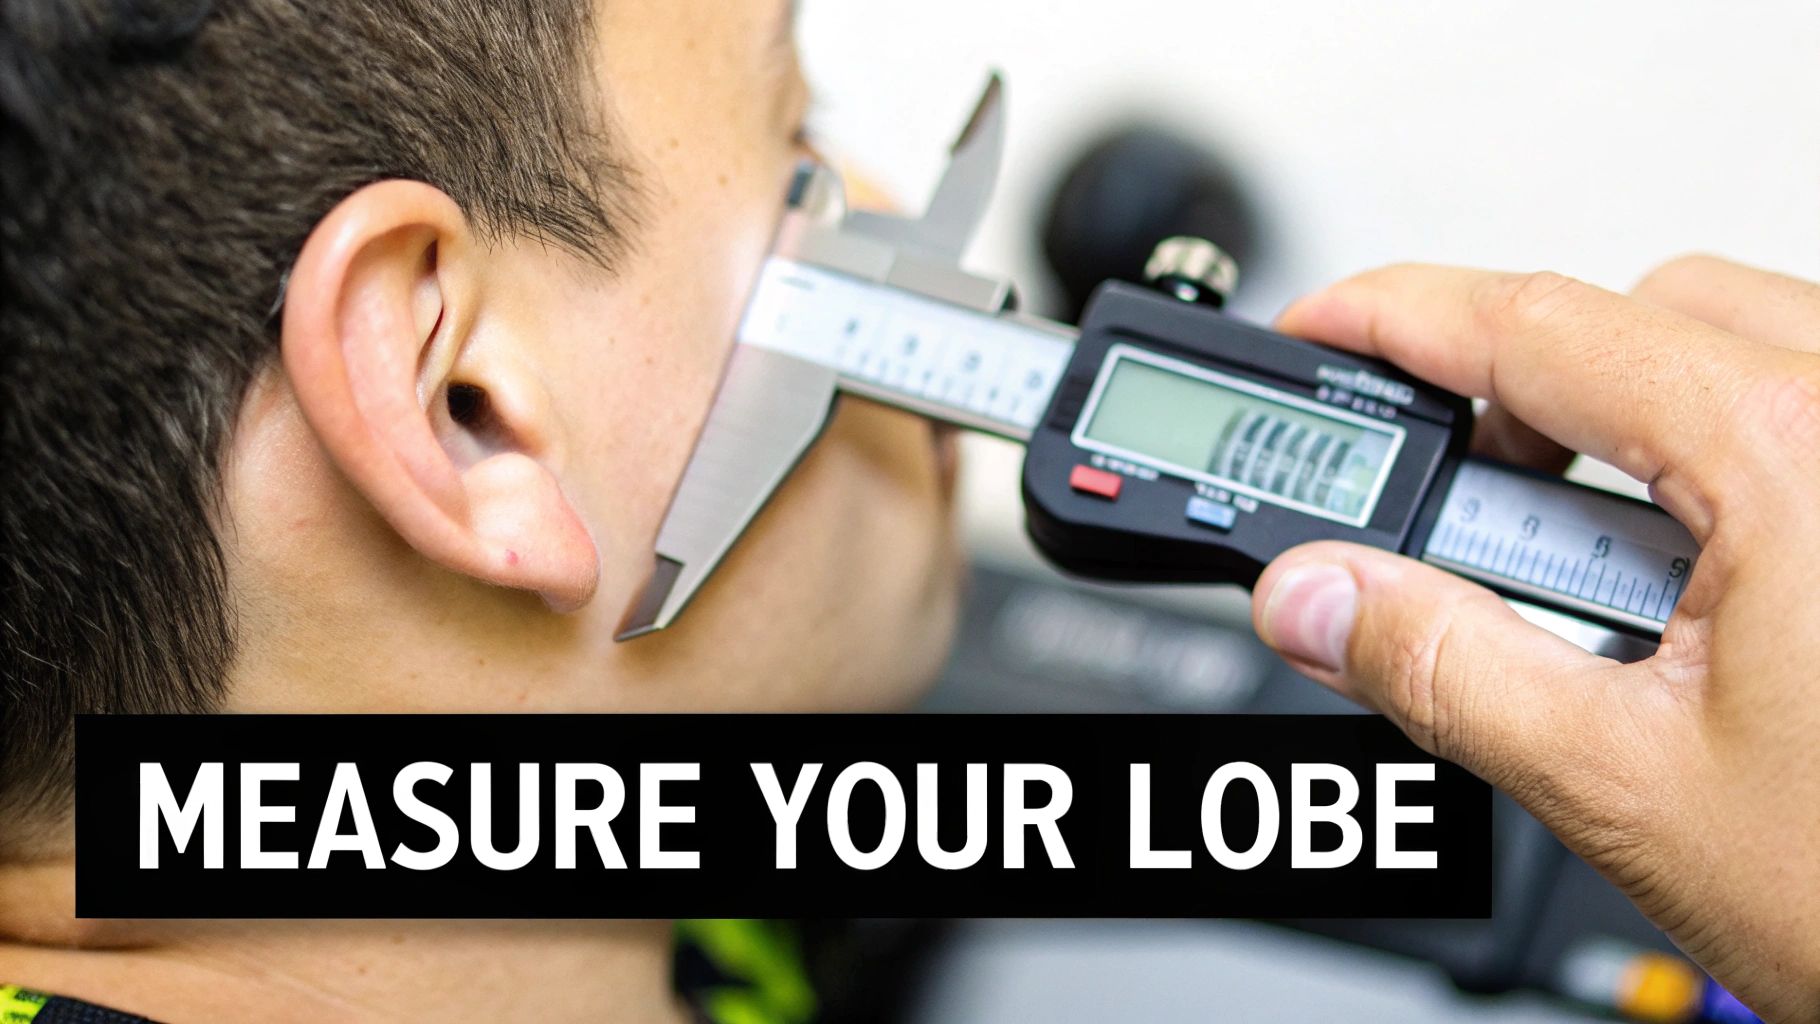
You don't need a high-tech lab to figure out your gauge sizes for ears. A couple of simple tools will give you a precise measurement in just a few minutes.
- Digital Calipers: This is the undisputed champion of accuracy. A digital caliper measures the diameter of your current plugs or tunnels down to a fraction of a millimeter. It's the most reliable method, especially as you get into larger gauges where the jumps between sizes get way more significant.
- Gauge Wheel or Card: Think of this as your quick-check tool. These have a bunch of labeled holes for different gauge sizes. You simply find the hole your jewelry fits into snugly without having to force it. It’s super handy for a fast confirmation.
- Ruler with Millimeters: If you're in a pinch, a ruler can get the job done! It’s definitely a bit trickier to get a perfect reading, but you can measure the diameter of your plug in millimeters. It's a whole lot better than guessing and can give you a pretty close estimate.
Sizing Up Single-Flared vs. Double-Flared Plugs
Heads up—not all plugs are built the same, and that can change how you size them up. Getting this right is the key to a comfy fit.
Single-flared plugs have one flared end and a straight post, held in place by a little o-ring. To get the right size, you need to measure the wearable surface—that’s the straight part that actually sits inside your piercing.
Double-flared plugs are a different story. They have a flare on both ends to hold them in place. The middle part, the wearable area, is the size listed on the package, but the flares are slightly larger. This means your lobes need to be fully healed and have enough elasticity to pop them in. Never force them—that's how tears happen. For fresh stretches, always, always stick with single-flared jewelry. Trust us, it makes all the difference.
A Safe and Healthy Stretching Timeline
Alright, let's talk about the single most important part of your stretching journey: patience. Seriously, if you remember one thing from this guide, let it be this—stretching is a marathon, not a sprint. Your lobes need time to heal, adapt, and make room for the next size. Rushing the process is the fastest way to get into trouble.
So, where do you begin? Most standard ear piercings are done at 20g or 18g. Your very first stretch will likely be to a 16g or 14g. Starting small is absolutely non-negotiable. This initial step is often the easiest, but it sets the stage for a healthy journey ahead.
The Golden Rule of Stretching
The number one rule is to only go up one gauge size at a time. Skipping sizes is a huge mistake. It puts way too much stress on your ear tissue, which can lead to tearing, scar tissue, and permanent damage. You wouldn't try to lift a weight that's twice as heavy as your last one at the gym, right? The same logic applies here.
Give your body the respect it deserves by letting it heal completely between each stretch.
The absolute minimum waiting period between stretches is 4 to 6 weeks, but honestly, listening to your body is way more important than sticking to a strict calendar. Many seasoned stretchers wait 2-3 months or even longer, especially at larger gauge sizes.
If you feel any sharp pain or significant resistance when trying to insert the next size, just stop. Your ear is telling you it’s not ready.
Why You Should Never Rush
We get it—you're excited to reach your goal size! But forcing it can lead to some seriously gnarly consequences that can set you back for months or even ruin your lobes for good. Rushing is just not worth the risk.
Here’s exactly what you're trying to avoid:
- Blowouts: This is when the inner fistula (the healed tunnel) of your piercing is forced out the back, creating an ugly and uncomfortable lip of scar tissue. It's the most common result of stretching too fast.
- Tearing: Forcing a taper or plug through a lobe that isn't ready can cause micro-tears or even significant rips. These can bleed, get infected, and scar badly.
- Thinning Lobes: Consistently rushing can reduce blood flow and cause the bottom of your lobe to get dangerously thin, limiting how large you can safely go.
- Infections: Any open wound, like a tear from stretching, is an open invitation for bacteria. Proper healing time is your best defense against infection.
This dedication to body modification is a global phenomenon. For instance, Europe holds over 30% of the global market for ear-related products, a market valued at USD 457.38 million. This reflects a strong cultural appreciation for body art, including safe stretching practices. You can discover more insights about these market trends.
For an in-depth guide on the entire process, check out our article on how to properly stretch your lobes. This roadmap is all about creating a foundation for healthy, beautiful stretched ears that you can love for a lifetime.
Choosing The Best Jewelry Materials
Okay, you've got your stretching timeline mapped out. Now, let's talk about something equally important: the actual jewelry you put in your ears. The material you choose has a massive impact on the health of your lobes, especially when they're sensitive right after a stretch.
Think of it this way: choosing the wrong material is like putting a wool sweater on a fresh sunburn. It can lead to irritation, allergic reactions, or even an infection, which can seriously set back your stretching journey. Getting this right from the start is a total game-changer for a smooth and happy healing process.
The Gold Standard For Stretching
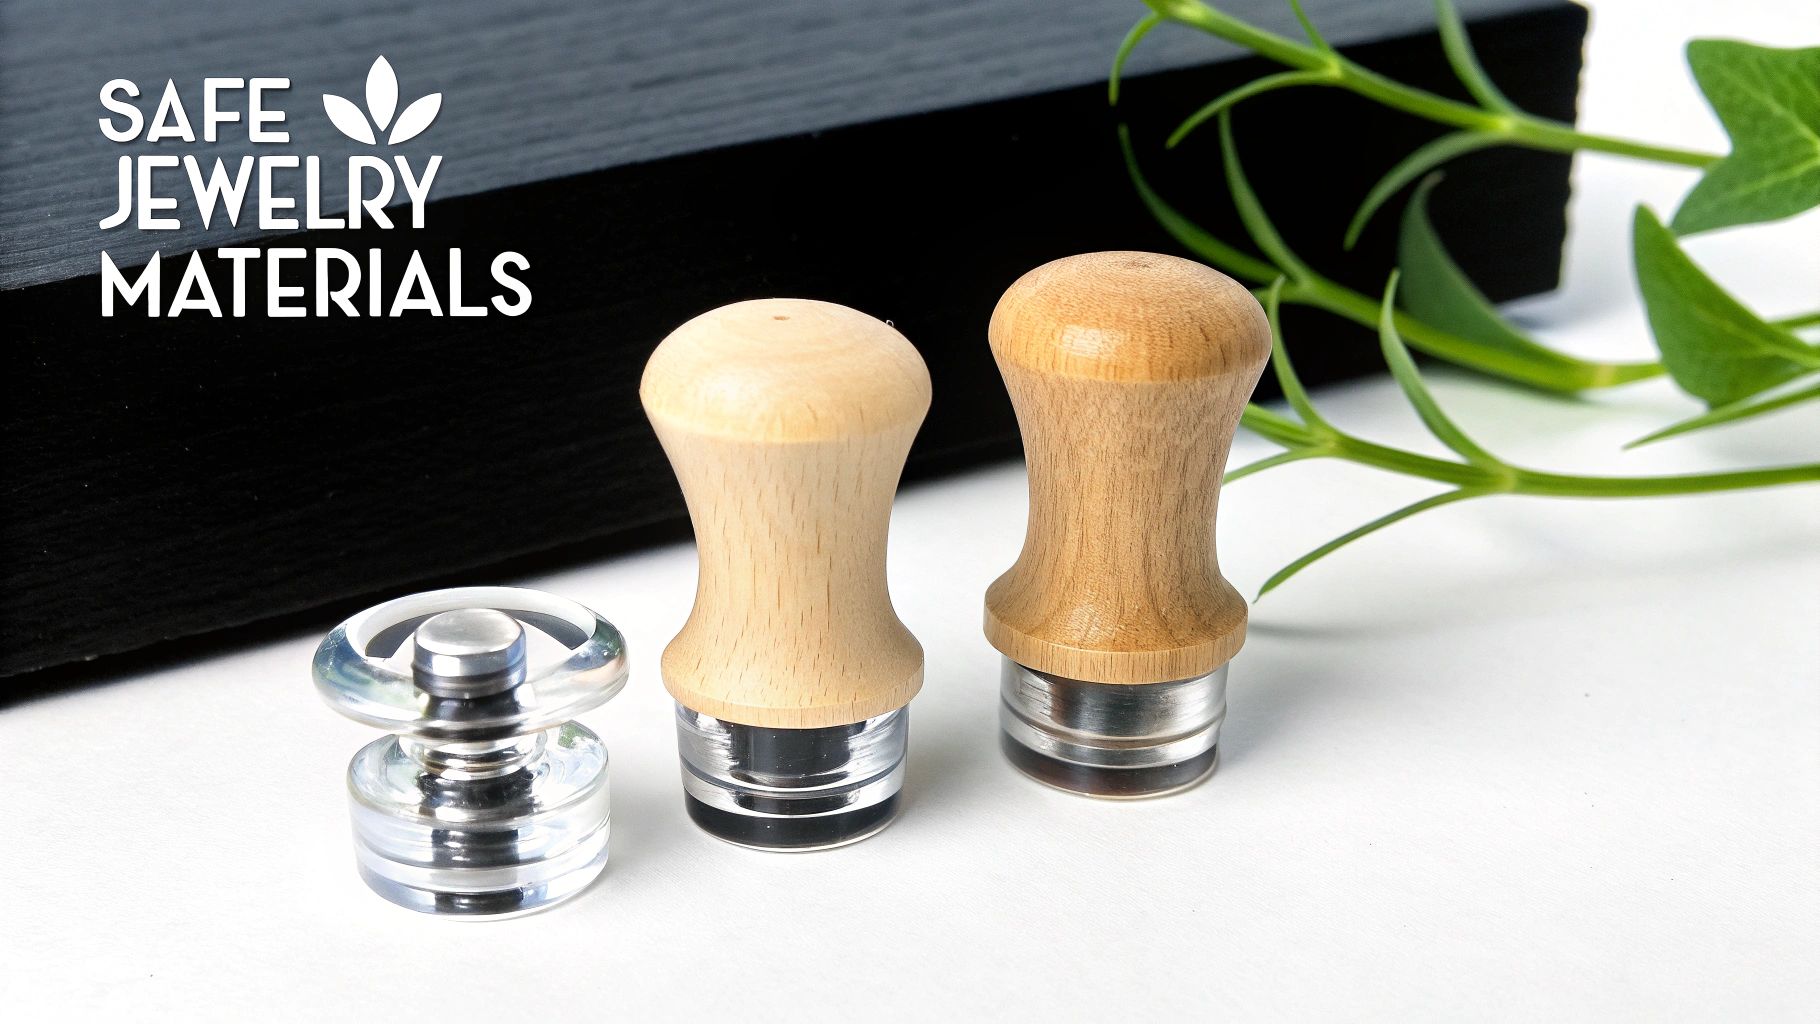
When you're actively stretching, your lobes are in a delicate state. The material you pick needs to be non-porous, perfectly smooth, and body-safe. No exceptions.
For a fresh stretch, single-flared glass plugs are considered the undisputed champion. Their incredibly smooth surface minimizes friction and irritation, and their slight weight can gently help your lobes relax and heal. They are also non-porous, meaning bacteria has nowhere to hide—which is exactly what you want.
Implant-grade titanium and 316L surgical steel are also fantastic, hypoallergenic choices that won't give your healing lobes any trouble. They are durable, a breeze to clean, and come in a huge variety of styles. If you're exploring other lightweight and flexible options, learning about the benefits of bioplast in body jewelry is a great next step.
Materials For Healed Lobes
Once your lobes are fully healed and settled in at their current size, a whole new world of awesome materials opens up. This is where your personal style can really shine!
-
Wood: Organic and lightweight, wood plugs are a classic choice. They’re breathable but are also porous, so only wear them in completely healed piercings. They need a little TLC with regular oiling to keep them from drying out.
-
Stone: From amethyst to tiger's eye, stone plugs offer a unique and beautiful look. Like glass, they are smooth and easy to wear, but some can be pretty heavy, so always listen to your lobes.
-
Silicone: Super comfortable and flexible, silicone tunnels are perfect for sleeping or for anyone with an active lifestyle. Just be aware they can trap bacteria, so they're strictly for fully healed lobes and need to be kept clean.
The number one rule? Avoid porous materials like acrylic, wood, or silicone during the healing phase. These materials can harbor nasty bacteria and can even fuse to healing tissue, causing serious complications.
Stick with glass or implant-grade metals until you are 100% healed. Do that, and you'll set yourself up for a lifetime of healthy, stylishly stretched ears.
Jewelry Material Guide For Stretched Ears
Navigating all the material options can feel a bit overwhelming, but it doesn't have to be. We've put together this quick guide to help you choose the right material for the right time, whether you're in the middle of stretching or just styling your fully healed lobes.
| Material | Best For | Pros | Cons |
|---|---|---|---|
| Glass | Fresh Stretches & Healed Lobes | Non-porous, incredibly smooth, easy to clean, hypoallergenic. The weight can aid in gentle stretching. | Can break if dropped; limited intricate designs compared to other materials. |
| Surgical Steel (316L) | Fresh Stretches & Healed Lobes | Non-porous, durable, easy to clean, hypoallergenic, wide variety of styles. | Can be heavy at larger sizes; contains nickel, which can irritate highly sensitive skin. |
| Titanium (Implant Grade) | Fresh Stretches & Healed Lobes | Lightweight, completely nickel-free, non-porous, extremely durable. Perfect for sensitive skin. | Often more expensive than steel; color options are typically anodized, not painted. |
| Wood | Healed Lobes ONLY | Lightweight, breathable, unique natural patterns, comfortable for long-term wear. | Porous (can harbor bacteria), requires regular oiling, can be damaged by water. Never use on a healing stretch. |
| Stone | Healed Lobes ONLY | Beautiful and unique, smooth surface, wide variety of natural colors and patterns. | Can be heavy, potentially fragile, porous depending on the type of stone. |
| Silicone | Healed Lobes ONLY | Very lightweight, flexible, comfortable for sleeping and physical activity. | Porous (can trap bacteria and odor), can cause lobes to shrink slightly. Never use to stretch. |
| Acrylic | Temporary Wear in Healed Lobes ONLY | Inexpensive, lightweight, vast range of colors and designs. | Porous, can degrade over time, may release toxins when heated, can cause irritation. Not for long-term wear. |
Ultimately, the best material is one that keeps your ears healthy and happy. By choosing non-porous, body-safe materials for stretching and saving the porous, organic stuff for when you're fully healed, you're making the smartest choice for your lobes.
Essential Aftercare for Healthy Stretched Ears
Proper aftercare is the line in the sand between a frustrating stretching experience and a smooth, successful one. Think of it as the ultimate insurance policy for your lobes! Nailing this part ensures they stay healthy, clean, and elastic, setting you up for an awesome journey to your goal size.
You've just sized up—congrats! Your lobes are now in a delicate healing phase and need some extra TLC. For the first few days after a stretch, your routine should be simple but totally consistent. A gentle daily cleaning is non-negotiable.
Your Daily Cleaning Routine
Keeping your fresh stretch clean is your number one priority to head off infection and help your ears heal right. The good news is, it's super easy and only takes a couple of minutes each day.
- Gentle Soap: Use a mild, unscented antibacterial soap and warm water to gently clean around the piercing. You want to stay far away from harsh chemicals or alcohol, which will just dry out your skin and cause irritation.
- Sea Salt Soaks: A warm sea salt soak is about to become your new best friend. Just mix about a quarter teaspoon of non-iodized sea salt into a cup of warm water, and let your lobes soak for 5-10 minutes. This is amazing for soothing irritation and keeping everything clean.
After a fresh stretch, it's totally normal for your ears to feel a little warm, tingly, or slightly tender. What you don't want to feel is sharp pain, or see any major swelling or pus. Those are red flags that something's wrong.
The Magic of Lobe Massages
Once that initial tenderness has chilled out (usually after a week or so), it's time to bring in the most important habit for long-term lobe health: daily massages. Seriously, this simple step is a total game-changer for keeping your ears in top shape.
Massaging your lobes with a good-quality oil for a few minutes every day boosts blood flow, which is absolutely critical for healing and keeping the skin healthy. It also helps break down any potential scar tissue and dramatically improves your skin's elasticity. More elasticity means easier, healthier stretches down the road!
For the best results, use a skin-friendly oil. Jojoba oil is a huge fan-favorite because its makeup is incredibly similar to your skin's natural oils. Vitamin E oil is another fantastic choice, known for its healing and moisturizing powers. This simple ritual not only keeps your lobes thick and healthy but also helps prevent the dreaded thinning that can happen over time. Happy lobes make for a happy stretching journey
Got Questions About Ear Gauge Sizes?
If you're new to stretching, you probably have a bunch of questions floating around. Don't worry, we've all been there. Let's tackle some of the most common things people wonder about when they start their ear stretching journey.
Does Stretching Your Ears Hurt?
Honestly, when you do it right, stretching shouldn't hurt. A little tingling or a warm feeling for a minute is normal, but sharp pain is a huge red flag. That's your body screaming "Stop!" If you feel pain, it means you're pushing your lobes too far, too fast. Listen to your body and never, ever force jewelry through.
What Is a Blowout?
A "blowout" is probably the most common (and ugliest) stretching injury. It's what happens when the inside of your piercing (the fistula) gets forced out the back, creating a nasty-looking lip of scar tissue. This is almost always caused by jumping up a size too quickly or skipping sizes altogether.
Can I Wear Tapers as Jewelry?
Nope, please don't! Think of tapers as a tool, not a fashion statement. They are only meant to guide the new, larger plugs into your ears and should be taken out immediately after. Leaving them in is a bad idea because their uneven weight can cause your lobes to thin out or heal in a weird, oblong shape.
Ready to find the perfect plugs for your next stretch? BodyCandy has an amazing collection of body-safe jewelry to keep your lobes happy and healthy. Shop our full collection today