
Trying to figure out your earring gauge size can feel like learning a whole new language. Don't worry, you're not alone! It's a super common point of confusion, and we're here to make it totally simple for you.
The most important thing to remember is this: the higher the gauge number, the thinner the earring. A standard earlobe piercing is usually a 20g, while a thicker cartilage piercing might be a 16g. Easy, right?
Decoding Earring Gauge Sizes
Feeling lost in a world of gauges, millimeters, and inches? Let's clear things up! The gauge system is the industry standard for measuring the thickness of body jewelry, but it works in reverse—which is what trips most people up at first.
Think of it like this: a tiny 20g earring is just 0.81mm thick, while a 00g is a whopping 10mm wide. This counterintuitive setup is a holdover from 19th-century wire-making, where a higher number meant the wire had been pulled through a thinning plate more times. More pulls, higher number, skinnier wire. It's an old-school system, but hey, it's the one we've got!
This guide is your new best friend for all things sizing. We’ll break it all down so you can confidently pick the perfect piece for any piercing. Whether you're shopping for your first cartilage stud or just trying to match your current jewelry, getting the basics down is key. For even more detail, you can also check out our guide on the standards of gauge sizing for body jewelry.
Let's start with a quick-reference chart before diving into the complete earring gauge size chart.
Definitive Earring Gauge Conversion Chart
Alright, let's get down to the nitty-gritty. This is the heart of our guide—your one-stop shop for understanding earring gauge sizes. We’ve put together a super clear, easy-to-read chart that covers the entire spectrum, from the most delicate 22g posts all the way up to large-gauge plugs.
Think of this as your personal cheat sheet. Whether you're browsing for new BodyCandy jewelry at home or trying to remember your size on the fly, this is the tool you need. Go ahead and bookmark this page! It’s the best way to make sure you always grab the right size for your piercing, every single time. No more guessing games.
From Tiny Studs to Bold Plugs
The world of body jewelry is massive, and sizes can be all over the place. The jewelry for a standard lobe piercing is totally different from what you'd wear in a cartilage piercing, which is different again from what you'd need for a stretched piercing. This chart breaks it all down, converting every gauge size into both millimeters (mm) and inches ("). This gives you a clear, universal way to know exactly what you’re looking at.
This handy visual below gives you a quick idea of the size difference between some of the most common piercing gauges you'll run into.
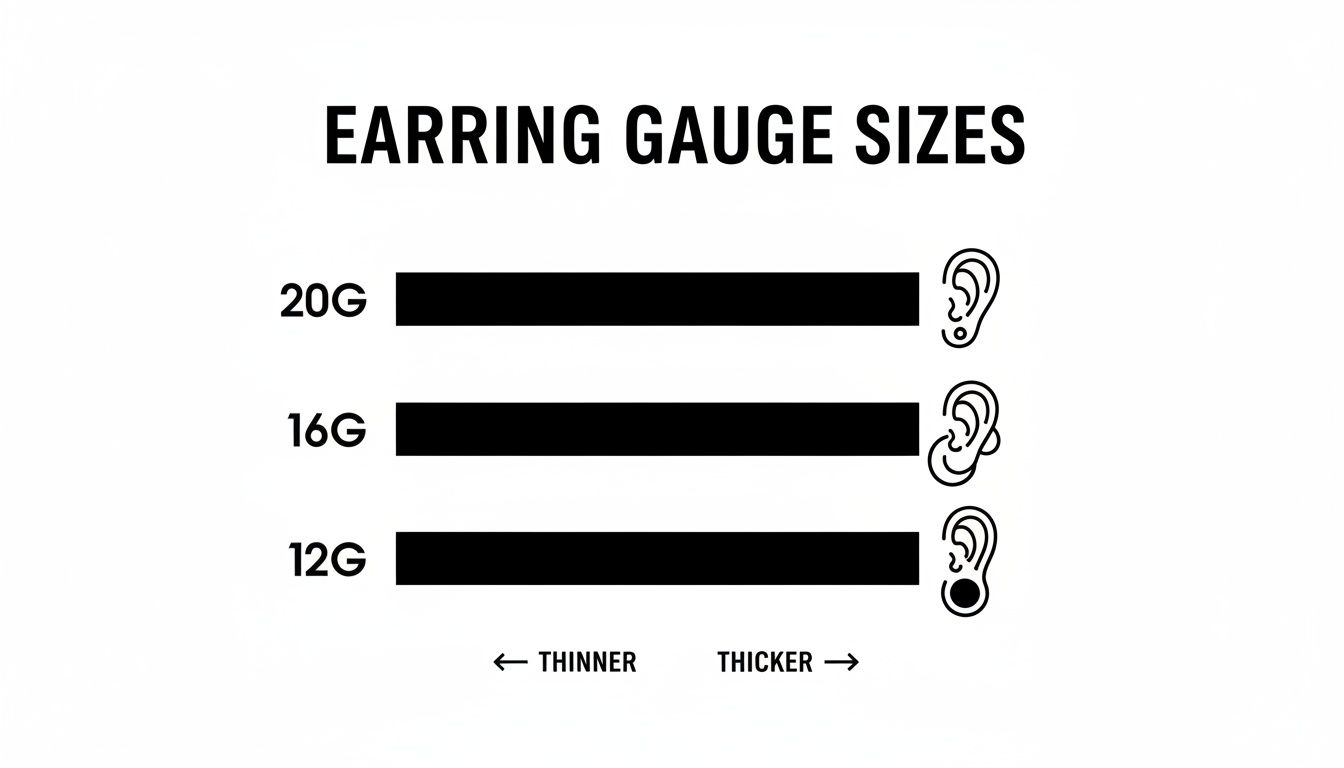
As you can see, the jump from a standard 20g lobe earring to a 16g cartilage stud is pretty noticeable, and the step up to a 12g for initial stretching is even bigger.
Now, for the full breakdown. Use this detailed earring gauge size chart to find your exact measurement and shop with total confidence.
| Gauge (g) | Millimeters (mm) | Inches (") |
|---|---|---|
| 22g | 0.64mm | 1/40" |
| 20g | 0.81mm | 1/32" |
| 18g | 1.0mm | 3/64" |
| 16g | 1.2mm | 3/64" |
| 14g | 1.6mm | 1/16" |
| 12g | 2.0mm | 5/64" |
| 10g | 2.4mm | 3/32" |
| 8g | 3.2mm | 1/8" |
| 6g | 4.0mm | 5/32" |
| 4g | 5.0mm | 3/16" |
| 2g | 6.0mm | 1/4" |
| 0g | 8.0mm | 5/16" |
| 00g | 10.0mm | 3/8" |
| 1/2" | 12.0mm | 1/2" |
| 9/16" | 14.0mm | 9/16" |
| 5/8" | 16.0mm | 5/8" |
| 3/4" | 19.0mm | 3/4" |
| 7/8" | 22.0mm | 7/8" |
| 1" | 25.0mm | 1" |
| 1-1/8" | 28.0mm | 1-1/8" |
| 1-1/4" | 32.0mm | 1-1/4" |
| 1-3/8" | 35.0mm | 1-3/8" |
| 1-1/2" | 38.0mm | 1-1/2" |
| 1-5/8" | 41.0mm | 1-5/8" |
| 1-3/4" | 44.0mm | 1-3/4" |
| 1-7/8" | 47.0mm | 1-7/8" |
| 2" | 51.0mm | 2" |
Matching Piercing Types to Common Gauge Sizes
Alright, you've got the earring gauge size chart memorized. Now for the fun part: let's connect those numbers to actual piercings so you can see how it all comes together in the real world. Think of this as your practical guide to understanding why your piercer chose a specific size for your helix versus your lobes.
Matching the right gauge to the right piercing isn't just about looks; it's absolutely crucial for a happy and healthy healing process. Your piercer makes a calculated choice based on your anatomy and the type of jewelry that will sit best in that specific spot.
Lobes and Cartilage Basics
For most people, the piercing journey starts with the earlobe. It’s the most common and versatile spot on the ear, and the sizing definitely reflects that.
- 20g (0.81mm): This is the standard size for earlobe piercings, especially the ones done with a piercing gun at a mall kiosk. It’s thin, comfortable, and fits the vast majority of traditional butterfly-back earrings you see everywhere.
- 18g (1.0mm): Many professional piercers prefer using a hollow needle to pierce lobes at 18g. That slightly thicker post provides more stability, which can really help prevent irritation and the dreaded "cheese-cutter effect" that can happen with heavier jewelry.
- 16g (1.2mm): This is the go-to size for most cartilage piercings like the helix, tragus, and conch. A thicker post is essential for the stability of these piercings, since cartilage is way less forgiving and takes longer to heal than soft lobe tissue. A stable, thicker bar reduces movement and promotes much better healing.
- 14g (1.6mm): You'll often see this size used for piercings that need even more support, like an industrial piercing. The strength of a 14g bar is what you need to safely connect two separate cartilage piercings without putting too much stress on either one.
Stretched Lobes and Specialized Piercings
Ready to go a bit bigger? When you move into the world of ear stretching, the gauge sizes start dropping into the single digits and eventually get measured in fractions of an inch. Each step up is a deliberate, patient process.
Stretching typically begins by moving from a standard 18g or 16g piercing to a 14g, and then slowly sizing up from there. It's a journey that requires a lot of patience, and understanding those incremental jumps in the earring gauge size chart is your roadmap to doing it safely and successfully. For a deeper dive, you might want to check out our guide on plug sizing for US and UK standards.
Statistically speaking, the sizes between 22g and 14g make up about 85% of the global body piercing market, which is exactly the playground where most of our Bodycandy fam lives. A delicate 22g post is only 0.64mm thick—perfect for a subtle look—while the more robust 14g at 1.6mm is built for durability. This range perfectly aligns with professional piercing practices.
How to Measure Your Earring Gauge at Home
Ever found a piece of jewelry you absolutely love, but you have no clue what size it is? It’s a super common problem. Don't worry, you don't need to head to a piercing studio to figure it out—you can become a sizing pro right from your couch.
Knowing your current earring gauge is the key to shopping for body jewelry online with confidence. It means you can browse BodyCandy’s massive collection and be sure that whatever you order will be a perfect, comfortable fit. No more disappointment when that awesome new labret stud arrives and it's too thick to go in!
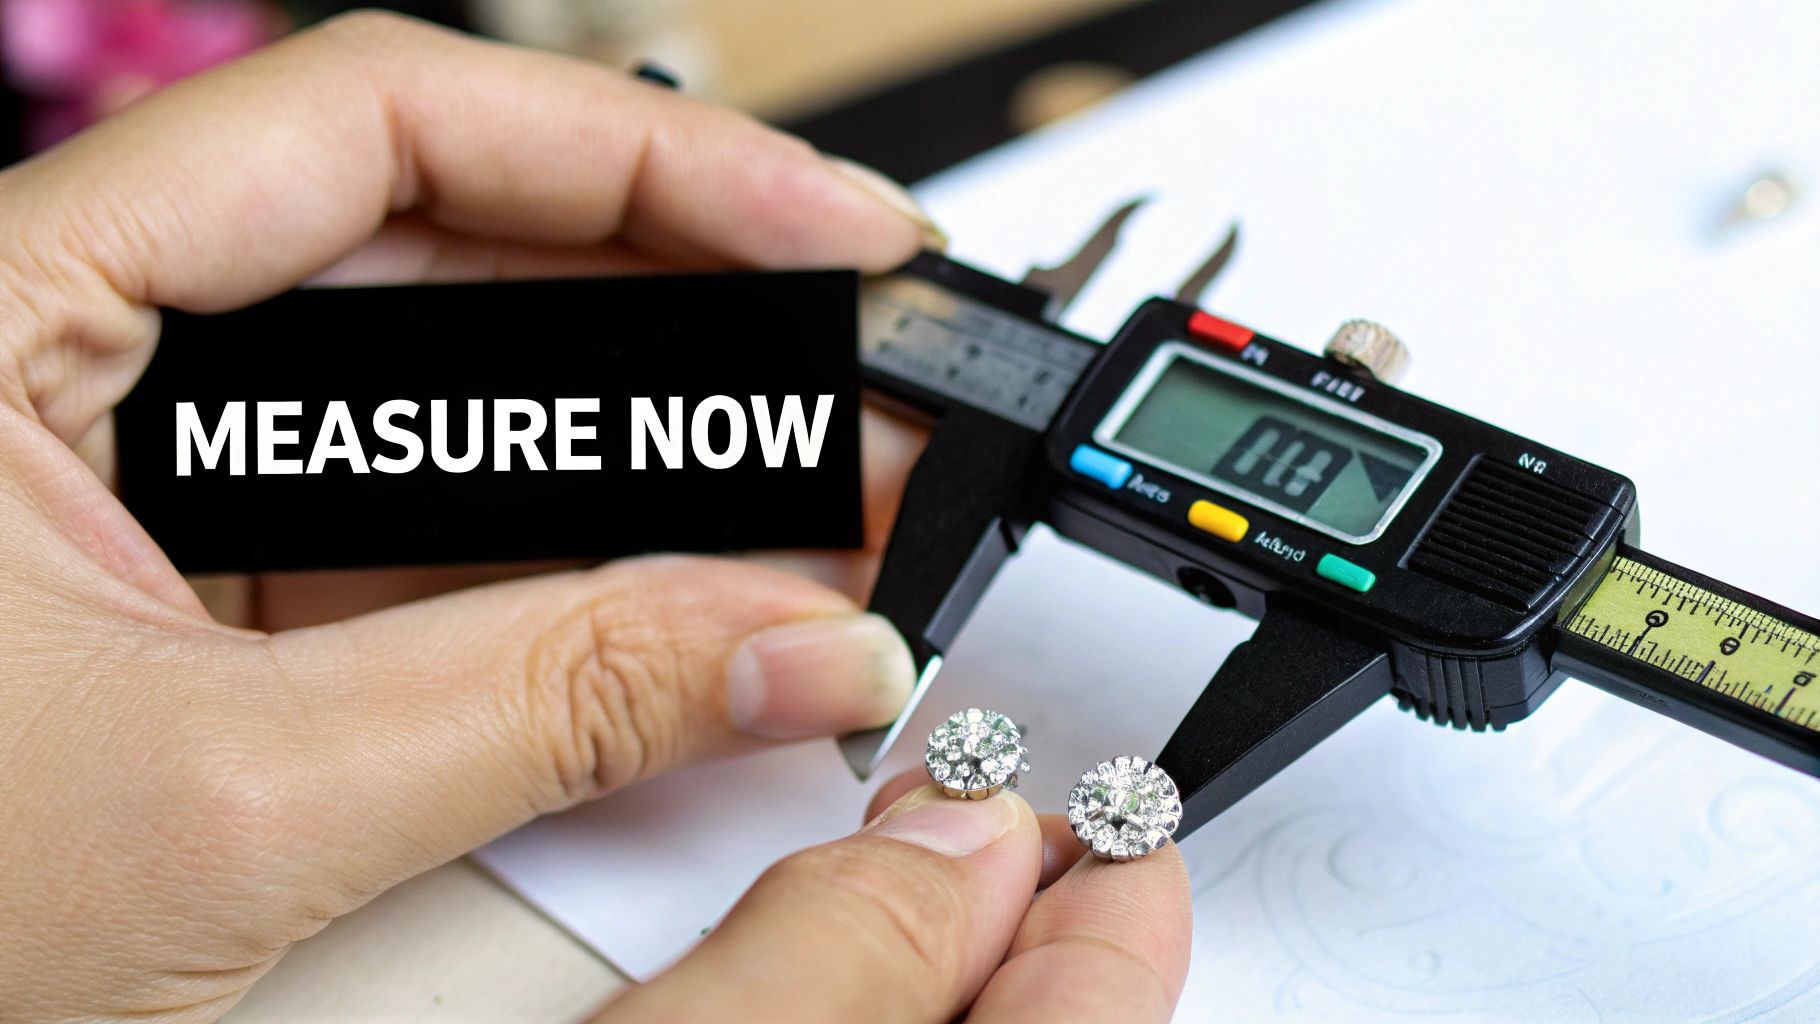
Using a Digital Caliper for Precision
The absolute best way to get a dead-on measurement is with a digital caliper. These handy tools are surprisingly affordable and give you an exact reading in millimeters. Once you have that, you can just match it up with our earring gauge size chart.
Here's the quick rundown:
- Gently place the post (the part that goes through your ear) between the caliper's jaws.
- Close the jaws until they're just touching the jewelry. Be careful not to clamp down too hard or you might scratch the finish.
- Read the measurement on the digital screen. Let's say it reads 1.2mm—bingo, your jewelry is 16g.
- Just compare that millimeter reading to the complete chart in this guide to find its gauge size.
The Visual Comparison Method
Don't have a caliper lying around? No sweat. You can still get a really good idea of your earring gauge by doing a simple visual comparison. It's not as precise, but it definitely works in a pinch.
Pro Tip: Print out a true-to-scale gauge card or pull one up on your computer screen. If you're using a screen, make sure your zoom is set to 100% to keep the visual comparison accurate.
All you have to do is hold your earring post up to the chart. Carefully line it up against the different gauge sizes until you find the one that perfectly matches its thickness. A good strategy is to start with the most common sizes, like 20g or 16g, and go from there. This simple check is all you need to order correctly and expand your collection without any sizing mishaps.
Your Guide to Safe Ear Stretching
Thinking about sizing up your lobes? Ear stretching is an amazing way to customize your look, but let’s get one thing straight: doing it the right way is non-negotiable. Safe stretching is all about having patience and, most importantly, listening to your body to avoid nasty problems like damage, blowouts, or infections. This guide breaks down the essentials so you can hit your goal size safely.
The journey of stretching your lobes is a pretty cool transformation. You'll see jewelry like plugs and tunnels that go from an initial 16g (1.2mm) stretch all the way up to an impressive 2 inches (51mm) for the seasoned pros. In fact, these larger sizes make up a huge 35% of BodyCandy's stretched jewelry sales in key markets. While a 2018 survey mentioned that about 70% of people who stretch usually stop around 8g (3.2mm), knowing the whole process is the only way to avoid trouble. You can discover more insights about the body jewelry market on Cognitive Market Research.
The Golden Rules of Stretching
Before you even think about going up a size, your piercing must be 100% healed. We can't stress this enough—it's the single most important rule. A fresh, new, or even slightly irritated piercing is absolutely not ready for the stress of stretching.
Once you’re fully healed and ready to go, stick to these core principles:
- One Size at a Time: Never, ever skip sizes. Just don't. The earring gauge size chart is your best friend here, and you should only move up one single gauge at a time (for example, from 14g to 12g).
- Wait It Out: Patience is everything in the stretching game. You need to wait a bare minimum of 4-6 weeks between stretches. For larger gauges, you should wait even longer. Your body needs that time to heal and adjust.
- Listen to Your Body: If you feel any sharp pain, stop immediately. Seriously. A slight tingle or minor discomfort can be normal, but real pain is your body screaming that it's not ready.
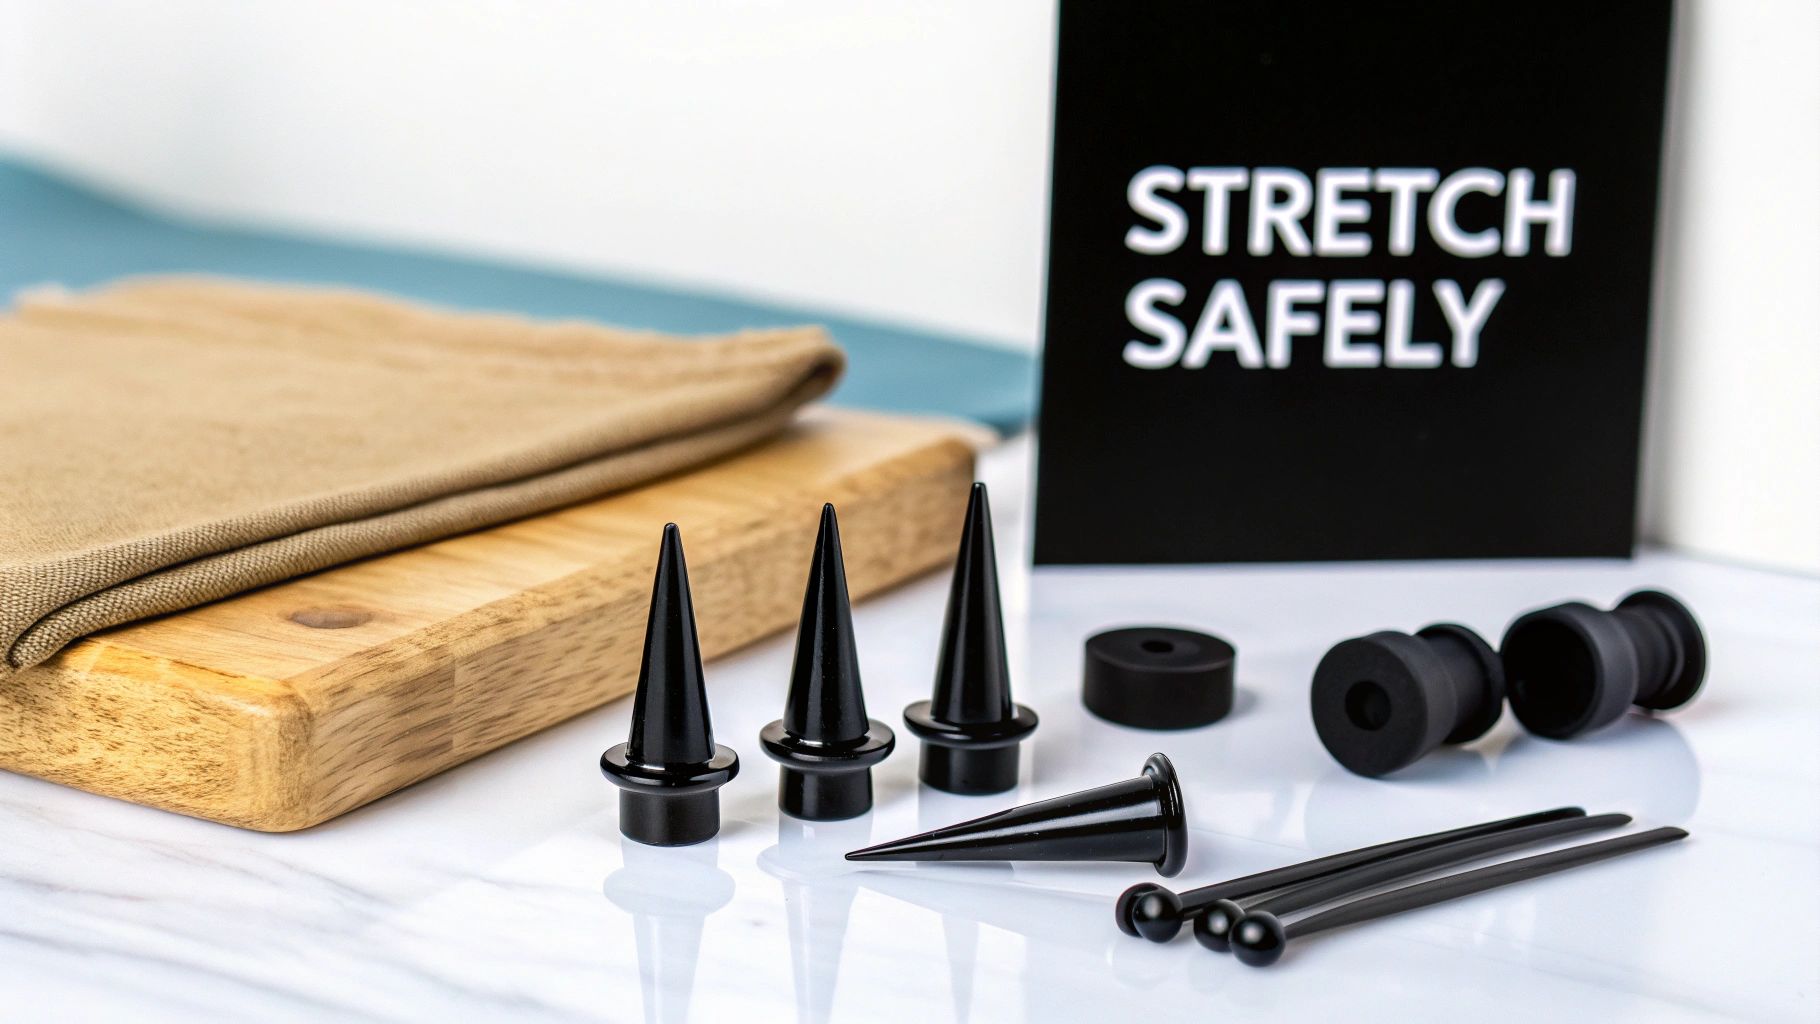
Tools and Materials for Success
Using the right tools makes all the difference between a happy stretch and a painful mistake. For stretching, you’ll want to get a good set of tapers and some single-flare plugs made from body-safe materials.
Stretching Kit Essentials: A good starter kit will come with high-quality tapers and single-flare plugs for each size on your journey. Single-flare plugs are perfect for fresh stretches because their flat back won't irritate the healing tissue.
Look for materials that are smooth and non-porous. 316L surgical steel and glass are both excellent choices because they are super easy to clean and won't harbor bacteria. You'll want to avoid acrylic or silicone for a fresh stretch, as these materials are porous and can lead to irritation or worse.
Ready to start your journey? Check out BodyCandy’s awesome selection of ear stretching kits to get all the high-quality tools you need for a safe and successful experience.
Choosing the Best Materials for Your Gauge
Getting the right earring gauge size is a huge win, but the material your jewelry is made from is just as crucial. Think of it like this: the right size makes it fit, but the right material makes it feel good. This is especially true for fresh piercings, new stretches, or if you have sensitive skin that gets angry easily.
Choosing a body-safe material is your first line of defense against irritation, allergic reactions, and healing complications. Let's break down the best options you’ll find here at BodyCandy so you can make a smart choice for your piercing’s health and your killer style.
Hypoallergenic Heroes for Happy Piercings
When your piercing is healing or if you know your skin is picky, you need top-tier, non-reactive materials. These are the undisputed champions for sensitive skin and fresh piercings, keeping everything calm and happy.
- Implant-Grade Titanium: This is the gold standard. It's 100% nickel-free, super lightweight, and the same stuff used in medical implants. If your skin reacts to literally everything, titanium is about to be your new best friend.
- 316L Surgical Steel: As a super popular and durable choice, surgical steel is a fantastic option for most people. While it contains a tiny amount of nickel, it's typically locked within the alloy, making it perfectly safe for the majority of healed piercings.
- Bioplast: This is a flexible, medical-grade plastic that’s both hypoallergenic and incredibly comfortable. It’s an amazing choice for tricky piercings or if you need something metal-free for an MRI or other medical procedure. If you're curious about its unique benefits, you should check out our complete guide to Bioplast body jewelry.
Fun Materials for Healed Piercings
Once your piercing is fully healed and totally established, you can start having more fun with different materials. Options like acrylic offer a whole rainbow of colors and styles at a great price. Just be sure to save these for piercings that are well past the delicate healing phase.
Find Your Perfect Fit at BodyCandy
Alright, you've officially leveled up your piercing knowledge! Now that you're an expert on earring gauges, it's time for the fun part—putting that wisdom to work and shopping for some killer new jewelry.
Think of BodyCandy as your ultimate playground. Armed with your new skills, you can explore our massive collections with total confidence. Whether you're hunting for the perfect 16g labret stud for your cartilage or a dazzling 14g navel ring, you know exactly what to look for. No more guessing games or getting the wrong size in the mail!
Your Go-To Jewelry Destination
Shopping on BodyCandy.com is a breeze once you know your numbers. Use what you've learned here to navigate our collections like a total pro.
- For Cartilage Lovers: Dive into our incredible selection of 16g cartilage earrings, perfect for your helix, tragus, or conch piercings.
- For Classic Style: Check out our endless variety of 20g and 18g studs for your lobes, from subtle gems to bold designs.
- For Statement Piercings: Explore our vibrant and unique 14g belly button rings and industrial barbells.
Your perfect fit is just a click away. Remember to use the sizing charts in this guide to filter your search and find pieces that are just right for your unique piercings.
Let's find your next favorite piece of body jewelry together. Happy shopping!
Common Questions About Earring Gauges
Feeling a bit more confident about earring gauges now? That’s awesome! But hey, it's totally normal if you still have a few questions buzzing around. Think of this as your final cheat sheet to clear up any lingering confusion. We’ve rounded up the most common questions we get and answered them with clear, simple advice.
Let's make sure you walk away from this earring gauge size chart feeling like a total pro. We want you to be 100% ready to pick out your next piece of amazing body jewelry without a single doubt.
What Gauge Are Regular Earrings?
This is probably the most asked question ever! Standard earrings, you know, the butterfly-back studs you’d find at a department store or get from a mall piercing gun, are almost always 20g (0.81mm). Occasionally, you might even find some that are a slightly thinner 22g.
So, if you’ve had your lobes pierced the old-fashioned way, it's a very safe bet that a 20g post will fit perfectly. This is the baseline size for most initial lobe piercings and pretty much all everyday earrings you'll come across.
Can I Put a 16g Earring in an 18g Hole?
Great question, and one we hear all the time! Going from an 18g (1.0mm) piercing to a 16g (1.2mm) piece of jewelry is considered a very small stretch. For a piercing that is completely healed and happy, this is often totally doable.
The key is to be gentle. A great tip is to try inserting the new, thicker jewelry right after a hot shower; the warmth makes your skin a little more pliable and forgiving. Using a tiny bit of water-based lubricant can also help it slide in smoothly. But always remember the golden rule: never force it. If you feel any real pain or significant resistance, your piercing just isn't ready. Stop immediately and consider using a taper for a safer, more gradual transition.
What Is the Difference Between Gauge and Millimeters?
Let’s break this down one last time, because it’s super important to get this straight. Gauge (g) is an old-school, inverse measurement system that originally came from wire manufacturing. "Inverse" means the higher the gauge number, the thinner the jewelry. It sounds backward, but that’s just how it is—a 20g earring is much thinner than a 16g earring.
On the other hand, millimeters (mm) measure the actual thickness directly, which is way more straightforward. With millimeters, the higher the number, the thicker the jewelry. So, a 1.2mm post is thicker than a 1.0mm post. Since millimeters are a universal standard, our earring gauge size chart includes both to eliminate any and all confusion when you're shopping.
Ready to put all your new knowledge to the test? BodyCandy has an incredible collection of jewelry in every size you can imagine. Explore our endless styles and find your perfect fit today at https://bodycandy.com


