So, you've taken the plunge and gotten that awesome new industrial piercing. Welcome to the club! Now for the important part: the healing. Let's be real, healing this unique cartilage piercing is a marathon, not a sprint. The full journey through all the industrial piercing healing stages will take anywhere from six to twelve months as your body carefully builds two separate fistula tunnels connected by that killer barbell.
Your Industrial Piercing Healing Roadmap
Committing to an industrial is a big deal, but knowing what's ahead makes the whole process way less intimidating. Think of it like a road trip—you wouldn't drive cross-country without a map, right? Same logic applies here. Understanding what's normal (and what isn't) at each stage gives you the confidence to care for it correctly from day one.
Industrials have a reputation for being slow healers for a good reason: you’re healing two separate cartilage piercings at the same time. A 2023 survey actually found that about 68% of people felt their industrial was completely healed within nine months, which is a solid benchmark to keep in mind. If you're a data nerd, you can find more piercing stats and facts by checking out these professional piercer insights on facts.net.
What to Expect on Your Journey
Your body is an amazing healing machine, and it goes through a few distinct phases to get your piercing happy and healthy. Here's a quick peek at what you've signed up for:
- The Angry Phase: The first few weeks are the most intense. Your ear is going to be swollen, red, and pretty tender. Don't panic! This is just a totally normal inflammatory response.
- The Deceptive Middle Ground: After the initial drama, things will calm down significantly. This is the longest stage, where the piercing might look and feel okay on the outside, but it's still working hard on healing internally.
- Fully Healed & Happy: The final stage is all about maturation. The new skin inside the piercing (called the fistula) gets strong and stable. You'll know you've made it when all the tenderness, swelling, and crusties are gone for good.
This timeline gives you a great visual of the key phases, from that first swollen week all the way to a fully healed, sparkling piercing.
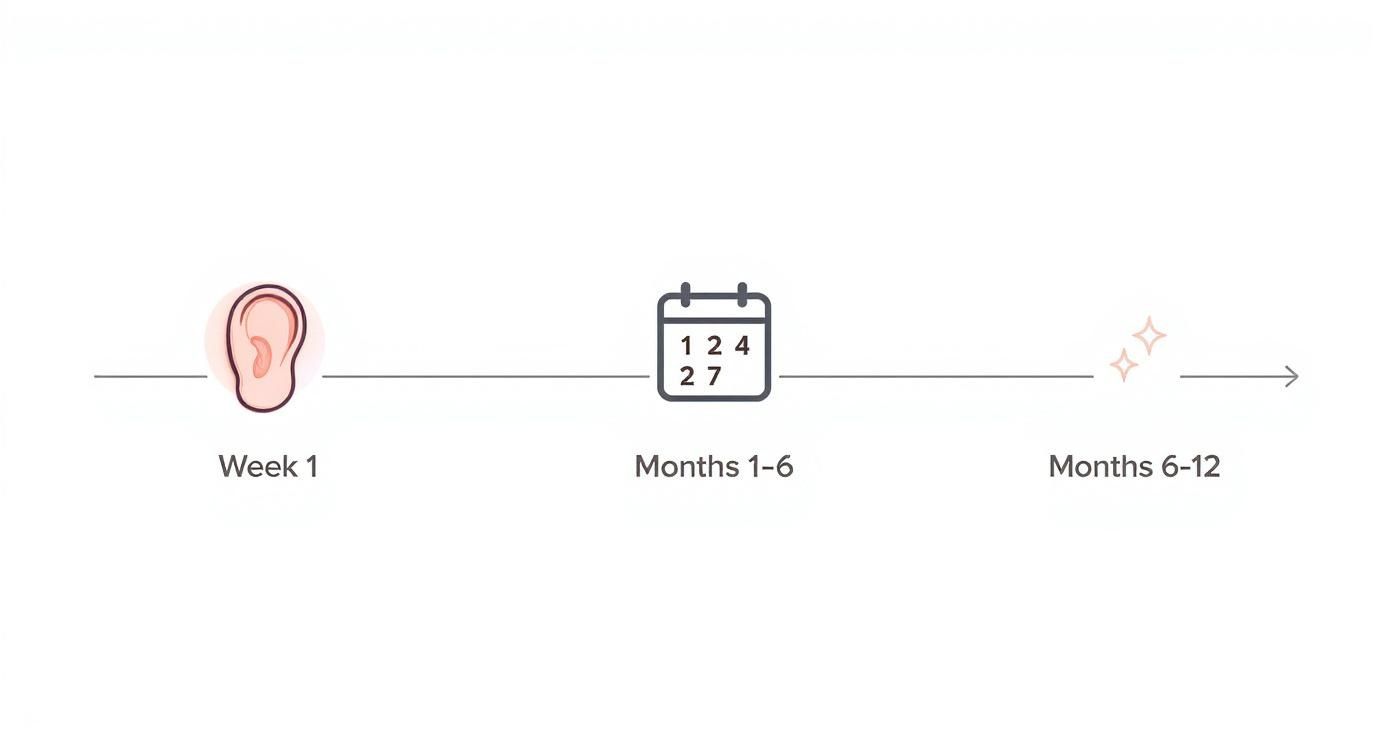
As you can see, the real heavy lifting happens in those first six months. The last half of the year is mostly about strengthening that new tissue so your piercing can last a lifetime.
Industrial Piercing Healing at a Glance
For those of you who just want the highlights, this table breaks down the entire journey into easy-to-digest stages. It's your cheat sheet for what to expect and when.
| Healing Stage | Typical Duration | What to Expect (The Norm!) |
|---|---|---|
| Week 1: The Fresh Piercing | 1-2 Weeks | Significant swelling, redness, tenderness, and some throbbing. Expect clear or yellowish "crusties." |
| Weeks 2-8: Early Healing | 2 Weeks - 2 Months | Swelling and redness gradually go down. Tenderness remains, especially if bumped. Crusties continue to form. |
| Months 3-6: Mid-Healing | 3-6 Months | Piercing looks much calmer. Tenderness is minimal, but flare-ups can happen. It's not fully healed yet! |
| Months 6-12: Mature & Healed | 6-12 Months | No more pain, swelling, or crusties. The jewelry moves freely. It's now safe to consider changing your barbell! |
Just remember, everyone heals at their own pace. This table is a great guide, but always listen to your body and your piercer.
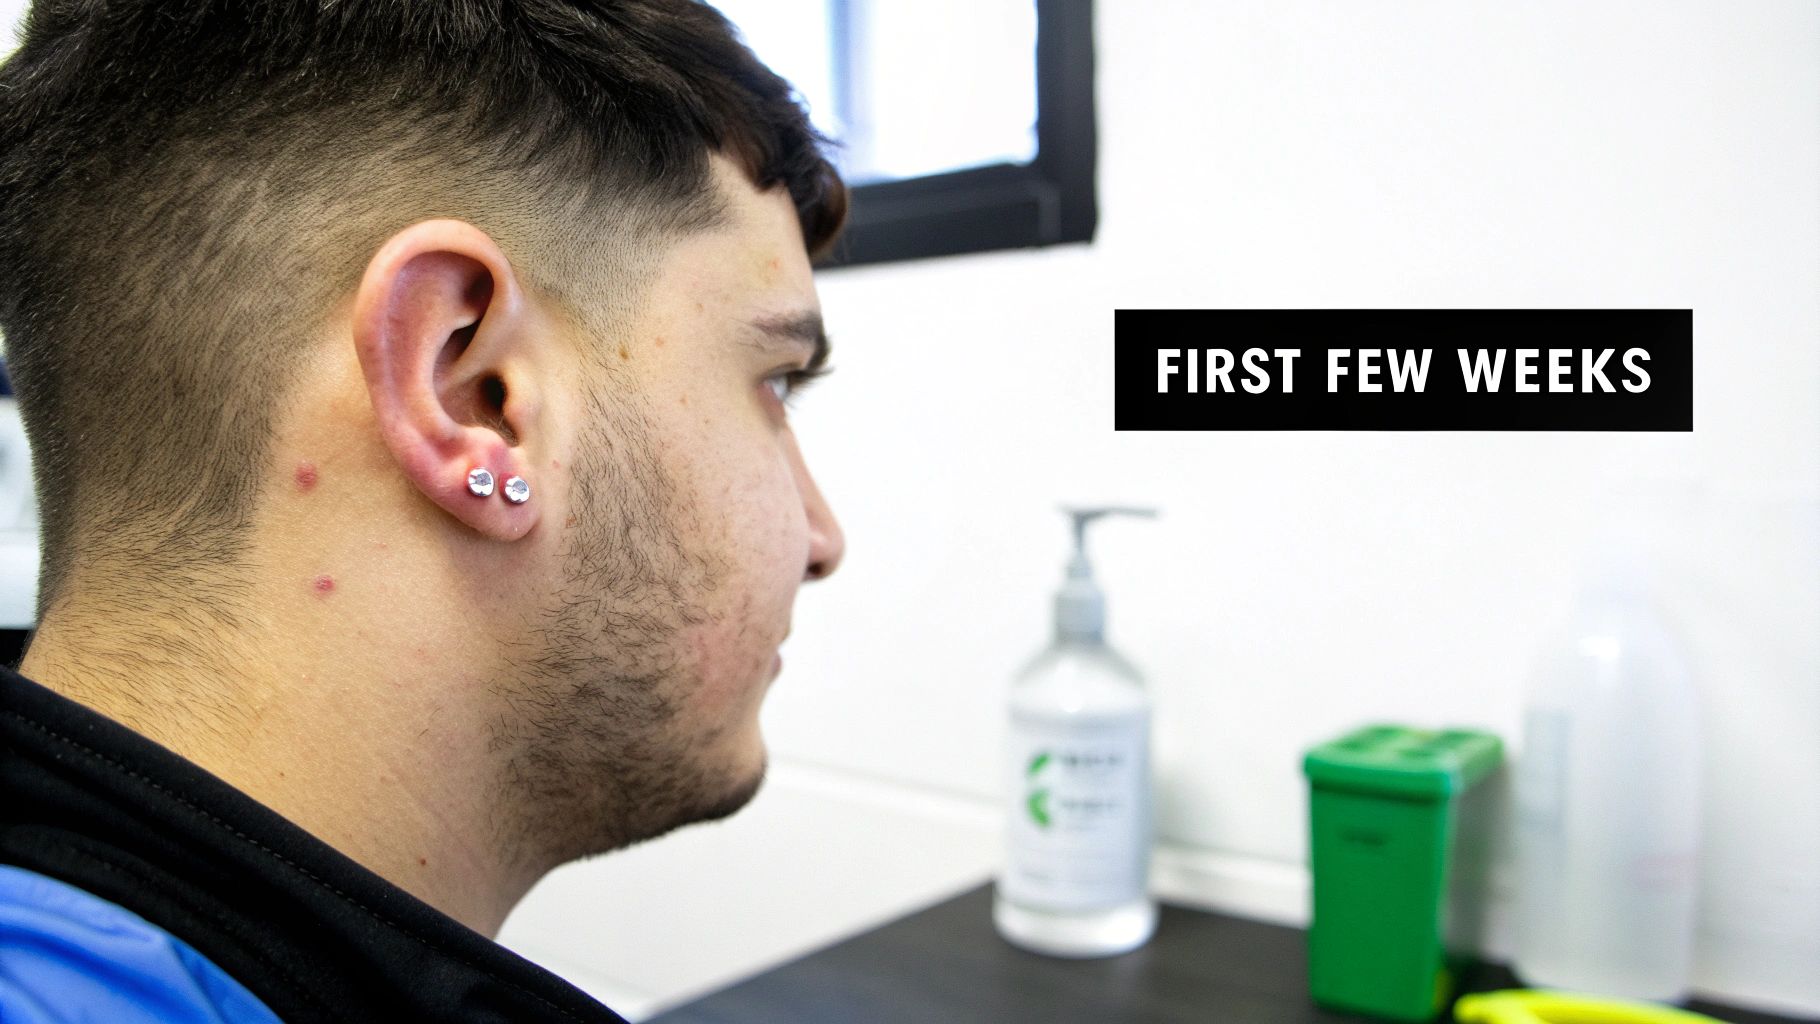
Stage One: The First Few Weeks of Healing
Alright, you did it! Your industrial is fresh, and your ear is officially a work of art. For the first few weeks, you're in what's called the inflammatory stage, and your body is in full-on triage mode.
Don't be surprised if your ear is swollen, red, and definitely tender. This isn't a red flag—it's just your body's way of rushing healing cells to the site. Think of it like this: your body just went through a minor trauma (getting poked with a needle, twice!), and its natural response is to protect and repair the area. Nailing the aftercare during this initial phase is everything.
Your New Aftercare Routine
For now, your new best friend is a simple sterile saline solution. You'll want to skip the DIY salt soaks, which can easily be mixed too strong or, worse, contain bacteria. A pre-packaged spray is the gold standard for a reason—it’s sterile, convenient, and has the perfect salt-to-water ratio.
Here's what your daily routine should look like:
- Clean Twice a Day: Gently spray the front and back of both piercing holes with your saline solution, once in the morning and once at night. That's it.
- Don't Twist the Jewelry: Forget the old advice to twist your jewelry. That's a huge myth! Twisting just irritates the delicate fistula (the skin tube healing inside) and can drag in bacteria.
- Pat, Don't Rub: After spraying, gently pat the area dry with a fresh piece of non-woven gauze or a paper towel. Regular bath towels are a no-go; they can harbor bacteria and snag your new barbell, which you really want to avoid.
Pro Tip: It's tempting to think more is better, but don't over-clean! Cleaning more than twice a day can strip your skin's natural oils, leaving it dry and irritated. Trust the process and let your body work its magic.
What to Avoid at All Costs
This initial stage is when your new piercing is at its most vulnerable. Your main goal is to minimize irritation and give it the best possible start. That means being super mindful of a few things that can derail your healing journey before it even gets going.
Make sure you avoid:
- Sleeping on it: This is the big one. Putting pressure on your new industrial can cause serious swelling, pain, and even shift the piercing's angle. A travel pillow is a total lifesaver here—just tuck your ear into the hole!
- Touching it: Seriously, hands off. Your fingers are covered in oils and bacteria that can easily lead to irritation bumps or a full-blown infection.
- Harsh chemicals: Steer clear of things like alcohol, hydrogen peroxide, and antibacterial ointments. These are way too aggressive for a fresh piercing and will do more harm than good.
- Getting it snagged: Be extra careful with long hair, hats, headphones, and even your glasses. Tying your hair back is a great habit to get into for the first few weeks.
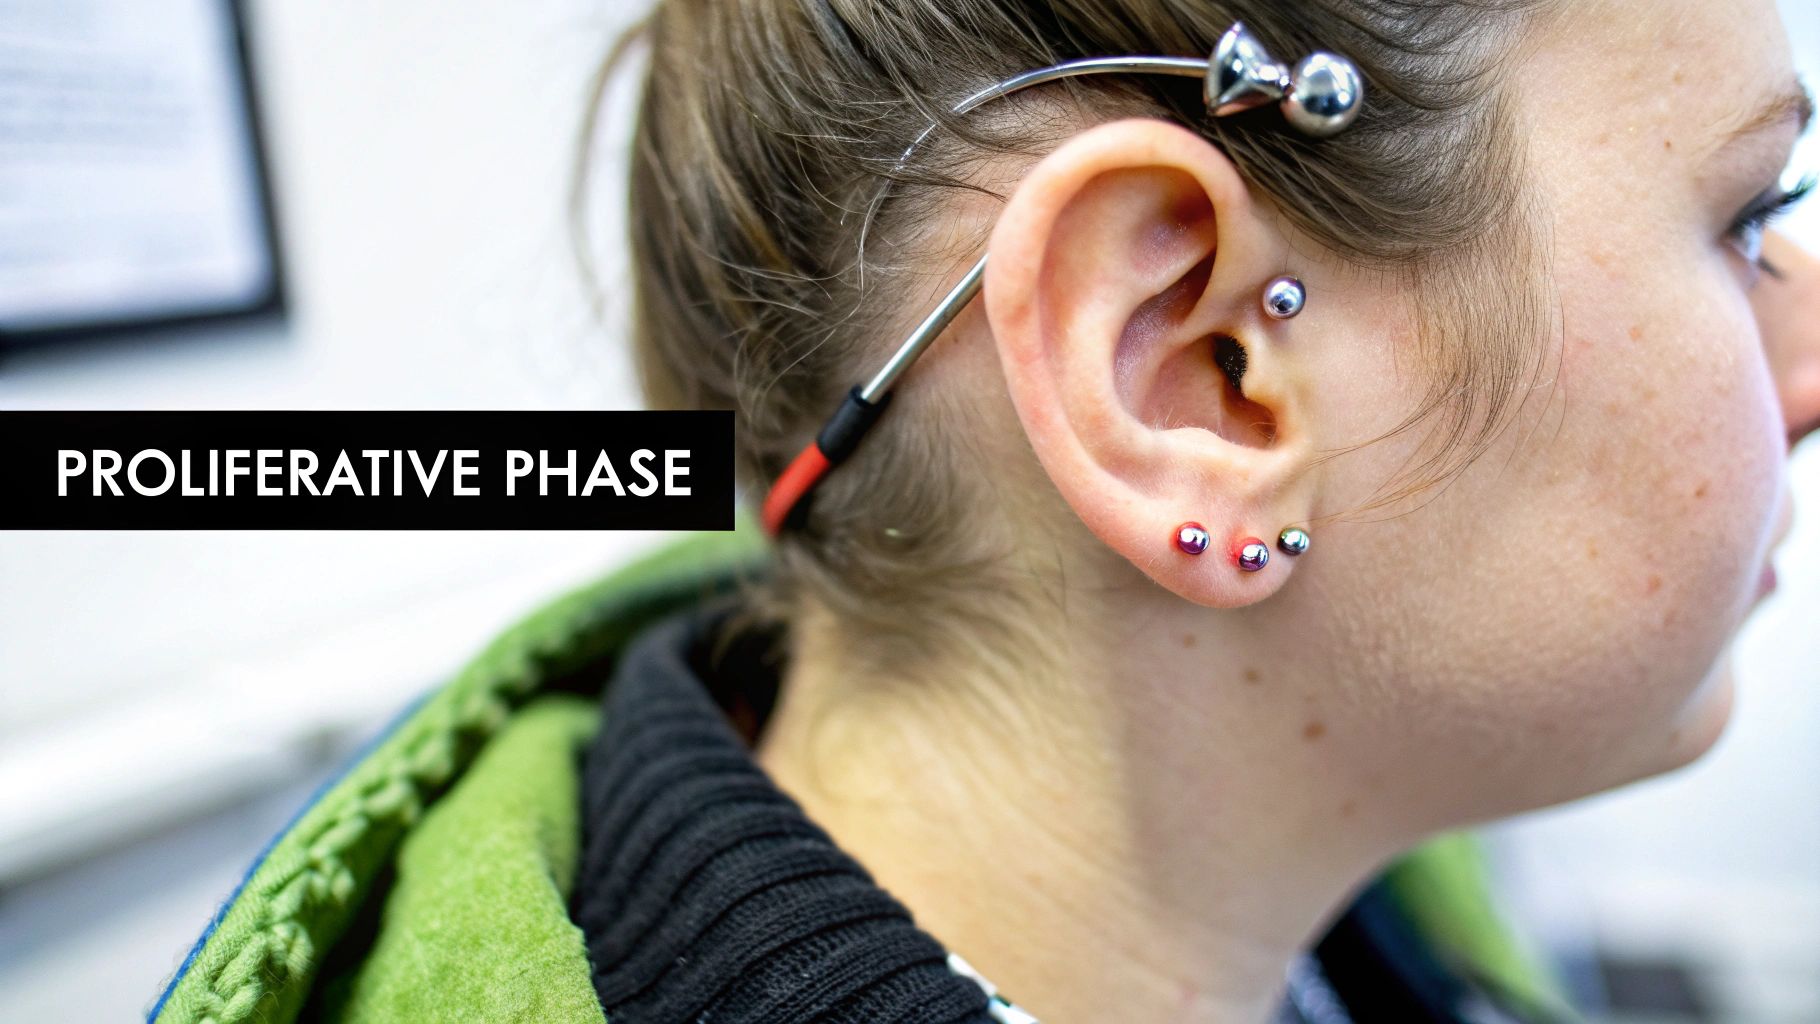
Stage Two: Navigating the Longest Healing Phase
Alright, you’ve made it through the initial fiery phase—congrats! Now you’re settling into what’s known as the proliferative stage. Honestly, this is the longest and trickiest part of your industrial piercing's healing journey. The intense swelling and redness have probably calmed down, which might make you think you're totally in the clear.
Don't let that fool you! While the outside is looking much better, your body is doing some serious construction work on the inside, building up the new fistula (that’s the skin tube that will make your piercing permanent). This is the exact moment many people start slacking on their aftercare, but it’s actually the time to be more diligent than ever.
Dealing with the Dreaded Piercing Bumps
This stage is prime time for those infamous "piercing bumps" to show up. These annoying little bumps are almost always a sign of irritation. Think of your new piercing as a fussy baby; anything that bothers it can trigger a flare-up.
These bumps are so common that a 2022 global study found 34% of people with industrial piercings experienced some kind of complication, with piercing bumps topping the list. A massive 60% of those issues popped up within the first three months—which is exactly where you are now. It just goes to show how critical your aftercare routine is during this period.
If you're curious about how your healing timeline stacks up against other piercings, you can explore our guide on healing times for popular piercings.
Protecting Your Piercing From Snags
Irritation is the number one enemy of a happy industrial. Your main job during this phase is to play defense and protect your piercing from anything that could snag, pull, or put pressure on it.
Your biggest challenges will be:
- Your Hair: Long hair loves to wrap itself around industrial barbells. Tying it back is a simple but game-changing move.
- Your Clothes: Be extra careful when pulling shirts or hoodies over your head. It’s so easy to forget and catch your jewelry by accident.
- Your Headphones: Over-ear headphones are a huge no-go right now. They put direct, constant pressure on the piercing sites, which is a recipe for irritation bumps and can even cause the piercing to shift or migrate.
Keep up with your saline spray twice a day, avoid touching the jewelry at all costs, and just continue to be gentle. This consistent, careful approach is your best bet for a smooth healing process and for keeping those frustrating bumps away. Remember, a little patience now pays off with a beautifully healed piercing later.
Stage Three: The Final Maturation Phase
You’re in the home stretch! This final part of the industrial piercing healing process is all about maturation, and honestly, it can feel a little anticlimactic. On the outside, your piercing probably looks and feels fantastic. But don't let that fool you—your body is still putting in the work.
During this stage, the fistula—that tunnel of skin your jewelry sits in—is strengthening and fortifying itself. Think of it like a newly paved road. At first, the asphalt is soft and needs time to cure and harden before it can handle heavy traffic. Your piercing is doing the exact same thing, building up resilience and stability from the inside out. This final curing process can take several months, which is why the total healing time can stretch up to a full year.
Is It Really Healed? A Checklist
So, how do you know you've actually crossed the finish line? Patience is everything, but there are some clear giveaways that your industrial piercing is fully mature and happy. Running through this mental checklist is a great way to gauge if you're ready for the fun part: changing your jewelry.
A fully healed industrial piercing should have:
- Zero Pain or Tenderness: You should be able to gently touch the area without any soreness, discomfort, or sharp pains.
- No More Discharge: The days of finding "crusties" on your barbell are long gone. The piercing sites should be completely clean and dry.
- Normal Skin Color: Any lingering redness or discoloration around the piercing holes should have completely faded back to your natural skin tone.
- Freely Moving Jewelry: The barbell should slide back and forth within the piercing smoothly, without any catching, tightness, or resistance.
It’s super important to wait until you can confidently say "yes" to all these points. Changing your jewelry too early can damage that delicate new tissue and send you right back to square one of the healing process.
Time for a New Look: Changing Your Barbell
Once you're positive your piercing is fully healed, it’s time to celebrate with an upgrade! That initial, often plain, long barbell did its job, but now you can dive into a whole new world of style. Your first jewelry change is a major milestone, so you definitely want to do it right.
We always, always recommend having a professional piercer handle your first jewelry swap. They can confirm your piercing is 100% ready and change the jewelry using sterile tools, which minimizes any risk of irritation. More importantly, they’ll make sure you get a barbell that’s a perfect fit for your anatomy.
When you're ready to pick out your new bling, stick with high-quality, body-safe materials. Your piercing is still relatively new, and cheap, mystery metals can trigger a nasty reaction. Implant-grade titanium is the absolute best choice; it’s hypoallergenic, lightweight, and what the pros trust. Check out Bodycandy’s collection of awesome titanium industrial barbells to find a safe and stylish piece that will keep your ear happy for years to come.
Identifying Trouble: Irritation vs. Infection
Okay, so you're doing everything right, but your new industrial is still acting up. Don't panic. It's incredibly important to learn the difference between a piercing that's just a bit irritated and one that's genuinely infected.
Think of it this way: irritation is your piercing being grumpy and complaining. An infection is a full-blown crisis that needs immediate attention.
Most of the time, what feels like a major disaster is just simple irritation. Cartilage is notoriously fussy, and things like sleeping on it wrong, snagging it on a t-shirt, or even just being stressed out can cause temporary redness and swelling. This is just your body’s way of saying, "Hey, back off a bit!" An infection, on the other hand, is caused by bacteria getting into the piercing, and it’s a whole different ballgame.
What Is My Piercing Trying to Tell Me?
Learning to read the signals your body is sending is the best way to stop a small issue from becoming a big problem. A little bit of redness and some clear or whitish fluid that dries into "crusties" is completely normal, especially during the early industrial piercing healing stages. It’s when other symptoms pop up that you need to start paying closer attention.
Figuring out what's what will save you a ton of anxiety. One situation just needs a little extra patience and care; the other requires a trip to a professional, no exceptions.
Key Takeaway: Irritation is a physical reaction to stress or movement. An infection is a bacterial invasion. Don't jump to conclusions at the first sign of redness—take a deep breath, assess all the symptoms, and see what your body is actually telling you.
Piercing Bumps: A Deeper Look
Let's get into those dreaded piercing bumps. They are hands-down the most common headache you can run into with cartilage piercings, but it's critical to understand that not all bumps are the same.
- Hypertrophic Scars: These are the usual suspects. They show up as small, reddish bumps right next to the piercing hole and are a classic sign of irritation from pressure, friction, or snagging. The good news? They almost always go away once you figure out what's causing the irritation and stop doing it.
- Keloids: This is a completely different animal. Keloids are a form of excessive scarring where scar tissue grows well beyond the boundary of the original piercing. They are genetic, much less common, and notoriously difficult to treat. If you or your close family members have a history of keloids, this is something you need to be aware of before getting pierced.
If a bump appears, don't immediately spiral. In over 90% of cases, it’s just a hypertrophic scar—your piercing's not-so-subtle way of telling you to quit sleeping on it or to be more careful when you brush your hair.
When to See a Professional
So, how do you know when it’s time to call in the experts? It’s all about knowing the warning signs. If your symptoms are leaning more toward the infection side of the chart below, don't wait around and hope it gets better. Go see your piercer or a doctor right away. Never, ever try to diagnose and treat a potential infection on your own.
Irritation vs. Infection: What's the Difference?
Here’s a quick cheat sheet to help you tell the difference between a cranky piercing and a true infection.
| Symptom | Normal Irritation | Potential Infection (See a Pro!) |
|---|---|---|
| Pain Level | Sore and tender, especially when touched or bumped. | Intense, persistent, throbbing pain that gets worse over time. |
| Swelling | Some localized puffiness right around the piercing holes. | Significant swelling that spreads far from the piercing site. |
| Discharge | Clear, white, or pale-yellow fluid that forms "crusties." | Thick, green, brown, or dark yellow pus, often with a foul odor. |
| Redness & Heat | A normal pinkish-red color directly around the piercing. | Dark red coloration or red streaks spreading out; the area feels hot to the touch. |
Your piercer is an incredible resource for troubleshooting everyday irritation and bumps. However, only a medical professional can properly diagnose and treat an infection. When in doubt, always play it safe and get it checked out.
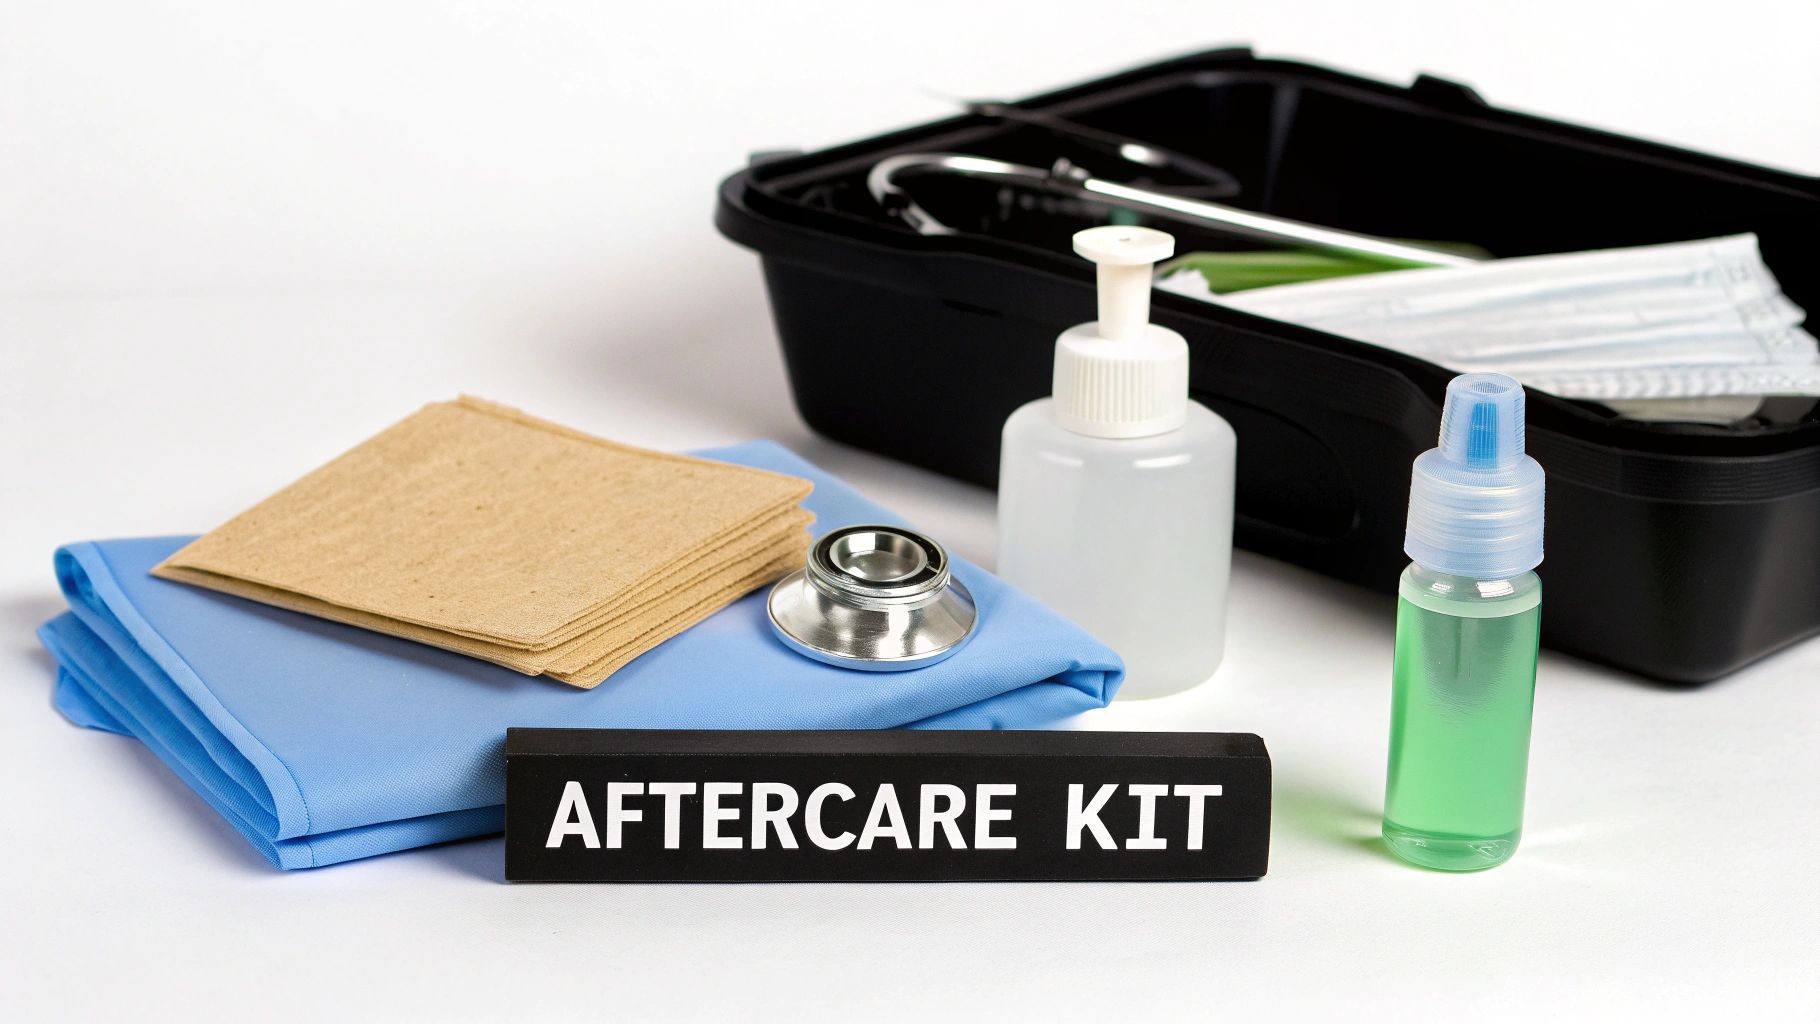
Building Your Industrial Piercing Aftercare Toolkit
Having the right stuff on hand makes aftercare a thousand times easier. A happy healing journey starts with a solid toolkit, so let's get you prepped before you even walk out of the studio. Think of it as your piercing's own little first-aid kit.
Your absolute number-one essential is a sterile saline spray. Seriously, this is not the time to be mixing your own salt water in the kitchen. DIY soaks can easily be made too harsh or, even worse, introduce nasty bacteria. A pre-made, sterile spray is perfectly formulated to clean your piercing without causing extra irritation. It's a total game-changer.
Next, you'll need a gentle way to dry the area after cleaning it. Put down the cotton balls and Q-tips! They're famous for leaving behind tiny, fuzzy fibers that can get tangled in your jewelry and really aggravate a new piercing. Instead, stock up on some non-woven gauze pads or just use a fresh paper towel to gently pat the area dry.
Your Jewelry Matters Most
That long barbell your piercer puts in isn't just for show; it's a critical part of the healing process. For initial jewelry, the undisputed champion is implant-grade titanium. This stuff is hypoallergenic, super lightweight, and completely body-safe, which dramatically cuts down the risk of allergic reactions or irritation while your piercing is at its most sensitive.
Starting with a high-quality barbell is non-negotiable. It truly sets the stage for a smoother trip through all the industrial piercing healing stages.
Your piercer will intentionally use a slightly longer barbell to make room for that initial swelling. Don't stress, this is totally normal and temporary! Once the swelling subsides, you'll go back for a "downsize" to a shorter bar that fits perfectly. Getting the right fit is crucial, and you can learn all about it in our complete guide to industrial barbell sizing.
Sticking to these basics—saline, gauze, and quality titanium—is the simplest and most effective way to help your body do its thing. With this curated toolkit, you're giving your new industrial the five-star treatment it deserves right from day one.
Your Industrial Piercing Questions Answered
Still have a few questions buzzing around? We've got you. The industrial piercing healing process can feel like a long road trip, so it's totally normal to need a little extra guidance along the way.
We’re tackling the most common questions to give you the clear, straightforward advice you need to feel confident in your aftercare routine.
Can I Speed Up My Industrial Piercing Healing Time?
While you can't force your body to heal on a faster schedule, you can absolutely create the perfect conditions for it to heal efficiently! The best way to "speed up" healing is to be incredibly consistent with your aftercare, maintain a healthy lifestyle, and get plenty of sleep.
More importantly, avoid all forms of irritation. This means no sleeping on it, no fiddling with the jewelry, and being super careful with your hair and headphones. Seriously, avoiding setbacks is the closest thing you'll get to a piercing fast-track.
When Can I Finally Sleep on My Industrial Piercing?
Patience is everything here! You really need to avoid sleeping directly on your industrial for the entire healing period, which can be up to a year. Even when it feels totally fine, that constant pressure can cause nasty irritation bumps and even shift the piercing's angle over time.
A travel pillow with a hole in the middle is a total game-changer. Just place your ear in the hole to sleep comfortably without putting any pressure on your new bling. This simple trick can save you from a lot of healing headaches!
How Do I Know It Is Safe to Change My Industrial Barbell?
You should wait until your piercing is 100% fully healed. We know it's tempting, but this means a minimum of six to nine months, but often closer to a full year. Seeing your piercing through to the end is crucial. For a firsthand look at what the journey is really like, check out Jalesa's industrial piercing experience on our blog.
Look for these signs of a fully healed piercing:
- No pain or tenderness at all, even when gently touched.
- No discharge or "crusties" forming around the holes.
- The jewelry moves smoothly through the piercing without any resistance.
We highly, highly recommend visiting your piercer for that very first jewelry change. They can confirm it's actually healed and swap the bar out safely without causing any trauma to the tissue.
Ready to find your new look? Shop our full collection of industrial barbells today at https://bodycandy.com