
So, you're feeling that magnetic pull to express yourself with stretched ears? You're in exactly the right place! This guide is your complete roadmap, designed to turn any confusion into pure confidence. We're covering everything from decoding sizes to mastering the art of safe stretching, so you can get the look you want without any of the guesswork.
Welcome to Your Ear Stretching Journey
Starting your ear stretching journey is incredibly exciting, but let's be real—it can also feel a little overwhelming with all the numbers, terms, and opinions floating around. Think of us as your trusted guide, here to walk you through every single step. You’ve got questions, and we’ve got the answers.
This isn't just about making your piercings bigger; it's a form of self-expression that connects you to a rich, global history of body art. Our mission is to demystify the whole process, making it simple, safe, and honestly, a lot of fun. Forget the confusing jargon and conflicting advice. We’re here to give you the straight-up facts so you can stretch your lobes the right way, right from the start.
What You'll Learn in This Guide
We've packed this guide with everything you need for a successful and healthy stretching experience. From your very first stretch all the way to your goal size, we've got you covered.
Here’s a sneak peek at what’s inside:
- Decoding Gauge Sizes: We’ll break down all the numbers with a simple gauge-to-mm conversion chart that will become your new best friend. Seriously.
- Safe Stretching Techniques: Learn the step-by-step process for stretching without causing damage, including the all-important question of how long to wait between sizes.
- Choosing the Best Jewelry: Discover which materials are perfect for fresh stretches and which are best for healed lobes. This will help you pick out some awesome—and safe—pieces from BodyCandy's amazing collection.
- Troubleshooting Common Issues: We'll help you spot and fix problems like blowouts or irritation before they turn into something more serious.
This guide is designed to empower you with the knowledge to stretch safely, avoid common mistakes, and finally achieve the look you’ve been dreaming of. Your journey to awesome stretched ears starts right now!
Ultimately, our goal is to make sure you feel totally confident and prepared. By the time you're done here, you’ll not only understand the "how" but also the "why" behind each step. You'll be ready to make smart choices for your body and pick out jewelry that truly reflects your unique style.
So, are you ready to get started? Let's dive in!
A Timeless Tradition of Self Expression
Deciding to stretch your ears is about so much more than a cool, modern look. It's a powerful way to express yourself, one that plugs you right into a deep and fascinating global history. When you start this journey, you’re not just tweaking your appearance—you're taking part in a tradition of body art that goes back thousands of years across countless cultures. This isn't just a trend; it's a profound way to tell your own story.
By choosing this path, you're adding your own chapter to an incredible human story. It's about celebrating identity, status, and beauty in a way that has resonated with people for centuries. Your journey becomes a part of this beautiful, ongoing narrative.
A Legacy Carved in Gold
You might be surprised to learn just how far back this practice goes. We're talking ancient civilizations and royalty. Archeological digs have uncovered that ancient Egyptian culture embraced ear stretching in a big way.
The most famous example? King Tutankhamun himself had stretched ears, estimated to be around 10mm (or 00g). This was such an integral part of his identity that it was proudly featured on his iconic golden death mask, one of the most famous artifacts in human history. This proves ear modification was deeply tied to cultural, spiritual, and social status.
This historical connection elevates ear stretching from a simple style choice to a practice steeped in legacy. When you pick out your first pair of plugs, you’re connecting with something once reserved for pharaohs and kings—a true symbol of power and divine connection.
Global Cultures and Modern Meanings
Beyond ancient Egypt, this form of body modification has held deep meaning for cultures all over the globe, each with its own unique purpose and symbolism. Think of it as a universal language of identity.
Check out these incredible examples:
- The Fulani People: In West Africa, Fulani women often stretch their ears to wear large, ornate gold earrings. These aren't just for show; they represent wealth, status, and cultural heritage.
- The Mursi Tribe: For the Mursi people of Ethiopia, large clay or wooden plates worn in stretched earlobes and lips are powerful symbols of social maturity and personal strength.
- The Karen-Padaung People: Known for the brass coils worn around their necks, this group from Southeast Asia also practices ear stretching, decorating their lobes with intricate jewelry that carries deep cultural weight.
Today, you're part of this legacy. While your reasons might be different—personal expression, aesthetics, or a sense of community—the core act of modifying your body to reflect your inner self remains the same.
Each stretch is a personal milestone, a deliberate choice to shape your own identity. It’s a visual declaration of who you are and what you value. This complete ear gauge size guide is here to help you navigate your own journey safely and confidently, connecting your modern story with this ancient art form.
Decoding Gauge Sizes with Our Conversion Chart
Okay, let's clear up the single most confusing part of stretching your ears: the numbers. Getting a handle on gauge sizes is your first major step, and trust us, it's way simpler than it looks. Here’s the one thing you absolutely need to remember: in the world of body jewelry, the sizing system works backward.
A smaller gauge number (like 14g) actually means a smaller hole. As you stretch up, the gauge number gets lower until you hit the bigger sizes. It's a bit weird at first, but think of it this way: a 2g is a lot larger than a 14g. You'll get the hang of it fast!
To make this totally foolproof, we put together a super handy conversion chart. Think of this as your new best friend for translating those gauge numbers into measurements that actually make sense: millimeters (mm) and inches. This chart is your ticket to browsing BodyCandy’s collection with confidence, knowing you're picking the perfect size, every single time.
Ear Gauge Size Conversion Chart
Bookmark this page, take a screenshot, do whatever you need to do! This chart breaks down every standard size, from a fresh piercing all the way up to an inch, making it easy to track your progress and plan your next steps.
| Gauge (g) | Millimeters (mm) | Inches (") |
|---|---|---|
| 20g | 0.8mm | 1/32" |
| 18g | 1.0mm | - |
| 16g | 1.2mm | 3/64" |
| 14g | 1.6mm | 1/16" |
| 12g | 2.0mm | 5/64" |
| 10g | 2.4mm | 3/32" |
| 8g | 3.2mm | 1/8" |
| 6g | 4.0mm | 5/32" |
| 4g | 5.0mm | 3/16" |
| 2g | 6.0mm | 1/4" |
| 0g | 8.0mm | 5/16" |
| 00g | 10.0mm | 3/8" |
| - | 11.0mm | 7/16" |
| - | 12.0mm | 1/2" |
| - | 14.0mm | 9/16" |
| - | 16.0mm | 5/8" |
| - | 19.0mm | 3/4" |
| - | 22.0mm | 7/8" |
| - | 25.0mm | 1" |
We've put 14g in bold because it's the most common starting point for anyone just beginning their stretching journey—it's just a hair larger than a standard earring post. For a little more info, you can check out our quick take on US and UK plug sizing.
Popular Goal Sizes and Why They're a Big Deal
As you scan the chart, you'll see a few sizes that just seem to pop up more often. That's because lots of people set "goal sizes" for their stretching journey, and a few key milestones are incredibly popular. The big three are 2g (6mm), 0g (8mm), and the famous 00g (10mm).
These sizes hit a sweet spot for many people—they're large enough to make a statement but still totally manageable for everyday life. In fact, 00g (10mm) is the number-one bestselling plug size across the board, making it the most common destination for people starting out.
Why did the gauges disappear? The switch to millimeters.
You might've noticed that after 00g, the gauge system pretty much vanishes. That's because the jumps between sizes become much larger and less consistent. To keep things clear and accurate, everyone in the body jewelry world switches over to millimeters (or inches) for any size larger than 10mm.
This move to a direct measurement system makes your life way easier. It takes the guesswork out of planning your next stretch and helps you find jewelry that fits perfectly, keeping your stretching journey safe and on track.
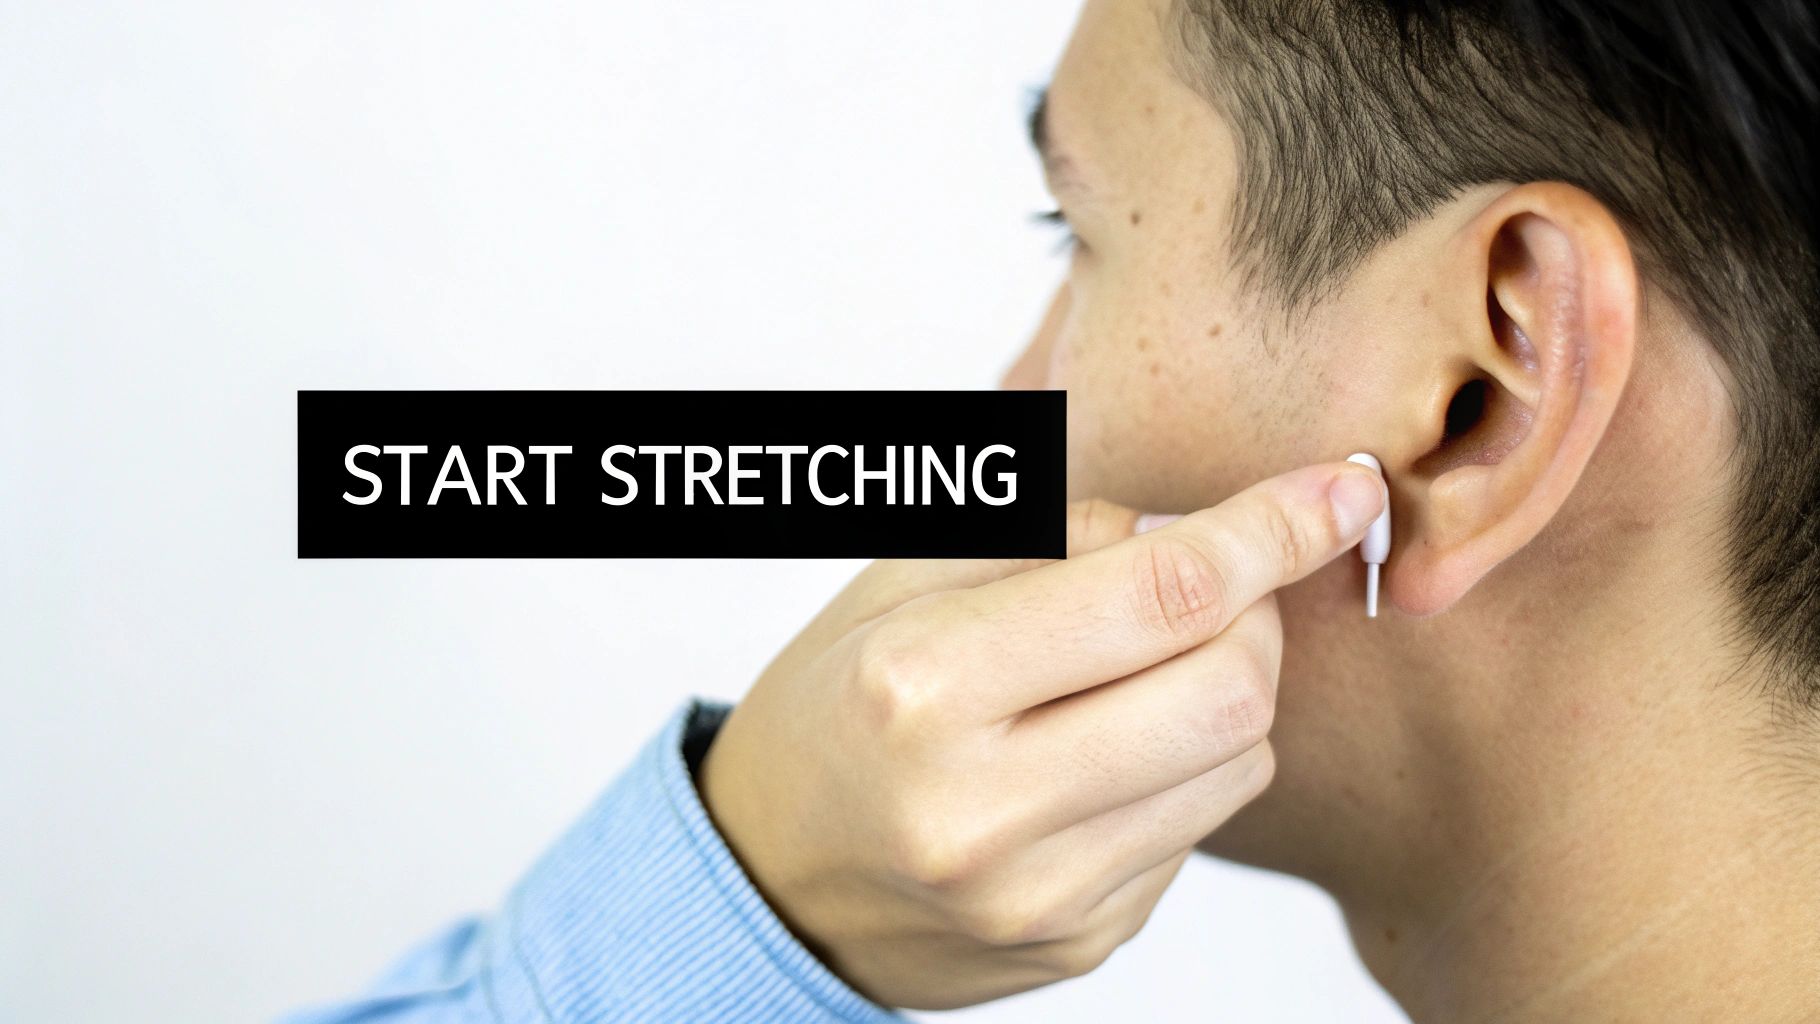
How to Stretch Your Ears Safely
Alright, let's get into the most important part of this whole adventure: stretching your ears the right way. This is where patience officially becomes your best friend. Seriously, think of it as a marathon, not a sprint. Your lobes are going to thank you for taking your time, and trust us, healthy lobes are happy lobes.
Stretching correctly is all about listening to your body. If you feel sharp pain, stop immediately. A little bit of pressure or a slight tingling sensation is normal, but actual pain is your body's way of screaming, "Hold up, I'm not ready for this!" Rushing the process is the fastest way to cause a painful blowout, which can lead to scarring and set your journey back weeks or even months.
The Golden Rules of Stretching
Ready to get started? Awesome. Before you even think about sliding in that next size, you need to prep your lobes to make the transition as smooth and comfortable as possible. A little bit of prep work goes a long way in preventing tears and irritation.
Here's your pre-stretching ritual:
- Warm Up Your Lobes: Take a nice, warm shower or just use a warm compress on your earlobes for a few minutes. This helps increase blood flow and makes the skin much more pliable and ready to stretch.
- Massage, Massage, Massage: After your shower, grab a small amount of a natural oil, like jojoba oil or a specialized ear butter, and gently massage your lobes for a couple of minutes. This is a crucial step for keeping the skin healthy and elastic.
- Lube It Up: When you're ready to insert the new jewelry, use a generous amount of a water-based lubricant on both your earlobe and the taper or single-flare plug. Never, ever stretch dry.
This simple routine is your secret weapon for a successful and pain-free stretch every single time. It only takes a few extra minutes, but the payoff is huge.
Methods and Timelines
When it comes to the actual stretching, you have a couple of popular methods to choose from. For smaller sizes (typically under 10mm or 00g), using tapers is the most common approach. Tapers are those cone-shaped tools that gradually get wider, allowing you to gently guide the next size into your ear. For a more detailed walkthrough, you can find a ton of helpful information by reading our guide to using ear stretching kits.
As you can see in this progression chart, the jumps between sizes become more significant as you go up.
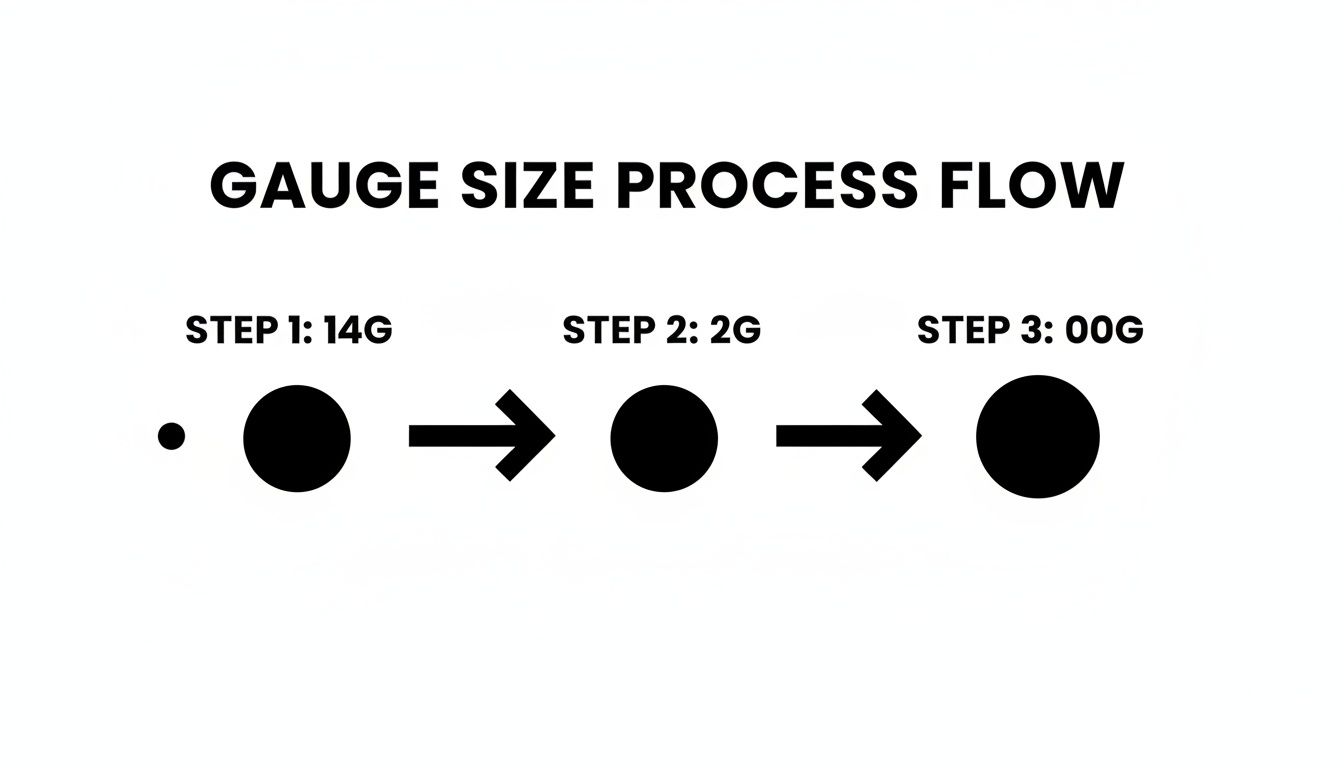
This visual really shows why patience is so critical; the physical change from a small 14g to a statement 00g is a significant journey for your earlobes.
For larger sizes, a lot of people switch to the taping method. This involves wrapping a thin layer of non-adhesive tape (like bondage tape) around your current plugs and re-inserting them. Every few days, you add another layer of tape, slowly and gently expanding the piercing until it's ready for the next full size.
No matter which method you choose, the timeline is non-negotiable. You must wait a minimum of 4-6 weeks between each stretch. Some people find they need to wait even longer, especially at larger sizes. This waiting period gives your earlobe the time it needs to fully heal and produce new, healthy skin cells.
Rushing this healing window is what causes most stretching problems. Remember, this complete ear gauge size guide is designed to help you get the look you want without compromising the health of your ears. Take it slow, be consistent, and your lobes will be perfectly prepped for all the amazing jewelry you're going to wear.
Choosing The Right Jewelry Materials For Healthy Lobes
So, you're on your stretching journey, and you're eyeing all the amazing plugs and tunnels out there. But hold on a second—what your jewelry is made of matters. A lot.
Think of it like this: your freshly stretched lobes are like sensitive, healing skin. You wouldn't wrap a fresh wound in just anything, right? The same logic applies here. The right material can be the difference between a smooth, easy stretch and a world of irritation, while the wrong one can set you back weeks.
For a new stretch, your lobes are crying out for materials that are non-porous and body-safe. This is non-negotiable. Porous materials (think wood or some plastics) have tiny microscopic holes that can trap bacteria, making them a total nightmare for healing tissue and a potential fast track to infection.
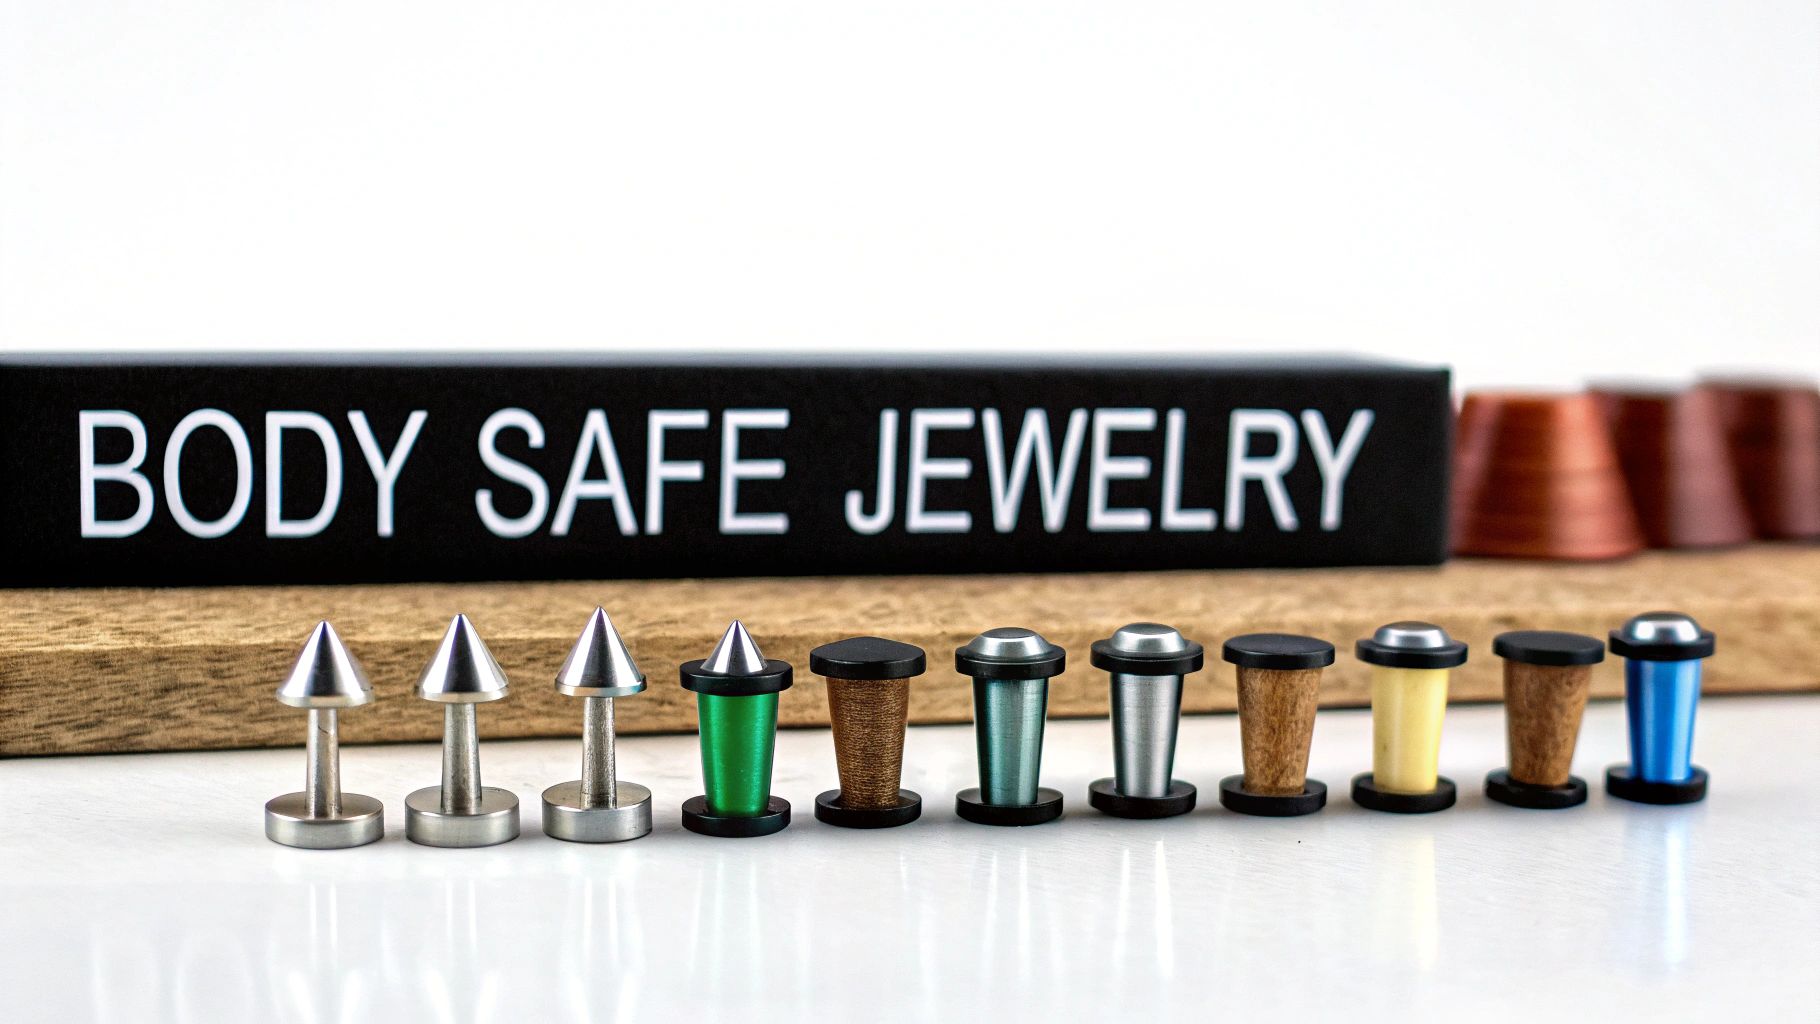
Best Materials For Fresh Stretches
When your lobes are in that delicate healing phase, you need to be picky. The goal is to use something super smooth, non-reactive, and easy to keep sparkling clean. These materials are the MVPs of safe stretching.
Here are the top-tier choices for your fresh stretches:
- Implant-Grade Surgical Steel: This is the gold standard for a reason. It's incredibly durable, non-porous, and affordable. Its polished, smooth surface won't irritate your healing fistula (the skin tube of your piercing).
- Titanium: If you have sensitive skin or are prone to metal allergies, titanium is your hero. It's lightweight, completely nickel-free, and just as strong as steel, making it the perfect choice for a worry-free stretch.
- Glass: Don't sleep on glass! It’s another fantastic option because it’s non-porous and extremely smooth, which makes for a comfortable, easy insertion. Plus, glass plugs come in a ton of awesome colors and designs.
When in doubt, stick to these three materials for any new stretch. They give your earlobes the clean, stable environment they need to heal properly, setting you up for success as you move to the next size.
Materials For Fully Healed Lobes
Once your ears are completely healed (meaning zero pain, swelling, or discharge for several weeks), you can start having some real fun! A whole new world of materials opens up, allowing you to express your style in countless ways. Just remember, these are for established, happy piercings only.
Here’s what you can look forward to wearing:
- Organic Wood: From sandalwood to ebony, wood plugs are lightweight, breathable, and come in beautiful natural grains. A cool bonus? They can help reduce that "ear cheese" smell because they absorb moisture.
- Stone: Plugs made from materials like amethyst, jade, or obsidian are absolutely stunning. They have a nice, satisfying weight to them, and each pair is totally unique thanks to the natural patterns in the stone.
- Silicone: For an ultra-comfortable and flexible option, silicone is amazing. It's perfect for sleeping in or wearing during sports. Just make sure you’re buying high-quality, body-safe silicone.
Ear Stretching Jewelry Materials Comparison
| Material | Best for Fresh Stretches? | Best for Healed Stretches? | Key Features |
|---|---|---|---|
| Surgical Steel | ✅ Yes | ✅ Yes | Non-porous, durable, affordable, easy to clean |
| Titanium | ✅ Yes | ✅ Yes | Hypoallergenic, nickel-free, lightweight, non-porous |
| Glass | ✅ Yes | ✅ Yes | Extremely smooth, non-porous, great color options |
| Silicone | ❌ No | ✅ Yes | Lightweight, flexible, comfortable for sleep/activity |
| Wood/Organics | ❌ No | ✅ Yes | Breathable, lightweight, natural aesthetic |
| Stone | ❌ No | ✅ Yes | Unique patterns, has a satisfying weight, stylish |
| Acrylic | ❌ No | ⚠️ Use with caution | Lightweight and colorful, but can be low-quality |
Ultimately, listening to your body is key, but this chart should give you a solid starting point for your jewelry choices.
Materials To Avoid During Healing
Finally, let's talk about what to avoid. Some materials might look cool, but they are a recipe for disaster in a fresh stretch. Steer clear of these until your lobes are 100% healed and happy.
- Acrylic: While it's cheap and comes in every color imaginable, acrylic is porous and can degrade over time, releasing chemicals that can seriously irritate your skin.
- Silicone: Yep, it's on both lists! While perfect for healed lobes, its flexibility can put uneven pressure on a healing fistula, and its slightly tacky surface can trap bacteria.
- Wood and other organics: These are highly porous and will soak up bacteria and moisture like a sponge, leading to potential irritation or infections. Wait until you're fully healed to enjoy these natural beauties.
Troubleshooting Common Stretching Issues
Even when you're super careful and follow every rule in the book, sometimes your stretching journey hits a bump in the road. Don't panic! Most issues are totally fixable if you act quickly and calmly.
Think of this as your first-aid guide for getting your lobes back on track. The most important thing is to listen to your body. Pain, excessive swelling, or weird discharge are all signs that your ears are not happy. Catching these signals early is the best way to prevent a minor hiccup from becoming a major setback.
The Dreaded Blowout
A blowout is probably the most common—and feared—stretching problem. This is what happens when you stretch too fast, forcing the skin on the inside of your piercing to push out the back. The result is a gnarly, lip-like ring of scar tissue.
If you spot a blowout forming, the solution is immediate and non-negotiable: downsize. Take out the jewelry and go back to the previous, smaller size. This takes the pressure off the damaged tissue, giving it a chance to heal and hopefully retract.
For aftercare, it’s pretty straightforward:
- Downsize Immediately: Go back to your last comfortable gauge. No excuses.
- Saline Soaks: Soak your lobes in a sterile saline solution twice a day. This keeps them clean and helps reduce inflammation.
- Gentle Massages: Once the initial irritation calms down, start massaging your lobes daily with jojoba oil. This can help break down scar tissue and improve blood flow to the area.
Handling Minor Tears and Irritation
Did you get a little too eager with that taper and feel a tiny sting? You might have a micro-tear. These are small, almost invisible tears in the skin that can happen if you stretch without enough lubricant or just a day or two too soon.
Just like with a blowout, the first step is to downsize. Your ear needs time to heal without the pressure of bigger jewelry. Keep the area clean with those saline soaks and, most importantly, leave it alone. Patience is everything here—let it heal completely before you even think about trying to stretch again.
The golden rule for any stretching issue is to give your body a break. Rushing the healing process will only lead to more scar tissue and a much longer journey to your goal size. Let your lobes guide the timeline.
Allergic Reactions and Infections
Sometimes, the problem isn't how you stretched but what you stretched with. If you’re dealing with persistent redness, itching, or swelling, you might be having an allergic reaction to your jewelry's material. This is a common scene with lower-quality materials like acrylic or metals containing nickel.
Your move? Immediately switch to a hypoallergenic material like implant-grade titanium or glass. These materials are body-safe and non-reactive, which will give your angry skin a chance to calm down. Check out BodyCandy's selection of titanium plugs to find a safe and stylish option.
Now, if you suspect an infection—we're talking green or yellow pus, intense pain, and heat—do not remove the jewelry. This can cause the piercing to close up and trap the infection. See a doctor right away. They can properly diagnose the issue and get you on antibiotics if needed.
Got Questions About Stretching? We've Got Answers
Alright, let's tackle some of the most common questions that pop up when you're starting your stretching journey. Think of this as your go-to FAQ, filled with clear, straightforward advice to keep you moving forward safely and with confidence.
Can I Skip Sizes to Stretch Faster?
Let's make this perfectly clear: absolutely not. It might be tempting to jump from a 10g to a 6g to speed things up, but that's a one-way ticket to a painful blowout or a nasty tear in your earlobe.
Imagine trying to shove a huge object through a small hole—it’s just going to cause damage. That kind of trauma creates scar tissue, which is way less elastic and makes future stretching so much harder. Honestly, skipping sizes will set you back way further than just being patient from the start. Stick to the one-size-at-a-time rule. No exceptions!
How Do I Know When I'm Ready for the Next Size?
Don't worry, your body will give you all the clues you need. The trick is to listen closely to what your ears are telling you and never, ever rush the healing process.
Before you even think about reaching for that next taper, run through this simple checklist:
- Is It Totally Healed? Your piercing should feel 100% normal. No pain, no swelling, no tenderness, no crusties. Nothing.
- Has Enough Time Passed? You need to wait at least 4-6 weeks since your last stretch. For larger sizes, you might even need to wait longer.
- Does Your Jewelry Feel Loose? Your current plugs or tunnels should feel a little loosey-goosey. They should be able to move back and forth in your lobe easily without any friction.
- Does the Next Taper Go in Easily? With a good bit of lubricant, the tip of the next size taper should slide in with very little pressure. If you have to force it, stop immediately. Your ear isn't ready.
What’s the Difference Between Plug Flare Styles?
When you start shopping for plugs, you'll see terms like "single flare," "double flare," and "no flare." This is all about the style of the plug's edges, and each one plays a different role in your journey.
- Single Flare Plugs: These are your absolute best friends for active stretching. They have one flared edge that keeps the plug from falling out the front, while the back is straight and held in place with a tiny O-ring. This design makes them super gentle and easy to slide into a fresh stretch.
- Double Flare Plugs: These have a flared edge on both the front and the back. They look amazing, but they are only for fully healed and well-seasoned lobes. Your earlobe has to be relaxed and stretchy enough to pop over that second flare. Never, ever try to force these into a new stretch.
- No Flare Plugs: Sometimes called straight plugs, these are just simple cylinders. They're held in place by two O-rings (one in front, one in back). They're another gentle option that works well for both healing and healed piercings.
Ready to show off those beautifully stretched lobes with some fresh jewelry? BodyCandy has an incredible collection of high-quality plugs, tunnels, and hangers for every size and style. Find your next favorite pair today at https://bodycandy.com


