So you did it—welcome to the belly bling club! Getting a navel piercing is super exciting, but what comes next is what really matters. Proper aftercare is everything when it comes to making sure your new piercing heals beautifully and looks amazing. The whole journey really boils down to two things: patience and consistency.
Your main goals are simple: keep it clean with a sterile saline solution and avoid bugging it with tight clothing or too much activity. Let's get into it!
Your Guide to the First Few Weeks
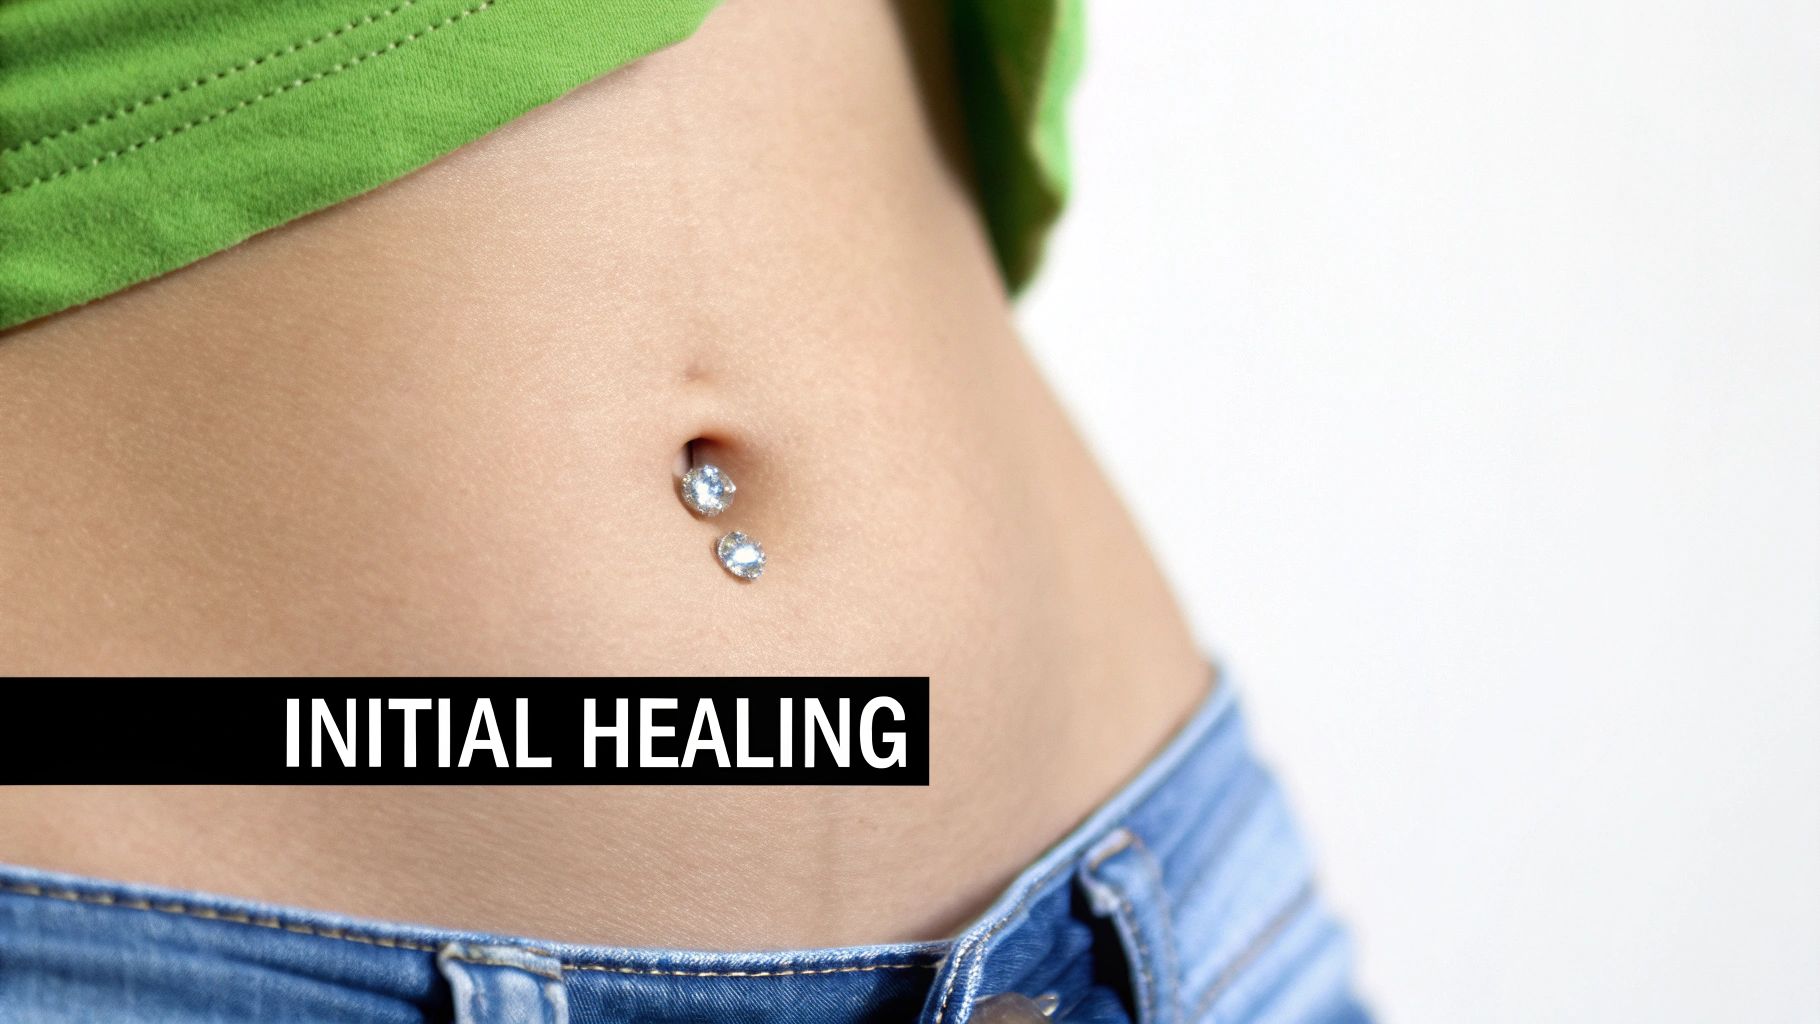
Congrats on the new bling! The first few weeks are the most critical, and honestly, knowing what to expect can make all the difference. Think of this period as setting the foundation for a happy, healthy piercing down the road.
During these initial days, your body is doing a lot of work, and some specific signs are completely normal. Don't be surprised if you notice:
- Mild Redness and Swelling: The area just went through some trauma, so a bit of puffiness and a pinkish hue is totally expected.
- Tenderness to the Touch: Your piercing will likely be sensitive, especially if it gets bumped. Try to be mindful of it!
- Clear or Whitish Fluid: This is just lymph fluid, a sign that your body is healing itself. It often dries into what piercers affectionately call "crusties" around the jewelry.
Understanding the Healing Timeline
Now for some real talk: navel piercings are notoriously slow healers. Because your midsection moves, twists, and bends all day, the piercing is constantly under stress. This movement can definitely prolong the healing process.
The navel is one of the slowest-healing piercing sites, often requiring a minimum of 6–9 months and sometimes up to a full year for the fistula (the healed tunnel of flesh) to fully mature. This is a marathon, not a sprint! That extended timeline is exactly why diligent aftercare is so important to avoid complications.
Here's a quick summary of what you can typically expect during the different phases of the healing process.
Navel Piercing Healing At a Glance
| Healing Stage | Typical Duration | What You Will Notice |
|---|---|---|
| Initial (Inflammatory) | 1–4 weeks | Redness, swelling, tenderness, and clear/whitish discharge ("crusties"). The piercing is very sensitive. |
| Mid-Healing (Proliferative) | 1–6 months | Redness and swelling will gradually go down. You'll see less discharge, but the area can still get irritated easily. |
| Maturation | 6–12 months | The piercing looks and feels healed on the outside. The tissue inside is strengthening. Discharge should stop completely. |
Remember, this timeline is just a guide. Everyone's body heals at its own pace, so don't worry if yours takes a little longer.
A word of warning: don't be fooled if your piercing looks healed on the outside after just a couple of months. The internal tissue channel takes much longer to fully strengthen. Patience is your absolute best friend here!
If you're curious about how this compares to other piercings, check out our guide on healing times for popular piercings. It'll give you a better perspective on why your navel just needs a little extra love and time to settle in. Resisting the urge to change your jewelry too soon is one of the most crucial things you can do for a smooth healing journey.
Mastering Your Cleaning Routine
Alright, let's get into the most important part of navel piercing aftercare: the cleaning routine. Honestly, getting this right is the difference between a piercing that heals beautifully and one that becomes a total headache. The best approach? Keep it simple.
Your new best friend for the next few months is a can of sterile saline solution. That's it. Forget everything else you might have heard about harsh chemicals. Things like rubbing alcohol and hydrogen peroxide are way too aggressive for a fresh piercing—they can actually damage the delicate new tissue and slow down your healing. The same goes for antibacterial soaps, ointments, and oils, which often do more harm than good by trapping bacteria or clogging the piercing.
Your Simple Cleaning Steps
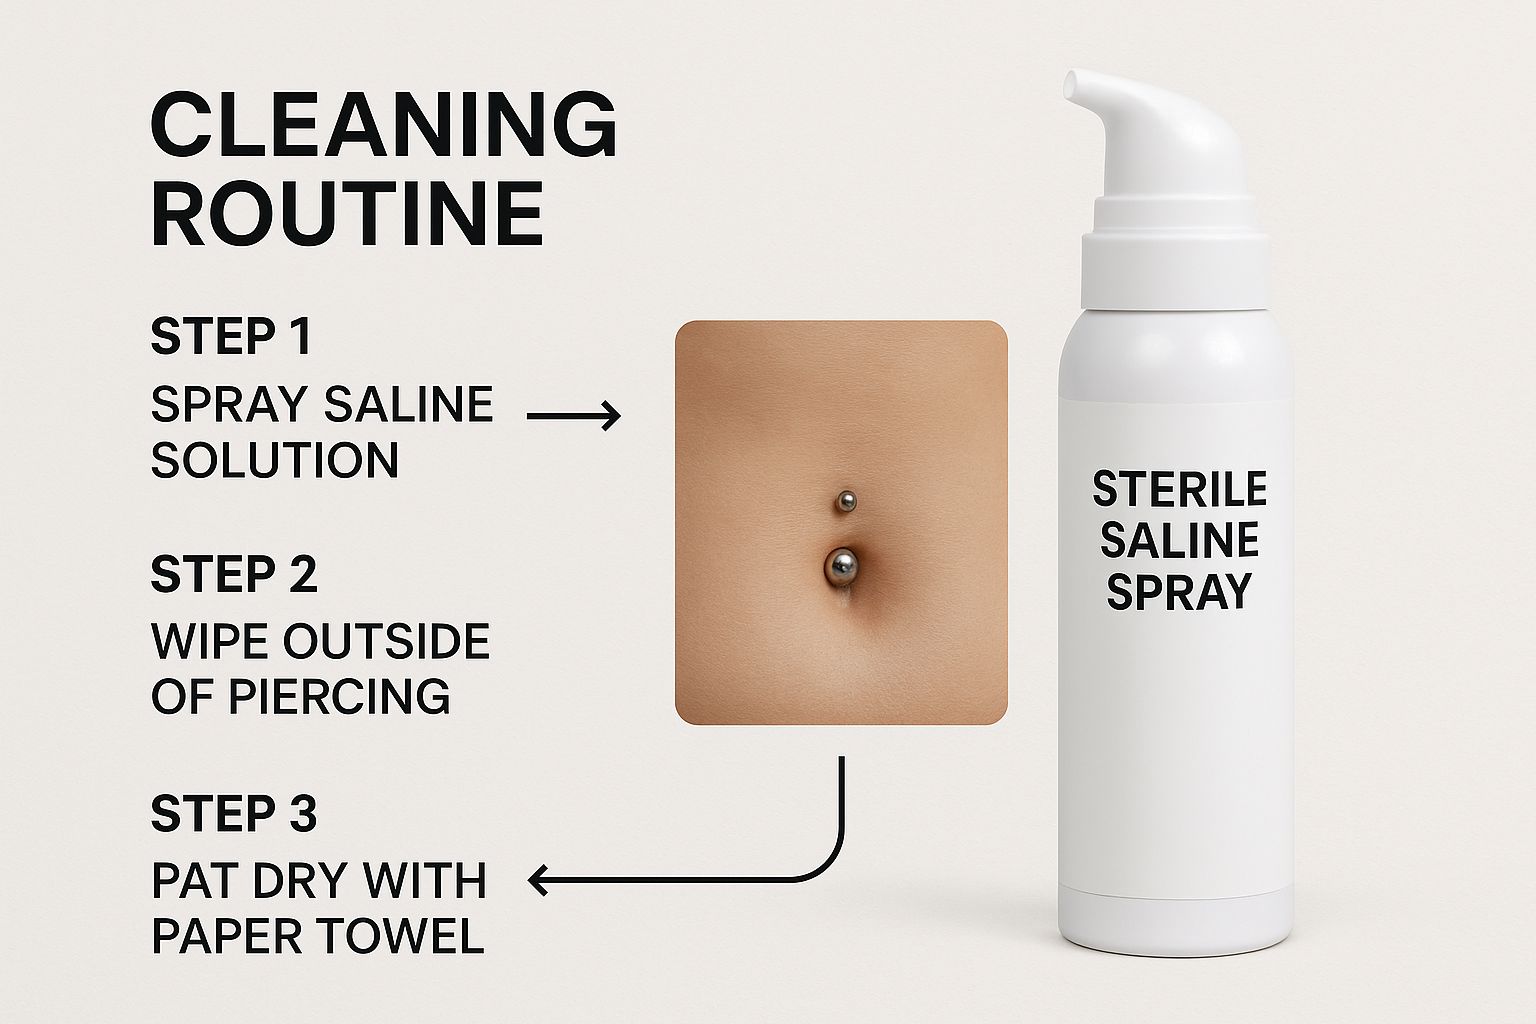
Keeping your new piercing clean is super easy, but you have to be consistent. Your goal is to clean it twice a day, usually once in the morning and once before bed. Cleaning it too much can be just as irritating as not cleaning it enough, so try to stick to that schedule.
- Hands Off! (Unless they're clean): Before you even think about touching your piercing, wash your hands thoroughly with soap and water. This is the number one rule.
- Spray and Flush: Give the front and back of your piercing a good spray with your sterile saline solution. Don't be stingy! You want to flush away any of those little "crusties" (which is just dried lymph fluid, totally normal).
- Gently Pat Dry: Grab a clean, disposable paper towel or a bit of non-woven gauze and carefully pat the area dry. Steer clear of bath towels; they can snag your jewelry and harbor sneaky bacteria.
Myth Buster Alert: Whatever you do, don't twist or turn your jewelry. This is old-school advice that we now know is a major no-no. Twisting it just drags bacteria into the healing channel (called a fistula) and tears the fragile tissue inside. Just let it be!
This infographic gives you a quick visual rundown of your new daily habit.
It really boils down to keeping things simple and sterile. If you want to learn more about why specific products work so well, check out our thoughts on H2Ocean piercing aftercare and why it's a piercer favorite. Just remember, a clean piercing is a happy piercing, so make this simple routine a non-negotiable part of your day.
Living Your Life with Your New Piercing
Okay, so you got the piercing! That doesn't mean you have to lock yourself away. But, let's be real—a few small tweaks to your daily routine can make all the difference between a happy piercing and a healing nightmare.
The name of the game is avoiding the three big troublemakers: friction, pressure, and too much moisture. If you can keep those in check, you're setting yourself up for a much smoother healing process.

Your closet is your first line of defense. Those high-waisted jeans you love? They’re going to have to take a vacation for a few months. A tight waistband constantly rubbing against your new jewelry is a one-way ticket to irritation.
Instead, think loose and breezy. It's time to embrace flowy tops, dresses, and comfy low-rise bottoms that give your piercing room to breathe.
What to Wear and How to Sleep
Soft, breathable fabrics like cotton should be your best friend. Stuffy materials that trap sweat can turn the area into a playground for bacteria, and that's the last thing you want near a fresh wound.
Bedtime can also be a bit tricky, especially if you’re a stomach sleeper. You'll need to train yourself to sleep on your back or side to avoid putting pressure on the piercing all night long. A pro tip? Try tucking a pillow under your knees—it can help prevent you from accidentally rolling onto your stomach in your sleep.
Working Out and Taking a Dip
Staying active is great, but be smart about it. Intense core workouts, like crunches or anything that involves a lot of bending at the waist, can pull and strain the area. Stick to lower-impact exercises for a while.
And this is important: always clean your piercing right after a workout. You want to get rid of any sweat and bacteria that built up before it has a chance to cause trouble.
Heads Up: Swimming is a hard "no" until your piercing is completely healed. This isn't just a friendly suggestion; it’s a critical rule to prevent nasty infections. Pools, hot tubs, lakes, and oceans are basically bacterial buffets for an open wound. Since a navel piercing can take up to 9 months to fully heal, you might have to sit out a summer of swimming.
These simple adjustments might feel like a pain at first, but they're a huge part of learning how to care for a navel piercing properly. Protecting your piercing from these everyday hazards will help it heal beautifully so you can show it off with confidence.
Troubleshooting Common Healing Hiccups
Even if you follow every rule in the book, piercings can still get a little fussy sometimes. The first rule? Don't panic! Figuring out what’s going on is the first step to getting your healing journey back on track. Your body is pretty great at sending signals, and learning to read them is a piercing superpower.
Most of the time, what looks scary is just simple irritation. A bit of stubborn redness or some extra swelling usually just means your piercing is reacting to something. Maybe you slept on it funny, or your favorite high-waisted leggings were a little too snug for its liking. This is a world away from a full-blown infection.
Irritation vs. Infection
It's super important to know the difference between a cranky piercing and one that's genuinely in trouble. An irritated piercing might be a little red and swollen, and you could see some clear or whitish fluid (that's just lymph fluid, a normal part of healing). An infection, on the other hand, is much more dramatic.
Be on the lookout for these key signs of a potential infection:
- Intense, throbbing pain that doesn't let up.
- Thick, yellow, or greenish pus instead of clear or whitish fluid.
- Major swelling and redness that seems to spread out from the piercing site.
- The area feels hot to the touch.
If you think you have an infection, do not take the jewelry out. This can actually trap the infection inside and make things worse. Get yourself to a doctor right away for proper treatment.
The Dreaded Irritation Bumps
Ah, the infamous bump. Seeing a small reddish bump pop up near your piercing hole can be alarming, but it’s almost always just an irritation bump, not a more serious issue like a keloid. These bumps are your body’s way of waving a little red flag and saying, "Hey, something is bothering me!"
The usual suspects are often pretty simple:
- Moisture: Not drying the area completely after cleaning or showering is a big one.
- Friction: Constant rubbing from clothing, seatbelts, or even just tossing and turning in your sleep.
- Pressure: Sleeping on your stomach or wearing clothes that press down on the jewelry.
The good news is that these bumps almost always go away once you figure out what's causing the problem and stop it. Take a hard look at your aftercare routine and daily habits to pinpoint the culprit.
Navel piercings are a classic, but they do demand a little extra TLC. A 2020 study from a major piercing studio showed belly button piercings made up an average of 5.5 procedures per week, proving they're as popular as ever. With so many people getting them, knowing how to handle these common hiccups is essential. You can read more about these piercing trends and see why solid aftercare is so crucial.
Knowing how to handle these minor issues will make your healing process a whole lot less stressful. And remember, when in doubt, your professional piercer is always your best resource. Give them a call!
When and How to Change Your Jewelry
We get it—you're absolutely dying to swap that initial barbell for some of the gorgeous, dangly bling you’ve been eyeing. But hold on! Changing your jewelry too soon is one of the biggest mistakes you can make, and it can seriously set back your healing.
Patience is everything here. You have to wait until your piercing is 100% fully healed, which, as you know, can take anywhere from 6 to 12 months. Don't let a piercing that looks fine on the outside fool you; the internal tissue (the fistula) is still busy strengthening itself, and swapping jewelry can tear all that delicate work apart.
Your Healed Piercing Checklist
So, how do you really know you're in the clear? Before you even think about shopping for new bling, your piercing needs to tick every single one of these boxes:
- The fistula (the piercing channel itself) should feel soft and uniform, with no hard spots or weird lumps.
- The skin around both piercing holes should be your normal, healthy color—any lingering redness or discoloration is a red flag.
- You can lightly press on the area and feel absolutely no tenderness or pain. None.
- There's been zero discharge or "crusties" forming around the jewelry for several weeks straight.
Once you've met all these criteria, it’s still a smart move to have your professional piercer confirm it's healed during a check-up. Honestly, for your very first jewelry change, having them do it for you is the safest bet. They've got the right tools and a gentle touch.
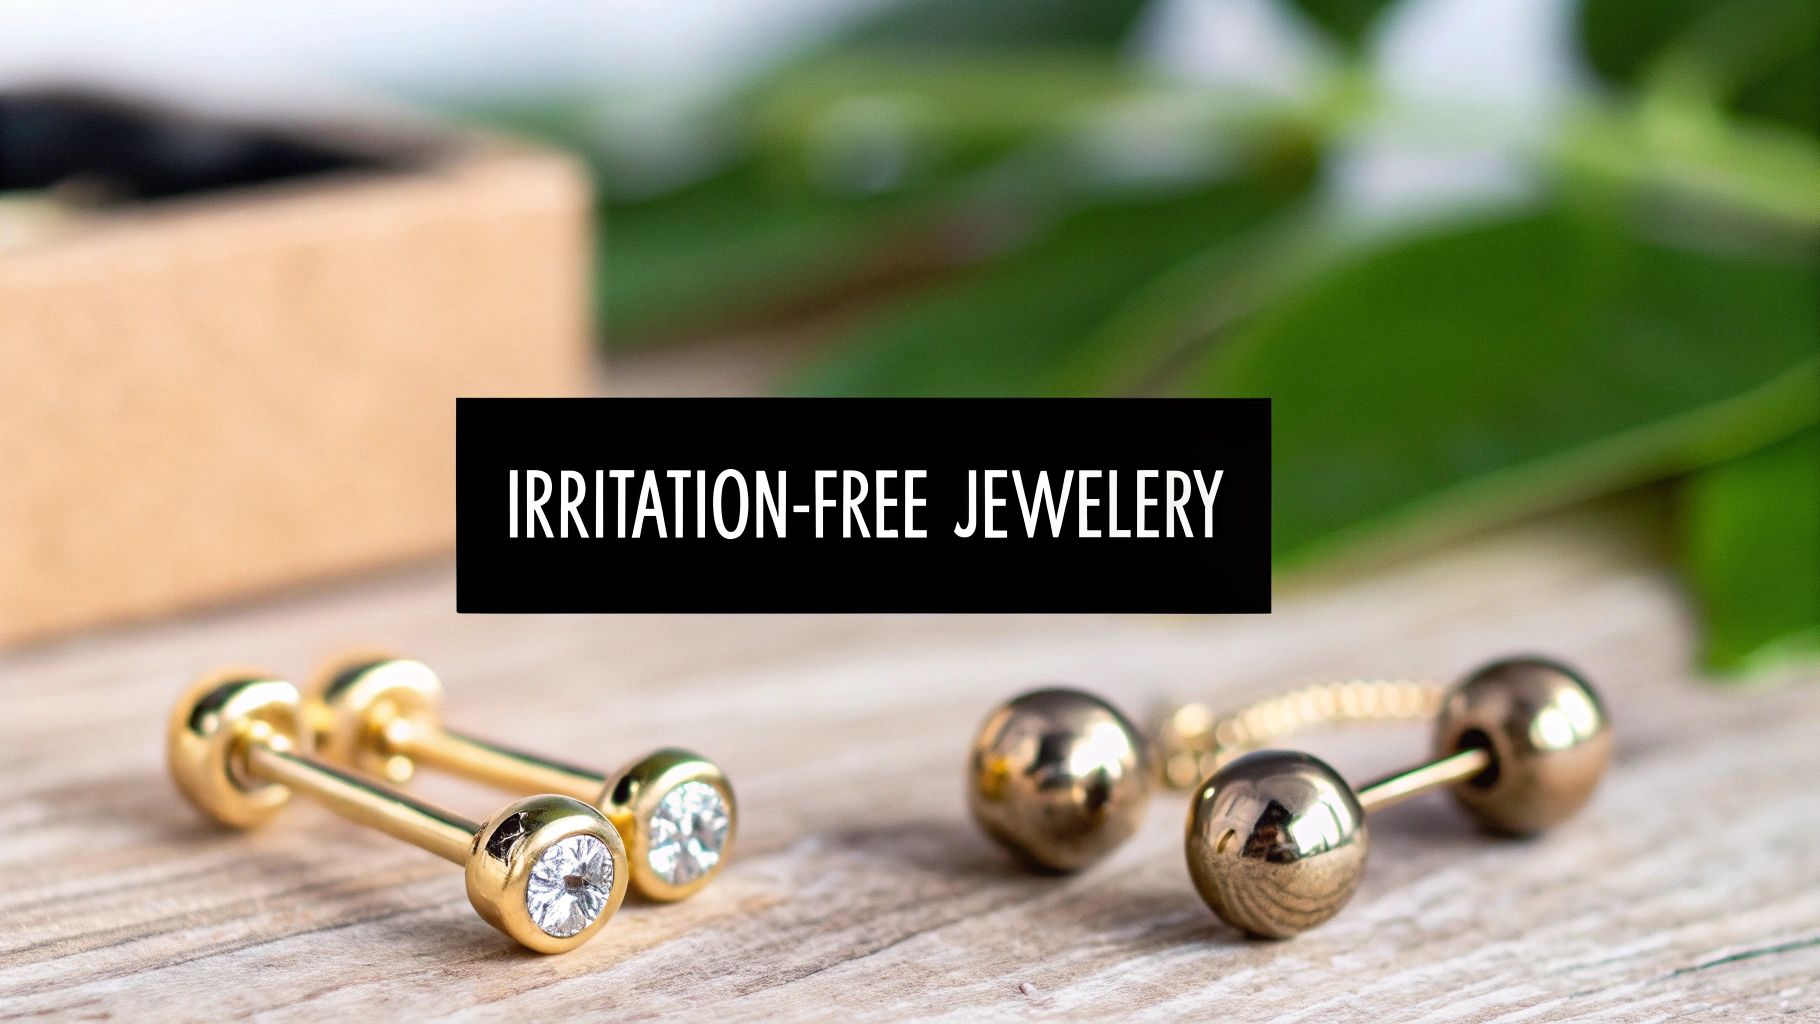
When you finally get the green light, it's time for the fun part! Get ready to explore a whole new world of navel rings by checking out our crash course on navel ring styles and materials. Sticking with high-quality options like implant-grade titanium or 14k gold will keep your piercing happy and healthy for years to come.
Your Navel Piercing Questions Answered
Still have a few things on your mind? No worries, we've got you. Let's tackle some of the most common questions that pop up during the healing journey. Getting the right info will give you peace of mind and help you master how to care for a navel piercing.
Can I Just Make My Own Salt Solution?
While it sounds like a simple DIY, we strongly advise against it. Getting the salt-to-water ratio just right is nearly impossible in your kitchen, and an improper mix can seriously irritate your new piercing. It's a recipe for disaster.
Plus, your kitchen counters and measuring spoons aren't sterile. A pre-made sterile saline spray is affordable, perfectly balanced, and ensures a safe, sterile application every single time. Don't risk it!
Is This an Irritation Bump or a Keloid?
This is a super common worry, so let's clear it up. An irritation bump is a small, fluid-filled bump usually caused by friction (like high-waisted pants), trapped moisture, or the wrong jewelry. They almost always disappear once you figure out and fix the problem.
A keloid, on the other hand, is a type of excessive scar tissue that grows much larger than the original wound. They are far, far rarer than simple irritation bumps. If you see a bump, don’t panic—odds are it’s just angry at you for something. Your piercer can help you figure out the cause.
Deep breaths! A piercing can look healed on the outside long before the internal tissue channel is stable. Changing jewelry too early can tear this delicate tissue, causing a major setback and ruining all your hard work.
It Looks Healed After 3 Months. Can I Change It Now?
Hold on there! We know you're excited, but a piercing can look totally healed on the outside way before the tissue on the inside is strong and stable. This is a critical mistake many people make.
You need to wait a minimum of 6 to 9 months—and even then, it's best to have a professional piercer confirm it's fully healed before you attempt that first exciting jewelry change. Patience now means a happy, healthy piercing for years to come.
Ready to find the perfect piece for your beautifully healed piercing? Bodycandy.com has a massive collection of stunning belly rings waiting for you. Explore our full range of navel jewelry today and show off your style