
So, you're ready to start your ear stretching journey! Awesome. Understanding ear gauges sizes is hands-down the most important part of getting a safe, successful stretch, whether this is your first time or you're a seasoned pro. Think of this guide as your go-to BFF for figuring out the world of gauges, millimeters, and inches like you've been doing it for years.
Your Essential Guide to Ear Stretching Sizes
Ready to dive in? Stretching is an incredible form of self-expression, but doing it the right way is what keeps your lobes healthy and gets you that perfect look. This guide is here to be your trusted friend, helping you plan every single step.
We're going to break down everything you need to know, from your very first stretch all the way to your ultimate goal size. Getting the sizing and timing right means your lobes will stay happy, healthy, and ready for all the amazing jewelry you're about to show off.
What to Expect in This Guide
Before you even think about picking up a taper, you need a solid plan. Here's a quick look at what we'll cover to make sure you start off on the right foot:
- Complete Conversion Charts: We've got a full ear gauges sizes chart so you can easily switch between gauges, millimeters, and inches without any guesswork.
- Safe Stretching Timelines: Patience is everything in this game. We'll show you exactly how long to wait between sizes to avoid blowouts or other damage.
- Jewelry Material Breakdowns: Find out which materials are best for fresh stretches (and which to avoid!), and what's good for fully healed lobes.
- Visual Size Guides: Sometimes you just need to see it. We'll show you what popular sizes actually look like to help you zero in on your goal.
For a deeper dive into the basics, make sure you check out our full guide on ear stretching 101 and how to properly stretch your lobes.
The Complete Ear Gauge Size Conversion Chart
Welcome to the heart of your stretching toolkit. Seriously, getting a solid handle on ear gauge sizes is the one thing that separates a smooth, healthy stretch from a frustrating guessing game. Think of this as your go-to reference for converting every standard gauge size into both millimeters (mm) and inches—it’ll make your entire journey a whole lot simpler.
First things first, let's clear up the most confusing part of the gauge system. It works in reverse: the smaller the gauge number, the larger the actual size of the jewelry. It feels a bit backward initially, but a 16G plug is way smaller than a 6G plug. You'll get the hang of it fast! To see how this applies across the board, check out our guide on the standards of gauge sizing for body jewelry.
From Gauges to Millimeters and Inches
To make everything crystal clear, I've laid out all the common sizes in the table below. You'll find that millimeters (mm) are your best friend for precision, especially when you're dealing with those tricky in-between sizes. Once you get past 00G, you'll see inches pop up more frequently.
Here’s a quick-reference chart to make converting sizes a breeze.
| Gauge (G) | Millimeters (mm) | Inches (") |
|---|---|---|
| 20G | 0.8 mm | 1/32" |
| 18G | 1.0 mm | - |
| 16G | 1.2 mm | 3/64" |
| 14G | 1.6 mm | 1/16" |
| 12G | 2.0 mm | 5/64" |
| 10G | 2.4 mm | 3/32" |
| 8G | 3.2 mm | 1/8" |
| 6G | 4.0 mm | 5/32" |
| 4G | 5.0 mm | 3/16" |
| 2G | 6.0 mm | 1/4" |
| 0G | 8.0 mm | 5/16" |
| 00G | 10.0 mm | 3/8" |
| - | 11.0 mm | 7/16" |
| - | 12.0 mm | 1/2" |
| - | 14.0 mm | 9/16" |
| - | 16.0 mm | 5/8" |
| - | 18.0 mm | 11/16" |
| - | 19.0 mm | 3/4" |
| - | 22.0 mm | 7/8" |
| - | 25.0 mm | 1" |
Keep this chart handy! It's the key to making sure you're buying the right size jewelry every single time.
This visual really drives home the point that a successful stretching journey is a process, not a race. You have to start right, learn your body's limits, and plan your next steps carefully.
Common Size Milestones to Know
As you move up in sizes, you'll start hitting some key milestones. These are often popular goals because they represent a more visible, intentional look that stands out from a standard piercing.
A standard earlobe piercing, like one done with a piercing gun, is usually a 20G (0.8 mm) or 18G (1.0 mm). The first real "stretch" is often to 16G (1.2 mm). From there, you'll work your way up to popular intermediate sizes like 8G (3.2 mm), 6G (4.0 mm), and 2G (6.0 mm).
For many, the first major goals are 0G (8.0 mm) and the iconic 00G (10.0 mm). These are some of the most referenced sizes out there. Once you pass 00G, the sizing system typically switches from gauges to fractions of an inch, starting with 7/16" (11.0 mm) and going all the way up to 1 inch (25.0 mm) and beyond.
How To Measure Your Current Gauge Size Accurately
So, you’ve got some awesome plugs in, but you've completely blanked on what size they are. It happens to the best of us! Knowing your current size is absolutely non-negotiable for buying new jewelry that actually fits and, more importantly, for safely planning your next stretch.
Getting this right saves you money, prevents painful damage, and ultimately keeps your lobes happy and healthy. The good news is that figuring out your exact size is way easier than you might think. You don't need a fancy lab—just the right tools and a little bit of know-how.
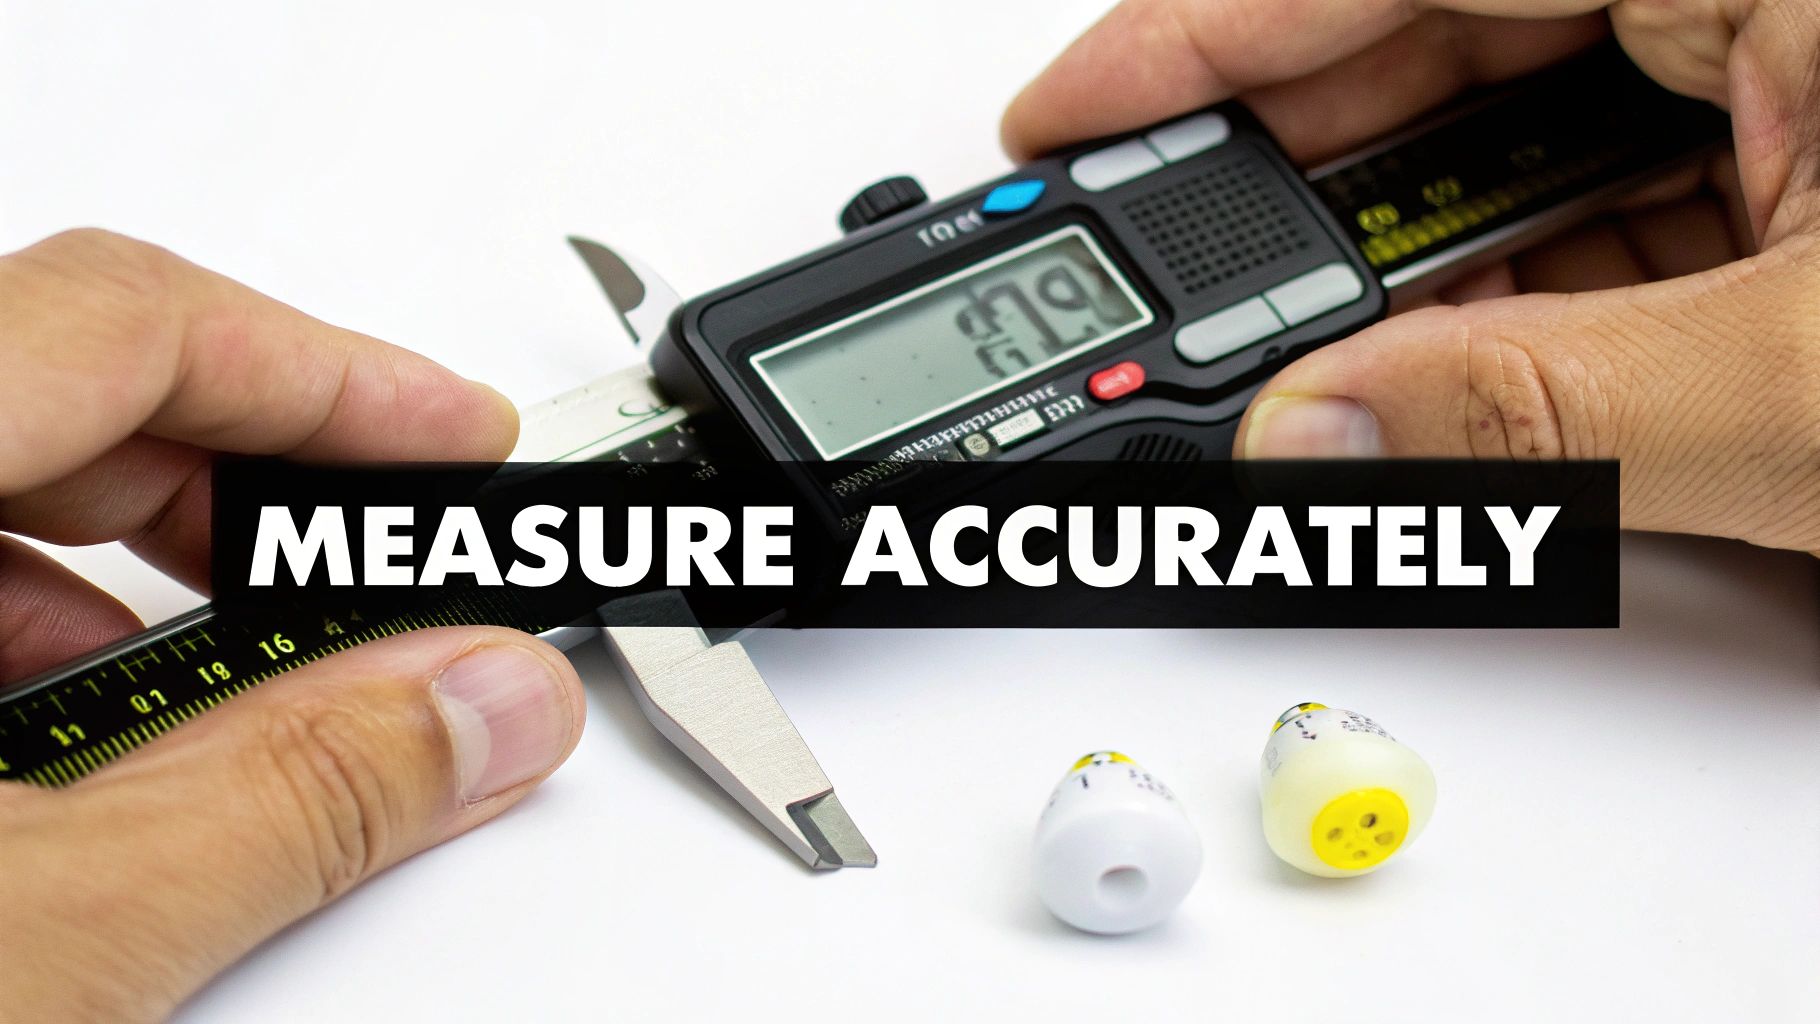
Using Digital Calipers For The Best Results
Honestly, the absolute best way to get a precise measurement is with a digital caliper. This tool is a total game-changer for anyone serious about stretching. It gives you an exact reading in millimeters, often down to the decimal point, which eliminates all the guesswork.
- Prep Your Jewelry: First things first, make sure your plug or tunnel is clean and completely dry.
- Position the Jaws: Gently open the caliper's jaws and place them on the widest part of the wearable area. If you have flared plugs, you'll want to measure the section that actually sits inside your ear, right between the flares.
- Get Your Reading: Close the jaws until they're snug against the jewelry, but don't squeeze so hard that you compress it. The digital screen will show you the exact size in millimeters. You can then pop over to our ear gauge conversion chart to find the corresponding gauge.
No Calipers? No Problem
Don't have calipers just lying around? No worries. You can still get a pretty solid idea of your size with a few simple tricks you can do right at home.
- Printable Size Chart: Look for a reliable, to-scale ear gauge size chart online. You can print it out and carefully place your jewelry over the circles to find the one that matches up perfectly. Just make sure you print it at 100% scale, otherwise, it won't be accurate!
- The Ruler Method: While it's definitely less precise, a regular ruler with millimeter markings can work in a pinch. Lay your jewelry flat and measure the diameter of the wearable surface. This gets trickier with smaller sizes but can give you a good enough estimate for larger plugs.
Pro Tip: Always, always measure your jewelry, not your earlobe! Trying to measure your fistula (the healed tunnel of flesh) directly is super inaccurate and can easily cause irritation. Stick to measuring the plugs or tunnels that you know already fit you comfortably.
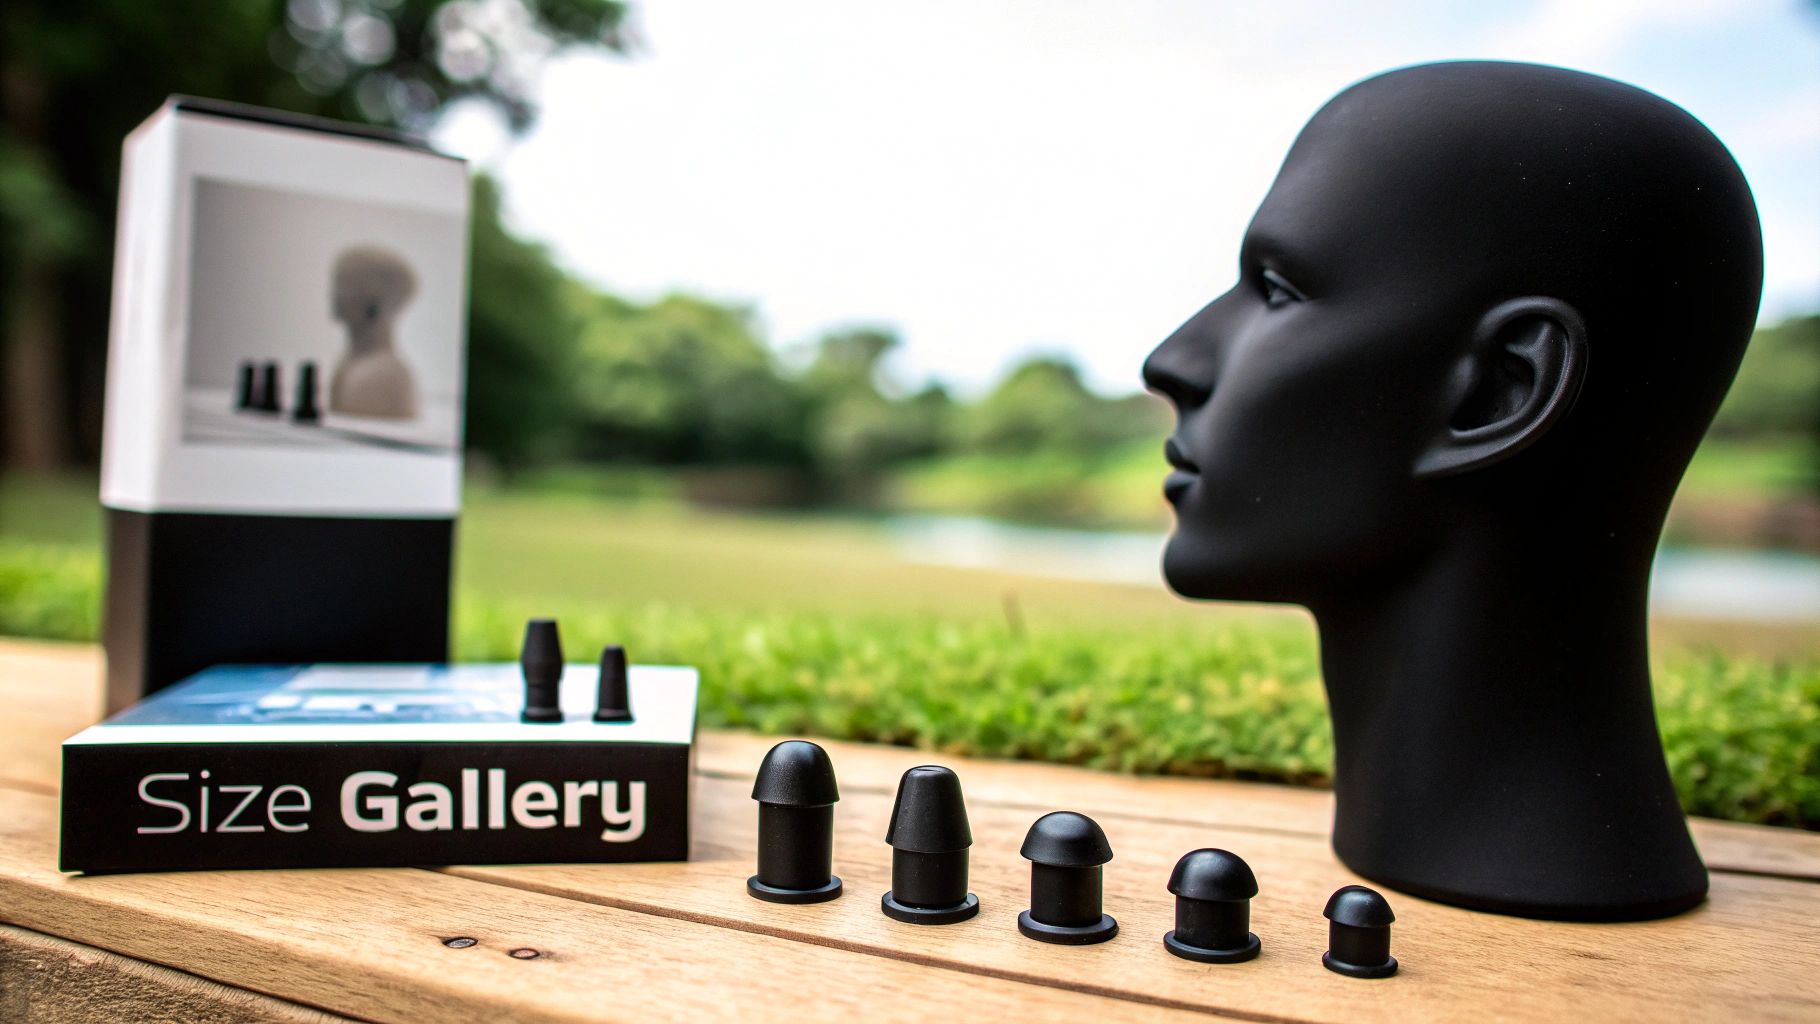
A Visual Guide To Popular Ear Gauge Sizes
Numbers on a chart are one thing, but seeing how different ear gauges sizes actually look in someone's ear? That’s a total game-changer. This guide is all about connecting the measurements to the real-world aesthetic you're going for. After all, seeing is believing, and it’s the best way to figure out your ultimate goal size.
Stretching is a journey, and every single size is a milestone. By picturing how each step up will look, you can make sure your stretching goals line up perfectly with your style. Let's walk through some of the most popular sizes to give you a clear idea of what to expect.
The Subtle Starting Sizes
When you first get started, the changes feel huge to you but might look pretty subtle to everyone else. These smaller sizes are perfect for getting comfortable with the process and the look of stretched lobes without making a huge statement right away.
- 8G (3.2 mm): This is often the first size where your piercing looks noticeably different from a standard earring. It’s big enough for some cool, small plugs and tunnels but still discreet enough for most workplaces.
- 6G (4.0 mm): At this point, your jewelry is becoming a clear part of your look. The opening is more obvious, and you can really start to appreciate the details in different plug materials, from stone to steel.
Hitting The Mid-Size Milestones
As you keep going, your stretched ears become a defining feature. This is the range where a lot of people find their sweet spot—it's visible, intentional, and opens up a ton of jewelry options.
- 2G (6.0 mm): For many, this is a huge milestone! At nearly a quarter of an inch, your lobes have a definite stretched appearance. It's a common size where people decide whether to stay put or keep going bigger.
- 0G (8.0 mm): Welcome to a true classic. Zero gauge is an iconic size that’s bold and impossible to miss. You can rock some seriously awesome plugs and tunnels at this stage, showing off intricate designs and materials.
Your goal size is deeply personal. Whether you're aiming for a subtle 8G or a statement 1/2 inch, the most important thing is choosing a size that makes you feel authentic and confident in your own skin.
Making A Statement With Larger Sizes
For those who want to go big, these sizes deliver a dramatic and impressive look. This is where your commitment to the stretching lifestyle really shines through.
- 00G (10.0 mm): Often called the "point of no return," 00G is a major achievement for many stretchers. It’s a substantial size that opens up a world of heavier, more detailed jewelry like chunky stone plugs and eye-catching tunnels.
- 1/2 Inch (12.0 mm): Once you hit half an inch, you’ve officially entered the territory of large, impossible-to-miss lobes. This size allows for incredible creativity with your jewelry collection and makes a powerful statement about your personal style.
Safe Ear Stretching Practices For Healthy Lobes
Let's get into the most important part of stretching your ears: patience is everything. Seriously. Getting those healthy, perfect lobes you're dreaming of is a marathon, not a sprint. Trying to rush it is the number one way people end up with irritation, painful tears, or the dreaded "blowout."
This is about more than just hitting your goal size. It’s about doing it the right way, so your lobes stay healthy, elastic, and ready for whatever cool jewelry you want to show off for years to come.
The Golden Rule: Wait Between Stretches
If you only remember one thing from this guide, make it this: you have to let your lobes heal completely before going up to the next size. This isn't just a friendly suggestion—it's the absolute, non-negotiable golden rule of stretching.
So how long do you wait? The standard advice is a minimum of 4-6 weeks between each stretch. For a lot of people, especially as you get into the larger gauge sizes, waiting 2-3 months (or even longer) is a much better idea. Your body knows best.
Listen To Your Lobes: If you feel any sharp pain or notice a lot of swelling when you try to size up, stop what you're doing. That’s your ear telling you it’s not ready. Forcing it is a recipe for disaster and can cause scar tissue, which will only make future stretches way harder.
That waiting period gives the tiny micro-tears in the skin time to heal up and for collagen to rebuild. That’s what creates the elasticity you need for the next size jump.
Proper Stretching Techniques That Work
There are a couple of tried-and-true methods for sizing up safely. Which one you go with usually comes down to personal preference and what size you're currently at.
-
Tapering: This is the go-to method for smaller sizes. A taper is a long, pin-like tool that gradually gets wider. You gently push it through your piercing, and then follow it with your new, larger jewelry. Just remember, tapers are a tool, not jewelry. You should never leave them in your ears for long periods.
-
Taping: Once you hit the bigger ear gauges sizes, the taping method is a fantastic, gentle option. This involves wrapping a very thin layer of non-adhesive tape (like PTFE or bondage tape) around the plugs you're already wearing. You just add another layer every few days to slowly and comfortably stretch the lobe over time.
Your Stretching Essentials Kit
To make every stretch go smoothly and safely, you're going to need a few key things. This is your holy trinity for stretching.
- High-Quality Lubricant: Never, ever stretch dry! Using a good lubricant is critical for reducing friction and preventing painful tearing. Jojoba oil is a huge favorite in the community because it’s so similar to your skin's natural oils, making it incredibly gentle and moisturizing.
- Single-Flare Plugs: When you've just stretched, single-flare plugs are your best friend. They have a flat back with a flare on just one end, which makes them super easy to slide in right after a taper. The flare holds the plug in place, and a simple O-ring secures it from the back.
- Clean Hands and Jewelry: This should go without saying, but always wash your hands thoroughly and make sure your jewelry and tapers are sterilized before you begin. Keeping everything clean is the easiest way to prevent infection and keep your lobes happy and healthy.
Choosing The Best Jewelry Materials For Each Stage
Okay, so you’ve got your stretching plan locked in and you're being patient between sizes. Awesome! Now, let's get into something that’s just as important: the material of the jewelry you're actually putting in your lobes. What your plugs are made of can seriously make or break your stretching experience, especially right after you size up.
Think of a freshly stretched ear as sensitive, healing skin—because that's exactly what it is. You need to stick with materials that are non-porous, which means they don't have tiny, microscopic holes where bacteria can throw a party. This is a huge deal for keeping your lobes happy and healthy.
Best Materials For Fresh Stretches
For those delicate, newly stretched lobes, you want the absolute smoothest, most body-friendly materials you can get your hands on. These are your best bets for a smooth healing process.
- Surgical Steel: This one is a classic for a reason. It's affordable, super durable, and non-porous, making it a solid choice for healing. Just be sure you're getting implant-grade steel to sidestep any potential nickel allergies.
- Titanium: If you have sensitive skin, titanium is your absolute best friend. It's totally hypoallergenic, incredibly lightweight, and won't cause irritation, making it the top-tier choice for fresh stretches. Learn all about it in our guide to titanium body jewelry.
- Glass: Not only does it look slick, but glass is also perfectly smooth and non-porous. Single-flare glass plugs are a fantastic, safe option for both stretching and healing.
These materials are a breeze to clean and won't harbor bacteria, which is precisely what you need to avoid irritation and infection while your ear adjusts to its new ear gauges sizes.
When To Switch To Organic Materials
Once your lobes are fully healed and settled in at their current size—and we're talking weeks, not days—you can start having more fun with a wider range of materials. Organic materials are porous, so they should only ever be worn in piercings that are 100% healed.
Healed Lobes Only: Materials like wood and stone are porous and can trap bacteria. That’s why they are only safe for piercings that are completely healed. Never, ever use them for a fresh stretch!
Some of the most popular organic options include:
- Wood: It's lightweight and breathable, but it can dry out your skin a bit. Make sure to keep your lobes moisturized with jojoba oil.
- Stone: Gives you a beautiful, weighty, and unique look. Every single pair is a little different!
- Horn & Bone: These are also lightweight choices that have been used for centuries, but they need proper cleaning and oiling to stay in great shape.
Picking the right material for each stage makes sure your stretching journey is not just stylish, but safe and comfortable, too.
The Cultural Significance of Stretched Ears
When you decide to stretch your ears, you’re plugging into a tradition that’s literally thousands of years old. This isn't just some modern trend; it's a practice with deep, historical roots that you can find all over the globe. From ancient civilizations to today's alternative scenes, stretched lobes have always been a powerful way for people to define their identity, status, and personal style.
Understanding this rich history adds a whole new layer of meaning to your stretching journey. You're not just picking out a new look—you're connecting with a global story of art, spirituality, and identity that has been told for centuries. It turns your personal style into a nod to a timeless human practice.
From Ancient Rituals To Modern Statements
Long before plugs were made from surgical steel or titanium, ancient cultures were using natural materials to stretch their earlobes for some pretty profound reasons. For many, it was a deeply spiritual practice. King Tutankhamun of Egypt, for example, was famously depicted with stretched lobes, and you’ll often see statues of the Buddha with elongated ears, symbolizing wisdom and enlightenment.
In many tribal communities, the size of your lobes could say it all—your social standing, whether you were married, your wealth, or your bravery in battle. It was a visual language that everyone in the community immediately understood.
Stretched ears were, and still are, a wearable story. They can communicate a person's entire life journey—their age, achievements, and spiritual path—without a single word being spoken.
This is a tradition that has been passed down through generations, evolving and changing with every new culture that embraces it.
The Punk Rock Revival and Mainstream Acceptance
Fast forward to more recent history, and you'll see the modern revival of ear stretching kicking off in the punk and alternative scenes of the 1980s and 90s. It was a bold act of rebellion, a visual middle finger to mainstream society. But what started as a niche subculture statement quickly gained traction.
Today, stretched ears have mostly shed their rebellious-only image and are now a celebrated form of self-expression. Ear gauges carry deep cultural symbolism worldwide, evolving from ancient tribal markers to modern fashion staples. Sizes like 0G (8mm) and 00G (10mm) often symbolize power and individuality. While in some tribal groups, gauges over 1 inch (25mm) historically denoted wealth, the modern revival began in the 1990s punk scene. Driven by social media and festival culture, the popularity of gauged ears has exploded, with Instagram’s #eargauges tag hitting over 5 million posts in 2024. Dive deeper into what different ear gauges symbolize and learn more about this fascinating history.
This incredible journey from ancient rite of passage to modern style fixture just goes to show how powerful and timeless body modification really is. Every time you choose a new set of plugs, you're becoming a part of that continuing story.
Common Questions About Ear Gauge Sizes And Stretching
Still have a few questions buzzing around? You're not alone! The world of ear gauges sizes and stretching comes with a lot of curiosity. To make sure you feel totally confident on your journey, we’ve gathered the most common questions and answered them right here.
How Long Should I Wait Between Stretches?
Patience is your absolute best friend on this journey, and the most crucial rule is giving your lobes a break between stretches. The standard advice is to wait a bare minimum of 4-6 weeks, but honestly, waiting 2-3 months is even better. This is especially true once you start getting into the larger sizes.
This isn't just a suggestion—it's essential. That waiting period gives the tiny micro-tears in your earlobe tissue time to properly heal and for strong, healthy new tissue to form. Rushing the process is a surefire way to get stubborn scar tissue, which makes future stretches way more difficult and even painful.
What Is A Blowout And How Do I Avoid It?
A blowout is what happens when you stretch too fast, forcing the new fistula (the healed tunnel of flesh) inside out, usually out the back of your piercing. It creates a gnarly-looking, irritated ring of scar tissue that can be a real pain to heal.
Thankfully, the best way to avoid a blowout is pretty simple:
- Listen to your body: If you feel any sharp, stinging pain when stretching, stop. Your ears are telling you they aren't ready. A little pressure is normal, but pain is a warning sign.
- Wait long enough: We can't say it enough—never rush the healing time between sizes.
- Use lubricant: Always use a quality, body-safe lubricant like jojoba oil to reduce friction and make the stretch smoother.
- Never skip sizes: Trying to jump from an 8G to a 4G is a recipe for disaster. Stick to one size increase at a time, period.
Can My Earlobes Shrink Back To A Smaller Size?
This is the big question for so many people! And the answer is: it really depends. For smaller ear gauges sizes, your lobes have a pretty good chance of shrinking back down, often close to a standard piercing size, if you simply take your jewelry out.
However, there's often a "point of no return," which for most people lands somewhere between 2G (6mm) and 00G (10mm). Once you stretch beyond this point, your lobes may never fully close on their own. Things like your skin’s natural elasticity and how long you’ve been at a certain size play a huge role here.
What Size Should I Start Stretching From?
If you have a standard earlobe piercing done with a gun or needle at a shop, you’re most likely starting at either a 20G (0.8mm) or an 18G (1.0mm). Your very first intentional stretch will be to a 16G (1.2mm) or 14G (1.6mm). Kicking things off with a high-quality taper kit is the perfect way to begin your stretching journey safely and correctly.
Ready to find your new look? Bodycandy has everything you need to start your stretching journey or find the perfect piece for your current size.


