So, you're ready to dive into the world of ear stretching, and you're asking the most important question first: "How do I gauge my ears safely?" The process, which we call ear stretching, is all about gradually increasing the size of your piercing over time. If you take away only one thing from this guide, let it be this: patience. Rushing the process is the single biggest mistake people make, so always, always listen to your body.
Starting Your Ear Stretching Journey The Right Way
Think of this as your pre-flight check. Getting it right from the very beginning makes all the difference between healthy, awesome-looking lobes and a painful, problematic experience. We're here to get you prepared and excited with everything you need before you even think about making that first stretch.

Why Patience Is Your Best Friend
Stretching your ears isn't a race; it's a long-term commitment. Each time you size up, you’re creating tiny micro-tears in the fistula (that's the skin tube of your piercing). These little tears need plenty of time to heal up and get strong again. If you rush it, you're asking for trouble in the form of painful blowouts, infections, or nasty scar tissue.
Having the right mindset is just as critical as having the right tools. Once you accept that this is a slow and steady process, you're setting yourself up for success.
The golden rule of ear stretching is to listen to your body. You should only feel a bit of warmth or slight pressure when sizing up—never sharp pain. Pain is your body’s way of screaming "STOP!"
More Than Just a Piercing
Ear gauging is a huge part of the body modification world. In fact, standard ear piercings and stretching are the most culturally significant and economically influential parts of the entire industry. Their wide social acceptance, lower cost, and relatively fast healing times keep them incredibly popular. You can even dig into some fascinating insights on the body piercing market to see just how big it is.
Before you jump in, it’s crucial to be fully prepared. That means understanding a few key things:
- The Commitment: Stretching is a permanent modification. While you might see some shrinkage with smaller gauges, larger sizes often require surgery if you want to close them up.
- The Process: You absolutely need to learn the correct techniques, what a good aftercare routine looks like, and how to spot signs of trouble.
- The Gear: Using high-quality, body-safe materials is non-negotiable. Don't cheap out. Grabbing a professional kit from a reputable source like BodyCandy ensures you have sterile, reliable jewelry right from the start.
This guide is going to be your best friend, walking you through every single step. Let's get started on doing this the right way.
Gathering Your Essential Stretching Toolkit
Before you even think about sizing up, let's talk about gear. Getting the right toolkit together isn't just a suggestion; it’s probably the most important part of a healthy, successful stretching journey. Think of this as your must-have shopping list for gauging your ears the right way.
Having the proper supplies on hand from the very beginning stops you from making those risky, impatient decisions we’ve all been tempted by. It’s all about setting yourself up for success, and we'll walk you through exactly what you need.
Tapers and Plugs: The Stars of the Show
The main tools of the trade are tapers and plugs. Tapers are those long, cone-shaped tools you’ll use to gently guide the stretch, and the plugs are the jewelry you’ll pop in right after.
For a brand-new stretch, the undisputed champion is the single-flare plug. These plugs have one flared end to keep them from slipping out the front and a flat back held in place with a little rubber O-ring. This design is perfect because it won't irritate your sensitive, freshly stretched lobe the way a double-flared plug might.
Your best bet when you're just starting out is to stick with high-quality, body-safe materials. These are your best friends for avoiding irritation and allergic reactions, which can seriously derail your stretching journey.
Choosing Your Materials Wisely
Material choice is absolutely critical, especially right after you stretch. Your lobes are basically a new wound at that point, and they need the cleanest, most sterile environment possible to heal up properly.
- Surgical Steel: This is a fantastic, non-porous option that’s also easy on the wallet. It's super easy to clean and sanitize, making it a go-to for pretty much everyone.
- Glass: Another excellent choice. Glass is completely non-porous and has a super smooth surface, which means insertion is a breeze and irritation is minimal. Plus, glass plugs just look cool.
- Titanium: If you’ve got sensitive skin or know you have a nickel allergy, implant-grade titanium is the absolute best you can get. It’s incredibly lightweight, biocompatible, and totally worth the extra investment for peace of mind.
So, what should you avoid? For any fresh stretch, steer clear of porous materials like acrylic, wood, or silicone. These materials can be a breeding ground for bacteria, which is the last thing you want near a healing piercing. Save those stylish organic plugs for when your lobes are fully healed and happy. For a deeper dive, you can learn more about the best materials and how to use them by checking out our guide to ear stretching kits.
Lubricant: Your Secret Weapon
Let's make this clear: never, ever try to stretch a dry earlobe. A good quality, skin-safe lubricant is non-negotiable. It helps the taper slide through smoothly, which dramatically reduces friction and helps prevent painful micro-tears in the skin.
You've got a couple of great options here:
- Jojoba Oil: This is a huge fan favorite because its makeup is incredibly similar to your skin's own natural oil (sebum).
- Specialized Stretching Balm: These are often a bit thicker and are formulated specifically to soothe and condition the skin during the whole process.
No matter which one you pick, make sure to apply a generous amount to both your clean earlobe and the taper itself before you even think about starting. Trust us, your ears will thank you for it.
The Safe and Steady Stretching Process
This is where the real fun begins. You've got your toolkit, you're mentally prepared, and now it's time to actually stretch your ears. Don't worry, this part is way less intimidating than it sounds, especially when you do it right. It’s all about being gentle, clean, and in tune with what your body is telling you.
Think of this process as a conversation between you and your earlobes. If you listen closely, they’ll tell you exactly what they need. Let's walk through this together, almost like I'm right there with you.
Prepping for a Perfect Stretch
First things first, preparation is everything. You wouldn't run a marathon without warming up, right? The same logic applies here. Your goal is to make your earlobes as soft, warm, and pliable as possible.
A great way to start is right after a warm shower. The steam and heat naturally increase blood flow to your lobes, making the skin much more elastic. If you’re not showering, a warm compress held against the lobe for a few minutes works just as well.
Next, give your lobes a gentle massage using your chosen lubricant, like jojoba oil. Spend a minute or two really working it into the tissue. This isn't just about making things slick; it's about stimulating circulation and getting your lobe ready for what’s to come.
The Moment of Truth: Guiding the Taper
Alright, it's go-time. Start by washing your hands thoroughly and making sure your taper and new plug are totally clean. Apply a generous amount of lubricant to the taper—don’t be shy!
Now, line up the small end of the taper with your piercing. As you begin to guide it through, do it slowly and steadily. You should feel some dull pressure or maybe a slight warming sensation. That's it.
CRITICAL TIP: Pain is a warning sign. If you feel any sharp, stinging, or intense pain, stop immediately. Your ear isn't ready. Pushing through pain is the fast track to a blowout or torn tissue.
Once the taper is most of the way through, line up your single-flare plug against the larger end. In one smooth motion, continue pushing the taper through while following it directly with the plug. The plug should slide right into place where the taper was.
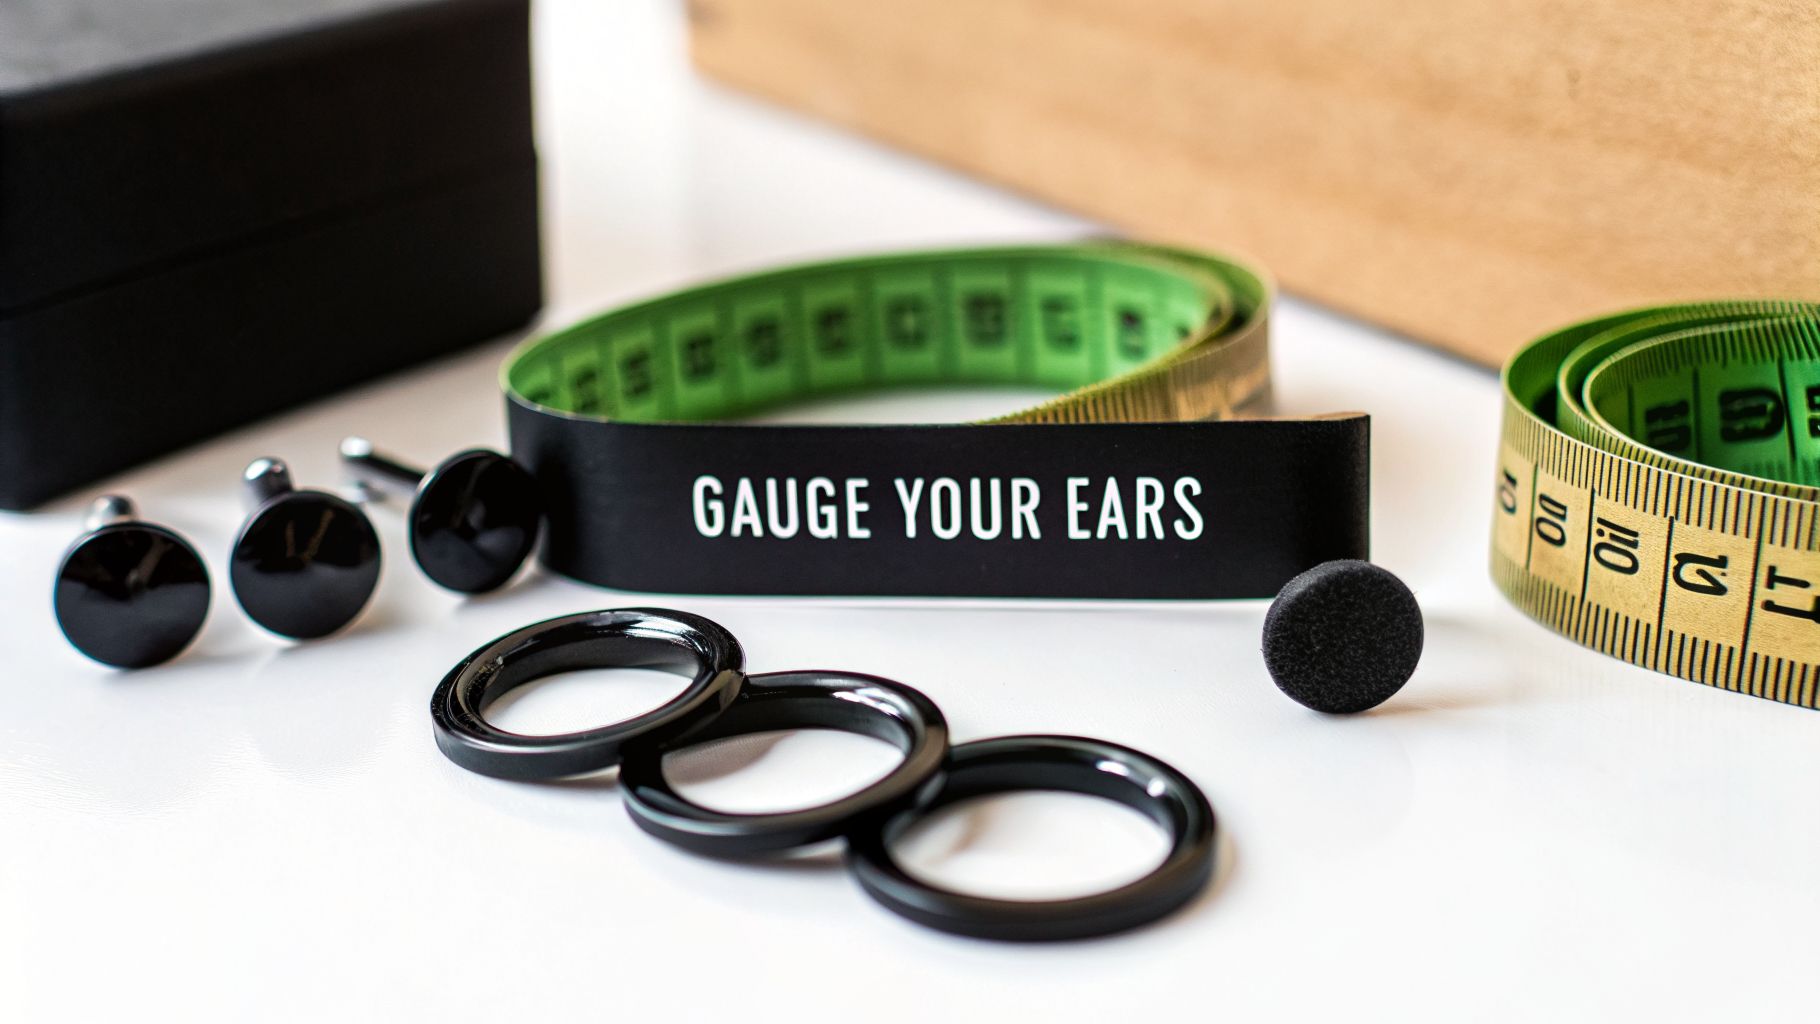
This diagram shows the key items you'll use in this process.

This visual highlights the simple but essential flow of tools needed for a safe stretch, from the gentle guide of the taper to the final placement of the plug.
Finish by sliding the small rubber O-ring onto the back of the plug to secure it. And that's it—you did it! Now, the most important part begins: healing.
The Cardinal Rules of Stretching
Ear stretching is a huge part of the body modification world, which is growing faster than you might think. The body piercing service market alone shows incredibly strong growth, estimated at USD 1.5 billion in 2024 and projected to hit USD 2 billion by 2029. This growth highlights how many people are embracing body art, making it even more important to share safe practices. You can explore more on these piercing industry trends to see just how popular it's becoming.
To make sure your journey is a successful one, keep these non-negotiable rules in mind:
- Go Slow, Always: This isn't a race. The goal is to guide the taper, not force it. The entire insertion process should take several seconds, not be a quick jab.
- Never Skip Sizes: Your ear needs to heal and adjust to each new size. Jumping from a 14g to a 10g, for example, is just asking for trouble. Stick to the incremental gauge sizes.
- One Stretch at a Time: If you're stretching both ears, that's fine. But don't try to go up another size until the previous stretch is 100% healed, which can take a month or even longer.
Your lobes might feel a little warm, tingly, or slightly swollen for a day or two afterward—this is normal. However, intense swelling, bleeding, or severe pain are signs you may have gone too fast or that your ear wasn't ready. If that happens, it's okay to downsize and let it heal before trying again.
Mastering Aftercare for Healthy Lobes
You did it! You successfully sized up, and that feeling of accomplishment is awesome. But the journey of gauging your ears doesn't stop the moment the plug is in. Consistent, smart aftercare is the real secret to preventing infections, avoiding dreaded blowouts, and keeping your lobes healthy for the next stretch.

Think of aftercare as the essential healing phase. This is where your body repairs the tiny micro-tears created during the stretch, building up new, flexible tissue. Skipping this step is like trying to run a marathon without any training—it’s just not going to end well.
Your Daily Healing Ritual
For the first week after a stretch, your routine should be simple but diligent. The goal is to keep the area clean without causing any extra irritation.
Your daily cleaning routine should involve:
- Sterile Saline Soaks: Once or twice a day, soak your lobes in a sterile saline solution for about five minutes. You can either dip your lobe into a small cup or use a saline-soaked gauze pad. This helps to gently clean the area and soothe any initial inflammation.
- Gentle Cleansing: When you shower, let warm water run over your lobes. You can use a bit of gentle, unscented soap, but be sure to rinse it away completely. And whatever you do, avoid twisting or turning your new plugs!
After the first week, you can continue with daily cleanings, but the real magic comes from lobe massages. This practice is a complete game-changer.
The Power of Lobe Massages
Once your lobes are no longer tender (usually after a week or two), it's time to introduce daily massages. This simple step is one of the best things you can do to promote healthy, elastic skin that’s ready for future stretches.
Daily massages with a quality oil do more than just moisturize. They increase blood flow to the tissue, help break down any potential scar tissue, and dramatically improve your skin's elasticity.
Here’s how to do it:
- Remove your jewelry and clean your lobes and plugs.
- Apply a few drops of jojoba oil or vitamin E oil to your fingertips.
- Gently massage the oil into your earlobes for a few minutes each.
This simple ritual is your best defense against stiffness and prepares your lobes for a smoother next stretch. It's a key reason why so many people are successfully and safely gauging their ears. The rising popularity of body modification has fueled a massive industry; the global body piercing jewelry market was valued at USD 8.46 billion in 2025 and is projected to climb to USD 10.76 billion by 2035. More people stretching means more amazing jewelry options for you!
Knowing When to Wait and What to Watch For
Patience is everything in the stretching game. You absolutely must wait for your lobes to heal completely before attempting the next size up. For smaller gauges, this means waiting a minimum of 4-6 weeks. For larger sizes, you might need to wait two months or even longer.
Listen to your body. You'll learn to know the difference between normal healing and a cry for help:
- Normal: Minor redness, a little bit of swelling, and some tenderness for the first few days are all part of the process.
- Red Flags: Sharp pain, bleeding, excessive swelling, or yellowish-green discharge are not. These are signs you've pushed things too fast. If you see them, downsize immediately and go back to your saline soaks. For detailed cleaning advice, check out our guide on H2Ocean aftercare products, which are perfect for new piercings and stretches.
Demystifying Gauge Sizes and Jewelry Materials
Jumping into the world of ear stretching can feel like learning a whole new language. Is a 14g bigger or smaller than a 12g? (Spoiler: with gauges, the smaller the number, the bigger the size). This whole section is designed to clear up that confusion and get you feeling totally confident about your stretching journey.
The easiest way to think about the gauge system is like a countdown. Most people start with a standard piercing size like 20g or 18g and work their way down the numbers—16g, 14g, 12g, and so on—as the piercing gets larger. Once you get past 00g, the measurements flip over to inches and millimeters.
Ear Gauge Size Conversion Chart
To keep things simple, we put together this handy reference chart. Use this chart to convert standard gauge sizes to millimeters (mm) and inches to track your ear stretching progress. It’s a lifesaver for tracking your progress and knowing exactly what size to shop for when you're ready for some new Bodycandy bling.
| Gauge (g) | Millimeters (mm) | Inches (") |
|---|---|---|
| 16g | 1.2mm | 3/64" |
| 14g | 1.6mm | 1/16" |
| 12g | 2mm | 5/64" |
| 10g | 2.4mm | 3/32" |
| 8g | 3.2mm | 1/8" |
| 6g | 4mm | 5/32" |
| 4g | 5mm | 3/16" |
| 2g | 6mm | 1/4" |
| 0g | 8mm | 5/16" |
| 00g | 10mm | 3/8" |
This chart covers the most common progression, which is absolutely crucial for a safe and successful stretch. For a more detailed look, our article on the standards of gauge sizing for body jewelry is another great resource to bookmark.
Choosing the Right Materials for Your Stretch
Okay, now for the fun part—the jewelry! The material you pick is incredibly important, especially right after a fresh stretch when your lobe is at its most sensitive. Seriously, your choices can make or break the entire healing process.
Think about it: when you've just stretched, your earlobe is essentially a new wound. You need to use non-porous, body-safe materials that won't harbor bacteria or cause irritation. Save the cool organic stuff for later!
Safe for Fresh Stretches:
- Surgical Steel: This is the go-to for a reason. It's affordable, super durable, and non-porous, which makes it incredibly easy to keep clean and sterile.
- Glass: Incredibly smooth and non-porous, glass plugs are perfect for easy insertion and a happy, healing lobe. Plus, they come in some awesome colors.
- Titanium: If you have sensitive skin or a known nickel allergy, implant-grade titanium is the absolute gold standard. It’s ridiculously lightweight and completely biocompatible.
For Healed Lobes Only: Once your lobes are fully healed and no longer tender (we're talking several months), you can start experimenting with other awesome materials.
- Stone: This offers a really unique, earthy vibe and comes in a huge variety of stunning natural patterns.
- Wood: A classic choice that's lightweight and breathable. Just remember it's porous and needs regular oiling to stay in good shape.
- Silicone: Super flexible and comfortable for daily wear or sleeping, but never, ever use it for stretching!
Picking the right material at the right time is a huge part of gauging your ears safely. Stick with steel, glass, or titanium for fresh stretches, and you’ll set yourself up for a smooth, irritation-free experience from the start.
Your Top Ear Stretching Questions, Answered
Over the years, we've heard just about every question you can imagine when it comes to stretching. We've compiled some of the most frequent ones right here. Think of this as your personal FAQ for any little worries that might pop up on your journey.
How Long Should I Wait Between Stretches?
This is the big one, and the answer is simple: patience is your best friend. For smaller sizes, say from a 16g to a 12g, you need to give your lobes a minimum of 4-6 weeks to chill out and recover.
Once you start getting into the bigger leagues, you have to slow down even more. For larger jumps, plan on waiting 2-3 months—sometimes even longer. Your body is busy rebuilding tissue, and that's a process you just can't rush. If you feel any sharp pain or serious resistance, that’s your ear telling you to back off. It's not ready yet. Always listen to your body; it knows what's up.
What Is a Blowout and How Do I Avoid It?
A "blowout" is the stretching community's boogeyman, and it happens when you stretch way too fast. Basically, you force the inside of your piercing (the fistula) out the back of your earlobe, creating a gnarly-looking fleshy ring. It’s the number one problem people run into when they get impatient.
Avoiding it is all about following the golden rules:
- Never, ever force a taper. If it doesn't glide, it doesn't go.
- Go heavy on a skin-safe lubricant. There's no such thing as too much.
- Never skip sizes. The journey is part of the fun, so stick to the gradual progression.
- Give your lobes enough time to heal completely before you even think about the next size.
If you do end up with a blowout, don't panic. Immediately downsize to a smaller gauge. Treat your lobes to daily saline soaks and gentle oil massages to help the tissue heal and pull back in.
A blowout is basically a trauma injury to your earlobe. It's not the end of the world, but it is a huge red flag telling you to slow down and treat your ears with a lot more respect.
Can I Use Silicone Tunnels to Stretch My Ears?
Let's make this crystal clear: absolutely not. Silicone jewelry is fantastic for fully healed lobes—it's super light and comfy. But for the actual act of stretching? It’s a disaster waiting to happen.
Silicone is porous, which means it can trap bacteria right up against your freshly stretched, vulnerable skin. That's a fast track to a nasty infection. Plus, its grippy texture can cause it to expand in your ear, stretching the tissue too fast and unevenly, which is a textbook cause of blowouts. For the stretch itself, always stick with single-flare plugs made of steel, glass, or titanium.
What Should I Do If My Ear Gets Infected?
First things first, take a breath and don't immediately yank the jewelry out. Removing it can trap the infection inside the piercing as it closes up. Not good.
Instead, start cleaning the area 2-3 times a day with a sterile saline solution. Stay far away from harsh stuff like alcohol or peroxide—they’ll just irritate your poor ear even more. If you notice thick yellow or green gunk, major swelling, or the pain is getting worse instead of better, it's time to call in the pros. See a doctor or a reputable professional piercer for advice. A little irritation after a stretch is normal, but a full-blown infection needs serious attention.
Ready to show off your beautifully stretched ears? The BodyCandy collection has everything you need, from high-quality glass and steel plugs for your next stretch to stunning organic and decorative pieces for your healed lobes. Shop our full collection today and find your next favorite pair