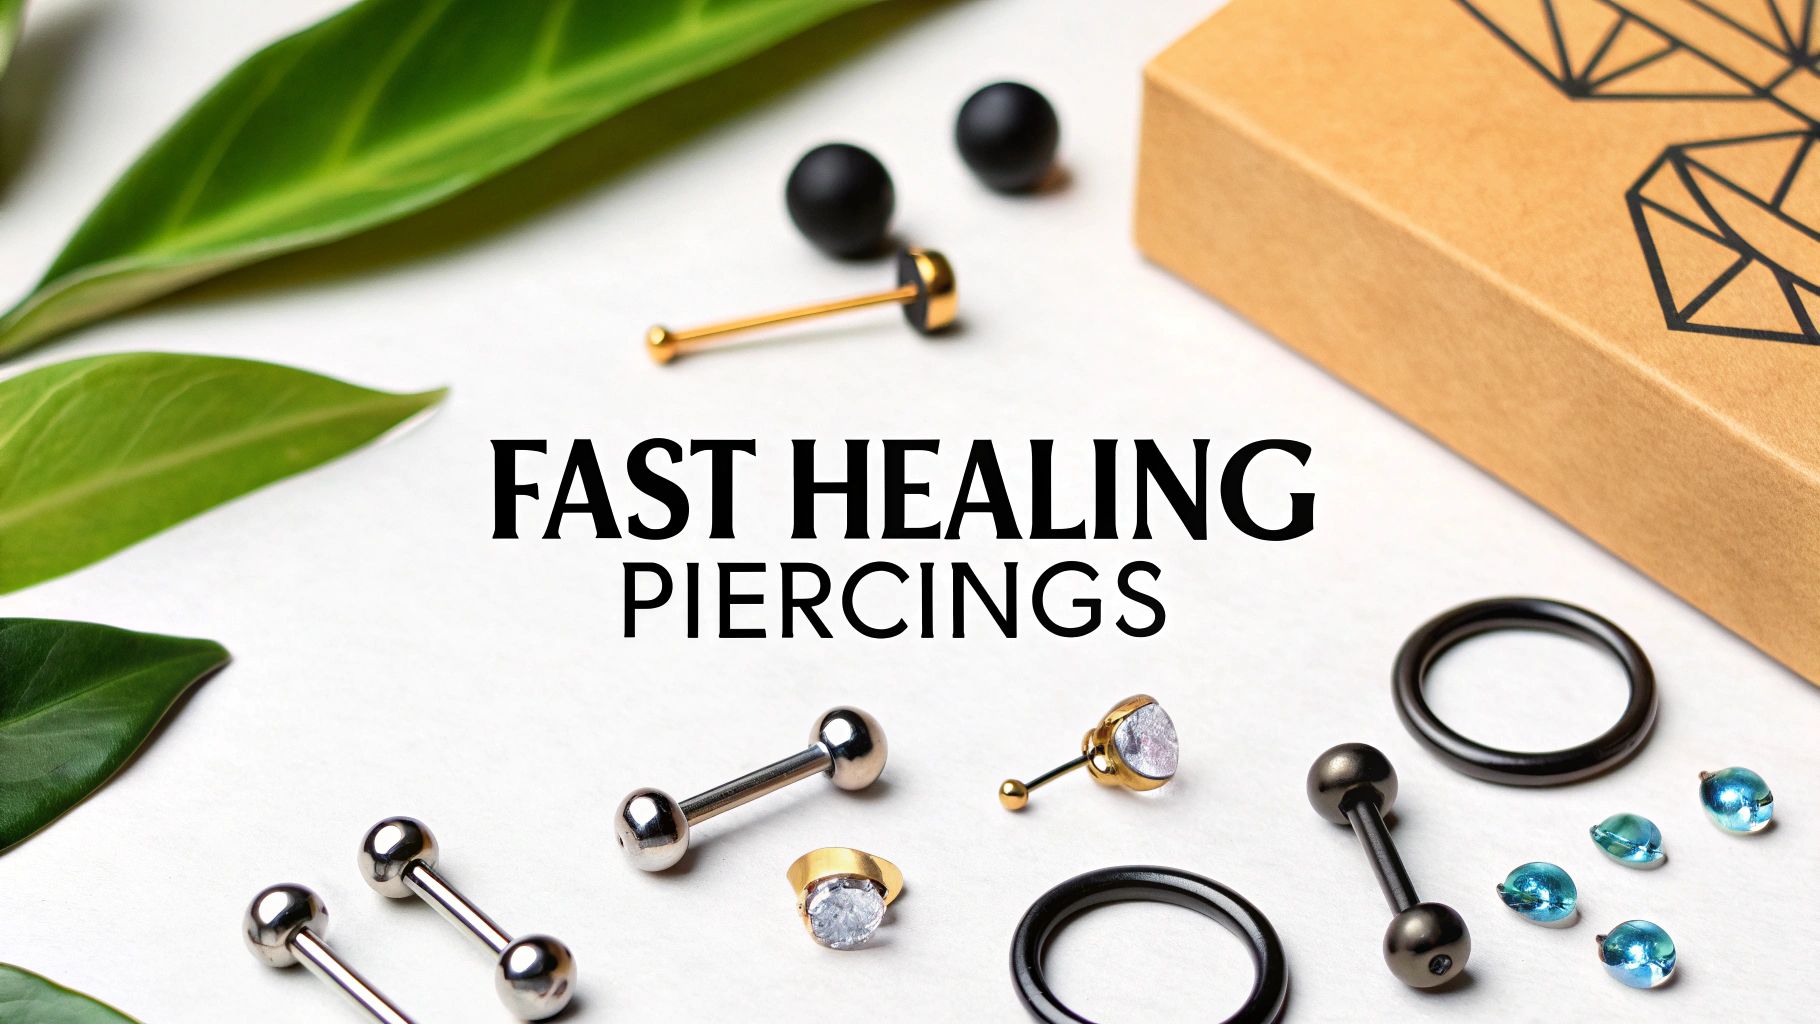
So, you did it! You’ve got that amazing new piece of sparkle you’ve been dreaming about. The adrenaline is still buzzing, and you can’t stop catching glimpses of it in every reflection. Getting a new piercing is an incredible feeling, but the real journey starts right after you walk out of the studio.
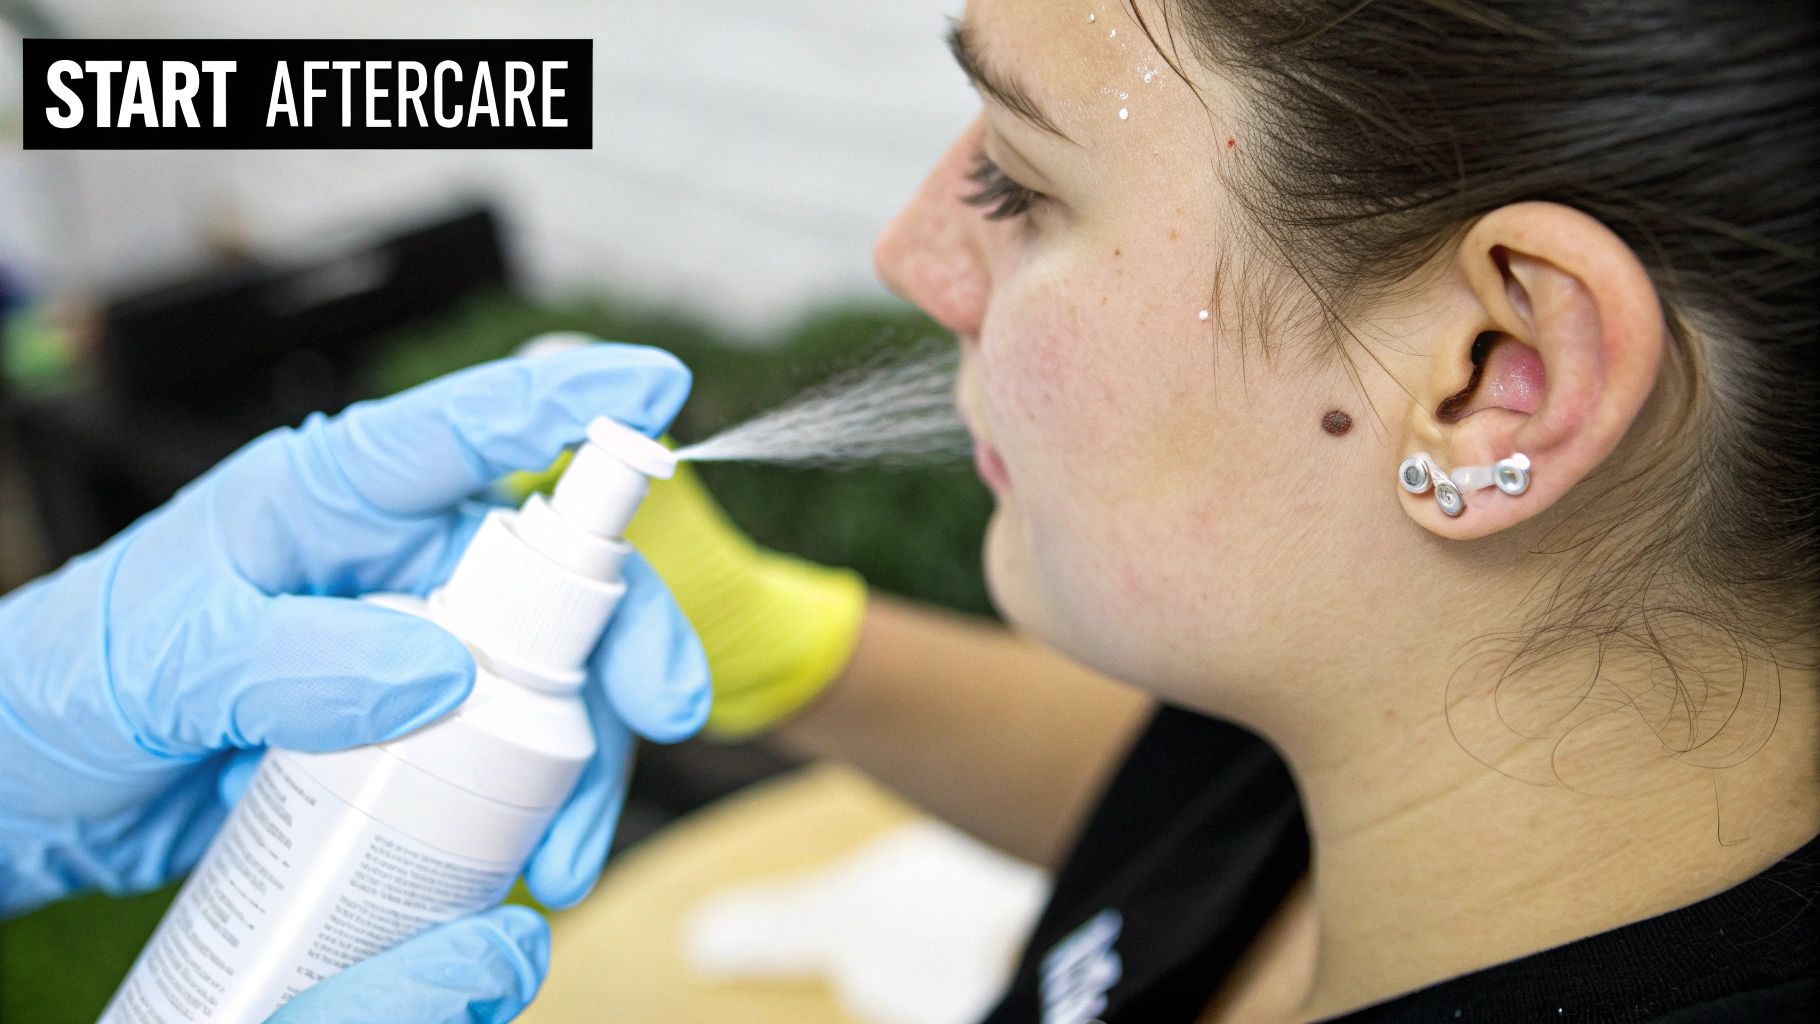
Welcome to the wonderful world of aftercare! This guide is your new best friend for the healing process. We're cutting through the noise and myths to give you straightforward, piercer-approved advice. Forget everything you’ve heard about twisting the jewelry or using harsh soaps—we're here to set the record straight.
Why Aftercare Is So Important
Think of a new piercing as a tiny, precise wound. Your body is ready to heal it, but it needs the right environment to do its job properly. Great aftercare isn't just about dodging an infection; it’s about making the entire healing process as smooth and quick as possible. That means less irritation, minimal swelling, and a much happier piercing in the long run.
Taking care of new piercings has become a huge focus, so much so that the piercing aftercare spray market alone is valued at around $150 million globally. It's projected to grow by nearly 7% annually over the next decade. This just goes to show how many people are investing in a healthy healing journey. If you're curious, you can learn more about piercing aftercare market trends to see how the industry is booming.
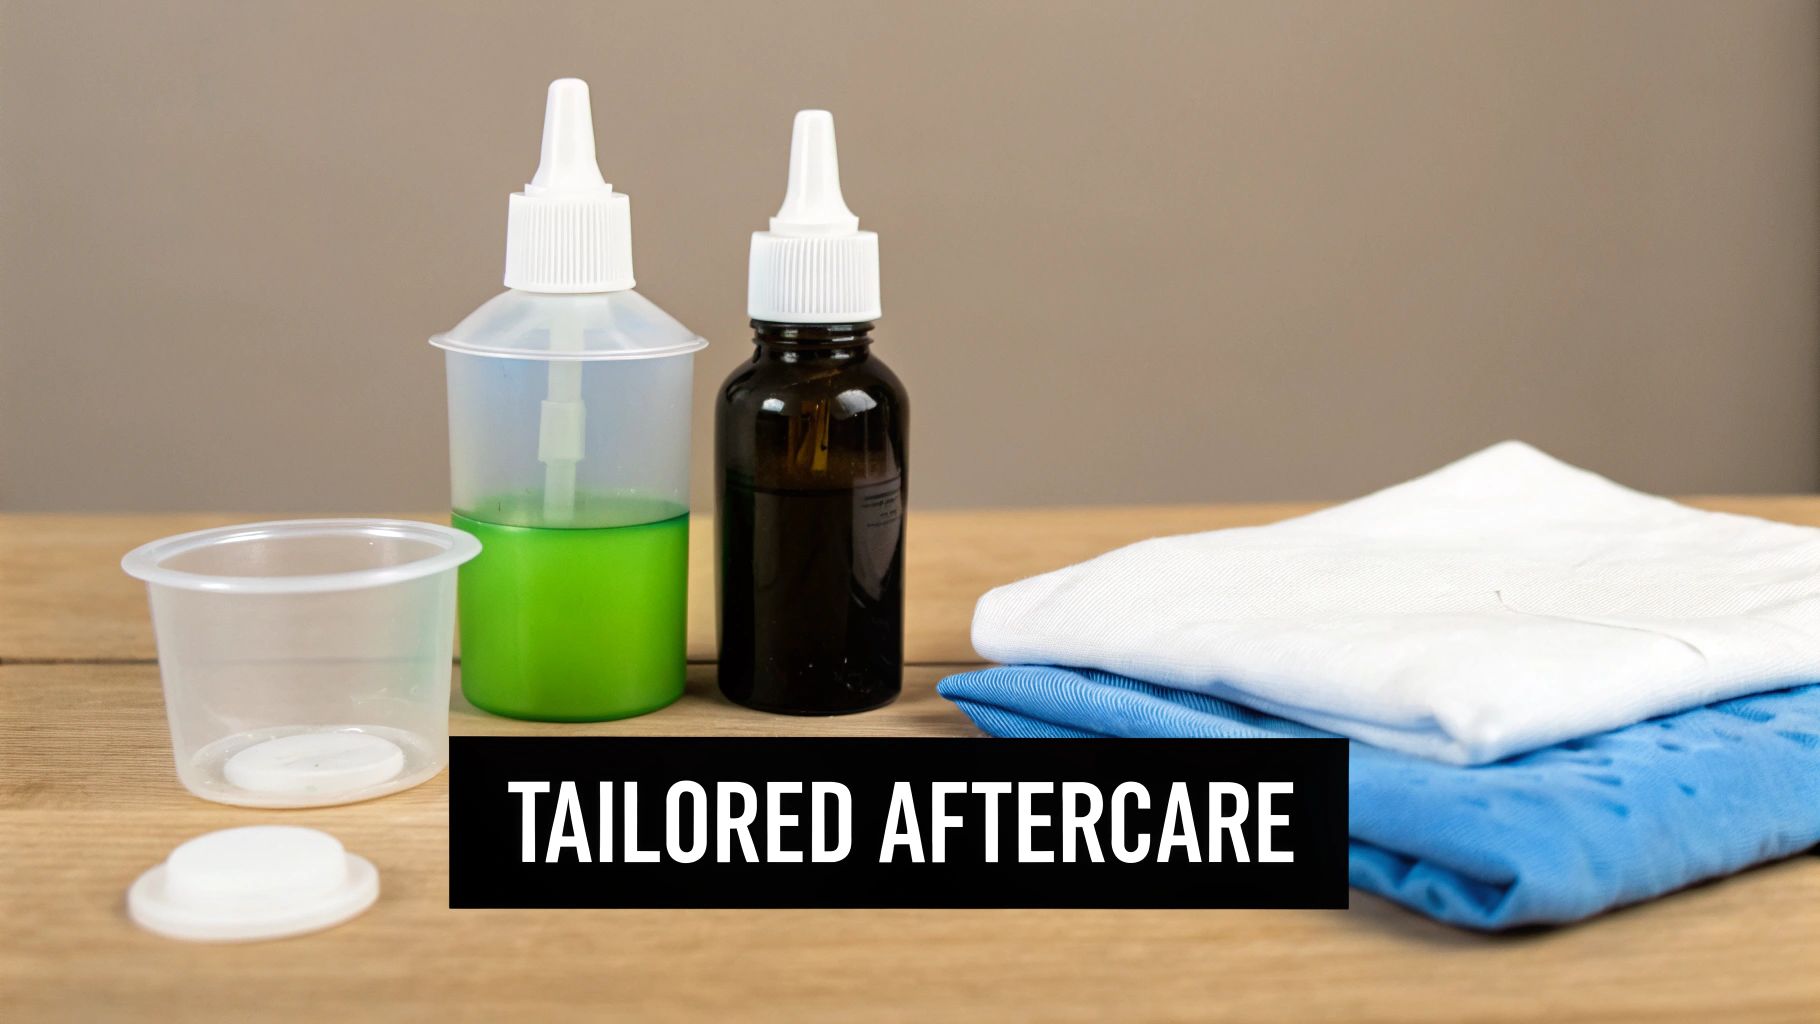
Building Your Aftercare Toolkit
Before we jump into the daily routine, let's get your supplies in order. Having everything you need on hand from day one makes sticking to your cleaning schedule a total breeze. You don't need a complicated, expensive setup—just a few key items will do the trick perfectly.
The golden rule of aftercare is consistency. A simple routine performed daily is far more effective than intensive cleaning done sporadically. Your piercing thrives on a gentle, predictable schedule.
To make things super easy, here’s a quick shopping list of the absolute essentials.
Your Essential Aftercare Shopping List
Grab these must-have items to build the perfect kit for caring for your new piercing.
| Item | Why You Need It | Where to Find It |
|---|---|---|
| Sterile Saline Solution | This is the star of the show. It's perfectly balanced to match your body's salinity, making it gentle and effective for cleaning without drying out your skin. | Drugstores, piercing studios, or online. Look for products specifically labeled for wound wash. |
| Clean Paper Towels | Use these for gently patting the area dry after cleaning. They are lint-free and disposable, which prevents introducing bacteria that can live on cloth towels. | Any grocery or department store. |
| Alcohol-Free Mouthwash | For oral piercings only! This helps keep the inside of your mouth clean without the harsh sting of alcohol, which can irritate a healing piercing. | Your local pharmacy or supermarket. |
With these few items, you're officially ready to start your healing journey on the right foot.
Your Daily Piercing Cleaning Routine
Alright, let's get down to business. The secret to a happy, healthy piercing isn't some complicated, time-consuming ritual. It’s all about consistency. Building a simple, effective routine is the single best thing you can do for a smooth healing journey.
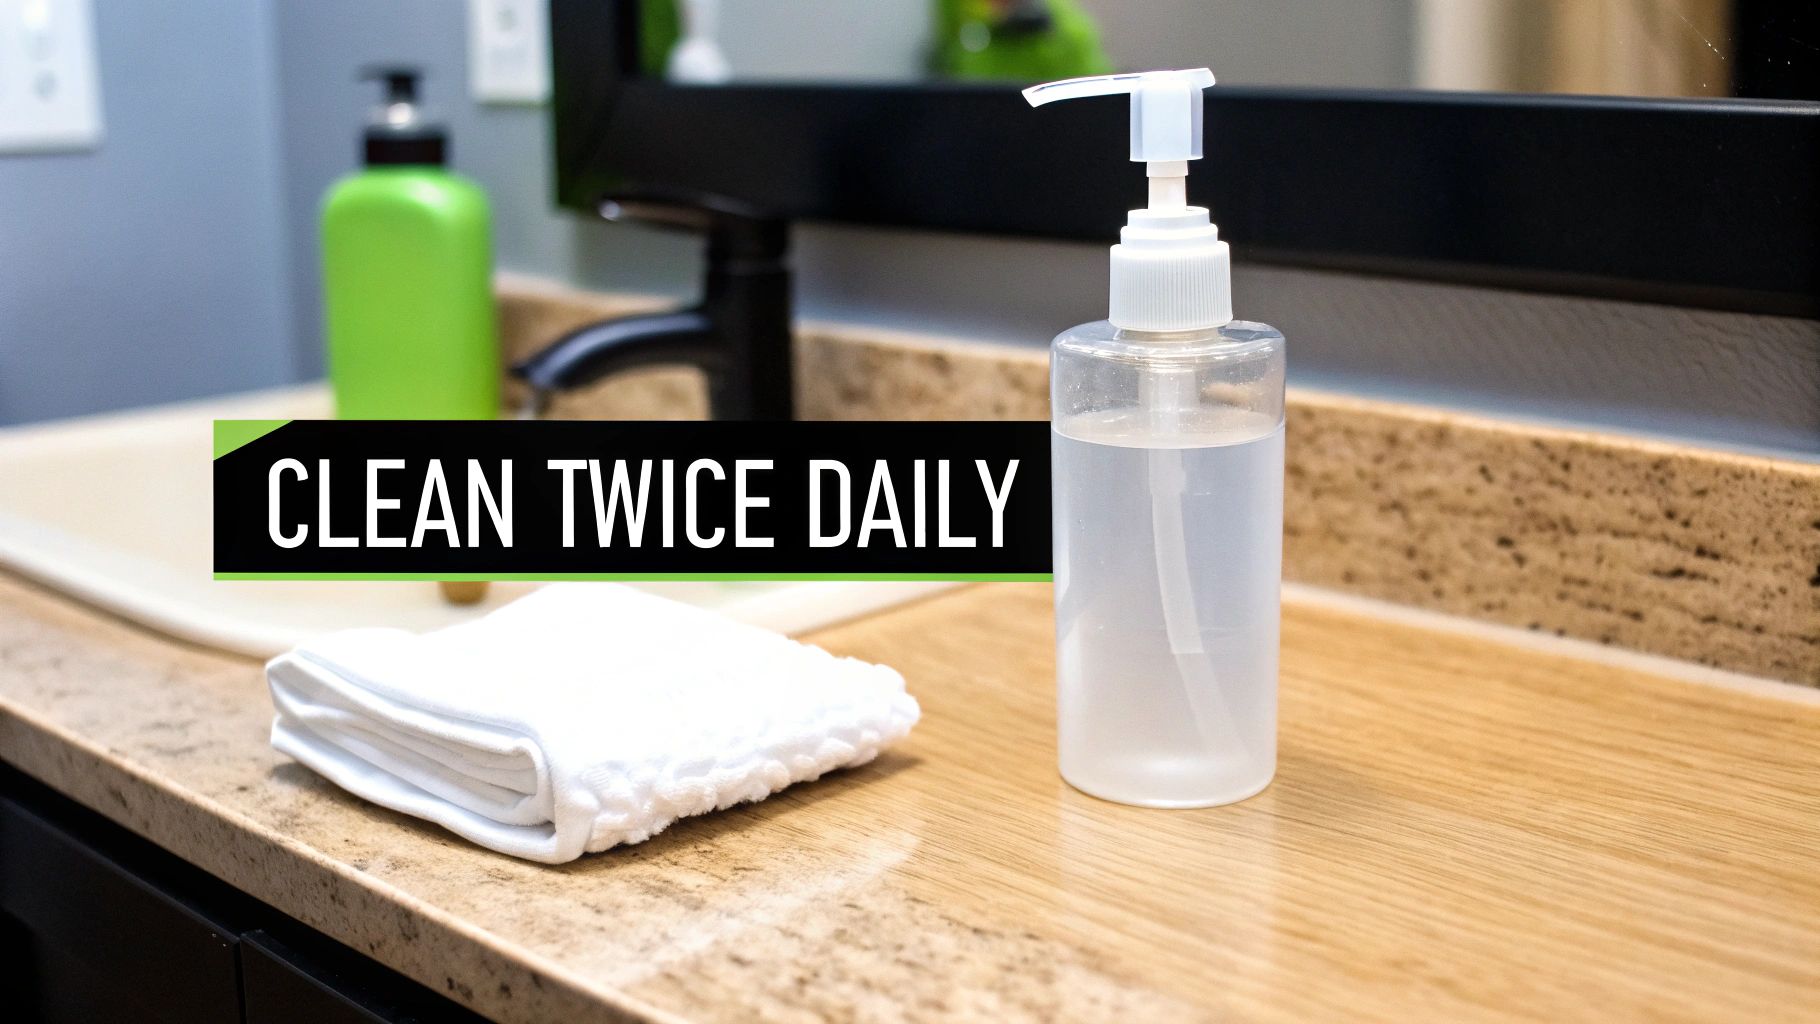
The magic number is twice a day—once in the morning, once at night. That’s it. Life gets busy, but don't be tempted to skip a cleaning or, on the flip side, overdo it. Cleaning more than twice a day can actually cause more harm than good by stripping the area of moisture and leading to some seriously unhappy, irritated skin.
The Right Tools for the Job
First things first: forget what you’ve heard about mixing up your own salt soaks or using harsh soaps. Your piercer gave you specific instructions for a reason!
The gold standard for aftercare, hands down, is a pre-packaged, sterile saline solution. Why? Because it’s precisely mixed to mimic your body's natural salinity and—most importantly—it's completely sterile right out of the can.
Trying to DIY a salt water solution at home is a recipe for trouble. It's almost impossible to get the salt-to-water ratio just right, and using unsterilized tap water or table salt (which often contains iodine) can introduce nasty bacteria and seriously irritate your fresh piercing.
To learn more about why piercers trust professionally formulated products, check out our deep dive on why H2Ocean aftercare is a piercer favorite. It’s a great read that breaks down what makes a quality aftercare spray.
Your Step-By-Step Cleaning Guide
Ready to nail your cleaning technique? It’s way easier than you think. The goal here is to be gentle but thorough.
- Wash Your Hands! Before you even think about touching your piercing, wash your hands with antibacterial soap and warm water for at least 20 seconds. This is non-negotiable. It's the #1 way to prevent transferring bacteria.
- Spray, Don't Play. Liberally spray the front and back of your piercing with the sterile saline solution. You really want to saturate the area to help soften and loosen any of those little "crusties" (which are just dried lymph fluid and totally normal!). Let it soak for about a minute.
- Gently Clean the Area. If any crusties are still hanging on, you can use a clean piece of non-woven gauze soaked in more saline to gently wipe them away. Whatever you do, never pick at them with your fingernails!
- Pat It Dry. Use a fresh, disposable paper towel to gently pat the area completely dry. Ditch the cloth towels for now—they can harbor bacteria and snag on your jewelry, which is a world of hurt you don't want. A hairdryer on a low, cool setting can also work wonders, especially for tricky spots.
The "Leave It The Heck Alone" Method
Just as important as your cleaning routine is what you don't do. The most common mistake we see is people fiddling with their new jewelry.
Twisting, turning, or pushing it back and forth doesn't "break it free"—it just introduces bacteria and tears the delicate new tissue (called a fistula) that your body is working so hard to build.
Pro Tip: Your body is incredibly smart. It knows exactly how to heal itself. Your only job is to keep the area clean and protected, then get out of the way and let it do its thing.
Think of it like a cut on your finger. You wouldn't poke and prod it every day, would you? The same idea applies here. Adopting a hands-off approach, known in the piercing world as the LITHA (Leave It The Heck Alone) method, is crucial. The less you mess with it, the faster and happier it will heal. This simple discipline will save you from countless potential problems down the road.
The 3 Piercing Healing Stages Explained
So, you survived the piercing chair and you're a couple of weeks into your cleaning routine. Nice! Now for the real journey: the healing. Think of it less like a sprint and more like a marathon. Your body is about to go through some totally normal (and sometimes weird-looking) stages to build a permanent home for your new jewelry.
Knowing what’s happening behind the scenes is the best way to keep from panicking when your piercing has a dramatic day. At its core, a new piercing is a small, controlled wound, and your body has a fascinating, multi-step plan to fix it. It doesn't just seal up overnight; it methodically rebuilds tissue from the inside out. Let's break down exactly what to expect.
Stage 1: The First Few Weeks (The Inflammatory Phase)
Right after you get pierced, your body’s emergency response team kicks into gear. This is the inflammatory phase, and it’s all about damage control. A few classic signs will show up during this time, and they’re all perfectly normal.
- Redness and Swelling: The area around your new bling will likely look a little pink and puffy. That’s just increased blood flow rushing to the site to start the repair work. No need to worry.
- Tenderness: Yep, it’s probably going to be sore to the touch. This sensitivity is your body's way of screaming, "Hey, be gentle with me right now!"
- Clear or Whitish Fluid: You'll probably see some fluid weeping from the piercing. This isn't pus! It’s called lymph fluid, a totally normal sign that your immune system is on the job.
This fluid will dry into what we lovingly call "crusties." I know it's tempting, but do not pick them! Using your fingers can introduce bacteria and tear the fragile new skin cells. Just let your daily saline soaks soften them up until they rinse away on their own.
Stage 2: The Middle Weeks (The Proliferative Phase)
Once the initial drama dies down, your body gets down to business with the proliferative phase. This is where the heavy construction begins. For the next several weeks—or even months—your body will be busy building a brand-new tunnel of skin (called a fistula) through the piercing.
This is often the trickiest part of the healing journey. Why? Because your piercing might look and feel healed on the outside long before the inside is actually ready. The soreness and redness might disappear, making you think you're in the clear. But that internal tissue is still incredibly delicate. This is exactly why you have to stick with your aftercare and resist the urge to swap out your jewelry too soon.
Your piercing isn't fully healed until a stable fistula has formed all the way through. Think of it like a tunnel being built through a mountain—the entrances might look finished first, but the interior structure needs time to become strong and secure.
Stage 3: The Final Stretch (The Maturation Phase)
Finally, you’ll hit the maturation phase, also known as the remodeling phase. This is the long haul. The new skin inside your piercing will spend this time strengthening, thickening, and smoothing out. This stage can take anywhere from six months to well over a year, depending on the piercing’s location and your personal healing abilities.
During maturation, the tissue around the jewelry will tighten up, and you’ll notice the piercing holes look more even and settled. There shouldn't be any discomfort, discharge, or crusties at this point. This final step is what makes your piercing strong, stable, and ready for all that awesome jewelry you’ve been eyeing.
For a detailed timeline on what to expect for different placements, be sure to check out our guide to healing times for popular piercings. Sticking with it through all three phases is the secret to a happy, healthy, and lifelong piercing.
Irritation vs. Infection: How to Spot the Difference
Even when you’re doing everything by the book, piercings can get a little angry sometimes. The real trick to successful aftercare is learning to listen to what your body is telling you. A little bit of redness is one thing, but a full-blown infection is another beast entirely.
Don't worry—we’re here to help you become a piercing detective. Most of the time, what you're seeing is just simple irritation, not the scary infection you're picturing after a late-night Google search. Knowing the difference will save you a ton of stress.
What Does a Piercing Infection Look Like?
First things first, let's talk about what's actually an emergency. A true infection goes way beyond a bit of soreness or some crusties. You're looking for a very specific combination of symptoms that signal it's time to get professional help, and fast.
Signs of a potential infection include:
- Thick, Opaque Discharge: This isn't the normal clear or whitish fluid that forms "crusties." Infected discharge is often thick, yellow, green, or even grayish and might have a funky smell.
- Hot to the Touch: The skin around the piercing will feel noticeably hot. A little warmth is normal in the first few days, but persistent, radiating heat is a big red flag.
- Spreading Pain and Swelling: The pain, redness, and swelling will get worse instead of better. It might even start to spread far away from the actual piercing site.
- Fever or Chills: If you feel sick all over—like you have the flu—that's a sign the infection could be spreading. This is serious, and you need to seek medical attention immediately.
If you have these symptoms, your next stop is a doctor's office, not just your piercer. Don't try to tough it out, and whatever you do, don't remove the jewelry. Taking it out can trap the infection inside, making things much worse.
Is It Irritation or Infection? (A Quick Guide)
Use this quick comparison to check your symptoms and understand what's happening with your piercing. It helps take the guesswork out of troubleshooting.
| Symptom | Normal Irritation | Potential Infection |
|---|---|---|
| Discharge | Clear, white, or pale yellow fluid that forms crusties. | Thick, pus-like discharge (green, yellow, gray); may have an odor. |
| Pain | Localized soreness that improves over time. May flare up if bumped. | Throbbing, persistent pain that gets worse and may spread. |
| Redness & Swelling | Mild redness and swelling around the piercing site, especially in the first week. | Dark red or red streaks spreading from the piercing. Swelling is significant and worsening. |
| Skin Temperature | May feel slightly warm initially, but cools down. | Hot to the touch. |
| Systemic Symptoms | None. You feel fine otherwise. | Fever, chills, nausea, or feeling generally unwell. |
| Bumps | A small, localized bump (pimple-like) may form next to the piercing. | Severe swelling, abscess formation. |
Remember, when in doubt, it's always better to be safe and consult a professional.
The Annoying (But Common) Irritation Bump
Now, let's talk about the much more likely culprit: the dreaded irritation bump. These pesky little bumps show up right next to the piercing and are basically your body's way of screaming, "Hey, something is bothering me!"
They're usually just small, fluid-filled sacs that pop up in response to some kind of stress or physical trauma. They are not infections, and they are not permanent.
The cause is almost always one of these common issues:
- Physical Trauma: Snagging your jewelry on clothing, a towel, or your hair is a classic trigger.
- Pressure: Constantly sleeping on a new cartilage piercing or wearing tight, high-waisted pants over a navel piercing is a recipe for a bump.
- Improper Aftercare: Using harsh chemicals like alcohol, hydrogen peroxide, or undiluted tea tree oil will absolutely anger a new piercing. Stick to saline.
- Low-Quality Jewelry: Your body might be reacting to the metal itself. If you suspect this is the problem, our guide on piercing irritation and allergic reactions is a great resource.
- Moisture: Not drying your piercing thoroughly after cleaning creates a damp environment where bacteria—and bumps—love to thrive.
Getting rid of an irritation bump means you have to play detective. Figure out what's causing the irritation and stop it. Double down on your gentle saline soaks, be extra careful not to bump the piercing, and embrace the "Leave It The Heck Alone" (LITHA) method.
Key Takeaway: Infections are rare; irritations are common. An infection involves pus, heat, and spreading pain, while an irritation bump is a localized reaction to a specific stressor. Don't panic—troubleshoot first.
This decision tree infographic is a great way to visualize the difference between normal healing and potential issues.
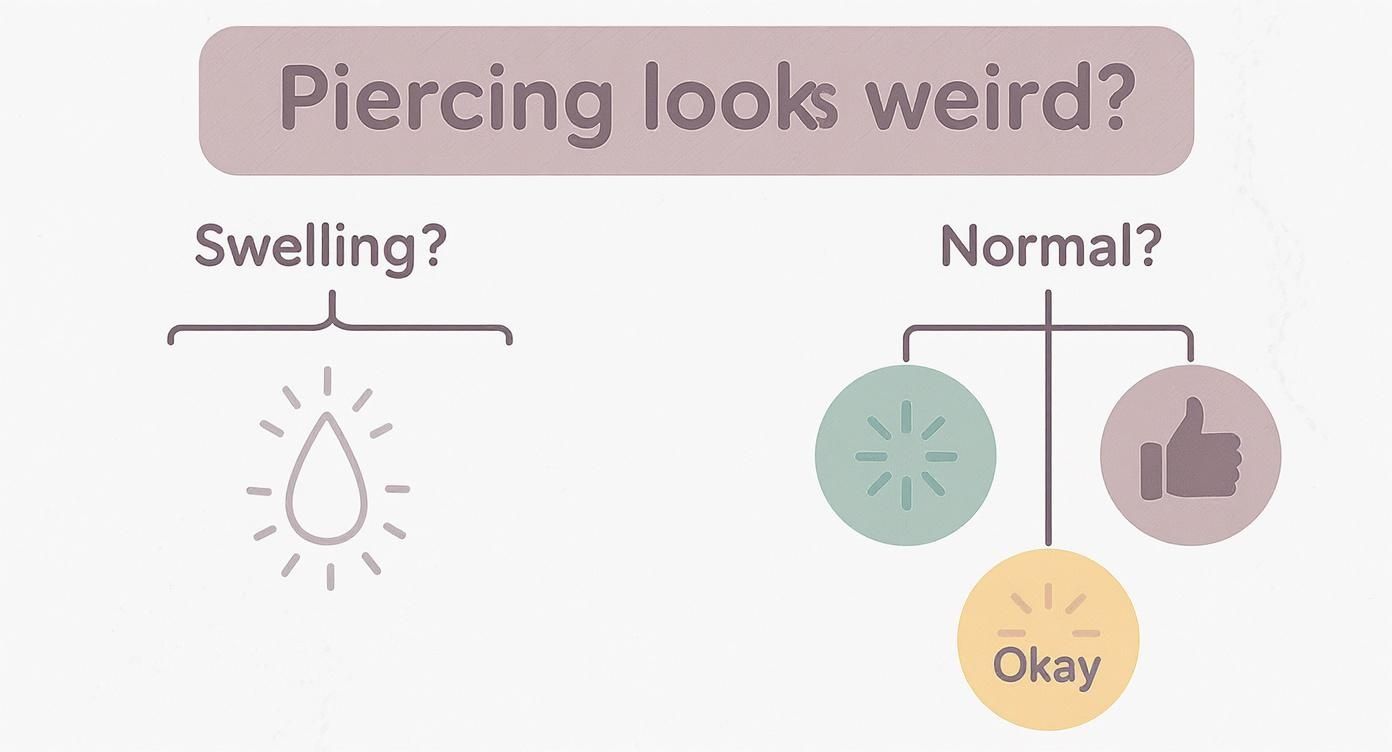
As you can see, most of the common symptoms, like some swelling and those crusties, are just a normal part of the process.
When to See Your Piercer or a Doctor
So, how do you know when it's time to call for backup?
If you’ve tried to eliminate all the possible irritants and the bump isn't getting better after a week or two, it’s time to check in with your piercer. They can take a look at the piercing angle, make sure your jewelry is the right size, and give you expert advice tailored to your situation.
However, if you have any of the signs of a true infection we talked about—especially a fever—skip the piercing studio and go straight to a doctor or an urgent care clinic. Your health comes first.
Tailoring Aftercare for Different Piercings
You wouldn't use the same routine for a delicate facial piercing as you would for a tough-as-nails lobe piercing, right? Of course not. While the core principle of keeping it clean with saline solution is pretty much universal, the location of your new bling plays a huge role in the day-to-day details.
This is where we get specific. Adjusting your aftercare to fit your piercing’s unique needs can make all the difference between a smooth heal and a frustrating one. Let's break down the special considerations for some of the most popular spots.
Oral Piercings: Lip and Tongue
When a piercing is inside your mouth, you're dealing with a totally different environment. Your mouth is a playground for bacteria (both good and bad), so pristine hygiene is everything.
- Rinse After Everything: After you eat, drink, or smoke, you need to rinse your mouth. The key is to use an alcohol-free antimicrobial or antibacterial mouthwash. Alcohol-based rinses are way too harsh and will cause major irritation, slowing down your healing.
- Watch What You Eat: For the first week or two, you'll want to be gentle. Stay away from super spicy, acidic, or crunchy foods that can aggravate the fresh wound. Think smoothies, soups, and yogurt.
- Go Easy on the Swelling: Tongue piercings are notorious for swelling up. Sucking on ice chips and keeping your head elevated can help bring it down. Your piercer will use a longer bar initially to accommodate this; don't forget to go back for your downsize once the swelling subsides!
Navel Piercings
Belly button piercings are super cute, but they live in a high-friction zone. Your main goal here is to protect it from getting snagged, bumped, or squished.
The biggest challenge for a navel piercing is constant motion and friction from clothing. What you wear can either help or hinder the healing process dramatically.
Low-rise pants and loose-fitting tops will be your best friends for a while. High-waisted jeans, leggings, or tight belts that sit right on top of the piercing are a recipe for irritation bumps and migration. Be mindful when you're exercising or even just bending over to avoid putting pressure on the jewelry.
Cartilage Piercings: Helix, Conch, and Tragus
Ah, the cartilage piercing—stylish, a bit edgy, and famously finicky to heal. Because cartilage has less blood flow than fleshy areas like your earlobe, the healing process is much longer and more prone to irritation.
The number one enemy of a happy cartilage piercing? Pressure.
Sleeping directly on your new piercing is the fastest way to cause angry bumps, swelling, and even change the angle of the piercing itself. Your new best friend is a travel pillow. Seriously. Sleep with your ear in the hole of the pillow to keep all pressure off the area. It’s a total game-changer.
Nipple and Surface Piercings
Much like navel piercings, nipple piercings are all about minimizing friction. For the first few weeks, many people find that wearing a soft, snug-fitting cotton bra or tank top (even to bed) can be really comfortable. It provides a protective barrier against snags and keeps the jewelry from moving around too much.
Surface piercings and dermal anchors have their own unique set of challenges because they don't go all the way through the tissue. They are more prone to rejection, so being extra gentle and avoiding any kind of snagging is crucial for their long-term success.
The good news is that specialized aftercare has made managing these different needs much easier. In fact, the global market for piercing aftercare saline mists was valued at $320 million and is expected to soar to nearly $780 million by 2033. This growth highlights just how many people are recognizing that proper, targeted hygiene is key. You can explore more about the growth of the saline mist market to see just how important these products have become.
By customizing your routine, you give your specific piercing the best possible chance to heal beautifully.
Your Piercing Aftercare Questions Answered
Even with the perfect aftercare plan, questions are going to pop up. Don't worry, we hear them all the time! This is your go-to FAQ section for all things healing, from hitting the beach to swapping out that starter stud.
Can I Go Swimming With a New Piercing?
This is probably the number one question we get, especially when summer rolls around. The short, honest answer? You really, really need to stay out of the water for a while.
Think about it: pools, hot tubs, lakes, and oceans are basically giant petri dishes teeming with bacteria. Plunging a fresh, open wound into that environment is like sending an open invitation for a nasty infection. Your piercing is most vulnerable during this initial healing phase, so it's best to avoid swimming for at least 4-6 weeks.
Of course, life happens. If you find yourself in a situation where getting wet is unavoidable—say, you get splashed or accidentally dunked—your best defense is a waterproof wound-sealant bandage. You can grab these at any drugstore. Make sure you cover the piercing completely before getting in, and the second you get out, give the area a thorough cleaning with your sterile saline solution.
When Can I Change My Jewelry?
We get it. You're dying to swap that simple starter stud for some killer new bling you've been eyeing. But this is where patience becomes your superpower. You should absolutely not change your initial jewelry until the piercing is 100% healed. No exceptions.
Changing it too early can unleash a world of problems. You risk tearing the delicate new tissue (the fistula) your body worked so hard to build, introducing bacteria, and setting your healing back by weeks or even months.
So, how long are we talking? Healing times vary wildly:
- Earlobes: Can be ready in as little as 6-8 weeks.
- Navel: Often takes a solid 6 months to a full year.
- Nipples: You're looking at around 9-12 months.
- Cartilage (Helix, Tragus, etc.): Brace yourself—these can take anywhere from 6 months to over a year to fully mature.
The absolute best way to handle that first jewelry change is to head back to your professional piercer. They have the right tools and a trained eye to see if the piercing is truly healed on the inside, not just on the surface, and can swap it out safely for you.
What Is the Best Material for Initial Jewelry?
When you're dealing with a fresh piercing, the material of your jewelry is non-negotiable. Using low-quality metal is one of the fastest tickets to irritation, allergic reactions, and major healing complications. Your body is trying to heal, so you need to use metals it won't see as a threat.
For a brand-new piercing, you should only ever wear jewelry made from biocompatible, implant-grade materials.
- Implant-Grade Titanium (ASTM F-136): This is the gold standard for most professional piercers. It's incredibly lightweight, completely nickel-free, and the least likely material to cause a reaction.
- Implant-Grade Steel (ASTM F-138): Another solid choice, but it does contain a tiny amount of nickel. While it's fine for most people, if you have a known nickel allergy, just stick with titanium.
- Solid 14k or 18k Gold: The key words here are solid and nickel-free. Plated jewelry is a huge no-go, as the plating can flake off and expose the mystery metal underneath, leading to some serious irritation.
Crucial Tip: Stay far away from materials like sterling silver (it tarnishes and can stain your skin), "surgical steel" that isn't implant-grade (it's a vague term with no quality standard), and anything made of acrylic or plastic. These can degrade or harbor bacteria, making them totally unsuitable for a healing piercing.
What Should I Do About This Bump on My Piercing?
First, take a deep breath. That scary-looking bump that just appeared next to your piercing is almost certainly an irritation bump, not a dreaded keloid. Keloids are a specific type of scar tissue and are actually pretty rare. Irritation bumps, on the other hand, are super common.
These bumps are just your body's way of saying, "Hey, something is bothering me!" Your job is to play detective and figure out what's causing the stress. Think back—have you been sleeping on it? Snagged it on a hairbrush? Are those new high-waisted jeans constantly rubbing your navel ring?
The fix is usually to just get back to basics.
- Find and Remove the Irritant: Pressure, friction, moisture, and snagging are the usual suspects. Pinpoint the problem and stop it from happening.
- Stick to Your Routine: Double down on your gentle saline soaks, twice a day. Don't be tempted to use harsh extras like tea tree oil or aspirin pastes; they'll only make things worse.
- Embrace the LITHA Method: Seriously, Leave It The Heck Alone. No touching, twisting, or poking. Let your body do its thing.
If you've removed the source of irritation and the bump isn't getting better after a couple of weeks, it's time to check in with your piercer. They can take a look at the jewelry's size, style, and angle to make sure everything is perfectly suited to your anatomy.
Ready to find the perfect, high-quality jewelry for your healed piercing? At Bodycandy, we have thousands of styles in implant-grade titanium and 14k gold to help you show off your unique look.