
So you did it! Congrats on your awesome new cartilage piercing. Taking care of it is pretty simple, but you gotta be consistent. The golden rule? Clean it twice a day with a sterile saline solution, try your best not to touch it or sleep on it, and get ready for the 6-12 month healing journey.
One thing to remember right off the bat: absolutely avoid the harsh stuff like alcohol or peroxide. They do way more harm than good, seriously irritating the delicate new tissue your body is trying to build.
Your Essential Cartilage Piercing Aftercare Guide
Welcome to the cartilage piercing club! Before you start daydreaming about your future jewelry collection, let's get through the most critical part: aftercare.
Think of this as the straightforward, no-nonsense guide you need to keep that new piercing happy and healthy from day one. Getting this right is non-negotiable for a smooth heal, and trust us, it's worth the effort.
Setting Up for Success
That first week is when your piercing is at its most vulnerable. Expect it to be red, a little swollen, and definitely tender. This is totally normal! Your body is having a natural reaction to the new bling, kicking off what's called the inflammatory phase.
This initial stage usually lasts about two to four days. It’s your immune system rushing to the scene to guard against infection and start the healing process. Don't freak out over a little warmth or soreness—it just means your body is on the job.
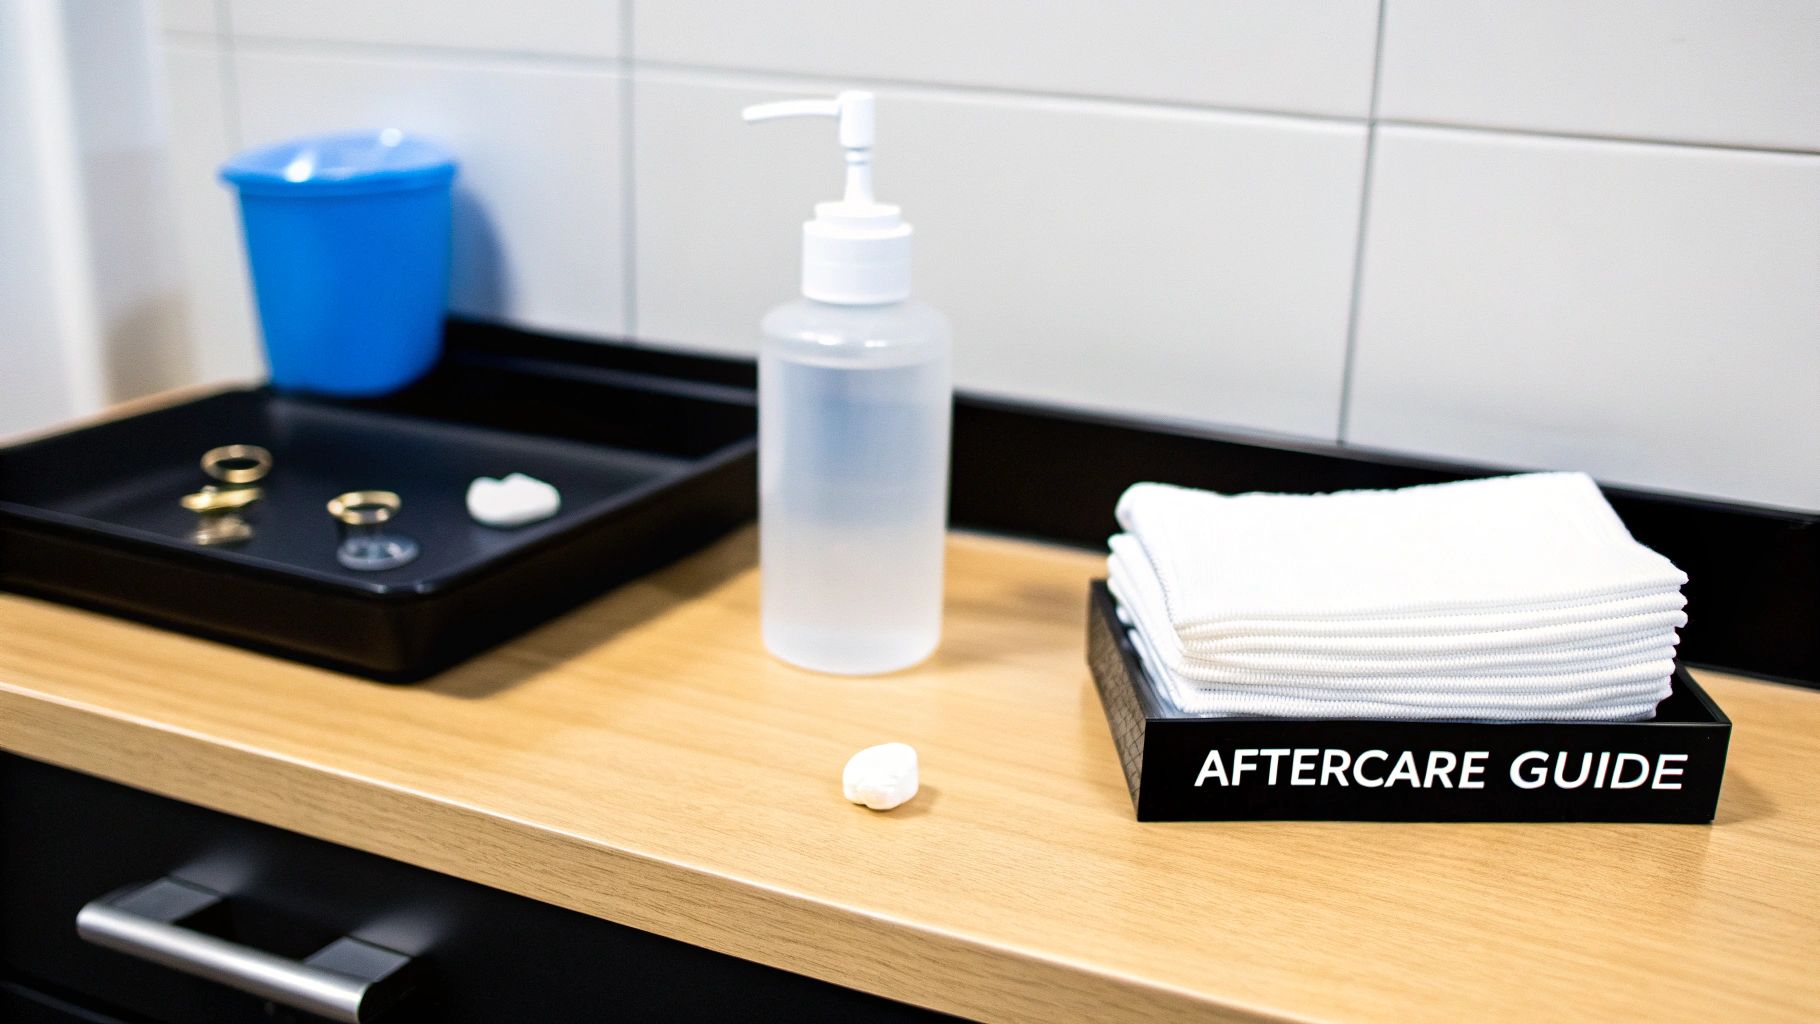
To make it through this phase like a champ, you only need a few key supplies. The goal here isn't to blast your piercing with chemicals, but just to help it heal itself in a clean, happy environment.
- Sterile Saline Solution: This is your new BFF. Look for a wound wash spray that contains only two ingredients: water and 0.9% sodium chloride. Avoid anything with extra additives or preservatives.
- Non-Woven Gauze: Please, ditch the cotton balls and Q-tips. Their tiny fibers are notorious for snagging on jewelry and causing a world of irritation. Non-woven gauze is your go-to for gently drying the area.
- A Travel Pillow: Are you a side sleeper? This little donut pillow will be a total game-changer. It lets you sleep without putting any pressure on your healing ear, which is a major cause of those dreaded irritation bumps.
First Week Aftercare Checklist
That first seven-day stretch really sets the stage for your entire healing journey. Being diligent with a simple, consistent routine is the absolute best way to sidestep any drama.
Here’s a quick-reference checklist to keep you on track during this crucial first week.
| Action | Frequency | Why It Matters |
|---|---|---|
| Clean with Saline | 2 times daily | Gently flushes away crusties and bacteria without drying out the skin, which is vital for new cell growth. |
| Hands-Off Policy | Always | Your hands are covered in germs. Touching or twisting your jewelry is the number one cause of irritation bumps. |
| Avoid Pressure | Daily | Constant pressure can change the piercing's angle and cause those dreaded irritation bumps. |
| Keep it Dry | After every wash | Moisture is a breeding ground for bacteria. Gently pat the area dry with non-woven gauze to prevent issues. |
Sticking to these basics is your ticket to a much smoother healing process. Be patient, be clean, and let your body do its thing!
Nailing Your Daily Cleaning Ritual
Alright, let's talk about the single most important part of your new cartilage piercing's life: the daily cleaning. This isn't just a friendly suggestion—it's the absolute foundation for a happy, healthy piercing that looks amazing. Get this routine down, and you're setting yourself up for a smooth, drama-free healing journey.
Consistency is the name of the game here. Your body is already working overtime to heal, so your job is just to provide a clean, supportive environment. Think of it as a quick, twice-a-day spa treatment for your ear.
The Only Cleaning Solution You'll Ever Need
When it comes to what you should be spraying on your fresh piercing, the answer is incredibly simple: sterile saline solution. That's it. This is absolutely not the time to get creative with homemade salt soaks, essential oils, or anything from your medicine cabinet.
You're looking for a product specifically labeled "sterile saline wound wash." The ingredients list should be short and sweet: 0.9% sodium chloride (that's the salt part) and purified water. This concentration is "isotonic," which is a fancy way of saying it matches your body's natural salinity. It cleans gently without drying out or aggravating that brand new, sensitive tissue.
If you want to dive deeper into aftercare sprays, you can explore our guide on H2Ocean products for more details.
A huge mistake we see people make is thinking "stronger is better." They'll reach for harsh stuff like rubbing alcohol or hydrogen peroxide. These are way too aggressive for a puncture wound. They actually kill off the healthy new cells your body is trying to build, which can set your healing back in a major way.
Your Step-by-Step Cleaning Process
To get this just right, you'll clean your piercing twice a day—once when you wake up and once before bed. It's tempting to clean more, but over-cleaning can be just as problematic as not cleaning enough. It can strip the area of its natural moisture and lead to some serious irritation.
Here’s the super simple process that works wonders:
- Wash Your Hands First: Before you even think about touching your ear, give your hands a thorough wash with soap and water. This is non-negotiable.
- Spray It Down: Give the front and back of your piercing a generous spray with your sterile saline. You want to fully saturate the area to help soften and flush away any "crusties" (which is just dried lymph fluid—totally normal!) and other debris.
- Let It Be: The best method is to simply let the area air dry. If you're short on time, you can gently pat the skin around the piercing with a fresh piece of non-woven gauze or a clean paper towel. Steer clear of cotton balls, Q-tips, or bath towels—their little fibers love to get snagged on jewelry and can cause a lot of irritation.
And that’s all there is to it. The key is to be incredibly gentle. Your piercing is a delicate wound; it doesn't need to be scrubbed, twisted, or messed with.
Common Myths We Need to Bust Right Now
The world of piercing advice is filled with outdated tips. Let's clear up a couple of the big ones to save you a headache later. Poor aftercare can quickly sour the experience. In fact, when aftercare is ignored, some piercers report infection rates as high as 45%, a number that plummets when piercings are properly cared for. You can find more piercing stats and insights from this industry research.
Myth 1: You have to twist your jewelry.
This is probably the most common—and most damaging—piece of bad advice out there. Twisting your jewelry doesn't stop it from getting stuck. What it actually does is tear up the delicate new tissue trying to form inside the piercing channel. This re-injures the wound every single time and drags bacteria into it. Just leave it alone!
Myth 2: Ointments and creams help it heal faster.
Nope. Antibiotic ointments and other thick creams create a barrier that traps moisture and bacteria right against the wound. This blocks oxygen flow (which is essential for healing) and creates the perfect swampy environment for germs to party. Stick to your saline spray and let your piercing breathe.
Navigating the Cartilage Healing Timeline
Patience, my friend, is everything when it comes to cartilage piercings. Unlike a quick-healing lobe, your new cartilage bling is playing the long game. Think of it less like a sprint and more like a marathon—a super stylish marathon, of course.
The reason for this extended healing time comes down to basic biology. Your earlobes are fleshy and full of blood vessels, which shuttle healing cells to the area quickly. Cartilage, on the other hand, has very limited blood flow. This means the healing process is much slower and more deliberate.
To give you a better idea of what you’re in for, we've mapped out the journey from that fresh, swollen stage to the final, fully healed result.
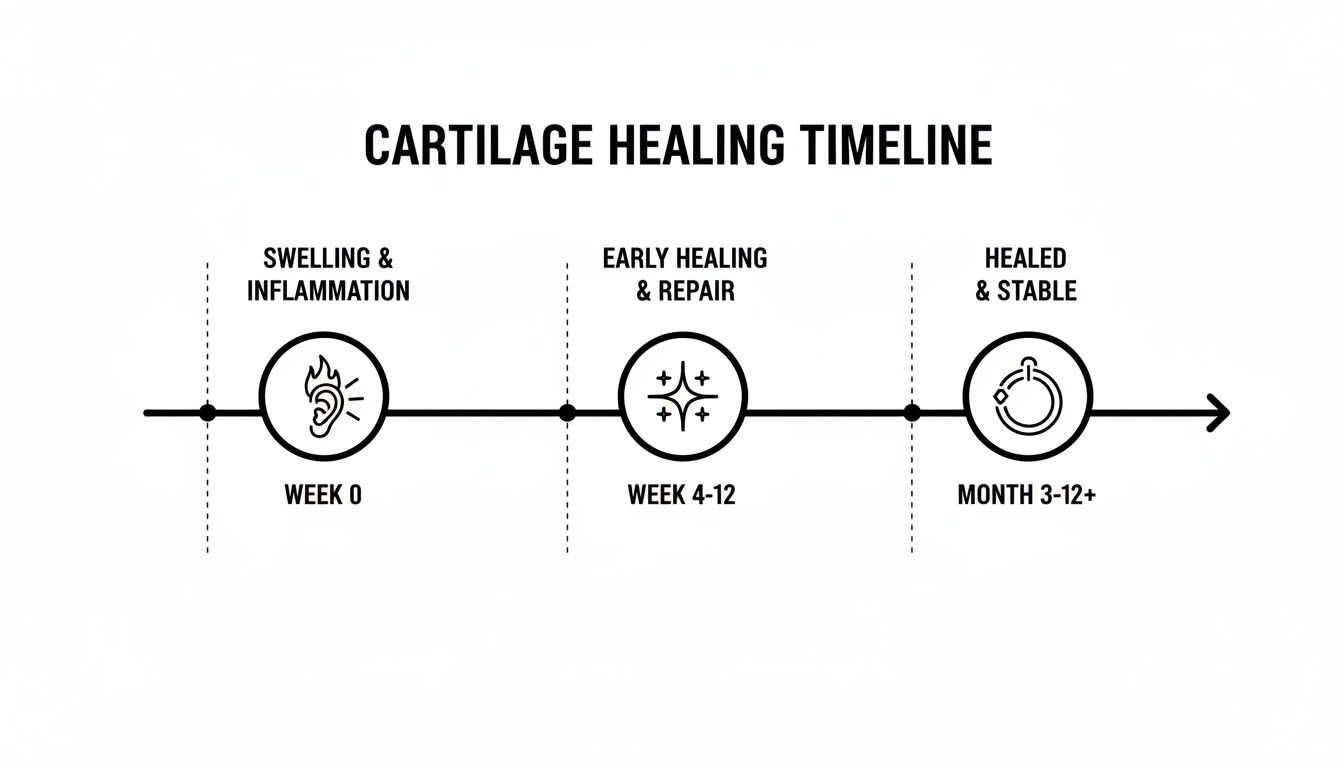
This process breaks down into three distinct phases. Knowing what’s happening at each step helps you set realistic expectations and avoid common pitfalls.
Let's walk through what you can expect during each stage.
| Cartilage Healing Stages and What to Expect |
| :--- | :--- | :--- |
| Healing Stage | Typical Duration | What to Expect and Key Actions |
| 1. Inflammatory Phase | 1-4 Weeks | Expect redness, swelling, tenderness, and some clear or yellowish discharge ("crusties"). This is your body's normal response. Key Action: Be extra gentle and stick to your cleaning routine religiously. Don't pick at the crusties! |
| 2. Proliferative Phase | 1-12 Months | The piercing might look healed from the outside, but your body is busy building new tissue (a fistula) inside. Swelling and tenderness should be gone. Key Action: RESIST the urge to change your jewelry. The new tissue is incredibly fragile. |
| 3. Maturation Phase | 6-12+ Months | The fistula fully strengthens and becomes smooth. The piercing is now stable and less prone to irritation. Key Action: Once you're sure it's fully healed (see signs below), you can carefully change jewelry. Continue to keep high-quality metal in the piercing. |
Understanding these stages is the key to a happy, healthy piercing that you'll love for years to come.
The First Few Weeks
This is the inflammatory phase, and it kicks in right after you leave the studio. It's totally normal to see some redness, swelling, and feel some tenderness. You'll probably also notice a clear or yellowish fluid that dries into "crusties."
Don't panic! This isn't a sign of infection. It’s just lymph fluid, a perfectly normal part of the healing process. Your body is just sending in the clean-up crew to protect the site. The most important thing you can do right now is be gentle and stay on top of your cleaning routine without fail.
The Long Haul Healing Phase
Next up is the proliferative phase. This is the longest part of the journey, where your body gets down to the serious business of building new tissue, called a fistula, through the piercing channel. This can last anywhere from a few months up to a year.
During this stage, your piercing might look and feel healed on the outside. The initial redness and swelling will have subsided, and it might not hurt anymore. This is the danger zone where so many people make a critical mistake: they assume it's fully healed and swap their jewelry out way too soon.
Don't be fooled by a calm-looking piercing! The tissue inside is still incredibly fragile. Changing your starter jewelry prematurely can tear this delicate new skin, introduce bacteria, and set your healing back to square one.
When Is It Truly Healed?
The final stage is the maturation phase. This is when the fistula inside the piercing channel fully strengthens and becomes smooth. This phase can overlap with the end of the proliferative stage and continue for several months after the one-year mark.
You'll know your cartilage piercing is fully healed when:
- There's no more discharge, redness, swelling, or tenderness—even when gently bumped.
- The jewelry can move (slightly) without any discomfort.
- It has been at least 6-12 months, depending on the specific placement.
Even after it seems good to go, it’s a smart move to keep high-quality jewelry in for the first full year to ensure the piercing remains stable and open. Each body is different, and you can get a better sense of specific timelines by checking out this guide on healing times for popular piercings. Sticking it out for the full duration is the real secret to a happy, healthy piercing you can enjoy for a lifetime.
The Do's and Don'ts of Piercing Care
Getting through the healing process can sometimes feel like walking a tightrope. A few simple habits can be the difference between a flawless result and a frustrating, bumpy ride. Let's get into the essential rules of the road—the absolute must-do's and the definite don'ts.
Think of these as the golden rules for taking care of your new cartilage piercing. Follow them closely, and you’ll protect your investment and end up with a beautifully healed piercing you can show off for years to come.
The Do's Your Piercing Will Love
Sticking to these positive habits is all about creating the perfect environment for your body to heal up right. It boils down to being gentle, clean, and just generally mindful of your new addition.
- DO Keep It Clean (But Don't Overdo It): Your twice-daily saline spray is your new best friend. It’s the perfect way to gently clean the area without causing any extra irritation.
- DO Keep Your Hands Off: This one is a big deal. Your hands are covered in germs, and every time you touch, twist, or fiddle with your jewelry, you're basically rolling out the welcome mat for bacteria and aggravating the healing tissue.
- DO Sleep Smart: If you're a side sleeper, putting constant pressure on a fresh cartilage piercing is a one-way ticket to irritation bumps. The fix? Grab a travel pillow and sleep with your ear nestled in the donut hole. It’s a total game-changer, trust us.
- DO Keep It Dry: After you've cleaned your piercing or hopped out of the shower, gently pat the area dry with a clean piece of non-woven gauze. A damp environment is a playground for bacteria, so don't skip this.
By focusing on these simple actions, you're giving your body the backup it needs to heal properly.
The Don'ts That Can Derail Healing
Just as crucial as the do's are the things you absolutely shouldn't do. These are the common missteps that can seriously derail your healing, leading to painful irritation, bumps, and even infection.
You've made it this far, so let's make sure you sidestep these common piercing pitfalls.
- DON'T Use Harsh Chemicals: Steer clear of rubbing alcohol, hydrogen peroxide, and antibacterial soaps. These products are way too aggressive for a healing wound. They'll just destroy the delicate new cells your body is working so hard to build.
- DON'T Swim in Pools or Hot Tubs: For at least the first month (and honestly, longer is better), you have to avoid submerging your new piercing. Pools, hot tubs, lakes, and oceans are full of bacteria that can cause some really nasty infections.
- DON'T Change Jewelry Too Soon: We get it—you’re dying to swap in that cute new stud from your BodyCandy haul. But changing your jewelry before the piercing is fully healed, which can take 6-12 months, can cause major trauma and set your healing back to square one. Patience is everything!
- DON'T Twist or Turn Your Jewelry: This is an old, outdated myth that does way more harm than good. Twisting your earring just drags bacteria into the wound and tears up the fragile new tissue that's trying to form inside.
The bottom line is simple: the best aftercare is often the least complicated. Clean your piercing as directed and otherwise practice LITHA—"Leave It The Heck Alone." Your body knows what to do; your only job is to keep the area clean and protect it from getting bumped or snagged.
Resisting the urge to mess with it is probably the hardest part, but it's also the most important. Treat your piercing with care, avoid these common mistakes, and you'll be on the fast track to a happy, healthy, and stunning new look.
Navigating Common Cartilage Piercing Hiccups
Even if you’re doing everything right, sometimes a healing cartilage piercing decides to have a mind of its own. You might wake up to a surprise bump or deal with some lingering redness. First thing's first: don't panic. More often than not, these are just signs of simple irritation, not a full-blown emergency.
Your new piercing is a sensitive thing. It can react to almost anything—an accidental snag, a bit of extra moisture, even just sleeping on it wrong. Learning to read these signals is the key to getting your healing journey back on track. Here's how to figure out what your piercing is trying to tell you.
That Annoying Irritation Bump
If you’ve spent any time on piercing forums, you’ve definitely heard whispers of "the bump." It’s the single most common headache for anyone with a healing cartilage piercing. It shows up as a small, reddish bump right next to the piercing, and boy, can it be frustrating.
But here's the secret: these bumps are almost always a symptom, not the problem itself. They're your piercing’s way of yelling, "Hey, something is bugging me!" The culprits are usually one of three things: moisture, movement, or pressure.
Run through this checklist to play detective and find the cause:
- Are you sleeping on it? Honestly, this is the number one cause. All that pressure for hours on end is a recipe for an angry piercing. Your best bet is to grab a travel pillow and sleep with your ear nestled in the hole.
- Is your jewelry post too long? That initial long bar is essential to accommodate swelling. But once the swelling subsides, the extra length can get caught on everything, causing constant irritation. It's probably time to see your piercer for a downsize.
- Is it getting snagged? Think about your day-to-day routine. Are you catching it with your hair, your glasses, or your face mask? These tiny, repeated traumas really add up.
- Is it staying damp? After you shower or clean your piercing, are you drying it thoroughly? Trapped moisture creates a playground for irritation.
Think of an irritation bump as a little bubble of localized inflammation. It's your body's attempt to cushion an area that's being repeatedly aggravated. The fix isn't some miracle cream—it's about finding and removing the source of that aggravation.
Understanding Hypertrophic Scars
Sometimes, a long-term irritation bump can develop into what's called a hypertrophic scar. It sounds more intense than it usually is. A hypertrophic scar is just your body going a little overboard with collagen production while trying to heal a wound. The result is a raised scar that stays neatly within the borders of the original piercing.
The key difference between these and keloids (which are genetic and much rarer) is that hypertrophic scars are a direct result of trauma or irritation. They often look just like a very stubborn irritation bump. The great news is that once you eliminate the source of the irritation, these scars often calm down and flatten out over time.
Irritation vs. Infection: Knowing the Difference
This is the big one, the question that sends everyone into a late-night Google spiral. Knowing how to tell the difference is crucial, because you can handle irritation at home, but a genuine infection needs a doctor. Thankfully, the signs are pretty clear if you know what you’re looking for.
Signs of Irritation:
- A small bump right next to the piercing hole.
- Some redness and minor swelling contained to the immediate area.
- It might be a bit itchy or tender.
- You'll see clear or whitish-yellow "crusties."
Signs of a Real Infection:
- Intense, throbbing pain that seems to be getting worse.
- Redness that spreads far from the piercing site.
- Major swelling that affects a large part of your ear.
- Thick, yellow or green pus that often has an unpleasant odor.
- The area feels hot to the touch, and you might even run a fever.
If you're ticking off boxes on the infection list, do not take the jewelry out. Removing it can allow the piercing to close, trapping the infection inside and potentially leading to an abscess. Your next move is to contact a doctor. In the meantime, keep up with your gentle saline soaks to help manage the symptoms.
Choosing the Right Jewelry for a Happy Piercing
Okay, let's get to the fun part—the bling! After all that patient cleaning and healing, picking out new jewelry feels like a major reward. But hold on, because what you put in your piercing is just as critical for its long-term health as your aftercare routine ever was.
The right material can be the difference between a happy, settled piercing and one that’s constantly angry and irritated. Think of your initial jewelry like a medical implant; it’s literally living inside your body for months, so the material has to be biocompatible. This just means your body won't see it as a foreign invader and try to fight it off.
The Gold Standards of Piercing Materials
When you're dealing with a fresh or still-healing piercing, not just any metal is going to cut it. You need something nickel-free (or as close as you can get), durable, and non-corrosive. This is where professional-grade materials come in.
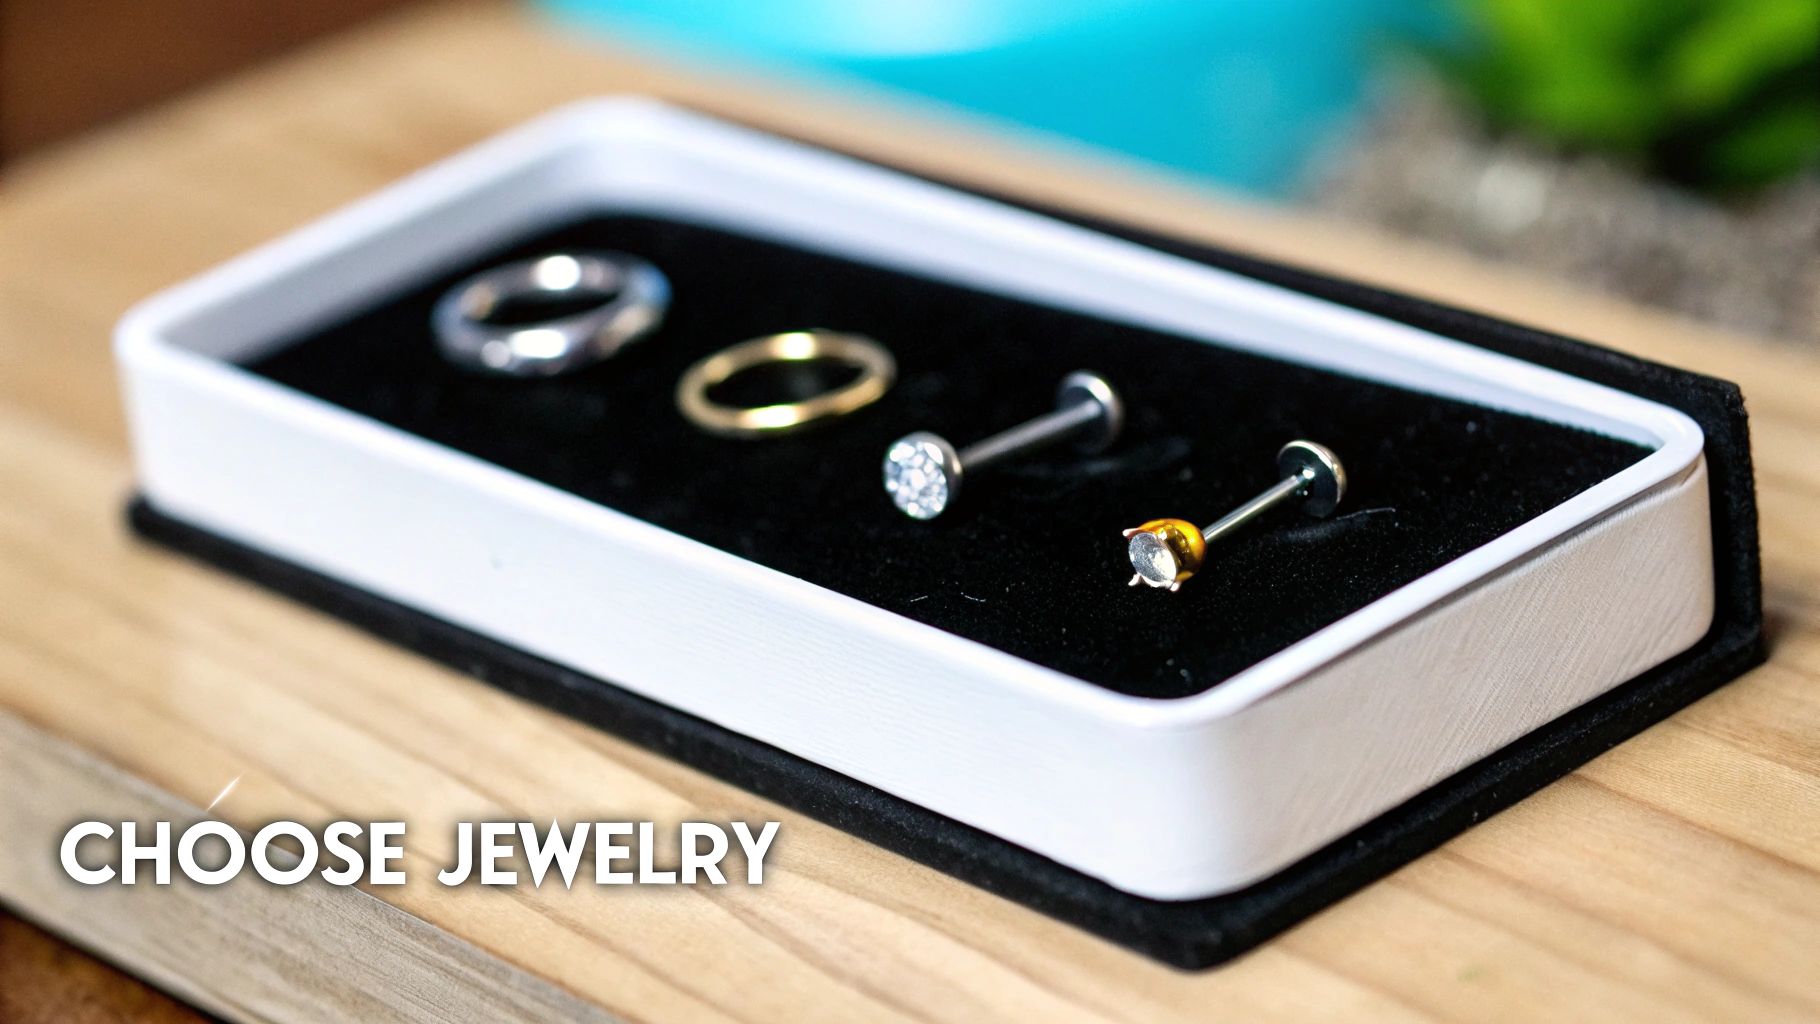
Your piercer will almost always start you off with one of these, and it's smart to stick with them until you are 100% healed.
- Implant-Grade Titanium (ASTM F-136): This is the holy grail for body jewelry. It's completely nickel-free, surprisingly lightweight, and it's the same stuff used for surgical implants. If you have sensitive skin or known metal allergies, titanium is your absolute safest bet.
- 316L Surgical Steel: Another very common and body-safe option. While it does contain a tiny amount of nickel, it's bound within the metal in such a way that it’s highly unlikely to cause a reaction in most people. It's a solid, reliable choice for happy healing.
- 14k or 18k Solid Gold: If you're a gold lover, make sure it’s the real deal. You want solid gold, not gold-plated. Plating can wear away over time, exposing whatever mystery metal is underneath. Stick to 14k or 18k—pure 24k gold is actually too soft for body jewelry and can get easily scratched, creating tiny hiding spots for bacteria.
Picking quality jewelry is a major factor in avoiding common pitfalls. While studies show 10-30% of cartilage piercings can face complications like infection, choosing hypoallergenic materials like titanium can seriously curb the risk of allergic reactions.
Why Some Metals Are a Major No-Go
I know it's tempting to grab that cute, cheap pair of earrings from a fashion store, but putting low-quality metal in a healing piercing is basically asking for trouble. You'll want to steer clear of these materials until your piercing is completely healed—and even then, proceed with caution.
Here’s what to avoid in a healing piercing:
- Sterling Silver: Silver tarnishes (oxidizes) when it comes into contact with air and bodily fluids. This tarnish can get into your piercing and permanently stain your skin a grayish-black color (a condition called argyria). It’s also a huge source of irritation.
- Low-Grade "Surgical" Steel: Not all steel is created equal. If a piece of jewelry isn't specifically labeled as 316L or implant-grade, it's likely a lower-quality alloy with a higher nickel content that's just waiting to make your ear angry.
- Plated Jewelry: Anything plated (gold, rhodium, etc.) has a super thin coating that will eventually chip and flake away. This not only exposes the cheap base metal underneath but also creates a rough, jagged surface that will absolutely irritate your piercing.
Sizing and Style for a Smooth Heal
Your initial jewelry will always have a longer post, and that’s on purpose. It leaves room for the inevitable swelling. This is crucial for the first few weeks, but once that initial puffiness goes down (usually around the 4-8 week mark), that extra length becomes a liability. It's way more likely to get snagged on your hair, your clothes, or your pillowcase.
This is when you'll go back to your piercer for a "downsize." They’ll swap out that long starter post for a shorter one that sits perfectly flush against your ear. Don't skip this appointment! It’s a critical step for preventing irritation bumps and ensuring a smooth final heal.
For cartilage, flat-back labret studs are often the best choice for healing. The flat disc on the back is much less likely to get caught on things than a traditional butterfly back, and it's way more comfortable to sleep on.
Once you’re fully healed, the world is your oyster! You can explore all kinds of styles, but always make quality materials your top priority. For some great ideas on what jewelry works for each spot, check out our crash course on cartilage piercing jewelry.
Got More Questions? We've Got Answers
Even with a solid aftercare plan, life happens. Little things pop up that can make you second-guess if you're doing things right. Don't worry, you're not the first person to wonder about these things, and you definitely won't be the last.
We've pulled together some of the most common questions that land in our inbox. Think of this as your go-to guide for all those little "wait, can I...?" moments.
Can I Go Swimming with a New Cartilage Piercing?
This one's a biggie, especially when summer rolls around. The short and non-negotiable answer is no. You absolutely must avoid submerging your healing piercing in any body of water for at least the first month, though waiting even longer is a much safer bet.
That means no pools, no hot tubs, no oceans, lakes, or even long soaks in your own bathtub. These places are basically a party for bacteria and harsh chemicals (like chlorine), which can quickly turn your healing piercing into an infected, irritated nightmare. Waterproof bandages might seem like a good idea, but they're rarely foolproof. The risk just isn't worth it.
What Should I Do If I Accidentally Snag My Piercing?
First off, take a deep breath. It happens to literally everyone. Whether you caught it on a hairbrush, a sweater, or a pillow in your sleep, a good snag can definitely make your piercing angry.
Your game plan here is simple: go right back to basics. Grab your sterile saline solution and give it a gentle cleaning to flush out any bacteria. It's totally normal to see some extra swelling or feel some tenderness for a day or two afterward. Just be extra gentle with it and stick to the golden rule: LITHA ("Leave It The Heck Alone").
When Can I Start Wearing Headphones or Earbuds?
This is a tough one for all the music lovers and podcast addicts out there. For the first few months, you need to avoid anything that puts direct pressure on your fresh piercing.
- Over-ear headphones: These are generally your safest option, but only if the cup is big enough to fit completely around your ear without touching the piercing itself.
- In-ear earbuds: These can be really tricky. If you have a daith or tragus piercing, earbuds are likely a no-go for a while. For other placements, you might get away with wearing one in the opposite, un-pierced ear.
The most important thing is to listen to your body. If it hurts or feels like it's putting pressure on the jewelry, it's too soon.
Is It Normal for My Piercing to Bleed a Little?
Seeing a tiny bit of blood, especially in the first day or two, is completely normal. At the end of the day, a piercing is a puncture wound. You might also see a little bit of blood after an accidental snag.
If this happens, just gently clean the area with your saline spray and then let it be. However, if you're dealing with continuous or heavy bleeding, that's your cue to contact your piercer or a doctor right away.
Ready to start daydreaming about the perfect jewelry for when your piercing is fully healed? The BodyCandy collection has thousands of high-quality, body-safe options waiting for you. Dive in and explore our full range of cartilage earrings today


