So, you're ready to start your ear stretching journey? Awesome. Getting it right comes down to three simple things: patience, cleanliness, and listening to your body.
Think of it as a marathon, not a sprint. A slow and steady approach is the only way to get those healthy, beautifully stretched lobes you're picturing.
Your Journey into Ear Stretching Starts Here

Ear stretching is a powerful form of self-expression with an incredibly rich history, but doing it right is everything. Before you even think about buying your first taper, let’s get on the same page. This isn't just about making a hole bigger; it's about carefully and respectfully modifying your body.
When you rush, you risk painful complications like tearing, infections, or the dreaded "blowout." Trust me, none of those are on your style goals list. This guide is your new best friend, here to walk you through the entire process from start to finish.
A Tradition Thousands of Years Old
You might think of stretched ears as a modern trend, but you’re actually joining a tradition that’s thousands of years old. Ear stretching is an ancient practice with documented origins dating back at least 5,300 years!
This was proven by the discovery of Ötzi the Iceman, a mummy from 3300 BCE whose remains showed stretched lobes. The practice was culturally significant in ancient Egypt, where artifacts like Tutankhamun's gold mask show lobes stretched to fit huge plugs.
Today’s methods of gradual sizing and proper hygiene are rooted in techniques used across the globe for millennia. You can discover more insights about the history of ear stretching and its cultural impact.
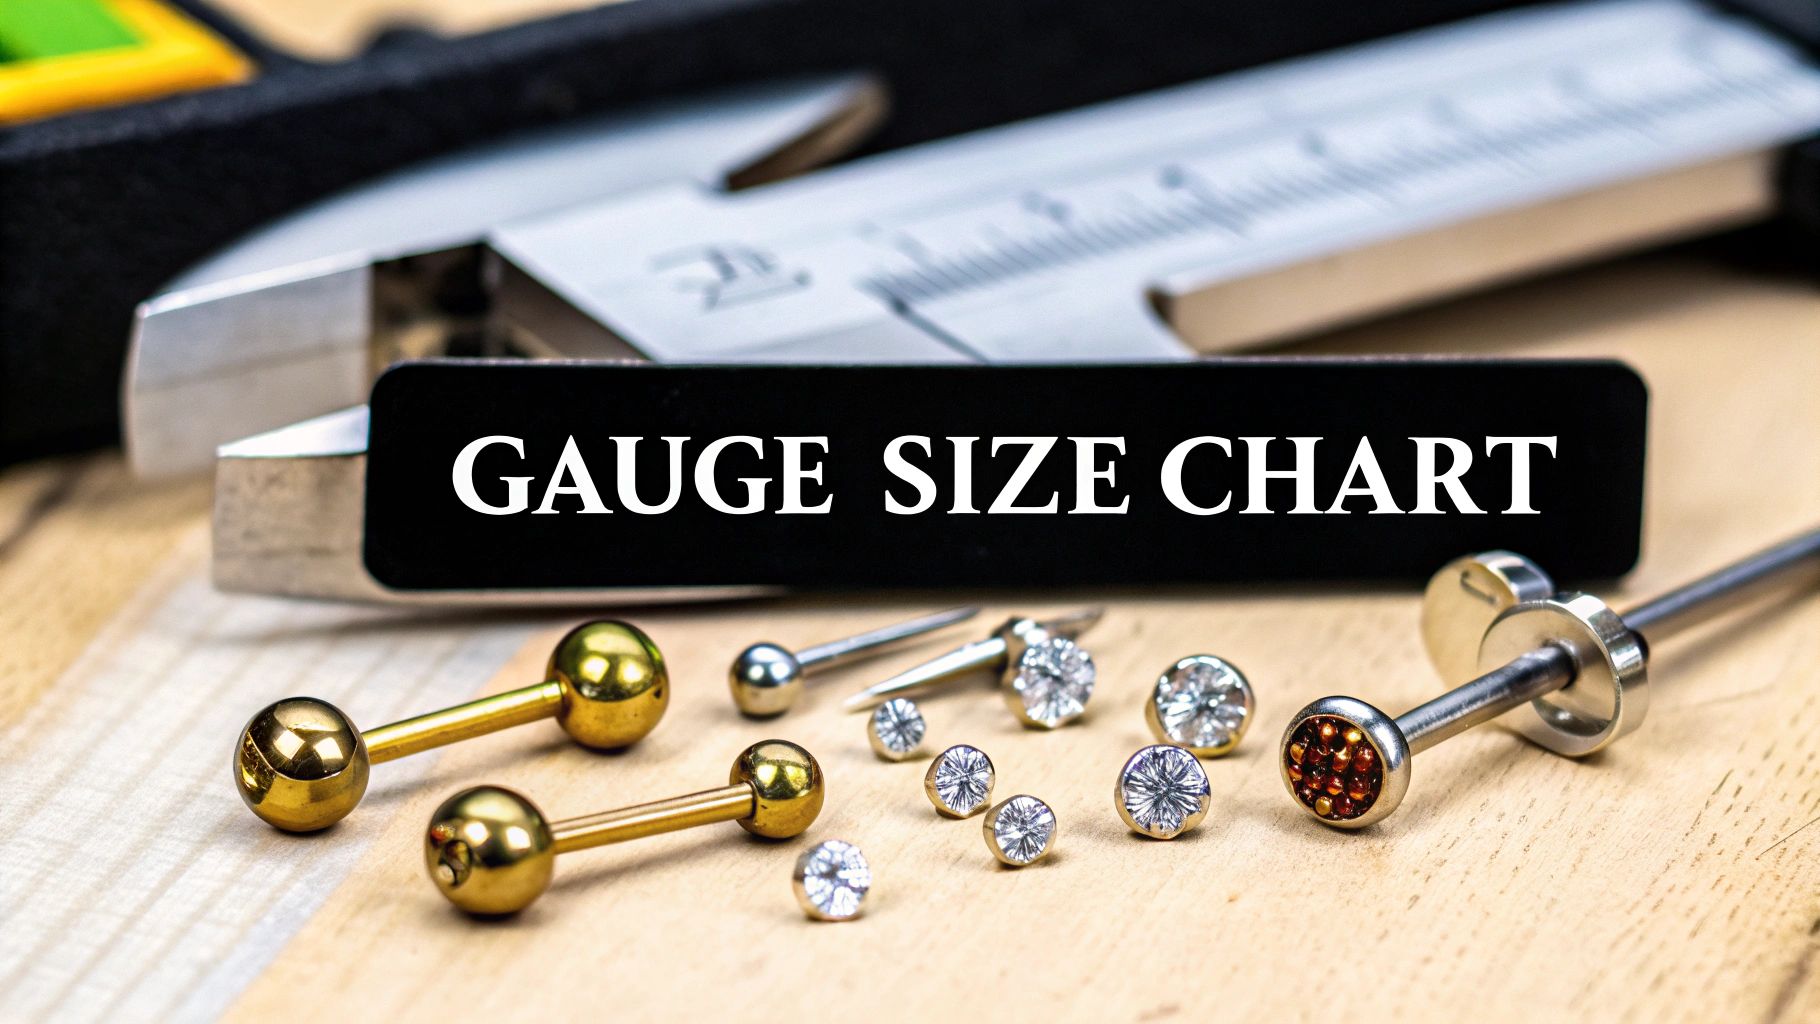
Safe Ear Stretching At a Glance
Here's a quick summary of the core principles for stretching your ears safely before we dive into the details.
| Core Principle | Why It Matters | Quick Tip |
|---|---|---|
| Go Slow | Prevents tears, blowouts, and excessive scar tissue. Healthy lobes are happy lobes. | Wait a minimum of 4-6 weeks between stretches. Longer is always better, especially at larger sizes. |
| Stay Clean | Freshly stretched skin is vulnerable to infection. Cleanliness is non-negotiable. | Use a sterile saline solution twice a day. Avoid harsh chemicals like alcohol or peroxide. |
| Use Quality Materials | Porous materials (like acrylic or wood) can trap bacteria and cause irritation in a new stretch. | Stick with single-flare glass, titanium, or surgical steel plugs for active stretching. |
| Listen To Your Body | Sharp pain is a clear sign that you're pushing your lobes too far, too fast. | If it hurts, stop. Your ears will tell you when they’re ready. Don't force it. |
Getting these basics down is the foundation of a successful and healthy stretching journey. Now, let's get into the details of how to do it right.
Gathering Your Essential Stretching Tools
Alright, before you even think about starting your stretch, let's talk about gear. Going into this unprepared is like trying to bake a cake without flour—it's just not going to work out well. Getting your toolkit in order is non-negotiable, because having the right tools makes the entire process safer, smoother, and way more comfortable.
Think of this as your official shopping list for a successful stretch. Having everything clean, organized, and ready to go will make you feel confident and in control. Let's build your kit.
Tapers The Right Way
First up: tapers. These are the long, cone-shaped tools you’ll use to gently guide the next size of jewelry into your piercing. But not all tapers are created equal, not by a long shot. You’ll want single-flare tapers made from high-quality materials.
Your best friends here are surgical steel or titanium. These materials are non-porous and super smooth, which means they won't harbor bacteria or irritate your sensitive, healing skin during the stretch.
Crucial Tip: Absolutely avoid acrylic tapers for active stretching. Acrylic is porous and can leach chemicals into the vulnerable, freshly stretched skin, which is a fast track to irritation and infection. Save the acrylic jewelry for fully healed lobes only!
And remember, tapers are just a tool for insertion—they are not meant to be worn as long-term jewelry. Wearing them for more than a few hours can cause uneven healing and put some weird, damaging pressure on your lobes. Get the plug in, and then put the taper away until your next size-up.
Plugs and Tunnels Your Everyday Wear
Once the taper has done its job, you’ll immediately follow it through with your actual jewelry. For a fresh stretch, you absolutely must use single-flare plugs or tunnels. A "single flare" just means one end has a slightly larger lip to keep it from falling out the front, while the back is straight and secured with a small, removable O-ring.
This design is essential. Double-flared plugs require you to stretch your ear over the flared edge just to get them in—something your lobes are definitely not ready for right after sizing up.
Just like with tapers, material is king. Your best options for new stretches are:
- Glass: It's hypoallergenic, incredibly smooth, and a breeze to clean. Plus, glass plugs come in awesome colors.
- Titanium: This is an implant-grade material, making it perfect for anyone with sensitive skin and ideal for a worry-free healing process.
- Surgical Steel: A reliable and affordable choice that’s non-porous and safe for most people.
Lubricant Your Secret Weapon
And now for the most underrated but absolutely essential item in your kit: lubricant. Seriously, never, ever attempt a dry stretch. Trying to force a taper through a dry piercing is painful and can easily lead to micro-tears, friction burns, and a whole lot of regret.
A good lubricant makes the entire process glide. You don't need to go overboard, just a little dab to coat the taper and your earlobe is all it takes.
Here are some excellent choices for lube:
- Jojoba Oil: This is a fan favorite because its composition is very similar to your skin's natural oils (sebum). It’s moisturizing and super gentle.
- Vitamin E Oil: Another fantastic natural option that's great for promoting skin health and elasticity.
- Dedicated Stretching Balms: Many companies make special balms or butters specifically for stretching, often combining nourishing ingredients like shea butter.
Putting together the perfect setup can feel like a lot, but many piercers and online stores offer complete packages. For a deeper look into what comes in these packages, check out our complete guide on using ear stretching kits. Getting a kit ensures all your materials and sizes are compatible, taking the guesswork out of the process for you.
The Stretching Process Done Right
So, you've done the hard part. Your lobes are totally healed from the initial piercing, you’ve got your new tools cleaned up and ready, and you're officially set to size up. This is the exciting part!
Let's walk through exactly how to do this right, making sure the whole process is smooth, safe, and most importantly, pain-free. Think of it like stretching before a run—you wouldn't just take off sprinting, and the same idea applies here. Your skin needs to be relaxed and pliable to welcome the new size without putting up a fight.
Prepping Your Lobes for Success
First thing's first: warm up your earlobes. A hot shower is perfect for this. The steam and warm water naturally get the blood flowing and soften the skin, making it way more elastic and ready for what's next.
No time for a shower? No problem. A warm compress will do the trick. Just soak a clean washcloth in warm water (not scalding hot!), wring it out, and press it against your lobe for about five to ten minutes. This simple step honestly makes a world of difference in how easily the taper slides through.
Once your lobes are feeling warm and relaxed, it's time for our secret weapon: lubricant. Grab your jojoba oil, vitamin E oil, or a dedicated stretching balm and apply a small, pea-sized amount directly to your earlobe. Don’t skimp here—coat the entire taper too. You want it slick for a super smooth entry.
This visual shows the essential flow of the tools you'll be using for a safe and effective stretch.
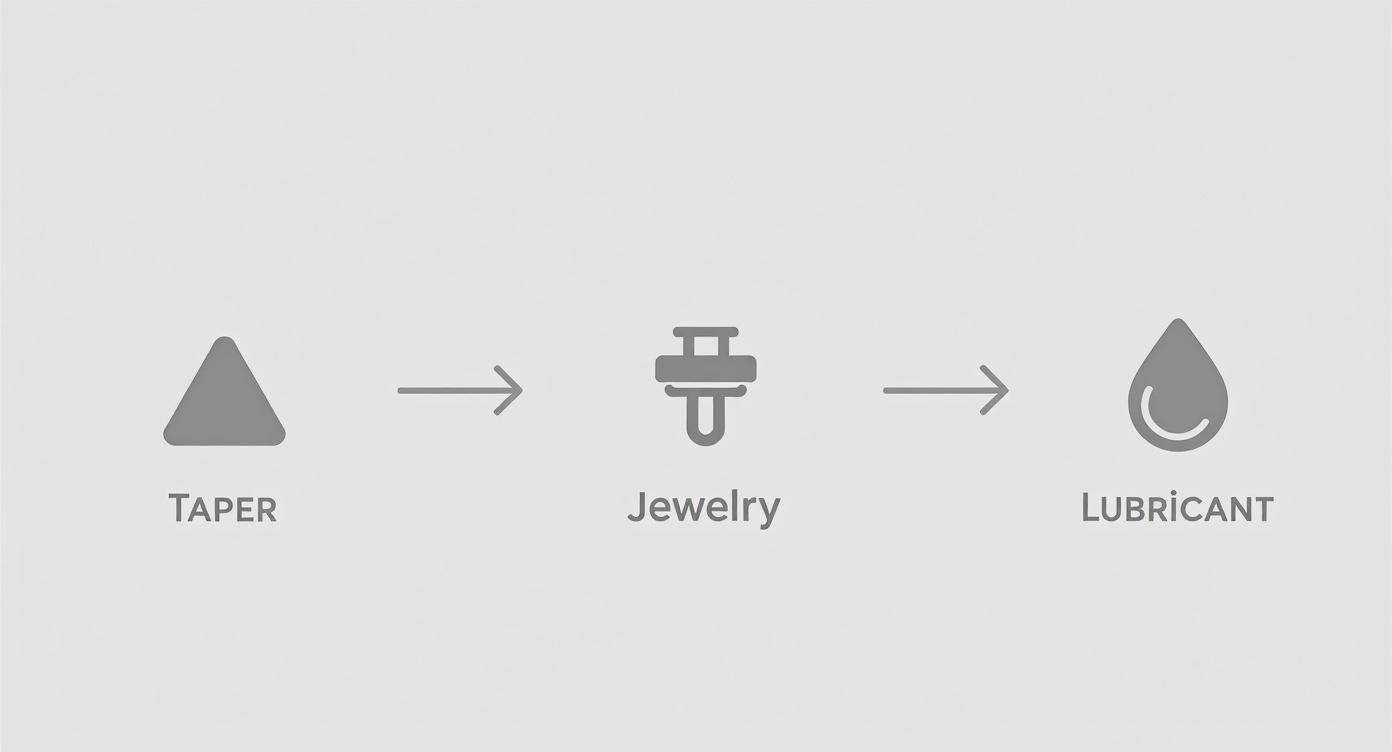
You can see how each tool has a specific role, starting with the taper for the initial stretch, followed immediately by your jewelry—all made possible by a good lubricant.
The Art of the Gentle Stretch
Now for the main event. With your lobe and taper lubed up, it's time to go. Take the narrow end of the taper and gently start guiding it into your piercing from the front. The key here is to be slow, steady, and in control.
You might feel a little bit of pressure or a slight tingling sensation as it goes through, and that's totally normal. What you should never feel is sharp, stinging, or intense pain. Listen to your body—it's the best guide you have. It will tell you right away if you're pushing too hard or too fast.
The Golden Rule of Ear Stretching: If it hurts, stop immediately! Pain is your body's alarm system, screaming, "I'm not ready for this!" Forcing it will only cause tearing, blowouts, and a major setback on your journey.
Keep guiding the taper through until its widest part is sitting flush with your piercing. Don't leave it in for too long; the taper is just a tool to get you to the next step.
Securing Your New Bling
The final part of the puzzle is a smooth handoff from the taper to your jewelry. Line up your single-flare plug against the wide, back end of the taper. In one continuous, gentle motion, push the plug right through your lobe. This will push the taper out the front seamlessly.
It should feel like a smooth exchange. Once your new plug is sitting comfortably, the only thing left is to secure it. Carefully slide the small O-ring onto the back of the plug. You want it snug enough to hold the jewelry in place, but not so tight that it’s pinching your skin or cutting off blood flow.
And you're done! You've successfully sized up. Take a second to admire your work. From here, the focus shifts to aftercare, which is just as crucial as the stretch itself. But for now, just keep your new stretch clean, and be proud of a job well done.
Mastering Aftercare for Healthy Lobes
You did it—you sized up! Go ahead, take a minute to admire your work. But don't get too comfortable, because the real effort begins now. The stretch itself is just one moment; your aftercare is what makes or breaks a healthy, successful journey.
Think of your freshly stretched lobes like any new piercing. They’re tender, they're healing, and they need some serious TLC. A solid aftercare routine is what separates happy, elastic lobes from ones that are painful and problematic down the road.
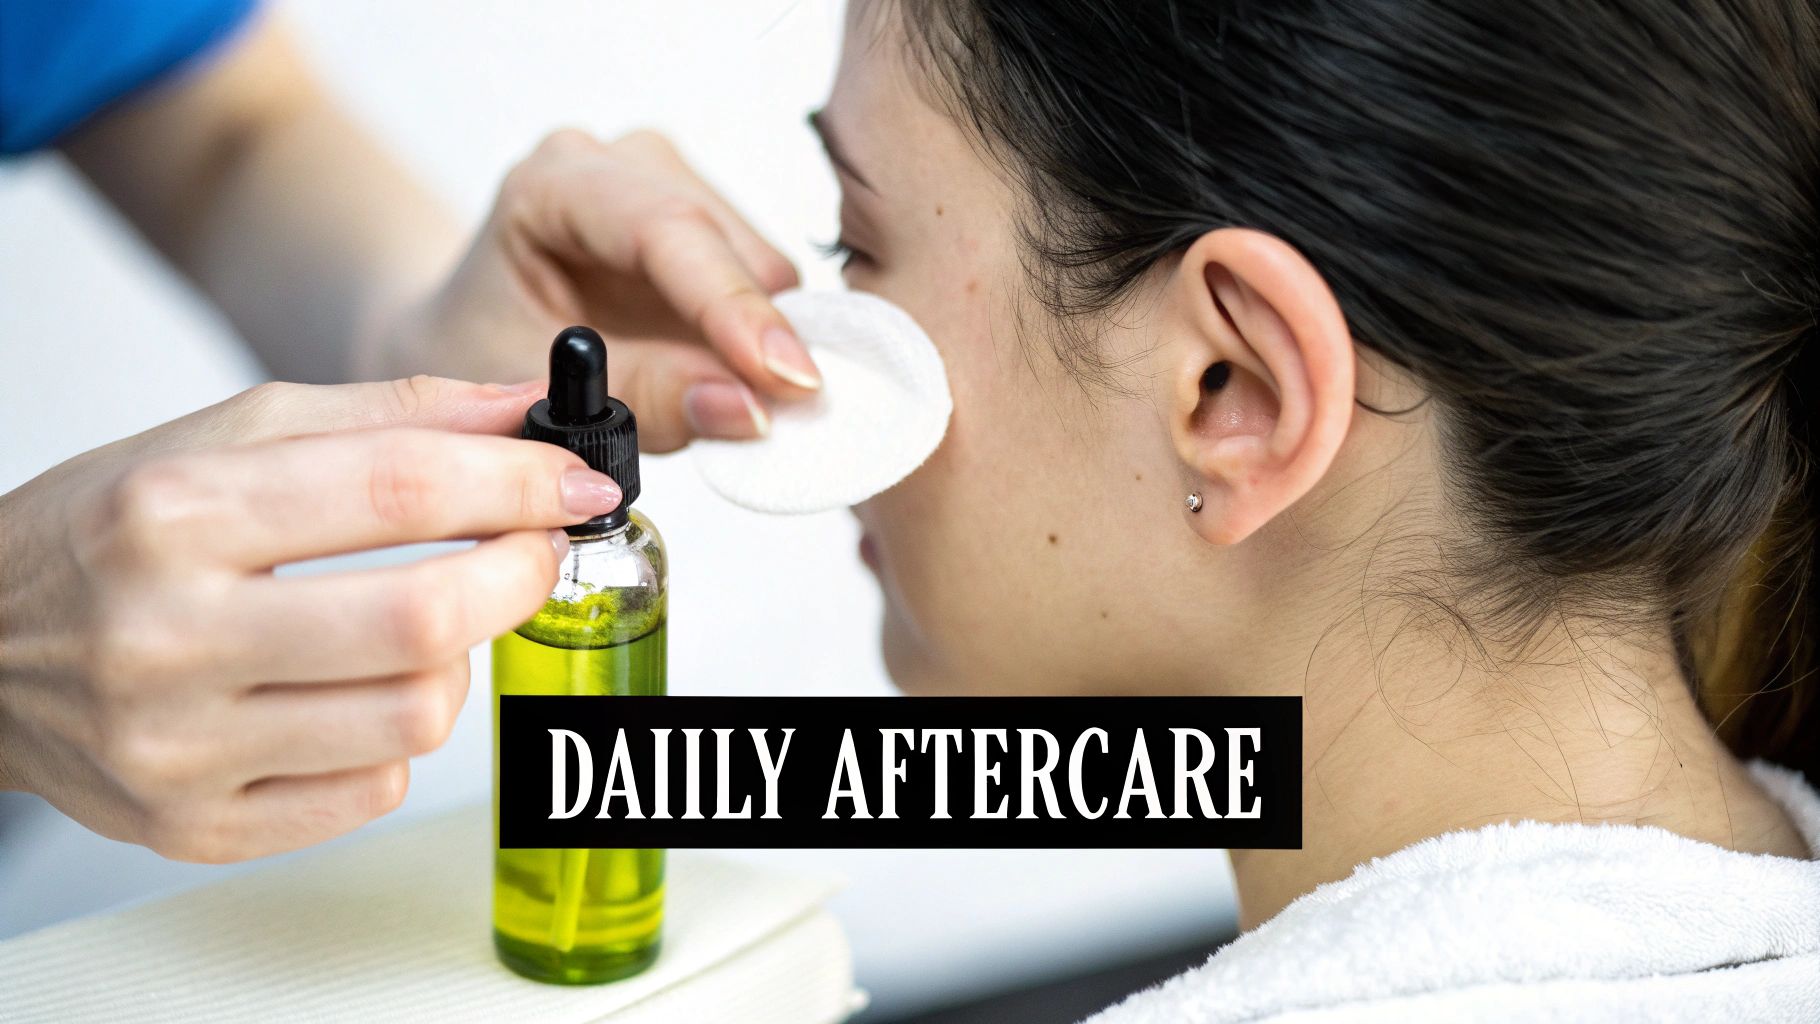
The Daily Cleaning Ritual
For the first week or two after any stretch, your main job is to keep your lobes clean. Your skin is busy adjusting and is more vulnerable to bacteria, so a gentle but consistent cleaning routine is an absolute must.
You’ve got a couple of great options here. You can do sterile saline soaks twice a day, which is a super gentle way to flush out any gunk or irritants. The other route is using a mild, unscented antibacterial soap in the shower. Just gently lather around the piercing and rinse it completely. The goal is to be clean, not harsh.
Pro Tip: Whatever you do, avoid rotating or removing your jewelry for the first few days. Just let your lobes settle into their new size. Fidgeting with them will only cause irritation and slow things down.
And a huge word of warning: stay away from harsh chemicals like alcohol or hydrogen peroxide. They are way too aggressive for healing skin and will only cause dryness and irritation, doing far more harm than good.
The Magic of Lobe Massages
Once that initial tenderness and swelling have completely vanished (usually after about a week), it's time to bring in the secret weapon for healthy lobes: daily massages. I can't stress this enough—this step is absolutely crucial for long-term lobe health and making future stretches easier.
Grab a high-quality, skin-friendly oil like jojoba or vitamin E oil. Put a few drops on your fingertips and gently massage each lobe for about five minutes a day. It’s best to do this with your jewelry out so you can really get to the entire surface of your skin.
This simple ritual does three amazing things for your ears:
- Boosts Blood Flow: Massaging gets the circulation going, bringing vital nutrients and oxygen to the tissue to speed up healing.
- Breaks Down Scar Tissue: Gentle massage helps prevent tough scar tissue from building up, keeping your lobes soft and pliable.
- Increases Elasticity: Think of it like a deep conditioning treatment for your skin. Well-moisturized skin is stretchy skin, and this preps your lobes for the next size up.
Knowing When You're Ready to Size Up
Patience is a virtue in stretching, and it's something people have understood for centuries. From ancient Egypt to the Aztecs, people used materials like bone and stone, but the core principle was always the same: gradual stretching and proper care. They knew how to work with the body's natural ability to heal.
So, how do you know when your ears are fully healed and ready for the next adventure? Your body will give you some pretty clear signals if you're paying attention.
Your lobes should feel completely normal again. That means zero pain, tenderness, swelling, or redness. The piercing channel itself should feel loose and relaxed around your current jewelry. If you can gently tug on your plug and it moves freely without any pinching or discomfort, that’s a fantastic sign.
Honestly, the best advice I can give is to wait until you can easily pop your jewelry out and put it back in without any resistance or even needing lubricant. Don't rush it. Seriously. Giving your lobes plenty of time to heal, rebuild collagen, and get their elasticity back is the single most important part of stretching your ears safely.
Your Ear Stretching Timeline: How Long to Wait Between Sizes
This table outlines the minimum recommended waiting times between stretches. Remember, these are just guidelines—if your body tells you it needs more time, listen to it!
| Current Gauge Size (AWG/Inches) | Next Size Up (AWG/Inches) | Minimum Wait Time |
|---|---|---|
| 16g (1.2mm) to 14g (1.6mm) | 14g (1.6mm) | 4-6 Weeks |
| 14g (1.6mm) to 12g (2mm) | 12g (2mm) | 4-6 Weeks |
| 12g (2mm) to 10g (2.4mm) | 10g (2.4mm) | 1-2 Months |
| 10g (2.4mm) to 8g (3.2mm) | 8g (3.2mm) | 1-2 Months |
| 8g (3.2mm) to 6g (4mm) | 6g (4mm) | 2-3 Months |
| 6g (4mm) to 4g (5mm) | 4g (5mm) | 2-3 Months |
| 4g (5mm) to 2g (6mm) | 2g (6mm) | 3-4 Months |
| 2g (6mm) to 0g (8mm) | 0g (8mm) | 3-4 Months |
| 0g (8mm) to 00g (10mm) | 00g (10mm) | 4+ Months |
| Above 00g (10mm) | Next 1mm-2mm increment | 4-6 Months or more |
As you can see, the larger you go, the longer you need to wait. This gives your skin the necessary time to heal properly and build up new, healthy tissue before the next stretch. Rushing this process is the number one cause of problems.
Common Stretching Mistakes to Avoid

Everyone makes mistakes, but some slip-ups in ear stretching can cause serious, long-term damage. Knowing what not to do is just as important as knowing the right steps.
Let's walk through the most common pitfalls so you can steer clear of them. Think of this as your friendly guide to sidestepping the stretching drama, ensuring your journey is all about awesome style, not painful setbacks.
Rushing the Process
The number one mistake, hands down, is stretching too fast. Impatience is your absolute worst enemy here. Your earlobes need time—we're talking weeks, often months—to heal, generate new tissue, and regain elasticity before you can even think about the next size.
When you rush, you're not actually stretching the skin; you're tearing it. This leads directly to the most common stretching problems: painful blowouts, infections, and tough scar tissue that can make future stretching impossible.
What Not to Do: Don't get excited and try to size up every two weeks.
What to Do Instead: Stick to the recommended healing times religiously. For smaller gauges, wait at least 4-6 weeks. For larger sizes, you should be waiting three months or more between stretches.
Skipping Sizes
Right up there with stretching too fast is skipping sizes. You might be tempted to jump from a 10g to a 6g to speed things up, but this is a recipe for disaster. Those in-between sizes (like 8g) exist for a very important reason.
Each jump in size should be a small, manageable increase. A standard jump is about 1mm, but skipping a size can mean forcing your ear to accommodate a 2mm or even 3mm difference at once. Your skin just can't handle that level of trauma without tearing.
- Don't Do This: Buy a kit and throw out the "in-between" sizes. Every single size is a crucial step.
- Do This Instead: Follow the gauge sequence precisely. Go from 10g to 8g, then 8g to 6g, and so on. Never skip a step.
Using the Wrong Materials
What you put in your fresh stretch matters immensely. Using porous or reactive materials in a healing lobe is like inviting bacteria to a party. The two biggest culprits are acrylic and silicone. While they're fine for fully healed ears, they are a huge no-no for a new stretch.
Acrylic can degrade and leach chemicals into your vulnerable skin, and silicone's grippy texture can trap bacteria and fuse to the healing fistula. Wood is also porous and should be saved for when you are completely healed.
Stick to the good stuff:
- Single-flare glass plugs
- Implant-grade titanium plugs
- High-quality surgical steel plugs
These materials are non-porous, slick, and body-safe, giving your ears the best possible environment to heal in.
Wearing Tapers as Jewelry
This is a classic rookie mistake. Tapers are a tool, not jewelry. They are designed for one purpose only: to guide your new plug through your ear during the stretching process. That's it.
Wearing them for hours or days puts uneven weight and pressure on your lobe, which can lead to thinning at the bottom of the piercing, crooked holes, and healing complications. Once the plug is in, the taper's job is done. Put it away until your next size-up.
This practice has become more mainstream as ear stretching has grown into a widespread fashion statement, especially in the US, UK, and Australia. With so many newcomers, it’s vital to share proper techniques. Despite its ancient roots, modern stretching is supported by online communities and professional piercers who can offer guidance. If you're interested, you can discover more insights about the history of stretching on plugyourholes.com.
Not Using Enough Lubricant
Finally, never, ever attempt a dry stretch. It’s painful and damaging. Without a good lubricant, you're creating friction that can cause micro-tears and irritation. A quality, skin-safe lube makes the taper glide through smoothly and without resistance.
Always use a generous amount on both your lobe and the taper itself. Your ears will thank you for it.
Your Ear Stretching Questions Answered
So, you’ve got the basics down: the steps, the aftercare, and the big mistakes to avoid. But maybe there are still a few nagging questions buzzing around in your head. That's totally normal!
Getting into ear stretching is a big commitment, and it's smart to arm yourself with all the info you can get. Let's tackle some of the most common questions people ask when they're starting out. Think of this as your final pep talk to make you feel totally confident in your journey.
What Is a Blowout and How Can I Fix It?
Let's start with the big one: the dreaded blowout. A blowout is when the inside of your piercing (the fistula) gets forced out the back of your lobe, creating a weird, fleshy, and super irritated-looking lip. It's not a good look, and it feels even worse.
This almost always happens for one of two reasons: stretching way too fast or skipping a size. It's your body's way of screaming that it wasn't ready for that much pressure.
If you spot one, don't panic, but you need to act fast. Here’s how to handle it:
- Immediately downsize. Take out your current jewelry and put in a plug that's at least one or two sizes smaller. If it's really bad, you might need to take your jewelry out completely for a while and let things calm down.
- Give it some TLC. Once the pressure is off, your job is to baby your lobe back to health. Daily sea salt soaks are your absolute best friend here. They'll keep the area clean and help reduce that angry inflammation.
- Massage it out. After the initial irritation has subsided for a few days, start gentle daily massages with vitamin E or jojoba oil. This helps break down the scar tissue and encourages that pushed-out skin to retract.
Patience is everything when you're fixing a blowout. It can take weeks, or even a few months, for it to fully heal. Whatever you do, don't even think about trying to stretch up again until it's 100% gone.
Will My Ears Ever Shrink Back to Normal?
Ah, the "point of no return." This is a huge question, and the honest answer is... it depends. Whether your lobes will shrink back down to a standard earring size is different for everyone. It really comes down to a few key factors: how large you stretched, how long you stayed at that size, and your skin's natural elasticity.
Generally, many people find their ears can shrink back pretty significantly if they stop somewhere around 2g (6mm) to 0g (8mm). This range is often talked about as the point of no return, but it’s more of a general guideline than a hard-and-fast rule. Some people can shrink back from larger sizes, while others might find that even smaller sizes become permanent faster.
If you stretch much larger than that, say, past a half-inch, it’s very likely you'll have permanently enlarged holes. Closing them up completely at that point would probably require a minor cosmetic procedure from a professional. The best advice is to stretch slowly and never go to a size you aren't prepared to potentially keep for the long haul.
Why Do My Stretched Ears Smell?
If you've noticed a funky smell coming from your lobes, congratulations—you've met the infamous "ear cheese." Don't worry, it’s completely normal and happens to almost everyone with stretched ears at some point.
That distinct odor is just a buildup of dead skin cells, your skin's natural oils (sebum), and harmless bacteria. They all get trapped between your lobe and your jewelry, and voilà, you get a smell.
The fix is simple: good hygiene. Once your stretch is fully healed and no longer tender, you should be taking your jewelry out every day to clean everything up.
Here’s your game plan for fresh-smelling lobes:
- Take 'em out daily. Give your lobes a chance to breathe.
- Wash everything. Gently wash both your earlobes and your jewelry with a mild, unscented soap and warm water.
- Dry completely. Make sure both your lobes and the jewelry are totally dry before putting them back in.
The material of your plugs also makes a huge difference. Non-porous materials like glass, surgical steel, and titanium are super easy to clean and far less likely to cause odor. Porous materials like wood or silicone can absorb those oils and are better worn in well-established, super-healthy lobes. Regular cleaning is truly the secret to keeping things from getting funky.
Ready to start your stretching journey with the best gear? At Body Candy, we've got everything you need, from high-quality surgical steel taper and plug kits to soothing jojoba oil for a perfect, healthy stretch.
Shop our complete collection of ear stretching kits and aftercare today!