So, you did it—welcome to the club! Taking care of your new hood piercing is honestly way simpler than you might think. It really just boils down to a consistent cleaning routine and making a few small, temporary tweaks to your daily life.
The whole point is to keep the area clean, dry, and happy. If you can do that, you're looking at a smooth healing process, which usually takes about 4 to 8 weeks.
Your First Few Weeks of Hood Piercing Aftercare
Getting a new hood piercing is a huge confidence booster, but these first few weeks are absolutely critical for a happy, healthy piercing. Think of this as your personal cheat sheet for a flawless start, cutting through all the online noise to give you the real must-dos from the moment you leave the studio.
This isn’t about adding a bunch of overwhelming chores to your day. We’re talking about a simple, effective routine that actually fits into your life. Nailing this initial period sets the foundation for a piercing that will last a lifetime, helping you feel confident and totally in control of your healing journey.
A well-healed piercing starts with a solid foundation. Let's walk through what a typical healing journey looks like so you know exactly what to expect and when.
Hood Piercing Healing Timeline At a Glance
Every body is different, but this table gives you a general idea of what's happening behind the scenes as your piercing heals.
| Healing Stage (Weeks) | What to Expect | Primary Aftercare Goal |
|---|---|---|
| Weeks 1-2 | Swelling, redness, tenderness, and some clear/whitish fluid (lymph). This is totally normal! | Keep It Clean & Calm. Focus on gentle saline soaks and avoiding any friction or pressure on the area. |
| Weeks 3-4 | Swelling and redness should be going down. You might still see some "crusties" forming around the jewelry. | Maintain Consistency. Continue your cleaning routine, but you can likely reduce the frequency as irritation subsides. |
| Weeks 5-8 | The piercing should look and feel pretty normal. Tenderness is gone, and discharge has stopped. | Assess & Prepare. The piercing looks healed, but the internal tissue is still strengthening. Time to think about your first jewelry change (with your piercer!). |
Remember, this is just a guideline. The most important thing is to listen to your body and stick with your aftercare for the full recommended time, even if it feels better sooner.
What to Expect Right Away
For the first few days, it's normal for your new piercing to feel a bit tender, look slightly red, or have some minor swelling. That’s just your body’s natural reaction to something new! You might also spot a clear or whitish fluid, which is called lymph. This is a good sign and part of the healing process—don't panic.
The key is knowing the difference between normal healing signs and red flags. A little sensitivity is fine; significant pain, intense heat, or green/yellow discharge is not. Trust your gut.
The vertical clitoral hood (VCH) piercing is a popular choice for a reason, but it still demands meticulous aftercare to heal properly. While the typical timeline is 4 to 8 weeks, this can change based on your unique anatomy and even tissue thickness. Piercers everywhere agree that diligent aftercare is the secret to avoiding annoying complications. You can check out more piercing statistics and trends to see just how common and well-loved this piercing has become.
Setting Up for Success
Do yourself a favor and get your aftercare supplies ready before you even head to the studio. This isn't about buying a ton of fancy products; it's about having a few simple, crucial tools on hand.
- Sterile Saline Solution: This is your best friend. A pre-made sterile saline spray from the pharmacy is perfect—it's convenient, properly mixed, and guaranteed to be free of contaminants.
- Clean Paper Towels: You’ll need these for gently patting the area dry after cleaning. Ditch the cloth towels for now, as they can harbor bacteria and snag on your new jewelry. Ouch.
- Loose, Breathable Underwear: Let your piercing breathe! Cotton is the way to go during healing. It allows for better airflow and cuts down on irritation from friction.
This initial phase is all about creating a clean, low-stress environment so your body can work its healing magic. Stick with these simple guidelines, and you're paving the way for a beautifully healed piercing you'll love for years.
Mastering Your Daily Cleaning Routine
Alright, let's get down to the nitty-gritty of keeping your new piercing happy and healthy. Consistency is your absolute best friend during the healing process. This isn't about some complicated, time-consuming ritual—it's about creating a simple, stress-free habit that will make all the difference in the long run.
Think of it as a little moment of self-care. You’re giving your body the best possible environment to heal, and that’s a pretty awesome thing to do for yourself.
The Saline Solution Secret Weapon
When it comes to what you should use for cleaning, there's one clear winner: sterile saline solution. Forget trying to mix your own salt water at home; it's nearly impossible to get the salt-to-water ratio just right, and using tap water can introduce all sorts of unwanted bacteria.
A pre-packaged sterile saline spray is a total game-changer. It's perfectly balanced, sterile, and incredibly easy to use. No mess, no guesswork. Just a quick, gentle spritz is all you need to flush the area and keep it clean.
Pro Tip: Look for a saline spray that only contains water and sodium chloride. Avoid anything with extra additives, preservatives, or antiseptics. These can be way too harsh for such a delicate area and might actually slow down your healing.
This timeline breaks down the key milestones in your initial aftercare, from that first day to the point where your piercing is well on its way.
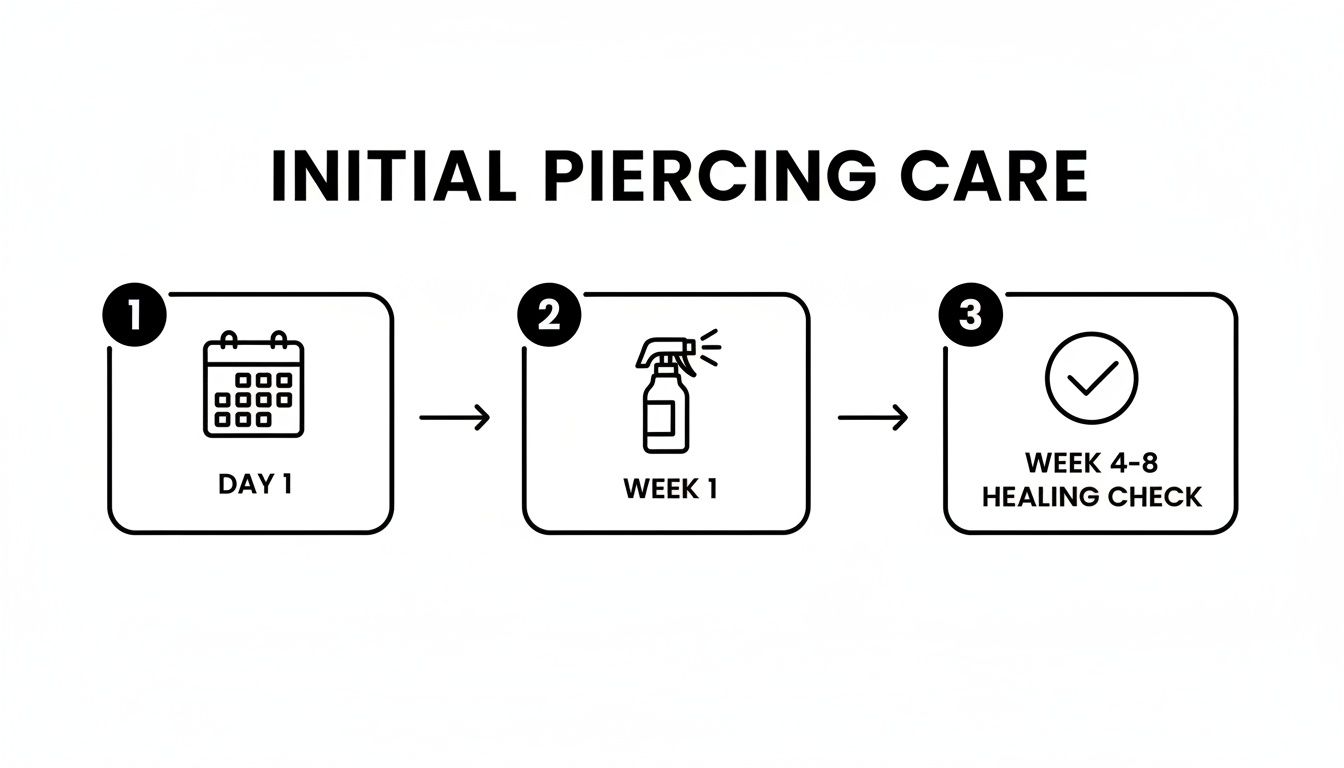
As you can see, consistent, gentle care in that first week is crucial for setting the stage for the longer-term healing that happens between weeks four and eight.
Your Step-By-Step Cleaning Guide
Ready to make this part of your routine? It’s super simple. You’ll want to do this twice a day—once in the morning and once at night is usually perfect.
- Wash Your Hands Thoroughly. Before you touch anything near your piercing, scrub your hands with soap and water for at least 20 seconds. This is a non-negotiable first step.
- Gently Spray the Area. Hold your sterile saline spray a few inches away and give the piercing a good, gentle misting. Make sure you get both the top and bottom entry points. Let the solution sit for about a minute to soften any "crusties" (that dried lymph fluid we mentioned).
- Rinse if Necessary. A quick rinse with clean, running water in the shower is great for washing away any loosened debris and leftover saline. Just let the water run over the area indirectly—no need for high pressure.
- Dry with Care. This is a critical step! Instead of a cloth towel that can harbor bacteria and snag your jewelry, gently pat the area completely dry with a fresh, disposable paper towel. Lingering moisture is not your friend.
That’s really it! The whole process takes maybe two minutes out of your day. If you want to dive deeper into why piercers are so specific about aftercare, you can explore more about why so many recommend products like H2Ocean piercing aftercare and other similar sterile saline options.
What to Strictly Avoid in Your Routine
Just as important as what you should do is what you absolutely shouldn't. Steer clear of these common mistakes to keep your piercing on the right track.
- Harsh Chemicals: Do not use alcohol, hydrogen peroxide, antibacterial soaps (like Dial), or any ointments. These are far too aggressive for a healing piercing and can kill off the good cells your body needs to rebuild tissue.
- Over-Cleaning: It might seem like more is better, but it's not. Cleaning more than twice a day can strip the area of its natural moisture, leading to dryness, irritation, and a very unhappy piercing.
- Twisting or Turning Your Jewelry: This is an old myth that needs to go! Moving the jewelry around only re-opens the healing wound, introduces bacteria from your hands, and can cause some serious irritation. Just let it be.
Your body is amazing and knows exactly how to heal itself. Your job is simply to provide a clean, safe environment for it to do its thing. Sticking to this simple routine is the best way to ensure you end up with a beautifully healed hood piercing that you'll love for years to come.
Juggling Daily Life While Your Piercing Heals
So, you’ve got the cleaning routine down pat—awesome! But a happy hood piercing needs more than just a saline spritz. It’s all about making a few small, temporary tweaks to your everyday life to give your body the best possible chance to heal up perfectly.
Think of it this way: your body is working overtime to build brand-new, healthy tissue around your jewelry. Your job is to be the world's best bodyguard for that process, clearing away any potential roadblocks so everything can proceed smoothly and quickly. Let's get into the simple adjustments that make a massive difference.
Dress for Healing Success
What you wear really, really matters, especially in those first few weeks. The mission is simple: minimize friction and maximize airflow. This is not the moment for your favorite tight lace panties, synthetic fabrics, or anything that’s going to constantly rub against your new piercing.
For now, breathable, loose-fitting clothing is your new uniform.
- Cotton is Your Best Friend: Stick with soft, 100% cotton underwear. It’s gentle, it breathes, and it helps keep the area dry—all things a healing piercing loves.
- Loose Over Tight: Prioritize flowy pants, skirts, or dresses over skinny jeans or leggings. Constant pressure and friction are the number one cause of irritation bumps and can seriously drag out your healing time.
- Go Commando at Night: If you’re comfortable with it, sleeping without underwear is a great way to give your piercing a break and let it breathe overnight.
These little changes take the physical stress off the area, letting your body pour all its energy into healing from the inside out.
Daily Hygiene: How to Help, Not Harm
Your normal shower routine needs a slight detour for a bit. You absolutely want to keep the area clean, but you also have to shield it from harsh products that can cause a world of irritation.
The golden rule here is to be gentle. When you shower, just let clean, warm water run over the piercing. Don't aim the showerhead directly at it. This is usually all it takes to rinse away any softened “crusties” without you needing to poke or prod the jewelry.
Key takeaway: The only things that should ever clean your piercing are sterile saline or clean water. Keep your body washes, shower gels, and especially scented soaps far, far away from the piercing itself. The chemicals and fragrances in those products are way too harsh for a fresh wound.
After your shower, drying is non-negotiable. Grab a clean, disposable paper towel and gently pat the entire area completely dry. A damp environment is a playground for bacteria, so don’t ever skip this step!
Activities to Put on the Back Burner
We get it, you have a life. But for a few weeks, you'll need to bench a couple of activities to protect your piercing from bacteria and unnecessary trauma. The main thing to avoid is any body of water that could be teeming with microscopic critters.
This means you’ll have to temporarily say no to:
- Swimming: Lakes, oceans, swimming pools, and especially hot tubs are a hard pass. They are basically giant petri dishes for bacteria that can cause a nasty infection.
- Baths: Soaking in a tub, even your own, can introduce bacteria into the fresh piercing. It's best to stick with showers for now.
- Certain Exercises: Any activity that causes a lot of friction or direct impact to the area—think cycling or horseback riding—should be avoided until the initial tenderness is long gone.
A Quick Word on Intimacy and Sexual Activity
This is the big question, and it's a completely normal one to have! A hood piercing is often chosen to enhance sensation, but you have to give it time to heal before you put it through its paces. Jumping back into sexual activity too soon is one of the fastest ways to traumatize the piercing, introduce bacteria, and set your healing back to square one.
Ideally, you need to wait the full 4-8 weeks for the piercing to be fully healed. If you and a partner decide to be intimate before then (and only after the initial swelling and soreness have completely subsided), you must be smart about it.
- Barriers Are a Must: Always use a barrier like a condom or dental dam. This is critical for protecting the piercing from foreign bacteria and bodily fluids.
- Lube Is Your Friend: A good water-based, glycerin-free lubricant will help reduce friction and prevent any painful snagging on the jewelry.
- Clean Up Immediately After: As soon as you’re done, clean your piercing with your sterile saline spray. This is a vital step to wash away any bacteria before it can settle in and cause problems.
Above all, listen to your body. If anything hurts or even feels slightly "off," stop immediately. Being patient for a few weeks now means you'll have a happy, healthy, and amazing piercing to enjoy for years and years to come.
Choosing Jewelry That Your Piercing Will Love
Okay, let's get to the fun part—the bling! But when it comes to a brand-new hood piercing, the jewelry you choose is so much more than a style statement. Think of it as a critical piece of your hood piercing aftercare strategy. Making the right choice from day one is your ticket to a smooth, happy healing journey.
Your initial jewelry isn’t your forever piece; its main job is to be a comfortable, non-reactive placeholder while your body does its healing magic. This is not the time for mystery metals or cute, dangly bits. It’s all about creating the perfect, calm environment for your piercing to thrive.
The Gold Standard of Piercing Materials
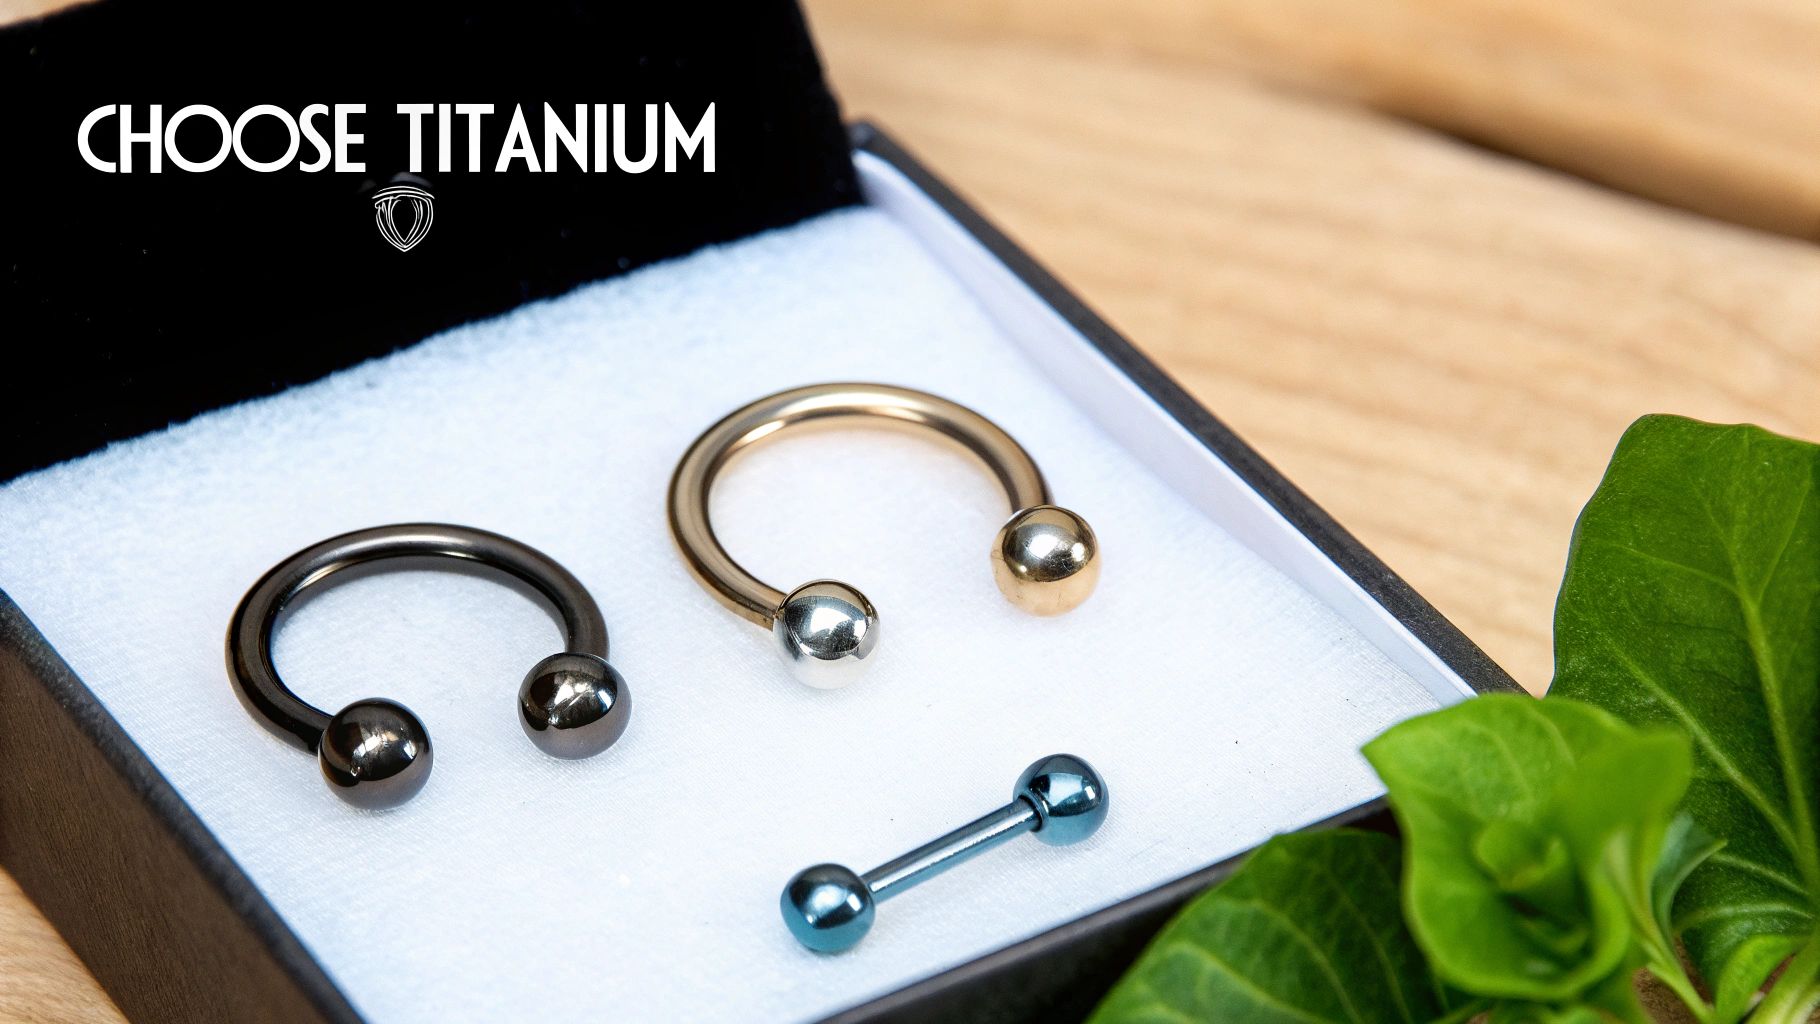
Your piercer will start you off with jewelry made from a body-safe, implant-grade material, and for a very good reason. A fresh piercing is an open wound, and it’s incredibly sensitive to whatever you put inside it. The absolute best-in-class choice is implant-grade titanium (ASTM F-136).
So, why is titanium the undisputed champ?
- It's Nickel-Free: Nickel is public enemy number one for fresh piercings, causing a huge percentage of allergic reactions and irritation. Titanium is completely free of it, making it the safest bet for just about everyone.
- It’s Super Lightweight: This material is surprisingly light, which means less weight and pulling on that tender, new piercing.
- It's Biocompatible: This is just a fancy way of saying your body doesn't see it as a foreign invader, which dramatically lowers the chance of a bad reaction.
While you might see surgical steel options out there, many varieties still contain trace amounts of nickel. It’s best to save those for much later, once your piercing is fully healed and far less picky. If you want to dive deeper into which metals are your friends, check out our guide to hypoallergenic jewelry for sensitive skin.
Why Your First Barbell Is a Little Longer
Notice how your initial jewelry seems a bit on the long side? That’s 100% on purpose. A professional piercer uses a slightly longer barbell to leave room for the initial swelling that’s a normal part of the first few days and weeks.
That extra space is crucial. It prevents the jewelry from getting too tight, which can cause painful pressure, embedding (where the jewelry sinks into the skin), and a whole host of other healing problems.
Once the swelling is completely gone—usually around the 4-8 week mark—it's time for a super important check-in with your piercer for downsizing.
Downsizing simply means swapping out that initial long barbell for a shorter one that fits more snugly. This isn’t something to DIY; let your piercer handle it. A properly fitted bar is way more comfortable for daily life and is less likely to get snagged on clothing, which can cause some major irritation and setbacks.
This step isn't just for looks; it’s a key part of long-term piercing health. Following proper aftercare, including downsizing, seriously lowers the risk of complications.
Jewelry Styles for Comfort and Healing
For a hood piercing, your piercer will typically use one of two main styles, and their recommendation will be based on what works best for your unique anatomy.
- Curved Barbell: This is the most popular choice for initial hood piercings. Its gentle curve mimics the natural shape of your anatomy, letting it sit comfortably without putting weird pressure on the tissue.
- Captive Bead Ring (CBR): Some people love the look of a ring right from the start. A CBR is a great option, but the piercer must choose a diameter that’s large enough to not pinch or pull on the entry and exit points of the piercing.
At the end of the day, the best jewelry is made from high-quality material, is sized perfectly for your body, and makes the healing process a breeze. Always trust your piercer’s recommendation—their experience is your best guide to finding the perfect starter piece.
What To Do If Your Piercing Seems Irritated
Even when you follow your hood piercing aftercare plan to the letter, bodies can be unpredictable. First things first: take a deep breath. A little irritation isn't a sign of impending doom. The key is learning to read the signals your body is sending so you can respond calmly and correctly.
Think of this as your personal troubleshooting guide. We'll walk you through what's normal, what's a minor hiccup you can handle, and what's a clear signal to call in the pros. Staying informed is the best way to tackle any issue with confidence.

Differentiating Normal Healing From Warning Signs
Let's be real for a second: a new piercing is a wound, and your body is going to react to it. It’s absolutely essential to know the difference between your body saying "I'm healing" and it screaming "Help me!"
To make it easier, here’s a quick-reference table to help you tell them apart.
Normal Healing vs. Potential Infection
| Symptom | Normal Healing | Potential Problem (Consult a Pro) |
|---|---|---|
| Swelling | Mild and localized right around the piercing, mostly in the first 1-2 weeks. | Excessive swelling that spreads, feels uncomfortably tight, or makes the jewelry look like it's sinking into the skin. |
| Redness | A pinkish or reddish tint directly around the piercing that slowly fades over time. | Dark red coloring, or red streaks that seem to spread out from the piercing. The area also feels hot to the touch. |
| Discharge | Clear, whitish, or pale yellow fluid (this is just lymph!) that dries into "crusties." Totally normal. | Thick, cloudy discharge that is yellow, green, or brown (pus), often accompanied by a bad smell. |
| Pain | General tenderness and sensitivity, especially when bumped. This should lessen over time, not get worse. | Throbbing, sharp, or escalating pain that doesn't improve or actually gets worse after the first couple of days. |
Basically, normal healing is your body doing its job, and it might be a little grumpy about it. A potential problem is when your body is sending up a flare, signaling it's fighting something it can't handle alone.
What Is This Bump on My Piercing?
So, you've spotted a small bump near your piercing. Don't panic! This is incredibly common and is usually just an irritation bump, not an infection. It's your body's way of saying, "Hey, something is bothering me here!"
These bumps are often caused by simple, fixable issues:
- Physical Trauma: Accidentally snagging your jewelry on your underwear or during sex.
- Moisture: Not drying the area thoroughly after cleaning, which creates a perfect little party environment for bacteria.
- Friction: Wearing super tight clothing that constantly rubs against the jewelry.
- Chemical Irritation: Using harsh soaps, scented body washes, or other products too close to the piercing.
The solution is usually to go back to basics. Double down on your strict saline cleaning routine, be extra gentle and avoid bumping the jewelry, and make sure the area stays completely dry. Most of the time, once you remove whatever is causing the irritation, the bump will disappear on its own. It's often just a reaction, and you can learn more about how to identify and manage different types of piercing irritation in our vital information guide.
When to Immediately Call Your Piercer or Doctor
While many issues are minor, some red flags demand immediate professional attention. Stop trying to self-diagnose and get help if you experience any of the following:
- Signs of Infection: Intense pain, a hot-to-the-touch feeling, thick green or yellow pus, or a foul odor.
- Red Streaks: Lines radiating from the piercing site are a classic sign that an infection is spreading.
- Jewelry Embedding: If swelling is so severe that your jewelry is sinking into your skin.
- Fever or Chills: If you start to feel sick all over (fever, nausea, body aches), it could mean the infection is becoming systemic.
Your professional piercer should always be your first call for any piercing-related concerns. They can assess the situation and guide you. However, they are not doctors. If you suspect a serious infection, do not hesitate to see a medical professional.
Your aftercare routine is so important for keeping these scary symptoms at bay. By sticking to a solid cleaning plan and being mindful of what you wear and do, you're taking the best steps to prevent complications before they even start.
Knowing when to troubleshoot yourself and when to get professional help is the most powerful tool you have. Trust your gut—if something feels seriously wrong, it probably is. Reaching out for advice is always the smartest move for your health and the long-term happiness of your piercing.
Got Questions About Hood Piercing Aftercare?
It’s totally normal to have a million questions buzzing around your head after getting a new piercing, especially one as personal as a hood piercing. Don't worry, we’ve got you. This is where we tackle the most common queries, bust some stubborn myths, and give you the straight-up, reliable info you need for peace of mind.
Think of this as your go-to FAQ for everything hood piercing aftercare. We're here to clear up any lingering doubts so you can focus on healing up and enjoying your awesome new addition.
Can I Use Tea Tree Oil or Antibacterial Soap to Clean It?
Let’s get this one out of the way right now: absolutely not. This is probably the biggest and most dangerous myth in the piercing world. While these products sound like they’d be great for killing germs, they are way, way too harsh for a delicate, healing piercing.
- Antibacterial Soaps (like Dial): These are loaded with aggressive chemicals that strip away all the bacteria, including the good stuff your body needs to heal properly. Using them can lead to extreme dryness, irritation, and can seriously throw your healing timeline off track.
- Tea Tree Oil: While it does have natural antiseptic properties, it's incredibly potent stuff. On sensitive skin—especially in that area—it can cause chemical burns, severe irritation, and even allergic reactions.
Your body is a healing machine. All it needs from you is a gentle, clean environment to do its job. Stick with a sterile saline solution; it’s perfectly balanced to clean without causing any harm.
How Soon Can I Actually Change My Jewelry?
We know how tempting it is to swap out that initial barbell for something with a little more sparkle, but patience truly is your best friend here. You absolutely must wait until your piercing is 100% fully healed, which is typically somewhere between 4 and 8 weeks.
Changing it too soon can re-traumatize the delicate new tissue (the fistula) your body has worked so hard to build. Doing so can easily lead to irritation, swelling, and a major setback in your healing journey.
For your very first jewelry change, we can't recommend this enough: go back to your professional piercer. They can swap it out safely, confirm the piercing is actually ready, and help you choose a new piece that’s the perfect size and material for your anatomy.
Will This Piercing Change My Sensitivity?
This is a big question for many, and honestly, it’s one of the main reasons this piercing is so popular. For most people, the answer is a resounding yes, in a good way. The jewelry, especially a curved barbell, is positioned to rest directly against the clitoris, which can add extra stimulation during daily movement and, of course, sexual activity.
However, every body is different. Some people report a significant increase in sensitivity, while for others it’s a more subtle enhancement. The key is to let it heal completely before you really start exploring. Once it's healed, you can even experiment with different ball sizes on your barbell to see what feels best. Just remember, incorrect placement by an inexperienced piercer can lead to complications, which is why choosing a reputable professional from the start is so important.
What If I Get My Period While It's Healing?
No need to stress about this at all! You can absolutely get a hood piercing while on your period, and you can definitely heal one while menstruating. The only thing that changes is being extra mindful of your hygiene during that time of the month.
Here are a few tips to make it a non-issue:
- Opt for Tampons or a Menstrual Cup: These are generally better options than pads, as they keep menstrual fluid away from the fresh piercing. This reduces the risk of irritation and unwanted bacterial exposure.
- Change Products Frequently: Your main goal is to keep the area as clean and dry as possible.
- Stick to Your Cleaning Routine: Don't skip your saline soaks or sprays. If anything, you might want to add an extra quick rinse with clean water during the day just to stay fresh.
Your body is already doing its thing. A little extra care is all you need to keep your piercing happy and on track to heal beautifully.
Ready to find that perfect piece for when you're fully healed? BodyCandy has an amazing selection of high-quality, body-safe jewelry that will make your new piercing shine. Shop our full collection at https://bodycandy.com today