So, you did it! You took the plunge and are now the proud owner of a super-cute helix piercing. Welcome to the club! Now the big question is probably, "How long until this thing is actually healed?"
The short answer is that helix piercing healing is a marathon, not a sprint. You're looking at anywhere from 6 to 12 months for it to fully mature. That might sound like forever, but trust me, it’s worth the wait for a piercing you'll love for years.
Your Helix Piercing Healing Timeline
Patience is your new best friend when it comes to cartilage piercings. Unlike a lobe piercing that can heal up in a couple of months, the helix goes through a much longer, multi-stage process. Your body is building a brand-new tunnel of skin (called a fistula) right through cartilage, which has way less blood flow than fleshy areas. That just means it needs more time to repair and strengthen itself.
While everyone's body is a little different, the healing journey generally follows a predictable path. Things like how diligent you are with aftercare, your sleeping habits, and even your immune system can speed things up or slow them down. Understanding the stages helps you know what's normal and when to just let your body do its thing.
The Three Main Healing Stages
Your piercing will go through a few distinct phases, and each one has its own personality. The first part is all about managing swelling and tenderness, while the later stages are focused on fortifying all that new tissue.
- The Inflammatory Stage (Weeks 1-4): Right after you get pierced, expect your ear to be red, swollen, and pretty tender. This is a totally normal immune response! Your body is sending blood and healing agents to the site to get to work. You might also notice some clear or yellowish fluid that forms "crusties"—for now, just leave them be.
- The Proliferative Stage (Months 2-6): During this phase, the initial ouch-factor should have calmed down a lot. Your body is now busy building new skin inside the piercing channel. Here's the tricky part: it might look healed from the outside, but it's still incredibly fragile internally. This is the most crucial time to be consistent with your aftercare and avoid bumps and snags.
- The Maturation Stage (Months 6-12+): This is the home stretch where the new tissue really strengthens and stabilizes. The piercing channel becomes smooth and robust. By the end of this stage, your piercing should feel completely normal, with no tenderness or discharge. Only then is it considered fully healed and ready for all the fun jewelry swaps you've been dreaming of.
This visual timeline breaks down the key phases of your helix piercing healing journey, from the initial swelling to the final, sparkling result.
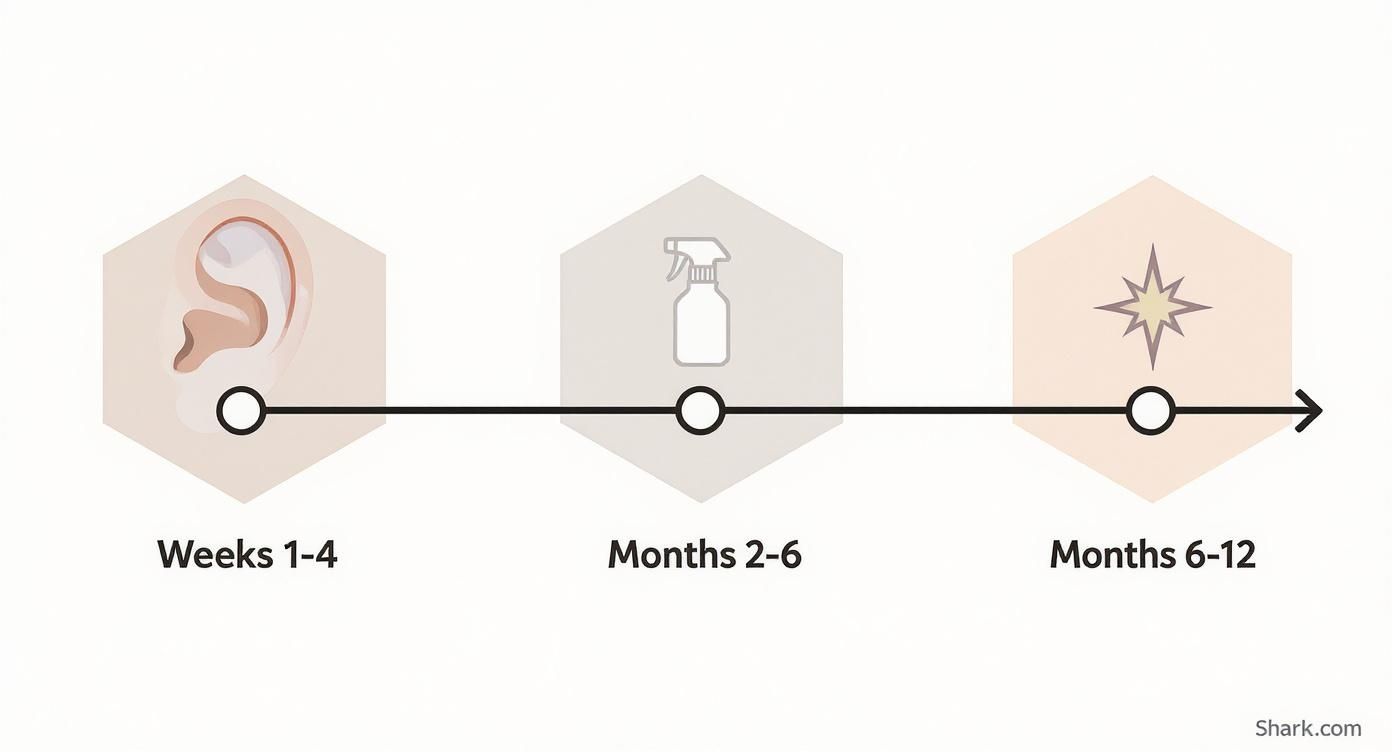
As you can see, the most active healing happens in the first six months, but that final strengthening phase is what really makes the piercing stable for the long haul.
To make it even clearer, here’s a quick breakdown of what you can expect during each phase of the healing process.
Helix Healing Stages: What to Expect
| Healing Stage | Typical Duration | What You'll Experience | Aftercare Focus |
|---|---|---|---|
| Inflammatory | Weeks 1-4 | Redness, swelling, tenderness, clear/yellowish discharge ("crusties"). | Gentle saline soaks, avoid touching, be careful not to sleep on it. |
| Proliferative | Months 2-6 | Swelling and tenderness subside. Piercing looks "healed" but is still fragile internally. | Consistent cleaning, avoid snagging, resist the urge to change jewelry. |
| Maturation | Months 6-12+ | No pain, discharge, or redness. The piercing channel strengthens and becomes smooth. | Continue cleaning as needed. Get the green light from a piercer before changing jewelry. |
Remember, these are just general guidelines. Everyone heals at their own pace, so listen to your body and give it the time it needs.
What the Data Says About Healing
This isn't just our opinion—piercing pros have a solid handle on these timelines. The average healing time for a helix is squarely between 6 and 12 months.
A 2022 survey actually found that 78% of helix piercings healed within 6 to 9 months when proper aftercare was followed. About 15% required 10 to 12 months, and the remaining 7% took over a year, usually due to complications. It really shows how much consistency pays off.
Key Takeaway: Just because your piercing stops hurting doesn't mean it's healed. The tissue inside is still delicate for many months. Stick with your aftercare routine and avoid changing jewelry too early to prevent major setbacks.
Cartilage piercings are a commitment, but the payoff is a beautifully healed piercing you can style for years to come. Curious how this compares to other spots? Check out our guide on healing times for popular piercings to see the full picture. The process is a testament to how amazing your body is at healing itself, so give it the time and care it truly deserves.
Mastering Your Piercing Aftercare Routine
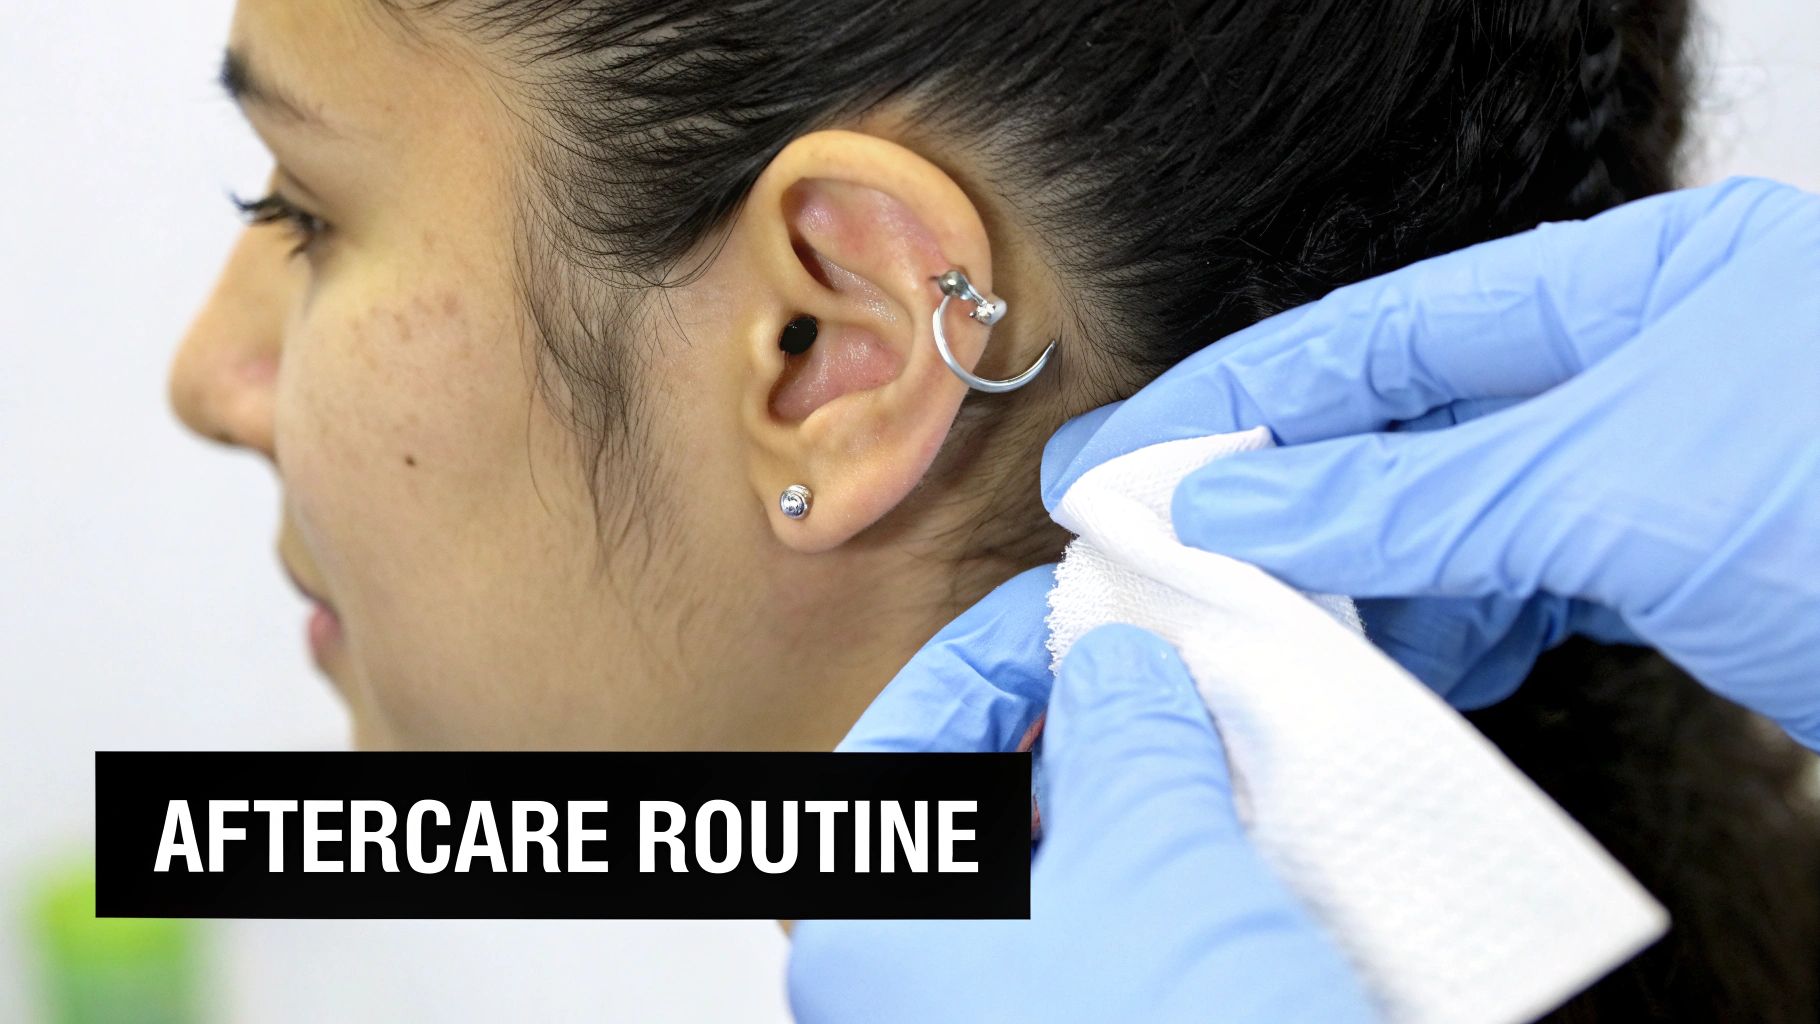
Let's talk about the single most important part of your helix piercing journey—your daily cleaning routine. This is where you become your piercing's bestie. Getting it right from day one sets you up for a smooth, drama-free heal. It's way simpler than you might think, I promise. No complicated steps or weird potions involved.

The key to a happy helix is consistency, not intensity. Your only job is to keep the area clean and free of irritants without going overboard. When it comes to healing piercings, a gentle touch is always the way to go.
Your Simple Cleaning Toolkit
You don't need a whole medicine cabinet to care for your new piercing. In fact, you really only need one thing.
- Sterile Saline Wound Wash: This stuff is your holy grail. Look for a spray can that contains only 0.9% sodium chloride and purified water. The mist applicator is perfect for gently flushing the piercing without ever having to touch it directly. Double-check the label to make sure it's free of any other additives, preservatives, or sketchy "ear care solutions."
Seriously, that’s it! Your body does all the heavy lifting of healing; you're just providing a clean environment for it to work its magic.
The Daily Cleaning Ritual
When it comes to your helix, less is absolutely more. Over-cleaning can be just as irritating as not cleaning at all. The sweet spot is cleaning your piercing twice a day—once in the morning and once before bed. This keeps things hygienic without stripping away the good stuff your body needs to heal.
Here’s the simple, effective routine we recommend to everyone:
- Wash Your Hands: First things first, before you even think about touching your ear, wash your hands thoroughly with soap and water. This is non-negotiable. It's the number one way to prevent introducing nasty bacteria.
- Spray and Soak: Generously spray the front and back of your helix with your sterile saline solution. Let it soak for about 30-60 seconds to help soften any "crusties" (that dried lymph fluid we talked about earlier).
- Gently Pat Dry: Grab a clean, disposable paper towel or some non-woven gauze to very gently pat the area dry. Please avoid cloth towels—they're a breeding ground for bacteria and can easily snag on your jewelry. Q-tips are also a hard no; their tiny fibers can get tangled in the piercing and cause a world of irritation.
If you shower, you can let warm water run over the piercing (just don't aim the showerhead directly at it!) to help rinse away any gunk. After, just follow up with your saline spray and pat dry as usual.
Pro Tip: Whatever you do, don't twist or turn your jewelry! This is ancient, outdated advice that does way more harm than good. It tears the delicate new tissue trying to form inside, invites bacteria in, and will seriously set back your healing time. Just let the jewelry be.
Aftercare Products You Must Avoid
The piercing world is full of myths and bad advice passed down over the years. To keep your helix happy, there are a few things you absolutely must keep away from it.
- Rubbing Alcohol & Hydrogen Peroxide: These are far too aggressive. They don't just kill bad bacteria; they also destroy the new, healthy cells your body is working hard to build. This leads to major irritation and a much longer healing time.
- Antibacterial Soaps (like Dial): These often contain harsh chemicals and fragrances that will dry out and seriously irritate your piercing. Stick to the simple saline.
- Ointments (Neosporin, Bacitracin): These are thick, greasy, and completely suffocate the piercing. They trap bacteria against the skin and prevent the wound from breathing, which is essential for proper healing.
- DIY Salt Soaks: While it sounds natural, getting the salt-to-water ratio perfect at home is nearly impossible. Too much salt is incredibly drying, and too little does nothing. Sterile saline is perfectly balanced, sterile, and just plain safer.
Sticking to a simple, piercer-approved aftercare routine is the best thing you can do for your new piercing. For more product recommendations, check out our deep dive into options like H2Ocean aftercare, another industry favorite. By keeping it clean and simple, you're paving the way for a beautiful, healthy piercing you’ll love for years to come.
Helix Healing Dos and Don'ts
Navigating the healing process for a new helix piercing can feel tricky, but don't worry, we've got your back. Think of this as your personal cheat sheet for the absolute 'dos' and the critical 'don'ts' that will lead to a happy, healthy piercing. Building the right habits from day one will save you a world of hurt (and frustration) later on.
It really comes down to the small, smart choices you make every day. Things you might not even consider—like how you sleep or answer your phone—can have a massive impact on your healing journey.
Let's break down the rules of the road that will set you up for success and help you dodge any of those annoying setbacks.
The Do List: Your Healing Essentials
These are the non-negotiables for keeping your new helix piercing on the straight and narrow. Make these habits second nature, and you're well on your way to a smooth heal.
- DO Use a Travel Pillow: This is the ultimate piercing hack, especially for side-sleepers! Sleeping directly on a new helix is one of the fastest ways to invite irritation and those dreaded piercing bumps. Just pop your ear in the hole of a travel or donut pillow, and you can sleep soundly without putting any pressure on your new bling. It's a total game-changer.
- DO Keep It Dry: Moisture is bacteria's best friend, and you don't want them crashing your healing party. After cleaning or showering, always gently pat the area completely dry with a fresh paper towel or a piece of non-woven gauze. A dry piercing is a happy piercing.
- DO Be Mindful of Your Phone and Hair: Your phone screen is a petri dish of germs. Seriously. When you take a call, try to use speakerphone or earbuds to keep that screen away from your fresh piercing. On that same note, keep hair products like hairspray, gels, and dry shampoo far, far away from the piercing site. The chemicals can cause major irritation.
Following these rules isn't just a friendly suggestion; it’s a proven strategy for better healing. A 2021 clinical study showed that people who were strict with their aftercare—like avoiding pressure and daily saline soaks—had a 34% lower risk of complications. You can dig deeper into the science behind good aftercare by checking out the full study findings.
The Don't List: Mistakes to Avoid
Knowing what not to do is just as important as knowing what you should be doing. Steer clear of these common mistakes to avoid irritation, infection, and a healing time that drags on forever.
Key Takeaway: Whatever you do, resist the urge to touch your piercing! Your hands are covered in germs, and every single time you touch, twist, or fiddle with your jewelry, you're introducing bacteria and messing with the delicate healing tissue.
Common Activities and How to Handle Them
Life doesn't pause for a new piercing. Here’s how to navigate a few real-world scenarios without derailing your helix healing.
Getting a Haircut
Give your stylist a heads-up about your new piercing before they even pick up a comb. Ask them to be extra careful around that ear with combs, scissors, and sprays. For an added layer of security, you can cover the piercing with a small piece of gauze secured with medical tape during your appointment.
Playing Sports
If you're into contact sports, your helix is in a high-risk zone for getting bumped or snagged. Chat with your piercer about the best way to protect it. Often, carefully taping it down with medical-grade tape can help, but it's absolutely crucial to clean it immediately after you're done playing to wash away sweat and bacteria.
Wearing Headphones or Masks
Be super aware of anything that puts pressure on or rubs against your helix. For music or calls, over-ear headphones that don't actually touch the piercing are your best bet. When it comes to face masks, look for styles with adjustable or tie-back straps that won't get tangled in your jewelry.
A little bit of caution and planning goes a long way. Being proactive means you can easily work your new piercing into your daily life without any unnecessary drama.
Troubleshooting Common Piercing Problems
We’ve all been there: that heart-stopping moment when you look in the mirror and see your new helix piercing looking red, angry, and maybe a little swollen. It’s easy to jump to the worst-case scenario, but before you panic, let's take a closer look at what's really going on.
Most of the time, a piercing flare-up is just your body’s way of saying it's been annoyed. Understanding the difference between simple irritation and a genuine infection is key to handling it correctly and keeping your cool.
Infection vs. Irritation: How to Tell the Difference
First things first, take a deep breath. A little redness and swelling are totally normal, especially in the first few weeks of a new cartilage piercing. But there are definitely some red flags you shouldn't ignore.
An angry piercing is usually just irritated from being bumped, slept on, or snagged on your hair. An infection, on the other hand, is a bacterial problem that needs a completely different—and more serious—approach.
So, how do you tell them apart? Here's a quick cheat sheet to help you figure out what your helix is trying to tell you.
Infection vs. Irritation How to Tell the Difference
This table is your quick-reference guide to decoding the signals your piercing is sending. Use it to compare what you're seeing against the typical signs of normal healing hiccups versus something that might need a doctor's attention.
| Symptom | Normal Irritation | Potential Infection |
|---|---|---|
| Discharge | Clear or slightly yellowish fluid that dries into "crusties." | Thick, pus-like discharge that is green, yellow, or grey. May have a foul odor. |
| Pain Level | General soreness that comes and goes, especially after being bumped. | Intense, throbbing pain that steadily gets worse and may radiate from the piercing site. |
| Swelling & Redness | Mild, localized swelling and redness right around the piercing. | Significant swelling that spreads far beyond the piercing. The area feels hot to the touch. |
| Overall Feeling | You feel perfectly fine otherwise. | You might feel unwell, run a fever, or see red streaks coming from the piercing site. |
If your symptoms are lining up with the "Potential Infection" column, it's time to act. But whatever you do, do not remove the jewelry. Taking it out can trap the infection inside as the hole closes, which could lead to a painful abscess. Your best move is to see a doctor right away for proper treatment.
Dealing with the Infamous Piercing Bump
Ah, the dreaded piercing bump. If there's one issue that plagues helix piercings, this is it. These little bumps are almost always a sign of irritation, not an infection. Think of them as your body's over-the-top reaction to being bothered.
The cause is usually something simple:
- Pressure: Sleeping on the piercing is the #1 culprit.
- Movement: Fidgeting with the jewelry, snagging it on clothes, or over-cleaning.
- Moisture: Not drying the area thoroughly after cleaning can trap bacteria.
- Bad Jewelry: Low-quality metals, jewelry that's the wrong size, or putting a hoop in too soon.
The secret to getting rid of the bump is simple: find the source of the irritation and eliminate it. Don't fall for internet "cures" like tea tree oil or aspirin paste. These are far too harsh and will only make things worse.
The Best Approach: Stick to your simple sterile saline cleaning routine, twice a day. Be extra careful not to touch or sleep on it. And most importantly, be patient. If the bump doesn't go away, go back to your piercer. They might suggest downsizing the post to a shorter bar, which can dramatically reduce movement and help the bump finally disappear.
Remember, the bump is just a symptom. Once you fix the root cause, it will go away on its own. It’s just your piercing’s way of asking for a little extra care to get back on track.
Choosing Jewelry for a Healing Helix
That starter jewelry your piercer picked out isn't just a placeholder—it's actually a critical tool for your helix piercing healing process. But let's be real, you're probably already daydreaming about all the cute hoops and sparkly studs you plan to wear. Thing is, the jewelry choices you make, both now and later, can seriously make or break your healing experience.

Think of that initial piece of jewelry as a medical device. Its entire job is to be biocompatible, comfortable, and give your new piercing the best possible start in life. This is why the material and style matter so much, especially when your piercing is fresh and super fragile.
The Gold Standard of Piercing Materials
When your body is trying to heal a new wound, the last thing it needs is to also fight off an irritating metal. This is exactly why professional piercers are so incredibly picky about what they use for that first piece of jewelry. Your body deserves only the best!
Here’s a quick rundown of what's safe and what you should absolutely avoid in a new helix piercing:
- Implant-Grade Titanium (ASTM F-136): This is the top dog for a reason. It's completely nickel-free, lightweight, and non-porous, which means it won't harbor nasty bacteria. It’s literally the same stuff used for medical implants, so you know it’s designed to live happily inside your body.
- Solid 14k or 18k Gold: Not all gold is created equal. For a healing piercing, it must be solid, nickel-free gold—not plated or filled. It’s a fantastic hypoallergenic option if you’re after that classic, luxe look right from the start.
- Niobium: Here's another excellent hypoallergenic choice. It's very similar to titanium and is a safe, inert material that won't cause angry reactions.
Crucial Tip: Materials like surgical steel, sterling silver, and anything with a mystery coating are a huge "no" for a healing piercing. "Surgical steel" is a vague term and can still contain enough nickel to cause a reaction. And silver? It tarnishes, which can stain your skin and cause major irritation.
If you've ever had a bad reaction to cheap earrings, you know the struggle is real. Want to learn more about which materials are your piercing's best friends? Dive into our full guide on allergic reactions and what piercing metals are right for you for a deeper look.
Threadless vs. Internally Threaded Jewelry
Beyond the material itself, the style of your jewelry is a big deal. You'll likely start with a straight bar (called a labret stud), and there are two main types your piercer will use.
- Threadless (or "Press-Fit"): This is a two-part system with a hollow post and a decorative end that has a tiny pin attached. The pin gets a slight bend to create tension, holding it securely inside the post. It’s smooth, incredibly easy to change, and a massive favorite among professional piercers.
- Internally Threaded: With this style, the screw threads are on the decorative end, which then screws into the post. This brilliant design means no sharp threads pass through your delicate piercing channel when changing jewelry, preventing scrapes and irritation.
Notice what's missing? Externally threaded jewelry. That's the kind where the screw threads are on the bar itself. It should never be used in a new piercing. It’s like dragging a cheese grater through your ear every time you change it out. Ouch.
The All-Important Downsize
When you're first pierced, your piercer uses a longer bar to leave room for the initial swelling. But after about 4-8 weeks, that swelling will go down, leaving you with extra space. This is your cue to schedule a downsize appointment.
A downsize is simply when your piercer swaps that initial long post for a shorter one that sits perfectly flush against your ear. Trust me, this is one of the most important steps in your helix healing journey.
Why is it so crucial?
- It Prevents Snagging: A long bar is a magnet for getting caught on hair, clothes, and pillows.
- It Avoids Irritation Bumps: Constant snagging and movement is a leading cause of those annoying piercing bumps.
- It Promotes a Proper Healing Angle: A bar with too much room can get pushed around, causing the piercing to heal at a wonky, crooked angle.
Skipping your downsize is one of the biggest mistakes you can make. It might seem like a small, insignificant step, but it makes a massive difference in ensuring a smooth, successful heal. It sets the stage for a piercing that will be healthy and ready for all that fun jewelry you've been eyeing for years to come.
Got More Helix Healing Questions? We've Got Answers
You've got the timeline down, you're a pro at aftercare, and you know the major do's and don'ts. But let's be real—healing a piercing always comes with those little nagging questions that pop up when you least expect them. You've got questions, and we've got the answers.
Think of this as your go-to FAQ for everything helix healing. We're diving into the nitty-gritty to clear up any confusion and keep you feeling confident.
Can I Wear Headphones With a New Helix Piercing?
This is a huge one, especially if you can't live without your music or podcasts. The short answer? You have to be extremely careful.
It's best to completely avoid any on-ear or over-ear headphones that press directly on your new piercing. That constant pressure is a surefire way to cause irritation, major swelling, and a much, much longer healing time. Your new piercing needs room to breathe, and squishing it is the last thing you want to do.
So, what are your options?
- Earbuds are your friend: These are a much safer bet! Just be super mindful when putting them in and taking them out so you don't accidentally snag your jewelry.
- Find a true over-ear style: If you absolutely have to wear headphones, look for a pair with cups large enough to completely encircle your ear without touching the helix piercing at all.
- Keep 'em clean: No matter what you use, wipe down your headphones or earbuds regularly. They can harbor a surprising amount of bacteria you definitely don't want near a healing wound.
What Are These Crusties On My Piercing?
First off, don't panic! Seeing little crusty bits form around your jewelry is a totally normal—and actually positive—part of the healing process.
That crust is just dried lymph fluid mixed with dead skin cells. Your body naturally pushes this stuff out as it repairs the piercing channel. It's a good sign! The number one rule here is to never, ever pick them off with your fingers. This can introduce nasty bacteria and tear the fragile new tissue underneath.
Instead, let your aftercare routine handle it. Your sterile saline spray will soften them up, allowing them to rinse away gently in the shower. If they're a little stubborn, you can gently wipe them away with a clean piece of non-woven gauze after a spray. If they don't come off easily, just leave them be until your next cleaning.
Key Insight: Those "crusties" are visible proof that your body is busy building new tissue and healing the piercing from the inside out. As long as they're a clear or yellowish color and not paired with severe pain or green/dark pus, they're a good thing.
If My Piercing Doesn't Hurt, Is It Fully Healed?
This is probably one of the most common myths in the piercing world, and believing it can lead to some serious setbacks. Just because the initial pain and tenderness are gone does not mean your helix is fully healed.
Here's the deal: cartilage heals from the outside in. It might look and feel perfectly fine on the surface, but the tissue deep inside that piercing channel is still maturing and super fragile. If you change your jewelry too early (other than the planned downsize with your piercer), you can easily damage that delicate new tissue. That can kick off a whole new cycle of swelling, irritation, and those dreaded piercing bumps.
Always, always wait the full 6-12 months and get the official all-clear from a professional piercer before you start swapping in new jewelry.
What's the Best Way to Sleep With a New Helix?
Sleeping is easily one of the trickiest parts of healing a new helix. The golden rule is incredibly simple: do not sleep on your pierced side.
But what if you're a die-hard side-sleeper? Don't worry, we've got the ultimate piercing hack for you: the travel pillow. Yep, that C-shaped pillow you use on airplanes is about to become your new best friend.
Just lay it down flat and place your ear right in the open hole. This genius trick lets you sleep on your favorite side without putting any pressure at all on your healing helix. It's a small change that can prevent a world of hurt, irritation bumps, and healing delays. Seriously, it's a game-changer.
Ready to start planning for that beautifully healed helix? At Bodycandy, we've got a massive collection of implant-grade titanium and 14k gold flat back studs perfect for when it's time to show off your new piercing. Shop our full collection today!