Getting a new piercing is such an exciting way to show off your style, but it definitely brings up a lot of questions. One of the most important things to get right from the start is choosing the perfect earrings for piercing. The jewelry you get pierced with is totally different from what you'll wear once you're healed, and we're here to walk you through all of it.
Your Journey to the Perfect Piercing Starts Here

Think of this as your personal roadmap for navigating the world of piercing jewelry. We'll help you find pieces that are not only stylish but, more importantly, safe and comfortable for both fresh and fully healed piercings. You're not going through this alone—you're joining a huge, growing community!
The love for body art is bigger than ever. The global body piercing jewelry market was valued at around US$7,983 million in 2026 and is rocketing towards US$9,594 million by 2031. This explosion is powered by young adults, who make up over 61% of the market, embracing piercings as a key part of their identity. Ear piercings, especially, are leading the way thanks to how versatile they are. Explore more about this growing trend.
First Piercing vs Healed Piercing Jewelry
So, what’s the real difference between the "starter" jewelry your piercer uses and the fun stuff you can wear later? It's all about the healing process. When you get a new piercing, your body is working hard to create a new tunnel of skin (called a fistula), and the jewelry's main job is to keep that path open and free from irritation.
Think of starter jewelry as a medical device first and an accessory second. Its primary purpose is to help you heal safely. Healed-piercing jewelry, on the other hand, is all about showing off your personal style.
This quick-glance table helps break down the crucial differences between starter jewelry and the fun styles you can wear later.
Quick Guide to First Piercing vs Healed Piercing Jewelry
| Feature | First-Piercing Earrings (Starter) | Healed-Piercing Earrings |
|---|---|---|
| Main Goal | Safe Healing | Style & Self-Expression |
| Material | Biocompatible (titanium, 14k gold) | Huge variety (gold, steel, acrylic, etc.) |
| Length | Longer post to allow for swelling | Standard length for a snug fit |
| Backing | Secure & non-irritating (flat back labrets) | Anything goes! (butterfly, screw-on, etc.) |
| Style | Simple studs or basic rings | Hoops, dangles, chains—you name it! |
Understanding these distinctions is key to a happy piercing. Once you're fully healed, the door opens to a whole new world of styles.
This is your roadmap to building a beautiful and healthy collection, starting with that very first piece. Let's make sure your piercing journey is as amazing as your new look will be, whether you're starting out or browsing the latest Bodycandy collections for your healed piercings.
Choosing Materials Your Skin Will Love
Walking into the world of piercing jewelry can feel like you're about to take a pop quiz on the periodic table—titanium, surgical steel, gold, oh my! But don't stress. Picking the right material for your earrings for piercing is the most crucial decision you'll make for a happy, healthy piercing, and it’s way simpler than it sounds.
Think of it like this: your fresh piercing is an open wound, and your skin is on high alert. You need to use a material that it won't see as a threat. This is where hypoallergenic, biocompatible metals come in. They’re the VIP guests your body rolls out the red carpet for, which is key to preventing irritation, allergic reactions, and those annoying healing hiccups.
To make it super easy, let's break down the most popular metals with a "Good, Better, Best" guide.
Best: The Gold Standard for New Piercings
When you’re getting a brand new piercing, one material truly stands above all the rest: implant-grade titanium. This isn't your average titanium; it's the exact same grade used for medical implants like bone screws. So, what makes it the best?
- Totally Nickel-Free: Titanium that is ASTM F-136 compliant is completely free of nickel. Nickel is the number one bad guy when it comes to metal allergies and skin irritation.
- Lightweight Comfort: It’s so light you’ll barely feel it, which means less stress and pulling on your fresh piercing. This can seriously help speed up your healing time.
- Super Strong and Durable: This stuff is built to last. It won’t tarnish or corrode, so your jewelry will look incredible for years.
If you want to give your new piercing the absolute best, drama-free start in life, implant-grade titanium is the only way to go. It’s the peace of mind you deserve.
The push for safer materials is a huge deal right now. A major market driver is the growing demand for sustainable and hypoallergenic options, with 42% of buyers now actively avoiding traditional metals known to cause reactions. By choosing high-quality materials like titanium, customers are cutting their risk of infection by up to 29% for long-term wear. You can discover more about these market insights and see for yourself why making smart material choices matters so much.
Better: A Solid and Stylish Choice
Next on our list is 316L surgical stainless steel. This is a fantastic, widely used material that strikes a great balance between quality and price. For many people, it's a solid choice, especially after a piercing is well on its way to being fully healed.
But, and this is a big "but," it's important to know that surgical steel contains a very small amount of nickel. While it's usually low enough not to bother most folks, if you know you have a nickel sensitivity, you're much safer sticking with titanium, especially for a brand new piercing.
Good: Shiny and Classic Options
Who doesn't love the timeless look of gold? For body jewelry, 14k or 18k solid gold (in yellow, white, or rose) is a beautiful and generally safe option. The key word here is solid. Stay away from gold-plated jewelry, which is just a thin layer of gold over a base metal (often full of nickel!) that can wear off and expose your sensitive skin to irritants.
You'll also want to steer clear of anything less than 14k gold, as it can be too soft and become a breeding ground for bacteria. On the flip side, higher karats like 24k are also too soft and can easily get scratched, bent, or damaged.
Materials to Avoid in Healing Piercings
Now for the "do not touch" list. These materials are an absolute no-go for a new or healing piercing.
- Sterling Silver: This one surprises a lot of people! When sterling silver comes into contact with body fluids and air, it tarnishes (oxidizes). This tarnish can actually stain your skin permanently (a condition called argyria) and cause serious irritation in a healing piercing. Save those cute silver hoops for when your piercing is 100% healed.
- Mystery Metals & Plated Jewelry: That cheap, unlabeled jewelry from a fast-fashion store is a huge gamble. It's almost always made of low-grade mystery metals with high nickel content and cheap plating that flakes right off. This is a one-way ticket to an angry, irritated, and possibly infected piercing.
- Acrylic/Plastic (for healing): While some flexible plastics have their place—like Bioplast, for example—standard hard acrylic is not what you want for a fresh piercing. It's a porous material that can degrade over time and trap bacteria, which is the last thing your healing skin needs. For more info on this, check out our guide on the benefits of Bioplast.
Decoding Piercing Sizes, Gauges, and Backs
Ever stared at a piece of jewelry labeled "16g" and felt like you were trying to crack a secret code? You're not alone! Picking out your first pieces of jewelry can feel a bit overwhelming, but we're here to break it all down for you. Getting the size right is just as crucial as choosing the right material for your earrings for piercing.
Let's jump right into the most common term you'll see: gauge. Gauge (or just "g") is all about the thickness of the post that goes through your piercing. Now, here’s the part that trips everyone up: the sizing is backward. The smaller the number, the thicker the post.
A good way to think about it is like pasta. A 14g post is like a thick piece of bucatini, while a delicate 20g post is more like a thin strand of angel hair. This is super important because popping the wrong size in your piercing can cause it to shrink or stretch out in a way you really don't want.
Gauge Sizes Unpacked
When you get pierced, your piercer very deliberately chooses a gauge based on where the piercing is. Cartilage piercings, for instance, are usually done with a thicker post (like a 16g) to build a strong, stable healing channel. Standard lobe piercings are typically done at a thinner 20g or 18g.
Trying to wear jewelry that's too thin in a cartilage piercing can cause something nasty called the "cheese-cutter effect"—where the skinny post slowly saws through your tissue over time. Ouch! This is exactly why you have to stick with the gauge your piercer used, especially while you're still in the healing phase.

Just as we talked about earlier with materials, this chart shows why starting with the best, like titanium, gives your piercing a solid foundation for happy healing.
To help you keep track, here’s a quick reference for the most common sizes you’ll encounter.
| Piercing Location | Common Gauge Size | Best For |
|---|---|---|
| Standard Lobe | 20g, 18g | Most traditional earrings and studs. Great for fully healed piercings. |
| Helix (Cartilage) | 18g, 16g | Studs and hoops. A 16g is the standard for initial piercings to ensure a stable healing channel. |
| Conch | 16g, 14g | A thicker gauge is essential for stability in this part of the ear. |
| Tragus/Daith | 16g | The standard for most initial tragus or daith piercings, offering both comfort and stability. |
| Nose (Nostril) | 20g, 18g | 18g is a common and versatile size, but some prefer the daintier look of a 20g. |
| Septum | 16g, 14g | 16g is the most common starting size, allowing for a wide variety of awesome clickers and rings. |
This chart is a great starting point, but always remember: your piercer knows best! If you're ever unsure, just ask them what gauge they used.
Choosing the Right Backing Style
The back of an earring is just as important as the front, especially when you're dealing with a fresh piercing. The right backing keeps your jewelry secure and comfy, while the wrong one is a recipe for irritation, snagging, and healing nightmares.
Here are the main styles you’ll run into:
- Flat Back Labrets: These are the absolute MVPs of piercing jewelry. A flat back has a post with a smooth, flat disc on one end and a screw-on top. They’re amazingly comfortable (no more getting poked behind your ear!), super secure, and perfect for almost any spot, especially cartilage like the helix, conch, and tragus.
- Screw-On Balls (Barbells): A total classic. Barbells feature a post with a ball that screws onto one or both ends. They're a secure staple for tons of piercings, coming in straight, curved, and circular styles for everything from industrial bars to septum rings.
- Butterfly Backs: You know these—they're the standard backs that come with most department store earrings. While they might be okay for old, fully healed lobe piercings, they are a huge no-go for new piercings or any cartilage. They are notorious for trapping gunk and bacteria, are a pain to clean properly, and often use posts that are too thin (20g or 22g).
Think of a flat back labret as your piercing's personal bodyguard. It sits flush against your skin, protecting the piercing channel from getting snagged, bumped, or irritated while you're sleeping or on the phone. It's no surprise that professional piercers almost always use them for initial cartilage work.
The other half of the sizing puzzle is length. This is the wearable length of the post—the part that actually goes through your ear. For a brand-new piercing, your piercer will use a longer post to leave room for all that initial swelling.
Once the swelling goes down and your piercing is fully healed, it's time to "downsize" to a shorter post. A post that’s too long can get caught on your hair and clothes, which can tug on the piercing and even change its angle over time. A post that fits perfectly sits snugly against your skin without pinching or pulling.
If you really want to get into the weeds, you can learn all about the standards of gauge sizing for body jewelry in our deep-dive guide.
Matching the Right Earrings to Your Piercing

Not all earrings for piercing are interchangeable. Think about it—you wouldn't wear hiking boots to a beach party, right? The same logic applies here. Picking the right jewelry style for a specific piercing is non-negotiable for both happy healing and achieving that killer look you're going for.
Let's break down the best choices for some of the most popular piercings you love to rock. We'll cover what you need for a fresh piercing versus all the fun you can have once it's fully healed.
Lobe Piercings: Your Go-To Canvas
There's a reason lobe piercings are a classic: they're incredibly versatile! For a brand-new lobe piercing, a simple stud is your best friend. Your piercer will almost always use a flat back labret or a barbell with a little extra room to handle any initial swelling.
Once you’re healed up (which can be as fast as 6-8 weeks!), you can really start having fun. Lobes are tough and can support pretty much any style you throw at them. This is where you can get creative:
- Dangling and Chandelier Earrings: Perfect for adding some eye-catching movement and drama.
- Hoops of All Sizes: From tiny huggies that discreetly hug the lobe to big, can't-miss statement hoops.
- Classic Studs: Create a cool, curated ear by mixing and matching different studs across multiple lobe piercings.
Because they're so forgiving, your lobes are the perfect playground to experiment with styles and start building your signature ear stack.
Helix Piercings: The Cartilage All-Star
The helix piercing sits on that upper rim of cartilage, and it definitely needs more attention than a simple lobe. For a new helix, a flat back labret stud is the undisputed champion. It's comfy, won't snag on your hair or clothes, and creates the stable environment your cartilage needs to heal without a fight.
One of the biggest mistakes you can make is putting a snug hoop in a fresh helix. The ring's curve puts constant, uneven pressure on the fistula (the straight tunnel your body is trying to heal), which often leads to irritation bumps, pain, and a much, much longer healing journey.
Think of it this way: you're trying to heal a straight tunnel. A flat back labret acts like a perfect placeholder, keeping that tunnel straight and secure. A hoop tries to force that straight tunnel into a curve, which your body will fight against every step of the way.
After your helix is fully healed—and you need to be patient, we’re talking 6-12 months—you can finally swap in that gorgeous hoop you’ve been dreaming of. Seamless rings, captive bead rings, and clickers are all incredible options that will hug the curve of your ear perfectly.
Tragus and Conch Piercings: Inner Ear Statements
The tragus (that little nub of cartilage over your ear canal) and the conch (the inner bowl of your ear) are prime real estate for showing off some stunning jewelry. Just like a helix, these guys heal best with a flat back labret stud. Their placement makes them easy to bump, so the low-profile, snag-free design of a flat back is your ticket to a smooth healing process.
Once healed, your options really open up.
- For the Tragus: Tiny decorative studs, sparkly clusters, and small, delicate hoops look amazing here. A snug-fitting ring can create a really sharp, eye-catching detail.
- For the Conch: This is where you can make a bold statement! A large, ornate stud cluster can easily become the centerpiece of your entire ear. Or, for a seriously cool look, go for a large-diameter orbital hoop that wraps around the outer edge of your ear.
If you want to get a better handle on all the different jewelry styles, check out Bodycandy's guide on earring styles and sizing to become a true pro.
Daith Piercings: The Heart of the Ear
The daith, tucked into the innermost fold of cartilage, has some very specific jewelry needs. Thanks to its unique location, it’s one of the few piercings that is almost always started with a ring. But not just any ring will do!
For a new daith, your piercer will use a ring with a larger diameter, like a captive bead ring (CBR) or a circular barbell. That extra space is critical. It gives the piercing plenty of room for swelling and makes cleaning much easier, preventing the area from feeling tight or getting irritated. Starting with a ring that's too small is a recipe for a very unhappy piercing.
After the 6-9 month healing journey is complete, you can switch to something more decorative and snug-fitting. This is where daith jewelry truly shines, with tons of beautiful clickers, heart-shaped rings, and ornate seamless designs made just for this spot.
The Aftercare Bible: Your Piercing's New BFF
So, you did it! You got that awesome new piercing and have the perfect starter earrings for piercing to show for it. High five! Now comes what is arguably the most important part of your entire piercing journey: the aftercare.
Taking care of your new piercing is surprisingly simple, but you absolutely have to be consistent. Think of it like a brand new plant—give it the right attention and a clean environment, and it's going to flourish.
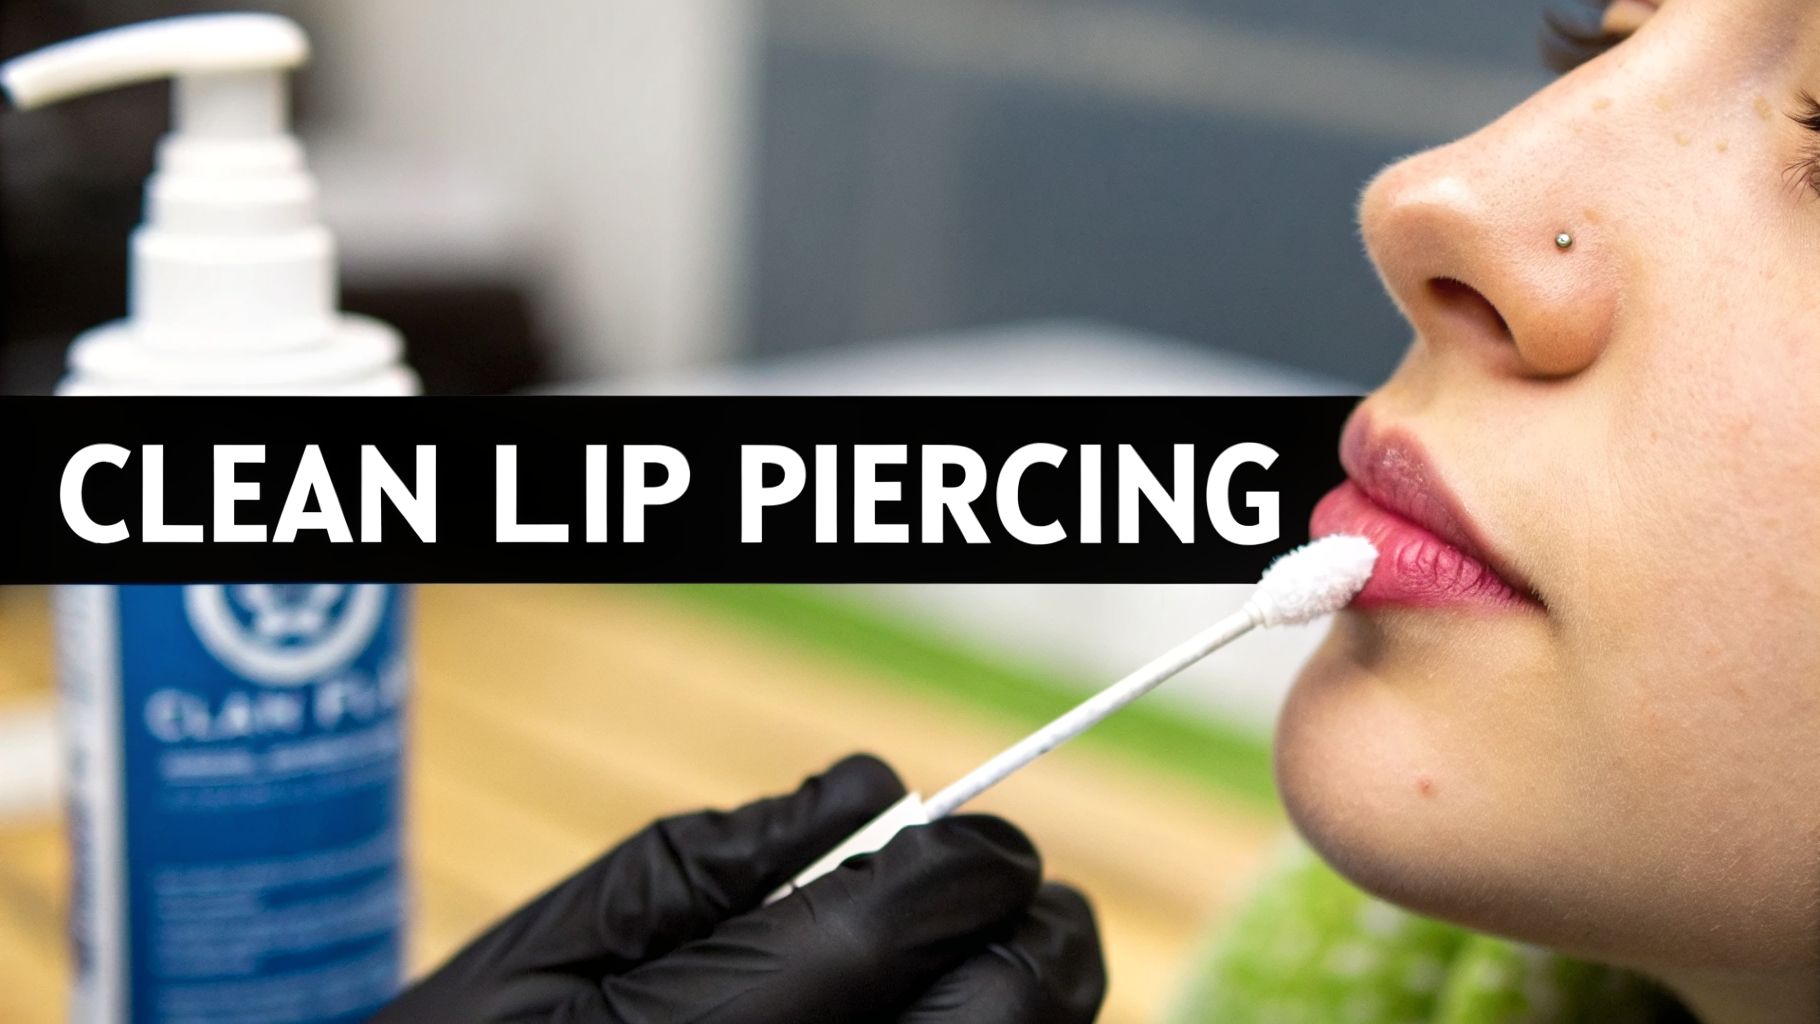
Your piercing's new best friend is a sterile saline solution. That's it! Your body is an incredible healing machine, and your main job is just to keep the piercing clean so it can work its magic without any drama.
You'll want to stay far, far away from the harsh stuff. That means no rubbing alcohol, hydrogen peroxide, or strong antibacterial soaps. These are way too aggressive for a healing piercing and will only cause irritation, dry out your skin, and actually slow down the healing process.
Your Simple Cleaning Routine
Keeping things clean doesn't need to be a complicated chore. Just stick to these easy steps twice a day, every single day, until your piercer gives you the official "all clear."
- Wash Your Hands: Before you even think about touching your piercing, get your hands squeaky clean with soap and water. This is a non-negotiable step!
- Soak or Spray: Be generous with your sterile saline solution, applying it to the front and back of the piercing. You can either spray it on directly or use a fresh, non-woven gauze pad soaked in the solution.
- Gently Pat Dry: Grab a clean paper towel or another piece of non-woven gauze to gently pat the area dry. Stay away from bath towels, which can snag on your jewelry and harbor unwanted bacteria.
- Leave It Alone: And that's it! Seriously. No twisting, turning, or picking at the "crusties" (which are a totally normal part of healing, by the way). Let your body handle the rest.
This simple routine is your golden ticket to a happy, healthy piercing. It's a small commitment that pays off with a beautiful, long-lasting result.
Normal Healing vs. Problem Signs
It's completely normal to see some redness, swelling, and feel a bit of tenderness for the first few weeks. You might also notice a clear or whitish fluid that dries into "crusties"—this is just lymph fluid, and it's a sign your body is healing exactly like it's supposed to.
However, you need to be on the lookout for signs of trouble. If you notice pain that doesn't go away, a bright yellow or green discharge, a bad smell, or the area feels hot to the touch, it's time to check in with your piercer or a doctor. Don't play guessing games; let a pro take a look.
Your aftercare routine is your first line of defense against complications. Good hygiene directly supports your body's natural healing process and minimizes the risk of infection, ensuring your piercing experience is a positive one.
It makes sense that globally, 36% of users worry about allergic reactions and safety. This has driven huge demand for hypoallergenic earrings made from materials like titanium. This concern is directly tied to aftercare, with emerging trends highlighting products designed to reduce the risks that concern 29% of users. When you pair quality materials with great aftercare, you're setting yourself up for success—especially with lobe piercings that can heal in as little as 4-6 weeks. Discover more insights about these piercing trends.
The Big Moment: When to Change Your Jewelry
We get it. The temptation to swap out that initial jewelry for something new is real, but patience is everything! You absolutely must wait until your piercing is 100% fully healed. Changing it too soon can re-injure the piercing, introduce bacteria, and basically reset your healing clock back to day one.
Healing times can vary wildly depending on your body and the piercing's location. Lobes might be ready for a change in a couple of months, but cartilage piercings like a helix or conch can take up to a full year to heal completely.
When in doubt, go see your piercer for a check-up! They can take a look and tell you for sure if you're ready for your first jewelry swap. They can even help you do it safely.
Styling Your Ear and Creating a Curated Look

So, you've done the hard part. You waited patiently, followed all the aftercare, and now your piercings are fully healed and ready for their debut. This is where the real fun begins—turning your ear into a personalized work of art that's 100% you. This is what the curated ear is all about: using your earrings for piercing to tell your own unique story.
Forget any old-school rules you've heard about making sure everything matches perfectly. Modern ear styling is all about creating a vibe that feels cohesive, not a carbon copy. You're the artist here, mixing and matching different shapes, textures, and sizes to create a look that's intentional and totally awesome.
Hot Trends to Inspire Your Ear Story
The "curated ear" isn't a single style; it’s a whole universe of possibilities. Let's dive into some of the hottest looks right now to get your creative juices flowing and help you find your signature aesthetic.
-
The Constellation Piercing: Imagine a cluster of delicate, sparkly studs mimicking a starry night sky on your ear. This is a beautiful, almost ethereal style that looks incredible on the lobe or the flat of the ear. It’s minimalist but makes a huge impact.
-
The Ear Stack: A total classic for a reason! An ear stack involves layering several hoops or huggies up the ear. You usually start with a larger hoop in your first lobe piercing and then use smaller ones as you move up. It’s a chic, timeless way to show off all those healed piercings.
-
Mixing Metals: Yes, you can—and should—mix your golds and silvers! The trick is to do it with purpose. Try alternating gold and silver hoops up your lobe for a cool pattern, or stick to one main metal and throw in a few accent pieces of another to really make them stand out.
The best part? You don't have to pick just one. A stacked lobe combined with a twinkling constellation on your flat can create a dynamic, personalized look that’s all your own.
How to Build Your Perfect Look
Putting together a balanced ear stack is way easier than it sounds. The secret is to find your "anchor" and build everything else around it. Start with your favorite statement piece—maybe it’s a killer hoop in your conch or a dazzling cluster in your helix. That piece is now the star of the show.
Think of your ear curation like decorating a room. You start with one major piece of furniture—like a sofa—and then you add complementary art, pillows, and lighting to complete the look. Your statement earring is that sofa.
Once your anchor piece is in place, you can fill in the surrounding piercings with more subtle, delicate jewelry. If you have a bold hoop, pair it with some tiny, sparkling studs. If you have an ornate dangle earring, balance it out with simple, classic huggies. It's this contrast between bold and delicate that creates that professional, put-together look.
For a more minimalist vibe, you could stick to all delicate gold studs, like our tiny crystal flat back studs. If you're feeling a bit edgier, try mixing black steel hoops with some chain details and spike-topped labrets. Your ear is your canvas, so grab your favorite Bodycandy pieces and start creating your masterpiece.
Got Piercing Questions? We've Got Answers.
Alright, let's get into it. You've got questions buzzing around about what jewelry to use, how to know when you're healed, and all the little details in between. We hear you! Consider this your go-to spot for the real answers, so you can feel 100% confident about your piercing choices.
Can I Use Regular Earrings in My Cartilage Piercing?
This is a big one, and we get it all the time! The short answer is, while you technically can put a standard earring in a fully healed cartilage piercing, it’s usually not a great idea. Here’s why: most of those earrings you buy at the mall have super thin 20g posts and those classic, but kinda awful, butterfly backs.
Your cartilage piercing was most likely done with a thicker 16g or 18g needle. When you put a thinner earring in, the piercing hole can actually shrink down. This makes it a real pain (sometimes literally) to get your proper cartilage jewelry back in later. And let's not even get started on butterfly backs—they're notorious for collecting gunk and poking you in your sleep. No thanks.
For a happy cartilage piercing, your best bet is sticking to jewelry made for it, like flat back labrets. They’re way more comfortable, easier to keep clean, and they match the gauge your piercing is actually used to.
How Do I Know When My Piercing Is Fully Healed?
Patience is probably the hardest part of getting a new piercing! Healing times vary like crazy from person to person, but the signs that you’ve finally crossed the finish line are pretty universal.
- There's zero pain, even if you accidentally snag it on a sweater.
- All the initial redness and swelling have completely vanished.
- You're not seeing any discharge—not even the normal "crusties."
- The tissue right around the jewelry feels soft and normal, not hard, tender, or raised.
Basically, the tunnel of skin inside your piercing (piercers call this a fistula) should feel solid and established. If you're even a little unsure, the absolute smartest move is to pop by your piercer’s shop for a quick check-up before you start swapping out jewelry.
What's the Difference Between Threading Types?
You've probably heard your piercer talk about "internally" vs. "externally" threaded jewelry. This isn't just piercer-nerd talk; it's actually super important for the health of your piercing, especially when it's new.
- Externally threaded jewelry has the screw threads on the outside of the post. Think of it like dragging a tiny cheese grater through your delicate piercing hole every time you insert it. Ouch! This can cause irritation and even tear the skin.
- Internally threaded jewelry is the good stuff. The post itself is perfectly smooth, and the decorative top has a little screw that goes into the post. It slides through your ear without any scraping or drama.
For new or sensitive piercings, internally threaded jewelry is the only way to go. It's the professional standard for a reason and ensures a smooth, irritation-free start for your awesome new earrings for piercing.
Ready to find that perfect piece for a healed piercing or start dreaming up your next one? Bodycandy has the largest selection of high-quality, stylish jewelry you could ask for.