So, you've just rocked a new piercing? Awesome! Now, let's talk aftercare. The gold standard, trusted by piercers everywhere, is the humble sea salt soak. It's a super simple, natural way to keep your new bling clean and happy while it heals. This approach creates the perfect environment for your body to do its thing, gently cleansing the area without any harsh chemicals.
Ready to become an aftercare pro? Let's dive in.
Why Sea Salt Soaks Are Your Piercing's Best Friend
Welcome to the club! You've picked out some killer new jewelry from BodyCandy, and now the most important part begins: the healing journey. Let's get into why sea salt soaks are the absolute go-to for piercing aftercare. This isn't just some passing trend; it's a method backed by science that pros have relied on for ages.
A warm sea salt soak works its magic by creating an isotonic solution—that's just a fancy way of saying it matches your body's own natural salinity. This gentle balance lets the solution flush out bacteria and any buildup from inside the piercing without causing irritation.
Gentle Cleansing Without The Harshness
Unlike aggressive antiseptics like rubbing alcohol or hydrogen peroxide—which can actually harm the delicate, healing tissue—a sea salt soak works with your body. Those harsh chemicals often lead to dryness and irritation, which can seriously slow down your healing time. A proper soak, on the other hand, does the exact opposite.
Here's a quick look at how it helps:
- It Soothes Irritation: The warmth from the water boosts blood flow to the area. This is huge because it brings in the oxygen and nutrients needed to promote healing.
- It Reduces Swelling: The saline solution helps draw out excess fluid that's trapped in the tissue, which can really calm down that initial puffiness.
- It Softens and Removes 'Crusties': Those little crusts that form are a totally normal part of healing. Soaking makes them soft so you can wipe them away gently, keeping you from picking at the site and tearing new skin.
Think of it this way: Your body is the hero doing all the hard work of healing. The sea salt soak is its trusty sidekick, creating the perfect, clean environment for it to succeed.
This simple routine can turn aftercare into a mini spa moment for your piercing. For a complete overview of what to expect, you might want to check out our guide covering everything you need to know about getting your first-time piercing. By sticking with this gentle approach, you're setting yourself up for a smoother, faster, and much happier healing process.
Crafting The Perfect Sea Salt Soak Recipe
Ready to mix up the perfect healing potion for your new piercing? It’s super simple, but getting the ratio right is absolutely critical. An incorrect mixture can seriously irritate your piercing, turning your helpful aftercare ritual into a huge headache.
So let's get this recipe perfect from the start.
Think of it like baking—a little too much of one ingredient can throw the whole thing off. The goal is to create an isotonic solution, which is a fancy way of saying we want to match the salt concentration that’s naturally in your body. This sweet spot allows for gentle cleansing without causing dreaded dryness or irritation.
Picking Your Key Ingredients
Before you start mixing, let’s talk ingredients. This is a two-ingredient recipe, which means choosing the right ones is non-negotiable.
First up, the salt. You absolutely must use non-iodized sea salt. Regular table salt is a major no-no; it's packed with iodine and anti-caking agents that will just make your fresh piercing angry. Pure, fine-grain sea salt is your best friend here.
Next is the water. To avoid introducing any unwanted bacteria, your best bet is always distilled or bottled water. If you're in a pinch and need to use tap water, you must boil it for at least five minutes and then let it cool to a comfortable, warm temperature before using it.
Getting these two components right is the foundation of a safe and effective sea salt soak. Don't be tempted to substitute with other salts like Epsom or Himalayan pink salt—they contain minerals and additives that just aren't suitable for a healing wound.
The Foolproof Measurement
Here’s the golden ratio you need to memorize:
- 1/4 teaspoon of non-iodized sea salt
- 8 ounces (1 cup) of warm, sterile water
Mix the salt into the warm water until it’s completely dissolved. That's it! One of the biggest mistakes people make is thinking "more is better" and adding extra salt. This creates a hypertonic solution that’s way too harsh, drying out your skin and leading to irritation bumps.
In fact, using a solution with over a 0.9% salt concentration is linked to a 15% higher rate of complications like those pesky irritation bumps. If you want to dive deeper into the science behind a proper saline mix, check out this great resource from Base Laboratories.
To make it even easier, we've put together a quick reference guide so you know exactly what to grab and what to leave on the shelf.
Sea Salt Soak Ingredients Dos and Don'ts
| Ingredient | What to Use (The Do's) | What to Avoid (The Don'ts) |
|---|---|---|
| Salt | Pure, non-iodized sea salt. Always check the label to be sure! | Table salt with iodine, Epsom salt, or any salt with added fragrances or colors. |
| Water | Distilled or bottled water for guaranteed sterility. | Unboiled tap water, which can contain bacteria and other contaminants. |
| Tools | A clean, dedicated glass or ceramic cup for mixing. | Reusing old containers or mixing in a cup you just drank from. |
Sticking to this simple list ensures your piercing gets the gentle, effective care it needs to heal beautifully. No guesswork, no irritation—just happy healing.
Mastering Your Piercing Soak Technique
You've mixed your perfect healing solution, so what’s next? Let's get into the actual soaking process. Nailing the technique is just as crucial as the recipe itself—it’s how you give your new piercing all the healing love it needs without any extra drama.
Whether you're healing a brand-new navel ring or a delicate cartilage stud, the core principles are always the same: be gentle, be clean, and be consistent. Before you even think about touching your piercing, always wash your hands thoroughly with soap and water. This is non-negotiable!
The visual below is a great little reminder of the simple recipe we covered, breaking down the three key parts of a perfect soak.
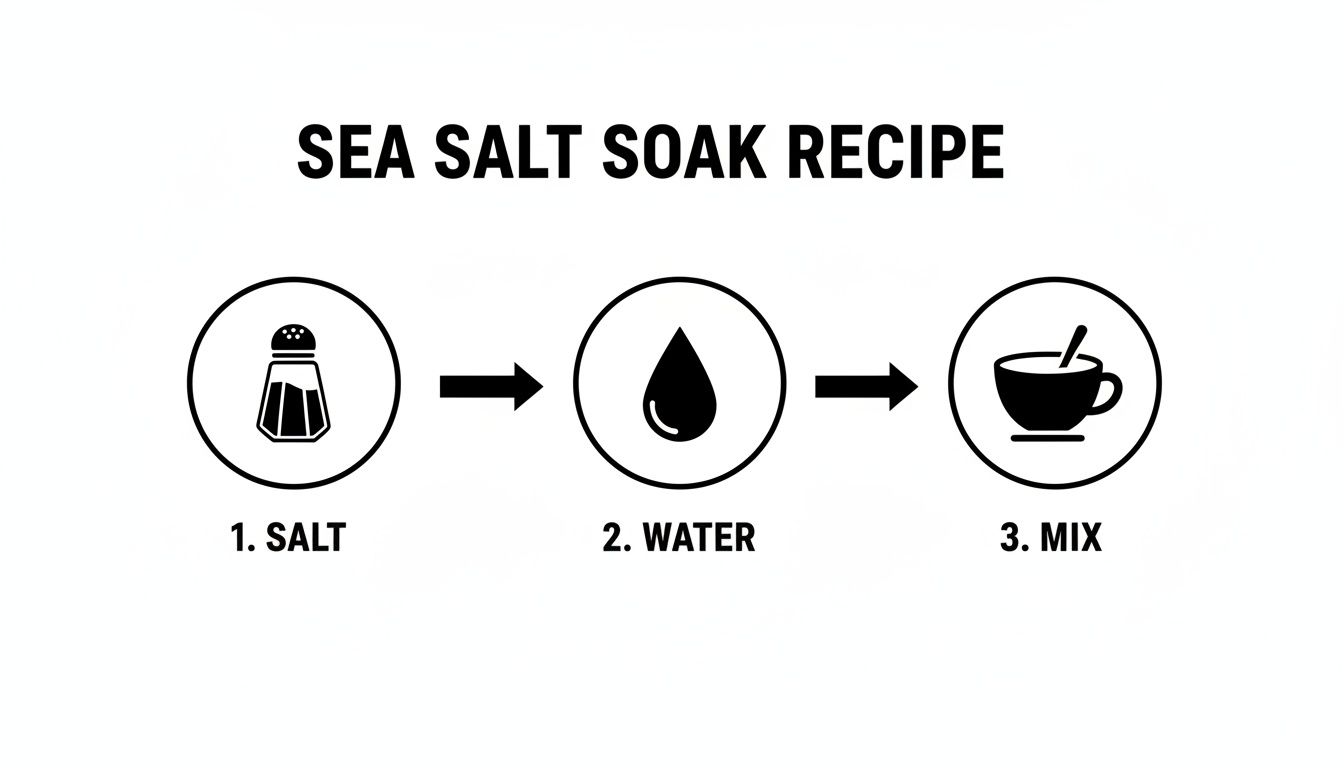
This simple flow—salt, water, mix—is the foundation of every successful sea salt soak. It guarantees your solution is both safe and effective. With your fresh, warm solution ready to go, it’s time to pick your method.
Choosing Your Soak Method
Look, not all piercings can just be dunked into a cup. Where your piercing is located will determine the best way to get it soaked. Don’t worry, both methods are super easy.
-
Full Submersion: This is the go-to for piercings like your navel or nipples. Just fill a small, clean shot glass or a disposable cup with your warm saline solution. Lean forward, press the cup over your piercing to create a gentle seal, and then carefully lie back. Now you can just relax and let it soak!
-
Saturated Compress: For those trickier spots like ears, eyebrows, or nostril piercings, the compress method is your best friend. Simply soak a sterile gauze pad or a clean, lint-free paper towel in the solution. Hold it gently but firmly against your piercing, making sure the entire area gets completely saturated.
No matter which method you use, the goal is to keep the piercing fully in contact with that warm solution. This helps the saline soften any "crusties" (that dried lymph fluid) and gently flush the area clean.
Timing and Frequency Are Everything
Now for the two biggest questions everyone asks: how long and how often? Getting this part right is the key to avoiding irritation and promoting a happy heal.
The ideal time for your sea salt soaks for piercings is between 5 and 10 minutes. Any longer and you risk drying out the surrounding skin, which can actually slow down healing. Think of it as a quick, therapeutic bath, not an all-day swim.
As for how often, twice a day is the sweet spot. A good soak in the morning and another one in the evening is perfect for keeping your piercing clean without overdoing it. Remember, consistency is way more important than intensity!
Pro Tip: After your soak, don't just leave the area wet. Gently pat it completely dry using a fresh, disposable paper towel. Regular bath towels are a definite no-go—they can harbor bacteria and snag on your gorgeous new jewelry.
By mastering these simple techniques, you’re not just cleaning your piercing; you’re creating the perfect environment for it to heal beautifully. It’s a small daily ritual that pays off big time, ensuring your new BodyCandy bling looks amazing for years to come.
Troubleshooting Common Healing Problems
Even when you do everything right, piercings can get a little fussy. Don't panic! This is your go-to guide for navigating those common bumps in the road. Most of the time, a little troubleshooting is all it takes to get your healing journey back on track.
First, let's talk about what's normal. Some redness, a bit of swelling, and those little "crusties" (which are just dried lymph fluid) are all totally expected with a new piercing. Your body is doing its thing, and these are just signs that the healing process has officially kicked off. A gentle sea salt soak is perfect for managing this initial phase.
Identifying Irritation Bumps
Ah, the dreaded irritation bump. That little reddish bump right next to your piercing is super common and almost always a sign that something is bothering it. It's not an infection, but a localized flare-up. The good news? They're usually easy to fix once you pinpoint the cause.
Think about your daily habits. Are you...
- Sleeping on the piercing? This is a huge culprit, especially for cartilage piercings. Constant pressure is a recipe for an angry piercing.
- Over-cleaning or using a harsh mix? Soaking too often or with a solution that's too salty will dry out and seriously annoy the skin.
- Snagging your jewelry? Catching your new bling on your hair, clothes, or towel can cause trauma to the healing tissue.
- Twisting or turning your jewelry? This is old-school advice that we now know is a major no-no. It just introduces bacteria and irritates the piercing channel.
Once you figure out what's causing the problem, correcting that habit is step one. Keep up with your gentle sea salt soaks for piercings once or twice a day to help calm things down. The warmth from the soak boosts blood flow, which is exactly what your body needs to heal.
Irritation is your piercing’s way of saying, "Hey, something's bugging me!" Listen to your body, pinpoint the cause, and give it the gentle care it needs to calm down.
When To See a Professional
Knowing the difference between simple irritation and a full-blown infection is crucial. While irritation is annoying, an infection needs medical attention.
Irritation typically looks like:
- Redness and minor swelling right around the piercing.
- A small, fluid-filled bump next to the piercing hole.
- Clear or whitish fluid (lymph) that dries into crusties.
An infection, on the other hand, is much more serious. Look out for:
- Intense, spreading redness and major swelling.
- Skin that feels hot to the touch.
- Thick, yellow, green, or foul-smelling pus.
- Severe pain or a fever.
If you suspect you have an infection, do not remove the jewelry. See a doctor right away. Taking out the jewelry could let the hole close up, trapping the infection inside and making things worse.
Remember, healing isn't always a straight line. A fresh cartilage piercing from BodyCandy's collection, for example, can take anywhere from 3 to 12 months to fully heal. But consistent, correct aftercare is your best friend. For a more detailed timeline of what to expect, check out our guide on the healing times for popular piercings.
Advanced Aftercare Tips From the Pros
Alright, so you’ve got the sea salt soak routine down. Now it's time to level up your aftercare game with some insider knowledge that can take your healing from good to *great*. These are the little secrets that make for an exceptionally smooth healing journey.We get it—life is hectic, and a full 10-minute soak isn't always going to happen. This is where a sterile saline spray becomes your best friend. Think of it as your aftercare hero for when you're on the move.
A quick spritz is perfect for a gentle cleanse after the gym or while you're traveling. It’s convenient, totally sterile, and you don't have to worry about mixing anything.
But don't toss out your soaks just yet! The warmth from a traditional soak is fantastic for increasing blood flow and soothing any irritation, something a cold spray just can't do. A truly top-tier routine often uses a combination of both.
Upgrade Your Jewelry Game
One of the most significant game-changers in healing is matching great aftercare with high-quality jewelry. What you put in your piercing is just as critical as how you clean it. If you're struggling with irritation that just won't quit, your jewelry might be the real problem.
This is where premium, hypoallergenic metals can make a world of difference. Switching to implant-grade titanium or 14k gold from BodyCandy can calm down a fussy piercing like nothing else. These materials are biocompatible, which means your body is far less likely to have a reaction to them. For anyone with sensitive skin, this combo—hypoallergenic jewelry plus proper soaks—is the ultimate formula for a happy, healthy piercing.
Globally, major piercing markets like the UK and Australia, which see over 10 million procedures each year, require 0.9% sterile saline to head off problems like hypertrophic scarring, which can impact up to 10% of new piercings.
Crucial Lifestyle Adjustments
Your daily habits have a huge impact on how well your piercing heals. A few minor tweaks can save you from major headaches later on.
Pro Tip: Remember, your new piercing is an open wound. Give it the same respect you'd give any other injury. Your job is to keep it clean, dry, and protected from any bumps or snags.
Here are a few things that are absolutely non-negotiable:
- Avoid Submerging It: Stay out of pools, hot tubs, lakes, and oceans while it's healing. These are basically playgrounds for bacteria that can lead to a nasty infection.
- Keep Products Away: Hairspray, makeup, lotions, and perfumes are full of chemicals that can seriously irritate a fresh piercing. Be careful when applying them and try to create a little barrier around your jewelry.
- Don't Twist the Jewelry: This is an old myth that needs to die! Twisting or turning your jewelry just drags bacteria into the piercing and tears up the delicate tissue your body is working hard to heal. Just leave it alone!
Mastering these advanced tips will help ensure your piercing heals beautifully, so you can show off your new BodyCandy bling without any issues. And if you're looking for product-specific advice, we also have a guide explaining why piercers often recommend sterile solutions like H2Ocean aftercare.
Your Sea Salt Soak Questions Answered
Still have a few things on your mind? We get it. We’ve rounded up the most common questions we hear about sea salt soaks and laid out the clear, direct answers you need. Let's clear up any confusion so you can feel totally confident in your aftercare routine.
We hear a lot of creative ideas about what can be used in a soak, but when it comes to a happy piercing, you really have to stick to the basics.
Can I Use Table Salt or Epsom Salt Instead of Sea Salt?
This is a hard no. It might seem like all salt is the same, but it’s definitely not when it comes to a healing piercing.
Table salt contains iodine and anti-caking agents, which are major irritants for a fresh piercing. And Epsom salt? That's actually magnesium sulfate, a completely different compound that’s great for sore muscles but has no place in your aftercare routine. Always, always stick to pure, non-iodized sea salt. Your piercing will thank you.
What if I Make My Sea Salt Soak Too Salty?
It’s tempting to think more salt means more cleaning power, but it's actually the opposite. More salt is not better!
A solution that's too concentrated (hypertonic) will aggressively dry out the delicate new skin around your piercing. This can cause some serious irritation, itchiness, and can even damage the new cells your body is working hard to build. This is one of the fastest ways to create an angry irritation bump. Stick to the 1/4 teaspoon per 8 ounces (1 cup) of water ratio for a safe, balanced solution.
Think of it like this: a properly mixed sea salt soak is like a gentle, hydrating rain shower for your piercing. A solution that's too salty is like a harsh, drying desert wind.
How Do I Know if My Piercing Is Infected or Just Irritated?
This is a huge one, and it's easy to mix them up since they can look similar at first glance. Knowing the difference is key to getting the right help.
Irritation usually involves:
- Localized redness and minor swelling right around the piercing site.
- Clear, whitish, or pale-yellow fluid (this is just lymph) that dries into "crusties."
- Maybe a small, fluid-filled bump right next to the jewelry.
An infection is much more severe and needs medical attention. Look for:
- Spreading, intense redness and significant swelling that gets worse over time.
- Skin that feels hot to the touch.
- Thick, opaque yellow or green pus, often with a bad smell.
- Throbbing pain or a fever.
If you suspect an infection, do not remove the jewelry. This can trap the infection inside. See a doctor right away for proper treatment.
Is It Possible to Soak My Piercing Too Much?
Absolutely. You can definitely have too much of a good thing. Soaking more than twice a day, or for longer than 10 minutes at a time, can strip the area of its natural moisture and healthy bacteria.
This leads to excessive dryness and cracking skin, which just creates more irritation and slows down the whole healing process. Remember, your body is doing the real work here; the soak is just there to give it a clean, supportive environment. Stick to a consistent, twice-daily routine for the best results.
Ready to find the perfect jewelry for your beautifully healed piercing? BodyCandy has an incredible collection of high-quality pieces to help you express your unique style.