So you did it—congrats on your new navel piercing! Now comes the most important part: making sure that new sparkle heals beautifully. I’m not going to lie, the journey from a fresh piercing to a fully healed stunner is a marathon, not a sprint. You’re looking at a commitment of six to twelve months on average.
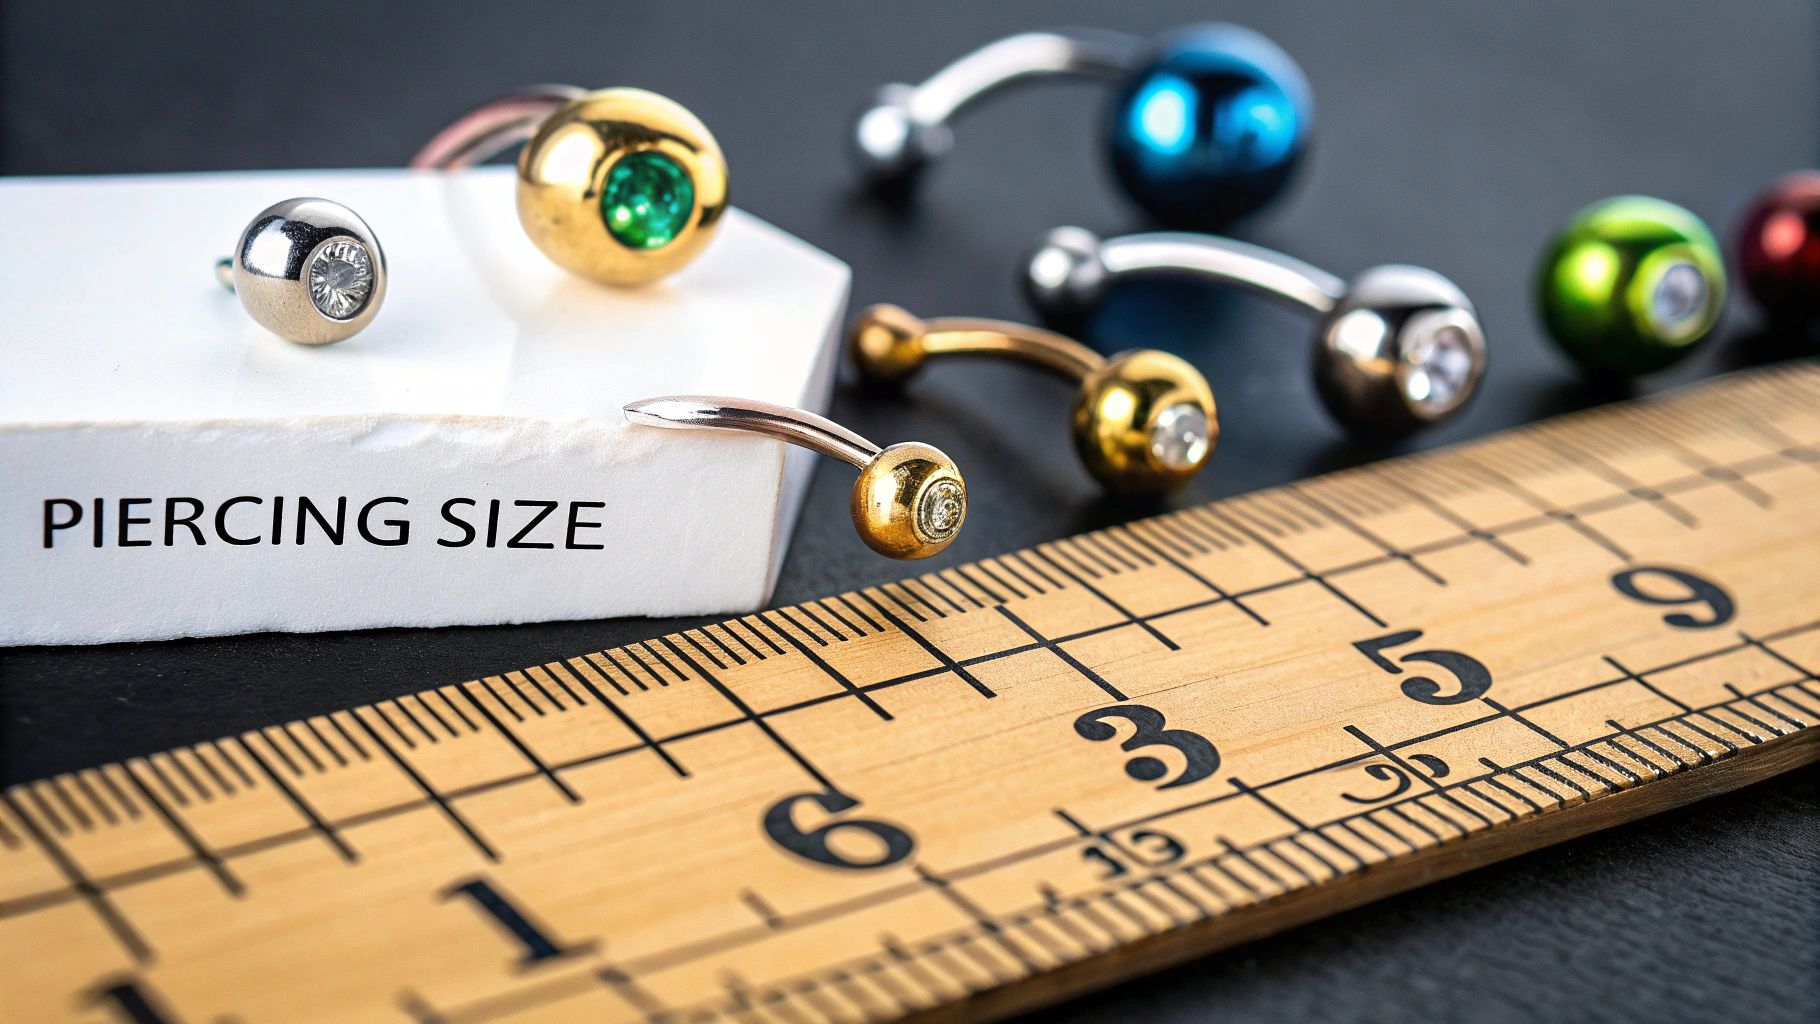
Your Guide to a Happy New Belly Piercing
Welcome to the club! That awesome new belly ring is officially part of your look, and now the real adventure begins—healing it like a pro. Forget any intimidating medical jargon you might have heard. Think of this as advice from your piercing-obsessed bestie who’s been there and is here to guide you with tips that actually work. Getting the aftercare right is everything; it’s what separates a happy, healthy piercing from a frustrating, problematic one.

This guide is your essential first-day companion. We’re breaking down exactly what to expect right after you leave the piercing studio, so you can start your routine on the right foot for a smooth, stylish, and stress-free healing journey.
What to Expect in the First Few Days
The first 48 hours are really all about letting your body adjust. It's totally normal to feel some initial tenderness, see a bit of redness, and even have some mild swelling around the piercing site. Your body is just reacting to the new addition and kicking off the healing process.
You might also notice a little bit of light bleeding during this time—don't panic! This is also a common and completely natural response. The key is to be gentle and let your body do its thing without you getting in the way.
Here’s a quick rundown of what’s normal right at the beginning:
- Mild Redness and Soreness: The area around your new jewelry will likely be tender to the touch. This should start to fade within a few days.
- Minor Swelling: Expect some puffiness. This is just your body's inflammatory response, which is a crucial part of healing.
- Clear or Pale Yellow Fluid: You may see some fluid that dries into "crusties." This is just dried lymph fluid, not pus, and it's a totally normal sign of a healthy, healing piercing.
Friend-to-Friend Tip: The goal during these first few days is simple: keep it clean, keep it dry, and leave it the heck alone. Resist the urge to touch, twist, or play with your new jewelry!
This initial phase really sets the stage for the entire healing journey. By understanding what’s normal from day one, you’ll feel more confident and in control of your navel piercing care routine. Now, let's get into the nitty-gritty of keeping it pristine.
The Perfect Navel Piercing Cleaning Routine
Alright, let's get into the most important part of your navel piercing care—the daily cleaning routine. Keeping your new bling happy and healthy isn't some complicated, time-consuming ritual. It’s all about gentle, consistent care that helps your body do its natural healing thing.
First things first: forget about harsh soaps, alcohol, or anything that promises to "disinfect." Those will only irritate your piercing and actually slow down the healing process. The absolute gold standard, recommended by piercers everywhere, is a simple sterile saline solution. It’s gentle, effective, and mimics your body's own fluids, so it won't cause any drama.
Building Your Simple Cleaning Habit
You’ll want to clean your piercing twice a day, every day, until your piercer gives you the all-clear. Think of it as a little self-care moment for you and your new jewelry. Consistency is truly the name of the game here!
A great time to clean is once in the morning and once at night. Pro tip: tack it onto a habit you already have, like right after you shower. This makes it so much easier to remember.
Seriously, Don't Skip This: Your hands are covered in germs! Before you even think about touching your piercing, wash your hands thoroughly with antibacterial soap and warm water for at least 20 seconds. This is a non-negotiable step to avoid introducing nasty bacteria.
Your Go-To Cleaning Method
Ready for the easiest routine ever? The goal is to get that saline solution where it needs to go without wiggling the jewelry around or causing friction.
- Saturate the Area: Generously spray a sterile saline solution directly onto the piercing. Make sure you get both the top and bottom holes. Don't be shy with it!
- Soften and Remove Debris: Just let the solution sit for about a minute. This will help soften up any "crusties" (that dried lymph fluid we talked about) so they come off easily without any picking or scrubbing.
- Gentle Rinse: If you’re in the shower, you can let clean, warm water run over the piercing for a few seconds to rinse away the saline and any loosened gunk. If not, another quick spray of saline will do the trick just fine.
- Pat Dry Carefully: This is a super important step! Use a clean, disposable paper towel or a non-woven gauze pad to gently pat the area completely dry. Avoid cloth towels at all costs—they can harbor bacteria and snag on your jewelry, which is a recipe for disaster.
Saline sprays are incredibly convenient and, most importantly, sterile. Lots of piercing aftercare products, like H2Ocean, are designed for this exact purpose. If you want to learn more about why piercers love it, you can check out our deep dive on H2Ocean aftercare products. It gives you the full scoop on why it's a solid choice.
A quick note on DIY solutions: making your own sea salt soak at home can be risky. It's almost impossible to get the salt-to-water ratio exactly right, which can easily lead to irritation. Sticking with a pre-made, sterile saline spray is always the safest bet for a happy piercing.
Daily Navel Piercing Do's and Don'ts
Feeling a little overwhelmed? No worries, we got you. Here’s a quick-reference guide to keep your new piercing on the right track during its healing journey.
| Do ✅ | Don't ❌ |
|---|---|
| Do wash your hands thoroughly before every cleaning session. | Don't use harsh chemicals like alcohol or hydrogen peroxide. |
| Do use a sterile saline wound wash spray. | Don't twist or turn your jewelry during cleaning. |
| Do gently pat the area completely dry with a paper towel. | Don't use cotton balls or Q-tips that can leave fibers. |
| Do clean your piercing twice daily, every single day. | Don't over-clean, as this can cause dryness and irritation. |
Keep this handy, and you'll be well on your way to a beautifully healed navel piercing. Simple, consistent care is all it takes!
Understanding the Navel Piercing Healing Stages
So, you’ve got the bling, but what’s the road ahead actually look like? Healing a navel piercing is a marathon, not a sprint. Knowing what your body is doing behind the scenes can make the whole process way less stressful and help you spot when something isn't quite right.
The full healing journey for a belly button piercing can take anywhere from six to twelve months. Yep, you read that right! It’s a long haul because your midsection moves, twists, and is often covered by clothing—all things that can irritate a new piercing. Your body is building a brand-new tunnel of skin (called a fistula) through your navel, and that process just takes time and patience.
The First Few Weeks
This is the initial, most intense phase. Right after you leave the studio, expect some redness, tenderness, and a bit of swelling. This is totally normal—it’s just your body's natural "what is this?!" reaction and a sign that the healing process has officially kicked off.
You'll also notice some clear or pale-yellowish fluid that dries into "crusties" around the jewelry. Don't panic! This is just dried lymph fluid, and it's a sign your body is hard at work healing. Just gently clean it away with your saline spray. Absolutely no picking!
Pro Tip: This is not the time to test-drive your new high-waisted jeans. Stick to loose, breathable clothing to avoid putting pressure or friction on your new piercing. It will thank you for it!
The Middle Months
After the first month or two, your piercing will probably look pretty healed on the outside. The initial redness and swelling will have calmed down, and it's easy to think you're in the clear. Not so fast!
This is what’s known as the "settling" or "toughening up" stage. While the surface looks good, that fistula on the inside is still super delicate and needs more time to strengthen. Your piercing might feel totally fine one day and a little bit grumpy the next. This is completely normal as your body continues to fortify the new tissue.
Keep up with your cleaning routine and continue to be gentle. This is the stage where it’s most tempting to slack off on aftercare, but consistency is what will get you to the finish line without any annoying setbacks. For a deeper look at how this timeline stacks up against others, check out our guide on healing times for popular piercings.
Knowing When You're Fully Healed
So, how do you really know when you've finally crossed the finish line? A fully healed navel piercing will show a few key signs:
- The fistula (the tunnel of skin) feels completely formed and smooth.
- You can gently move the jewelry without any pain or discomfort.
- There's no more redness, swelling, discharge, or crusting—ever.
- The skin around the entry and exit holes looks just like the rest of the skin on your stomach.
This simple infographic breaks down the core steps for your daily care routine, which are crucial during every single healing stage.
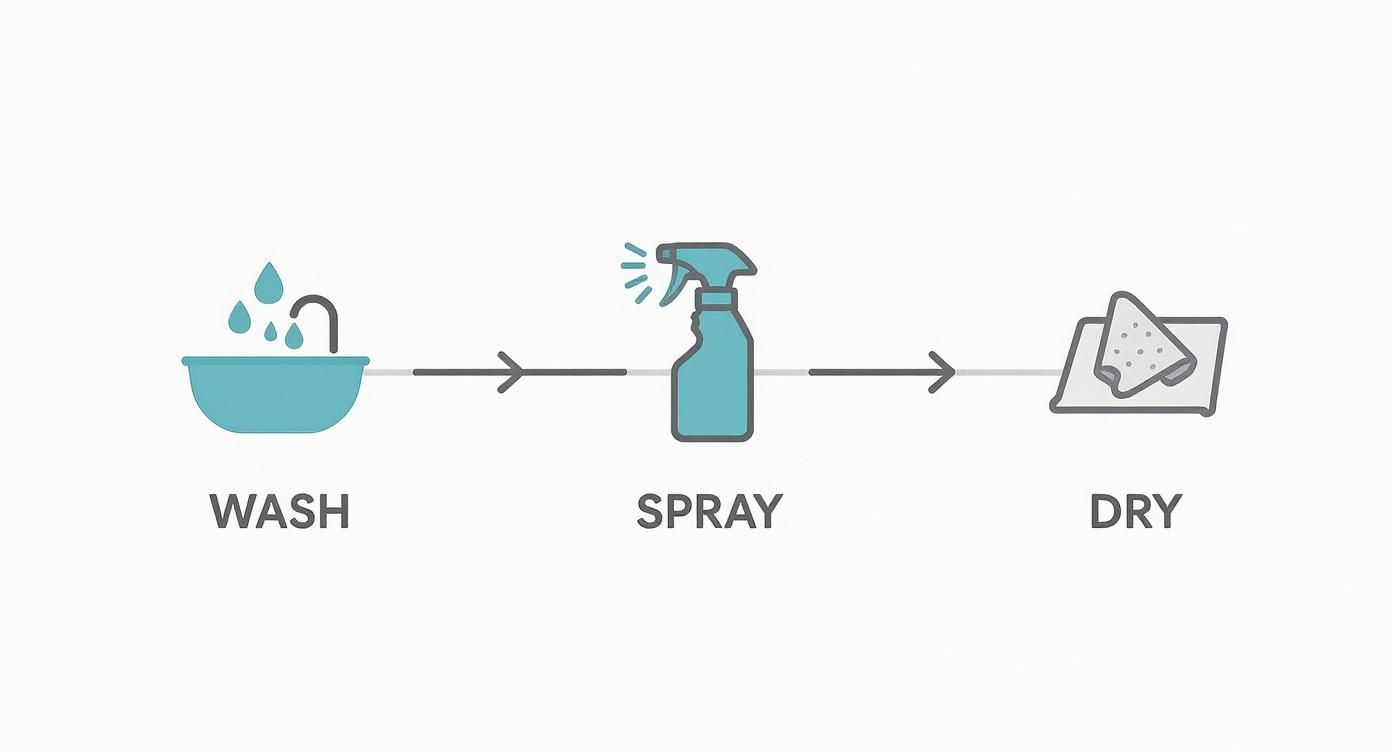
This visual is a great reminder that proper hygiene is the non-negotiable foundation for a happy, healthy piercing. It's a simple, repeatable process that protects your piercing while it does its thing.
Once you’re fully, truly healed, it’s time for the fun part—exploring all the amazing belly rings Bodycandy has to offer!
Troubleshooting Common Piercing Problems
Even when you follow every aftercare rule to the letter, piercings can sometimes get a little moody. Don't panic! Hitting a small bump in the road is totally normal, and knowing how to handle it will get you back on track in no time.
Most issues that pop up are just simple irritation, not a full-blown crisis. It's your body's way of telling you that something is bothering your new piercing. The trick is learning to listen and respond correctly to keep your navel piercing care on point.
Is It an Irritation Bump or an Infection?
This is the big question that sends everyone into a spin. Let's break it down so you can easily tell the difference.
An irritation bump is usually a small, fluid-filled bump that appears right next to the piercing hole. It might look a little reddish and feel tender, but it shouldn't cause intense, throbbing pain. These bumps are basically your piercing’s way of saying, "Hey, stop snagging me on your jeans!" or "This jewelry material isn't my favorite."
On the other hand, an infection is a whole different beast. An infection involves the entire piercing area, not just one little spot.
Key Takeaway: An irritation bump is a localized annoyance. An infection is a widespread, more serious problem that requires prompt attention. If you see thick, green, or foul-smelling pus and feel intense heat or radiating pain, it's time to see a doctor.
What to Do About Annoying Bumps
So, you've spotted an irritation bump. First things first: do not pick at it! Seriously. The key is to figure out what's causing the irritation and stop it.
- Check Your Habits: Are you sleeping on your stomach? Do you wear high-waisted pants that constantly rub against the jewelry? Maybe you're snagging it with your towel after a shower? Be honest with yourself and adjust your daily habits to give your piercing some breathing room.
- Jewelry Check-In: The jewelry itself could be the culprit. If your initial barbell is too short and not allowing for normal swelling, your body will let you know. The same goes if you're sensitive to the metal (like nickel in low-quality steel). A quick visit back to your piercer can solve this; they might suggest switching to a longer bar or a piece of high-quality, implant-grade titanium.
- Stick to the Basics: Don't go rogue with your aftercare routine. Over-cleaning or using harsh chemicals like alcohol or peroxide will only make the irritation worse. Just stick to your simple, twice-daily saline spray routine.
Understanding Piercing Migration and Rejection
Another potential issue to watch for is migration. This is when your piercing slowly starts shifting from its original spot. You might notice the skin between the entry and exit holes looking thinner over time.
Migration can happen for a few reasons, like constant pressure from clothing, improper placement by the piercer, or if your anatomy just wasn't quite right for a traditional navel piercing in the first place.
If migration goes unchecked, it can lead to rejection, where your body literally pushes the jewelry right out of your skin. If you suspect your piercing is on the move, it's crucial to see your piercer right away. They can assess what's happening and advise whether it's best to remove the jewelry to prevent significant scarring. It’s a bummer, for sure, but saving your skin is the top priority.
Lifestyle Tips for Easy Healing
Taking care of your new navel piercing is about more than just the daily cleaning routine. The small choices you make every day can have a huge impact on how well it heals. It's all about creating a happy, low-stress environment for your piercing to settle in.
Think of it as seamlessly integrating your new piercing into your life. A few simple adjustments can make all the difference, helping you sidestep irritation and enjoy a faster, smoother healing journey.
Dress for Success
Your wardrobe can be your piercing's best friend or its worst enemy right now. High-waisted jeans, tight leggings, and chunky belts that sit right on your navel? It’s time to put them on pause for a bit. These pieces create friction and pressure, which are notorious for causing those dreaded irritation bumps.
For the next few months, try leaning into these styles instead:
- Low-rise bottoms: Keep the waistband well below your piercing.
- Loose-fitting dresses and shirts: Let that piercing breathe! Airflow is key.
- Soft, breathable fabrics: Cotton and other natural fibers are your best bet. They won't trap moisture against your skin.
This simple wardrobe shift does wonders. It cuts down on the chances of snagging your jewelry and promotes the airflow that's essential for a happy piercing.
Everyday Habits That Help Healing
Beyond your closet, a few other lifestyle tweaks can help you cruise through the healing process. It might sound obvious, but getting enough sleep, eating a balanced diet, and staying hydrated gives your body the fuel it needs to build new tissue and fend off potential problems.
Heads Up: For the entire healing period, you need to avoid swimming. That means no pools, oceans, lakes, or hot tubs. These bodies of water are teeming with bacteria that can easily lead to a nasty infection. Your piercing is an open wound—protecting it is priority number one.
You'll also want to be mindful during workouts. Intense ab exercises that involve a lot of crunching or twisting can put a real strain on the area. It’s a good idea to stick to lower-impact activities for the first couple of months to avoid adding unnecessary stress.
Once you're all healed up, you'll be ready to explore all the fun jewelry options out there. Our crash course on navel ring styles and materials is the perfect place to start looking for your next favorite piece.
Your Navel Piercing Questions Answered
Got a few nagging questions about what's going on with your new belly button piercing? Good. It means you're paying attention! Let's clear up some of the most common things people wonder about while their navel piercing is healing.
We'll tackle everything from the ever-tempting jewelry change to figuring out what those weird "crusties" are all about. Think of this as your personal piercing FAQ, designed to give you peace of mind.
When Can I Change My Navel Jewelry?
This is the big one, and the short answer is: patience! You absolutely have to wait until your piercing is 100% fully healed before swapping out that initial barbell. For a navel piercing, that's a long haul—anywhere from six to twelve months.
Changing your jewelry too soon is a huge mistake. It can trigger some serious irritation, invite a ton of bacteria into what is still an open wound, and basically hit the reset button on your entire healing process. Trust us, nobody wants that!
Your professional piercer is the only one who can give you the final green light. Once they've confirmed you're all healed up, you can finally celebrate by diving into Bodycandy’s massive collection of gorgeous belly rings!
Are Yellow Crusties Around My Piercing Normal?
Yep, completely and totally normal! Those little crusty bits you're seeing are just dried lymph fluid. It's a natural part of the healing process and a good sign that your body is doing its job.
This fluid is usually clear, white, or a pale yellow. The important thing is to gently clean it away with your saline solution during your daily soaks. Just don't pick at it!
Heads Up: While pale yellow crusties are fine, be on the lookout for anything different. If you see thick, opaque, green, or foul-smelling discharge—especially if it comes with intense pain or heat around the piercing—it's time to check in with a doctor. That could be a sign of infection.
What Should I Do If I Snag My Piercing?
Ouch! Snags happen, even when you're being careful. First thing's first: take a deep breath and gently untangle whatever your jewelry is caught on. Don't yank. The area is probably going to be sore, red, and pretty angry with you for a little while.
The best course of action is to do a gentle saline soak to help calm it down and clean the site. Keep a close eye on it for the next few days. If the swelling gets worse, the pain doesn't go away, or you see any signs of infection, give your piercer a call.
To avoid this drama in the first place, try to stick with looser clothing (no high-waisted jeans for a bit!) and be extra mindful when drying off with a towel during those early healing months.
Ready to find your new look? At Bodycandy, we have an incredible collection of belly rings waiting for you. Find your perfect style and get ready to show off that beautifully healed piercing! Shop the full collection today.