So, you're thinking about sizing up your lobes? Getting that awesome stretched look is a killer way to express yourself, but it all comes down to one crucial thing: patience. This guide is your new best friend, here to walk you through the whole journey safely and make sure your lobes stay healthy and happy from your first stretch to your goal size.
Getting Started Without The Guesswork
Alright, you're ready to join the stretched-ear club. Fantastic! But before you even look at your first taper, let's talk about setting a solid foundation. This isn't just about forcing a bigger piece of jewelry in; it's a body modification that deserves some serious respect and care.
Think of your earlobes as the canvas for a rad art project. You wouldn’t start painting on a wet canvas, right? Same logic here. The number one, most important rule is to start with a piercing that is 100% healed.
Is Your Piercing Truly Healed?
And I don't just mean "it doesn't hurt anymore" healed. I mean fully healed, which can take a lot longer than you might think. A standard lobe piercing needs at least 4-6 months to be strong enough to handle the initial stress of stretching. Trying to stretch a fresh or still-healing piercing is just asking for pain, tearing, and infection. No thanks!
So, how can you be sure you're good to go? A healed piercing will have a few key signs:
- No Pain or Tenderness: You can gently touch and move the jewelry without any wincing or discomfort.
- No Swelling or Redness: The area looks calm and matches your normal skin tone.
- No Discharge: You're not seeing any crusties, fluid, or "lymph" coming from the hole.
- Loose Jewelry: The original earring feels a bit loose and can spin around freely without catching.
If you can tick all those boxes, you're probably in the clear. If not, just give it more time. There's no prize for rushing this! For a more detailed look, check out our insights on using ear stretching kits to start your journey off on the right foot.
The Rich History Behind Ear Stretching
When you start stretching, you're doing more than just following a modern trend—you're taking part in an ancient cultural practice that goes back thousands of years. How cool is that? It's a tradition that has connected cultures and generations all over the globe.
It’s an awesome reminder that this modification is a form of personal expression with deep roots, practiced by everyone from tribal warriors to Egyptian royalty. By taking your time and respecting the process, you're honoring that tradition and ensuring your own experience is a positive one.
Choosing Your Ear Stretching Tools
Alright, let's get into the fun part—the gear! Picking the right tools for your stretching journey is like having a good map for a road trip. It makes the whole process smoother and helps you avoid getting painfully lost.
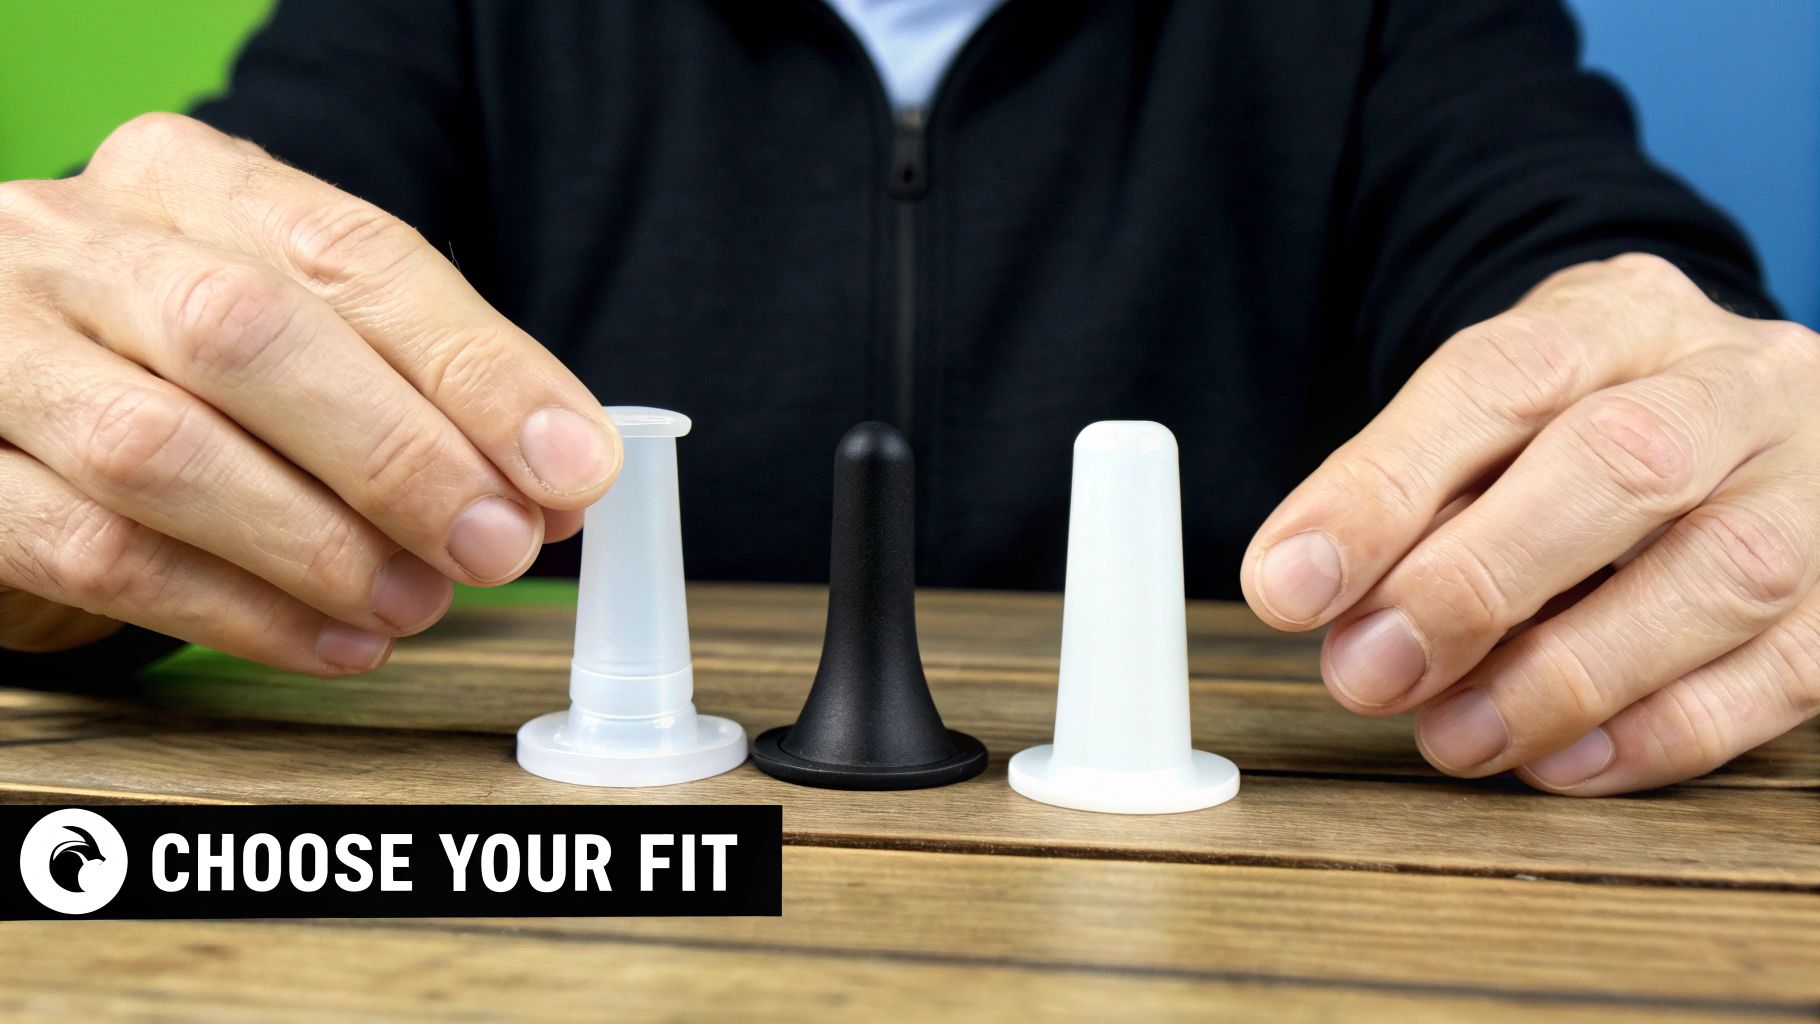
Your toolkit is what stands between a happy, healthy stretch and a painful mistake. It doesn’t have to be complicated, though. The two main players you'll be working with are tapers and plugs.
It’s crucial to understand that these two items have very different jobs. A taper is a cone-shaped tool designed only to guide the next size of jewelry into your ear. Think of it as the key that unlocks the next level. You gently slide it through, immediately follow it with your plug, and then the taper comes right back out. That's its whole purpose.
You should never, ever wear tapers as jewelry. Wearing them for long periods puts uneven weight on your fistula (the piercing channel), which can lead to thinning, tearing, or even a dreaded blowout. If you want to get into the nitty-gritty, you can explore different taper styles and their specific uses to see why they're just a temporary tool.
The real star of the show here is the single-flare plug. This is the jewelry you’ll actually wear as your lobe heals and adjusts between sizes. It has a flat front (the flare) and a flat back, which is secured with a small rubber O-ring. The flare is just slightly larger than the gauge size, so it won’t fall out, and the flat back makes it easy to slip in right after the taper.
Picking The Perfect Materials
When your lobe is freshly stretched, it's essentially a brand-new, sensitive piercing all over again. You have to treat it that way. That means using materials that are non-porous and body-safe to prevent any irritation or bacterial growth.
For fresh stretches, these materials are your best friends:
- Surgical Steel: This is the go-to for a reason. It's durable, non-porous, easy to clean, and pretty affordable. Just be sure it’s implant-grade steel to sidestep any potential nickel allergies.
- Glass: A truly fantastic option. Glass is completely non-porous and has a super smooth surface, which is perfect for sensitive skin. Plus, glass plugs look incredible and have a nice, solid weight to them.
On the flip side, some materials are a definite no-go for healing lobes. These should only be worn once your ears are completely healed at their current size—and we’re talking weeks, not days.
Pro Tip: Avoid porous materials like acrylic, silicone, wood, or stone in a fresh stretch. These materials can harbor bacteria, stick to healing skin, and cause some serious irritation. Save those awesome organic plugs for when your ears are fully healed and ready to show off.
The Unsung Hero: Lubricant
Let's talk about the most underrated but absolutely essential tool in your kit: lubricant. Never, ever attempt to stretch your ears dry. It's a one-way ticket to tearing your skin, causing a ton of unnecessary pain, and setting your progress way back.
A good lubricant makes the entire process smooth and comfortable. You don't need anything fancy, just something natural and skin-safe.
- Jojoba Oil: This is a crowd favorite, and for good reason. Its chemical structure is incredibly similar to your skin's natural oils (sebum), so it's easily absorbed and super gentle.
- Vitamin E Oil: Another excellent choice that’s great for promoting skin health and healing.
- Dedicated Stretching Balm: Many companies make balms specifically for stretching. These usually contain a mix of natural butters and oils designed to moisturize and protect your lobes.
Just a few drops on your lobe and your jewelry will make a world of difference. It helps the taper glide through with minimal friction, protecting that delicate tissue from any damage.
Kits vs. Individual Pieces
So, should you buy a full ear stretching kit or pick out your tools one by one? Especially when you're just starting out, a high-quality kit is often the best way to go. They typically include tapers and single-flare plugs for each size jump, often made from surgical steel, so you have everything you need in one shot.
Buying a kit takes all the guesswork out of the equation. You get a consistent set of tools, ensuring you're making safe, incremental jumps in size. It’s the perfect way to build a setup that will protect your lobes at every single stage of your journey.
Your Safe Stretching Process From Start To Finish
Alright, you’ve got your tools, your lobes are fully healed, and you’re ready to go. Now for the main event—the stretch itself. We'll walk through this together to make sure every step is safe, gentle, and all about listening to what your body is telling you.
Let's start with the absolute golden rule: stretching should never hurt. If you feel a sharp, stinging pain, stop immediately. That's your body's way of saying it's not ready. A little dull pressure or a slight feeling of warmth is totally normal, but actual pain is a huge red flag.
Setting The Stage For A Smooth Stretch
You wouldn't jump into a workout without a warm-up, right? The same logic applies here. Your earlobes will be much more cooperative if you give them a little prep work first, making the tissue more elastic and ready for the new size.
The easiest way to do this is to stretch right after a hot shower. The warmth naturally gets the blood flowing to your lobes and makes the skin soft and pliable. If a shower isn't on the agenda, just hold a warm compress gently against your lobe for a few minutes. It works just as well.
Once your lobe is warm, it’s massage time. Grab a few drops of your chosen lubricant—like jojoba or Vitamin E oil—and gently work it into the front and back of your piercing for a minute or two. This isn't just about moisturizing; it also boosts circulation, which is exactly what you want.
The Moment Of Truth: Inserting The Jewelry
With your lobe prepped and ready, grab your jewelry. Take your taper (or single-flare plug if you're dead stretching) and apply a generous amount of lubricant to it. Seriously, don't be shy here. More lube is your best friend for a smooth, friction-free insertion.
Now for the stretch itself. Here’s how to approach it:
- Line up the taper. Take the small end of the lubricated taper and line it up with your piercing.
- Slow and steady wins the race. Take a deep breath, and as you exhale, begin to slowly and gently push the taper through. It should glide through with very little effort. If you have to force it, stop. Your ear isn't ready.
- Follow with the plug. Once the taper is all the way through, line up your single-flare plug against the larger end. In one smooth motion, use the plug to push the taper out the other side.
- Secure your new bling. Pop the O-ring onto the back of the plug to hold it in place. That's it—you did it!
This simple visual breaks down the core rhythm of your stretching journey.
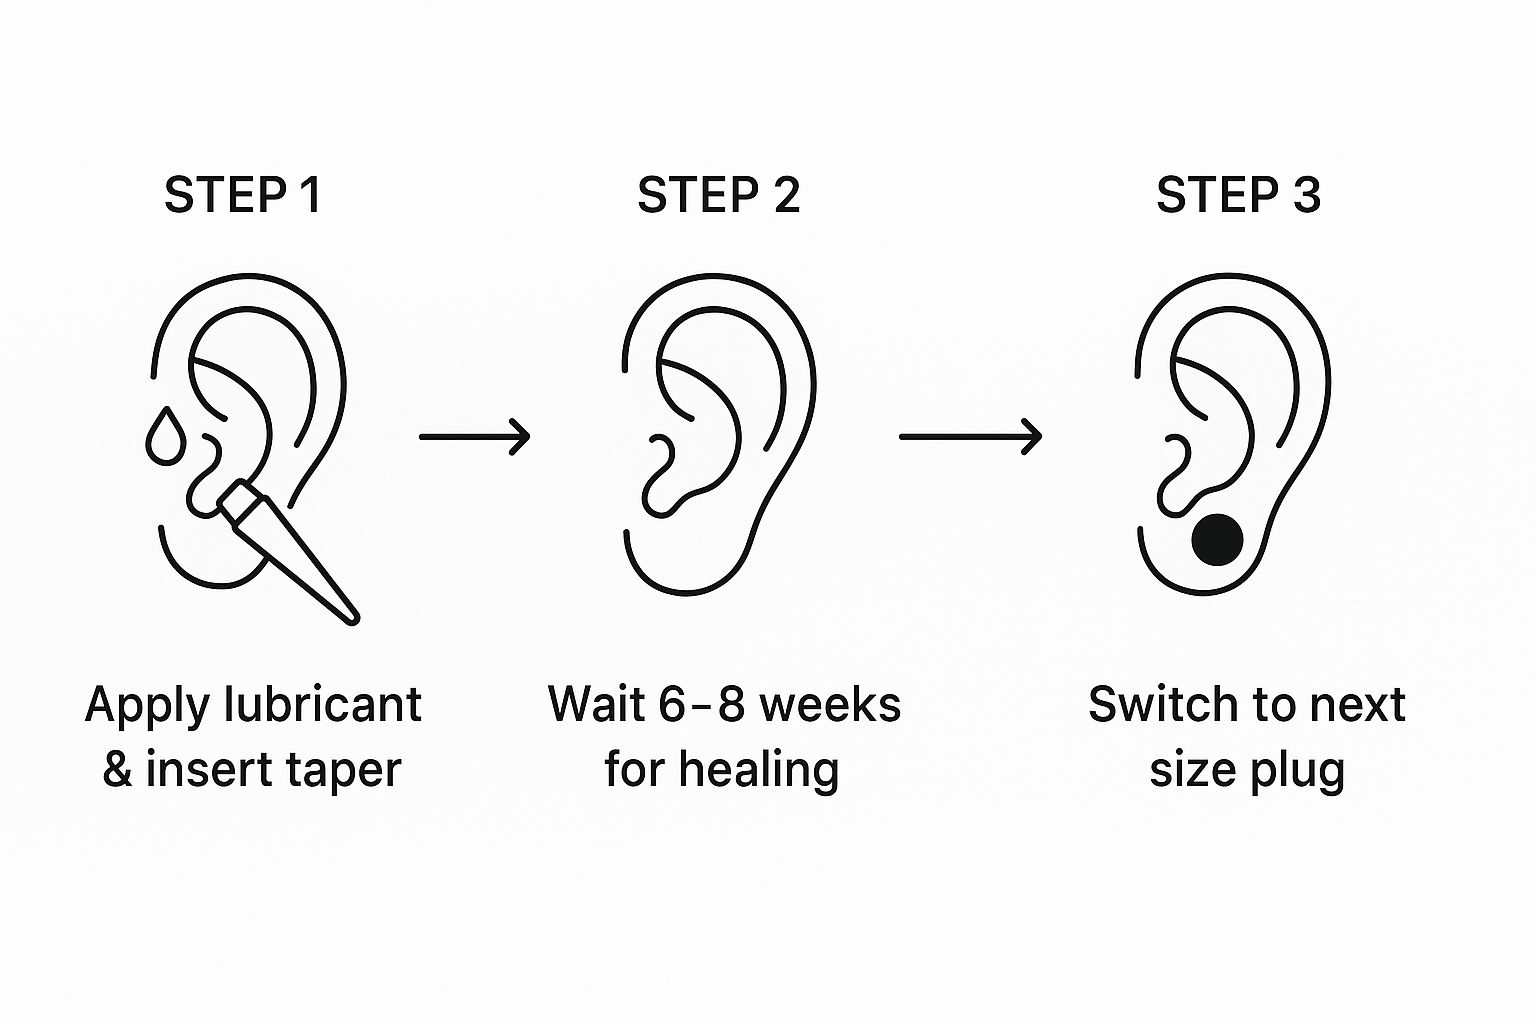
The key here is the cycle of "stretch, wait, repeat." That healing time in between is absolutely crucial for healthy lobes. To help you plan your journey, here's a quick-reference chart.
Ear Stretching Size Chart And Timeline
This chart maps out the standard gauge sizes and, more importantly, the minimum wait time you should respect between each stretch. Trying to rush this is the #1 cause of problems, so take these timelines seriously.
| Gauge Size (AWG) | Size in Millimeters (mm) | Recommended Wait Time |
|---|---|---|
| 16g | 1.2mm | 1-2 months |
| 14g | 1.6mm | 1-2 months |
| 12g | 2.0mm | 1-2 months |
| 10g | 2.4mm | 2-3 months |
| 8g | 3.2mm | 2-3 months |
| 6g | 4.0mm | 3-4 months |
| 4g | 5.0mm | 3-4 months |
| 2g | 6.0mm | 3-4 months |
| 0g | 8.0mm | 4+ months |
| 00g | 10.0mm | 4+ months |
| 1/2" | 12.0mm | 4+ months |
| 9/16" | 14.0mm | 4+ months |
| 5/8" | 16.0mm | 4+ months |
Remember, these are minimums. If your body needs more time, give it more time. Patience is your best tool.
Takeaway: Your body will stretch on its own schedule. Rushing the process by skipping sizes or not waiting long enough is the fastest way to cause a blowout, tear, or thinning, which can permanently damage your earlobe.
Immediate Aftercare For A Fresh Stretch
Congratulations on the successful size-up! It's completely normal for your lobes to feel a bit warm, slightly swollen, or tender for the next day or two. It's just your body's initial reaction to the change.
Here’s what you should do right after a stretch to keep things happy and healthy:
- Clean gently. For the first few days, clean the area once or twice a day with a sterile saline solution or a very mild, unscented soap. Stay away from harsh stuff like alcohol or hydrogen peroxide—they will only dry out and irritate your healing skin.
- Hands off! As tempting as it might be, resist the urge to twist, turn, or play with your new jewelry. Your ear needs some quiet time to calm down and adjust.
- Keep an eye on it. A little redness is fine, but if you notice excessive swelling, severe pain, or any weird discharge, it could be a sign of a problem.
Following these simple steps sets you up for a smooth healing period, which is the foundation for your next successful stretch. This whole journey is about making smart, safe choices for a look you'll love for years to come.
Aftercare And Healthy Lobe Maintenance
Congrats, you did it! You’ve successfully sized up, and your new plugs are looking awesome. But don't get too comfortable just yet—the journey to healthy, happy lobes is a marathon, not a sprint. Proper aftercare is what makes all the difference.
Think of a fresh stretch like a brand-new piercing. It's going to be tender, a little swollen, and it definitely needs some TLC. Your routine for the first week or so is simple but absolutely non-negotiable.
Your Daily Cleaning Routine
For the first few days, your main goal is to keep your lobes clean and let them calm down. You don’t need a complicated routine or a cabinet full of fancy products to make this happen.
A simple saline solution or a very mild, unscented soap is all you really need. A quick, gentle rinse once or twice a day is perfect. When you’re in the shower, just let warm water run over your ears and then gently clean around the jewelry with a bit of soap, making sure to rinse it all away.
Crucial Tip: Stay far away from harsh products like rubbing alcohol, hydrogen peroxide, or antibacterial ointments. These are way too aggressive for healing skin and will do more harm than good, causing irritation and slowing everything down.
Remember to be gentle. No twisting, turning, or fiddling with your jewelry. Your ear just went through a bit of a workout, and it needs some quiet time to recover and adjust.
The Magic Of Oil Massages
Once that initial tenderness and swelling have completely disappeared—usually after a week or two—you can introduce the secret weapon for healthy stretched ears: daily oil massages. This is one of the most important habits you can build for stretching success.
Massaging your lobes for just a few minutes each day with a good-quality oil works wonders. Jojoba oil is the undisputed king here because its structure is incredibly similar to your skin’s natural oils. Vitamin E oil is another fantastic choice.
So, why is this a game-changer?
- Boosts Blood Flow: Massaging encourages circulation, bringing fresh oxygen and nutrients to the tissue, which promotes stronger, faster healing.
- Increases Elasticity: Regular massages keep your skin soft and pliable. This makes future stretches so much easier and safer.
- Breaks Down Scar Tissue: This practice helps minimize the buildup of tough scar tissue, which can make lobes stubborn and more prone to issues down the line.
To do it, just take your jewelry out, put a couple of drops of oil on your fingertips, and gently massage your entire earlobe, front and back. It feels great and is the best long-term investment you can make in your lobes.
Why You Should Give Your Lobes Naked Time
Once your lobes are fully healed and comfortable at their current size, it's a great idea to start giving them some "naked time." This is as simple as it sounds: take your jewelry out for a few hours each day and let your skin breathe.
Leaving your plugs in 24/7 can sometimes restrict blood flow and trap moisture. Letting your lobes hang out jewelry-free for a bit helps improve circulation and allows the skin to firm up and thicken. This is also a fantastic way to help prevent or reduce the wrinkled "cat butt" look that can sometimes develop.
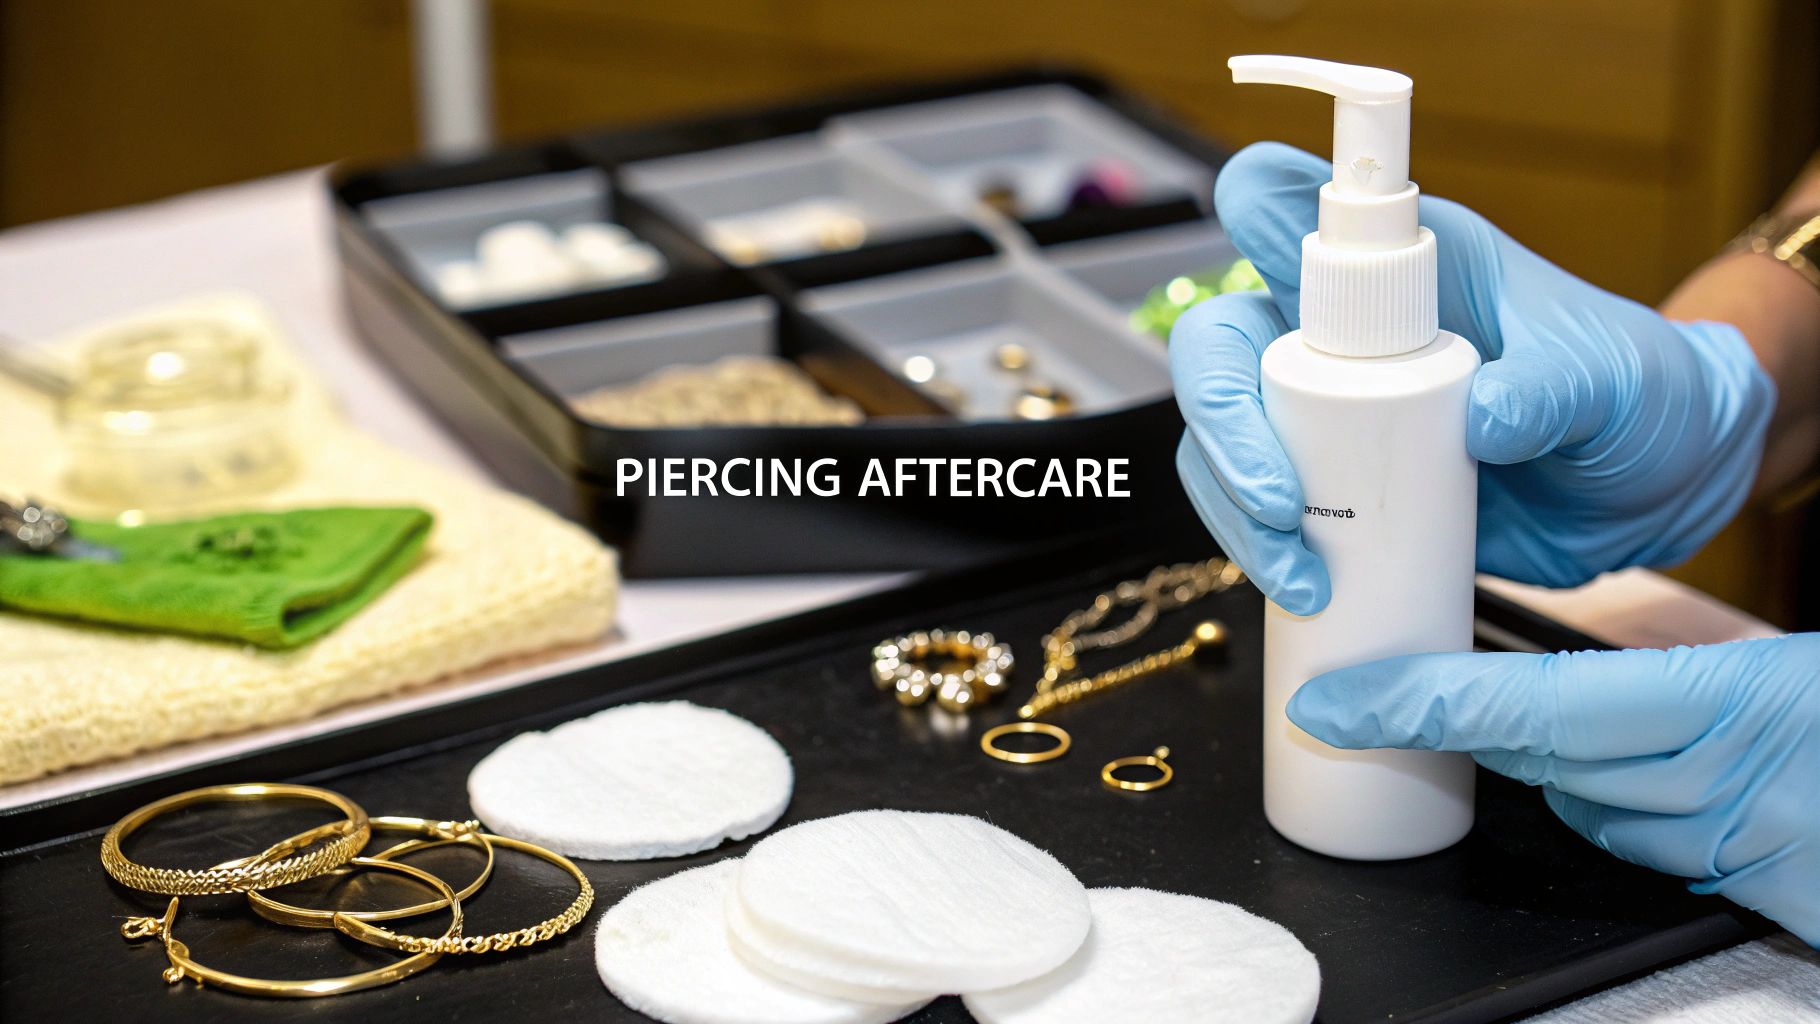
Start with just an hour a day and see how your lobes feel. Over time, you can work up to leaving them out overnight. This simple habit keeps your lobes strong, healthy, and resilient for the long haul. And remember, keeping your ears clean is always key. If you're looking for a solid aftercare product, our guide on using H2Ocean for piercing aftercare has some great info that applies here, too.
What to Do When Stretching Goes Wrong
Even if you’re doing everything by the book, sometimes your lobes just don't cooperate. Don't sweat it. Hitting a snag is a super common part of the stretching journey, and pretty much everyone runs into an issue at some point. Think of this as your field guide for handling those little bumps in the road so you can get back on track.
The most important thing is to listen to your body and act fast when something feels off. Ignoring a problem will only make it worse, trust me. But if you know what to look for and how to react, you can handle these issues like a pro.
The Infamous Ear Stretching Blowout
Let's get the big one out of the way first: the dreaded blowout. This is what happens when you push things too fast or try to skip a size. You end up forcing the inner lining of your piercing (called the fistula) out through the back of your earlobe. It creates this gnarly, fleshy lip that isn’t just ugly—it’s unhealthy for your ear.
You'll know it when you see it. It usually looks like a swollen, angry ring of skin peeking out from behind your jewelry. Your ear might feel tender, look red, and generally seem pretty unhappy.
If you even think you have a blowout, here's what you do immediately:
- Downsize. Now. Take out the jewelry you just stretched with. This part isn't optional. You need to go back down to a smaller size—often two or even three sizes smaller than where you were. Sometimes, it's best to take the jewelry out completely for a few days and let the swelling calm down.
- Go Back to Basics. Treat it like a brand-new piercing. That means cleaning it twice a day with a sterile saline solution. No alcohol, no peroxide, no harsh soaps. Just simple, gentle care.
- Massage It Out (But Not Yet). After the initial pain and swelling have gone down (give it a week or so), you can start daily massages with jojoba oil or Vitamin E oil. This is the key to helping break down that scar tissue and encouraging the fistula to settle back into place.
Dealing with Minor Tears and Irritation
Sometimes the problem isn't a full-on blowout but just some general irritation or a tiny micro-tear. This can happen from a stretch that was a little too rough, sleeping on it funny, or even just snagging your plug on a shirt. You’ll notice some redness, maybe a little swelling, or soreness that sticks around for more than a day or two.
When this happens, just give your lobe a break. Downsizing by one size is usually enough to take the pressure off and let the tissue heal properly. Stick with your saline rinses and try your best to leave it alone.
Allergic Reactions and Unhappy Skin
Is your ear red, itchy, and maybe even a little weepy, even though you waited ages to stretch? You could be having an allergic reaction to your jewelry. This happens all the time, especially with materials like acrylic or cheap metals that contain nickel.
If you suspect an allergy is the culprit:
- Swap Your Plugs: Immediately take out what you're wearing and switch to something completely body-safe, like glass or implant-grade titanium.
- Keep It Clean: Stick to simple saline soaks to help calm the irritation down.
- Take Note: Remember which material caused the problem so you can avoid it in the future, especially when your lobes are in that sensitive, freshly-stretched stage.
Every ear is different. What works for your friend might make your lobes angry. Pay close attention to how your skin reacts and always, always choose high-quality materials over a cheap price tag. Your ears will thank you.
When Your Lobes Just Refuse to Stretch
So, you've done everything right. You've waited for months, you’ve been massaging your lobes daily, and you're ready for the next size... but your ear just says "nope." Welcome to the stubborn lobe club. Hitting a plateau is normal, especially at some of the bigger sizes.
Whatever you do, don't force it. Instead, you've got a couple of classic tricks up your sleeve:
- The Taping Method: This is an old-school technique for a reason. Grab some bondage tape and wrap one thin layer around your current plugs. This increases the diameter just a tiny bit. Every few days, add another layer. It's a super slow, gentle way to coax your piercing to the next size.
- Find Those Half-Sizes: The jump from 2g (6mm) to 0g (8mm) is a notoriously difficult one. That 2mm gap is a huge leap for your fistula. The solution? Look for in-between sizes like 1g (7mm). These half-sizes make the stretch much more reasonable and seriously cut down on your risk of tearing.
Body modification has been around for ages, but its modern revival in the West since the 1990s has seen jewelry sizes commonly ranging from 2 mm to well over 10 mm. Learning to work through these little challenges is all part of the process. You can dig deeper into the history of ear stretching on PlugYourHoles.com. Safely navigating a stubborn stretch is just another step on your own unique journey.
Got Questions About Stretching? We've Got Answers
Alright, still have a few things bouncing around in your head? Good. That means you're taking this seriously, and your ears will thank you for it. Let's tackle some of the most common questions people ask before they start stretching.
Think of this as your personal FAQ session. No question is too out there when it comes to keeping your lobes happy and healthy.
How Long Should I Wait Between Ear Stretches?
This is where patience becomes your best friend. Seriously. The absolute rock-bottom minimum you should wait between stretches is 6-8 weeks. To be honest, though, waiting even longer is always the smarter move.
When you're at smaller sizes, sticking to that two-month goal is pretty solid. But once you start getting into the bigger leagues, especially anything above 0g (8mm), you need to pump the brakes. We're talking a wait time of 3-6 months, sometimes even longer, between sizes.
Your body needs that downtime to work its magic. It's busy building new, healthy tissue and restoring blood flow to your lobes. Rushing the process is the fast track to blowouts, tears, and nasty scar tissue. The best advice? Just listen to your body. If you go to size up and feel any sharp pain or meet a lot of resistance, stop. Your ears are telling you they're not ready. It's that simple.
What Is a Blowout and How Do I Fix It?
Ah, the dreaded blowout. It's what happens when you stretch too fast and the inside of your piercing channel (the fistula) gets forced out the back of your ear, creating a gross-looking fleshy lip. It's almost always caused by stretching too quickly, skipping a size, or trying to force jewelry into a lobe that just isn't ready.
If it happens to you, don't freak out—but you do need to act fast.
- Downsize. Immediately. Take the jewelry out and put in a much smaller size. Sometimes, it's best to leave jewelry out completely for a few days to let the swelling calm down.
- Treat it gently. Go back to basics and treat it like a fresh, angry piercing. Clean it once or twice a day with a sterile saline solution. No harsh soaps or chemicals.
- Massage, massage, massage (but later). Once the initial swelling and soreness are gone, start doing daily oil massages with jojoba or vitamin E oil. This is key for helping to break down that scar tissue so the fistula can hopefully retract.
Fixing a blowout takes a whole lot of patience, but most are fixable if you catch them early and downsize right away.
Can a Professional Piercer Stretch My Ears?
You bet! In fact, seeing a professional piercer is a great idea, especially if you're nervous or just starting out. A pro has the experience to look at your lobes, judge their health and elasticity, and use properly sterilized tools to get the job done with the least amount of trauma.
They're also an amazing resource if you get stuck at a certain size or run into any other issues. While tons of people stretch their ears at home without a problem, you really can't beat the expertise of someone who does this all day, every day. It's a surefire way to start your journey off on the right foot.
What Is the "Point of No Return" for Ear Stretching?
This is probably the question we hear the most, and the answer is a big, fat "it depends." The "point of no return" is the size where your stretched lobes might not shrink all the way back down to a standard earring size (usually 18g-20g) if you take your plugs out.
The old-school rule of thumb was always somewhere between 2g (6mm) and 0g (8mm). But honestly, it's different for everyone. Several things can affect whether your ears will shrink back:
- Your Skin's Natural Elasticity: Some people are just naturally stretchier than others. It's genetics!
- How You Stretched: If you went slowly and carefully, you've given your lobes the best possible chance to shrink back.
- How Long You Stayed at a Large Size: The longer you keep your ears at a big size, the more permanent that stretch becomes.
- Your Aftercare: Healthy, moisturized lobes are much more likely to bounce back than damaged, scarred ones.
By taking your time and following a safe stretching plan, you're giving your lobes the best odds of shrinking down if you ever decide to go back to smaller jewelry.
Ready to find the perfect plugs for your next size? At BodyCandy, we have a massive collection of high-quality glass, steel, and stone plugs to keep your lobes looking and feeling amazing at every stage of your journey. Shop our full collection of plugs and tunnels today!